Love this? Save it for later!
Share the inspiration with your friends
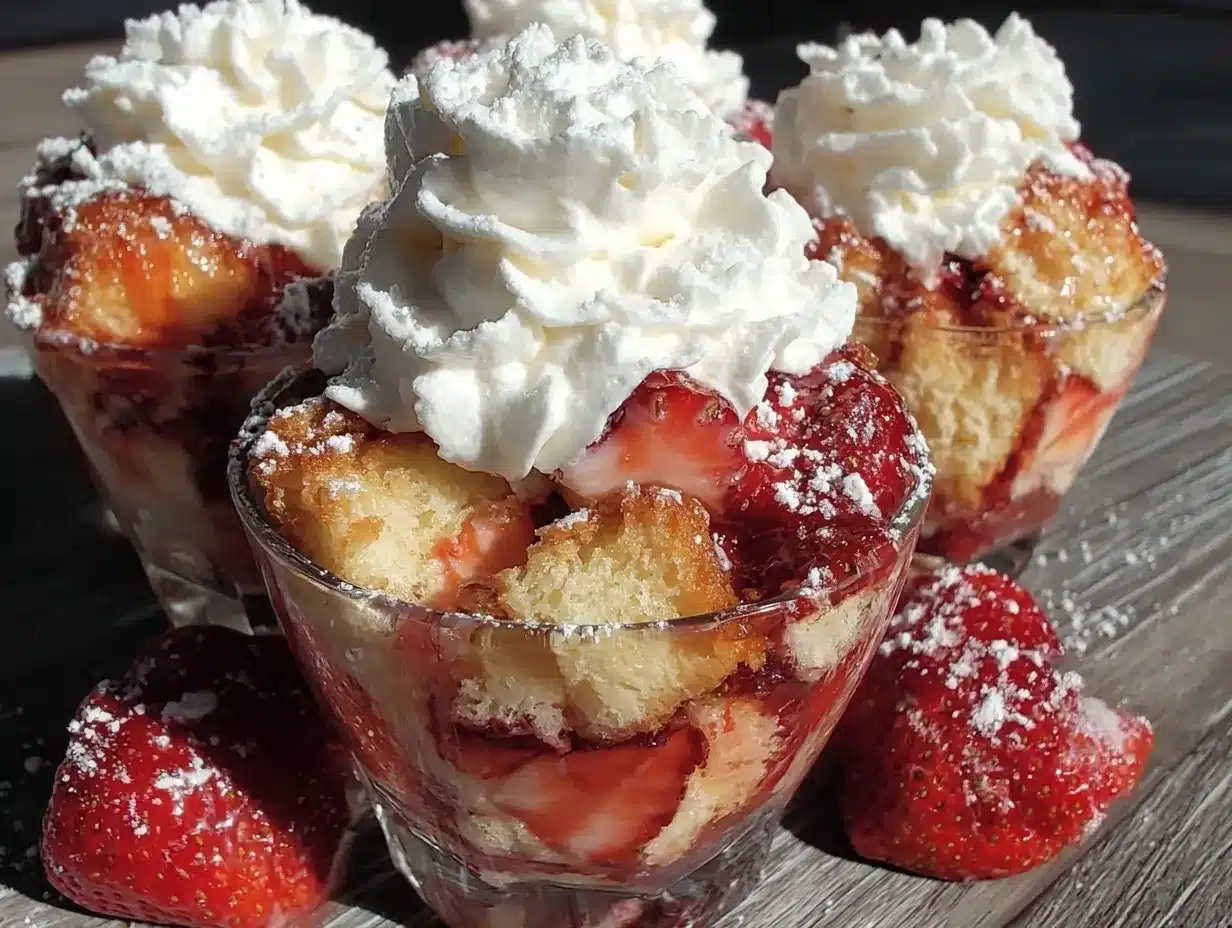
“I wasn’t expecting to become a dessert hero on a hectic Tuesday,” I confessed to my friend Lisa as we shared these Easy No-Bake Strawberry Shortcake Cups. You know that feeling when you’re juggling a million things, craving something sweet, but honestly, the last thing you want is to slave over an oven? That’s exactly how this recipe came to life.
Last spring, I found myself staring into my fridge late one afternoon, with a sudden urge for something fruity and light—but there was no time for baking. So I grabbed some fresh strawberries, a few pantry basics, and started experimenting. The result? This ridiculously simple, no-bake strawberry shortcake cup that takes just 10 minutes to throw together. Honestly, it was a bit of a happy accident—my mixing bowl cracked halfway through, and I almost gave up. But I’m so glad I stuck with it.
Maybe you’ve been there too—wanting a dessert that feels indulgent but isn’t complicated or time-consuming. These cups have a perfect balance of sweet, tangy, and creamy, with that nostalgic shortcake vibe, all without heating up the kitchen. Let me tell you, every single time I make them, they disappear faster than I can say “strawberry season.” If you love quick, fresh, and fuss-free desserts, this recipe is a keeper in your repertoire.
Why You’ll Love This Recipe
Honestly, this Easy No-Bake Strawberry Shortcake Cups recipe has become my go-to whenever I want to impress without the stress. After testing it multiple times and refining the steps, it’s clear this isn’t your average quick dessert.
- Quick & Easy: Ready in just 10 minutes—perfect for busy weeknights or last-minute guests.
- Simple Ingredients: Uses everyday pantry and fridge staples, no fancy shopping required.
- Perfect for Summer: The fresh strawberries make this ideal for warm days or outdoor gatherings.
- Crowd-Pleaser: Kids and adults alike rave about the fresh creaminess and crumbly texture.
- Unbelievably Delicious: The crumbly biscuit base combined with airy cream and bright berries hits all the right notes.
What sets this recipe apart is the layering technique I learned from a local baker who swore by chilled whipped cream for the fluffiest texture—no dense, heavy mess here. Plus, I swap out the usual sponge cake for crunchy, buttery biscuit crumbs that soak up just enough strawberry juice. It’s the kind of dessert that makes you close your eyes after the first bite—and maybe sneak a second cup when no one’s looking.
What Ingredients You Will Need
This recipe uses simple, wholesome ingredients to deliver bold flavor and satisfying texture without the fuss. Most of these are pantry staples, and the fresh strawberries add a seasonal pop. Here’s what you’ll need:
- Fresh Strawberries (about 2 cups, hulled and sliced) – juicy and sweet, the star of the show
- Granulated Sugar (2 tablespoons) – to macerate the strawberries and bring out their natural sweetness
- Buttery Biscuits (1 ½ cups crushed, such as shortbread or graham crackers) – I prefer using Walker’s shortbread for the best crumbly texture
- Heavy Whipping Cream (1 cup, cold) – for that airy, dreamy whipped cream topping
- Vanilla Extract (1 teaspoon) – adds warming depth to the cream
- Powdered Sugar (2 tablespoons) – gently sweetens the whipped cream
- Lemon Zest (optional, 1 teaspoon) – brightens the strawberry flavor
Substitutions: Swap heavy cream with coconut cream for a dairy-free version, and gluten-free biscuits work well if you’re avoiding gluten. For a lower sugar option, reduce granulated and powdered sugar by half.
Equipment Needed
- Mixing Bowls: At least two—one for macerating strawberries and another for whipping cream.
- Electric Mixer or Whisk: An electric hand mixer speeds up whipping, but a sturdy whisk works fine if you have the patience.
- Measuring Cups and Spoons: For precise ingredient amounts to get the right balance.
- Serving Cups or Glasses: Clear dessert cups really show off the layers—think small mason jars or pretty glass tumblers.
- Food Processor or Rolling Pin: To crush the biscuits finely. I usually use a ziptop bag and a rolling pin for easy cleanup.
If you don’t have an electric mixer, just be ready for a bit of an arm workout whipping that cream by hand. Personally, I found that cold bowls and cream make a huge difference in whipping speed, so chill your tools if you can.
Preparation Method
- Macerate Strawberries (10 minutes): In a medium bowl, toss the sliced strawberries with granulated sugar and optional lemon zest. Let them sit for about 10 minutes at room temperature to release their juices and become syrupy. You’ll notice the strawberries get glossy and soft—this is the flavor magic starting.
- Crush Biscuits: While the strawberries macerate, place the biscuits in a zip-top bag and crush them using a rolling pin until you get fine crumbs with a few small chunks for texture. Aim for about 1 ½ cups of crumbs. The crumbs should smell buttery and have a sandy texture but not powdery.
- Whip the Cream: Pour the cold heavy cream into a chilled mixing bowl. Add vanilla extract and powdered sugar. Using an electric mixer or whisk, beat until soft peaks form—it should be thick but still light and fluffy. Be careful not to overwhip, or you’ll get butter instead!
- Assemble the Cups: Start with a layer of biscuit crumbs at the bottom of each serving cup (about 2 tablespoons). Spoon a generous layer of macerated strawberries with their syrup over the crumbs. Follow with a dollop of whipped cream (about 3 tablespoons). Repeat the layering once more if your cups are tall enough.
- Chill and Serve: Refrigerate the assembled cups for at least 10 minutes before serving to let the flavors meld. The biscuit layer will soften slightly but keep a nice texture contrast.
Pro tip: If your whipped cream starts to look grainy, it means you’ve gone a bit too far—stop immediately! Also, don’t skip chilling the cream and bowl; it really helps with fluffiness. I once forgot this step and ended up with sad, runny cream—lesson learned the hard way!
Cooking Tips & Techniques
Whipping cream to the perfect consistency can be tricky, but here’s what I’ve learned over the years. Always use cold cream and a chilled bowl. It helps the fat molecules stay solid and trap air better. If you’re whipping by hand, steady wrist motion and patience are key.
Be mindful not to over-sugar the strawberries. The natural juices combined with a little sugar provide just enough sweetness. If you add too much, the dessert can get cloying.
When crushing biscuits, aim for a mix of fine crumbs and a few bigger pieces to maintain texture. Too fine and it’ll feel mushy; too chunky and it won’t meld well with the cream.
Another tip: assemble these cups shortly before serving to keep the biscuit crumb from getting soggy. If you must prepare in advance, keep the crumb layer separate and add it just before serving.
Timing-wise, while the strawberries macerate, crush your biscuits and whip the cream—multitasking saves precious minutes. I always have a kitchen timer going because it’s easy to get distracted and overwhip or over-macerate.
Variations & Adaptations
- Dairy-Free Version: Use coconut cream whipped with a little maple syrup and vanilla instead of heavy cream. Swap biscuits for gluten-free or nut-based crumbs.
- Berry Mix: Replace strawberries with a mix of raspberries, blueberries, and blackberries for a colorful, tangy twist. Adjust sugar slightly based on berry sweetness.
- Chocolate Lover’s Cup: Add a tablespoon of cocoa powder to the biscuit crumbs or sprinkle mini chocolate chips between layers for a richer dessert.
- Adult Twist: Add a splash of liqueur like Grand Marnier or amaretto to the macerated strawberries for a grown-up flavor.
- Personal Favorite: I’ve tried topping with a sprinkle of toasted coconut flakes just before serving—it adds a lovely crunch and tropical vibe.
Serving & Storage Suggestions
These Easy No-Bake Strawberry Shortcake Cups are best served chilled, straight from the fridge. The creamy layers and fresh berries taste bright and refreshing when cool.
Presentation-wise, clear glasses or pretty mason jars show off those beautiful layers—perfect for casual entertaining or picnic treats. Pair with a light sparkling wine or iced tea for a summery feel.
Store leftovers covered in the refrigerator for up to 2 days. The biscuit crumbs will soften over time, but the flavor actually deepens, making it a lovely next-day treat. Reheat is not recommended—these are best cold.
Nutritional Information & Benefits
Each serving of these no-bake strawberry shortcake cups contains approximately 250 calories, with a balance of carbohydrates, fats, and a bit of protein from the cream. The fresh strawberries provide vitamin C, antioxidants, and fiber, making this dessert a lighter option compared to traditional cakes.
If you swap in coconut cream and gluten-free crumbs, it becomes a great choice for dairy-free and gluten-sensitive diets. Keep in mind the sugar content, but you can always adjust to your preference.
Personally, I appreciate how this dessert satisfies my sweet tooth without feeling heavy or overly processed—honestly, it’s a little wellness win disguised as indulgence.
Conclusion
In short, these Easy No-Bake Strawberry Shortcake Cups are a lifesaver when you want a quick, fresh, and fuss-free dessert that still feels special. Whether you’re short on time or just craving something light and fruity, this recipe fits the bill perfectly.
Feel free to tweak the layers, swap berries, or adjust sweetness to make it truly your own. I keep coming back to this recipe because it’s simple, satisfying, and always puts a smile on faces around the table.
If you give it a try, I’d love to hear how you personalized it or what your favorite biscuit base was—drop a comment below and share your delicious creations!
Happy dessert making, friends!
FAQs
Can I make these strawberry shortcake cups ahead of time?
Yes, you can assemble them a few hours in advance and keep them chilled. For best texture, add the biscuit crumbs just before serving to avoid sogginess.
What can I use instead of heavy cream?
Coconut cream is a great dairy-free alternative. Chill it overnight and whip it just like heavy cream, adding a little sweetener and vanilla.
Are these cups suitable for gluten-free diets?
Absolutely. Just swap the biscuit crumbs for gluten-free cookies or crushed nuts to keep the texture and flavor.
How do I prevent the whipped cream from getting runny?
Make sure both your cream and mixing bowl are well chilled before whipping. Stop whipping as soon as soft peaks form to avoid turning the cream buttery.
Can I use frozen strawberries?
You can, but thaw and drain them well to avoid excess liquid. Fresh strawberries provide the best texture and flavor.
Pin This Recipe!
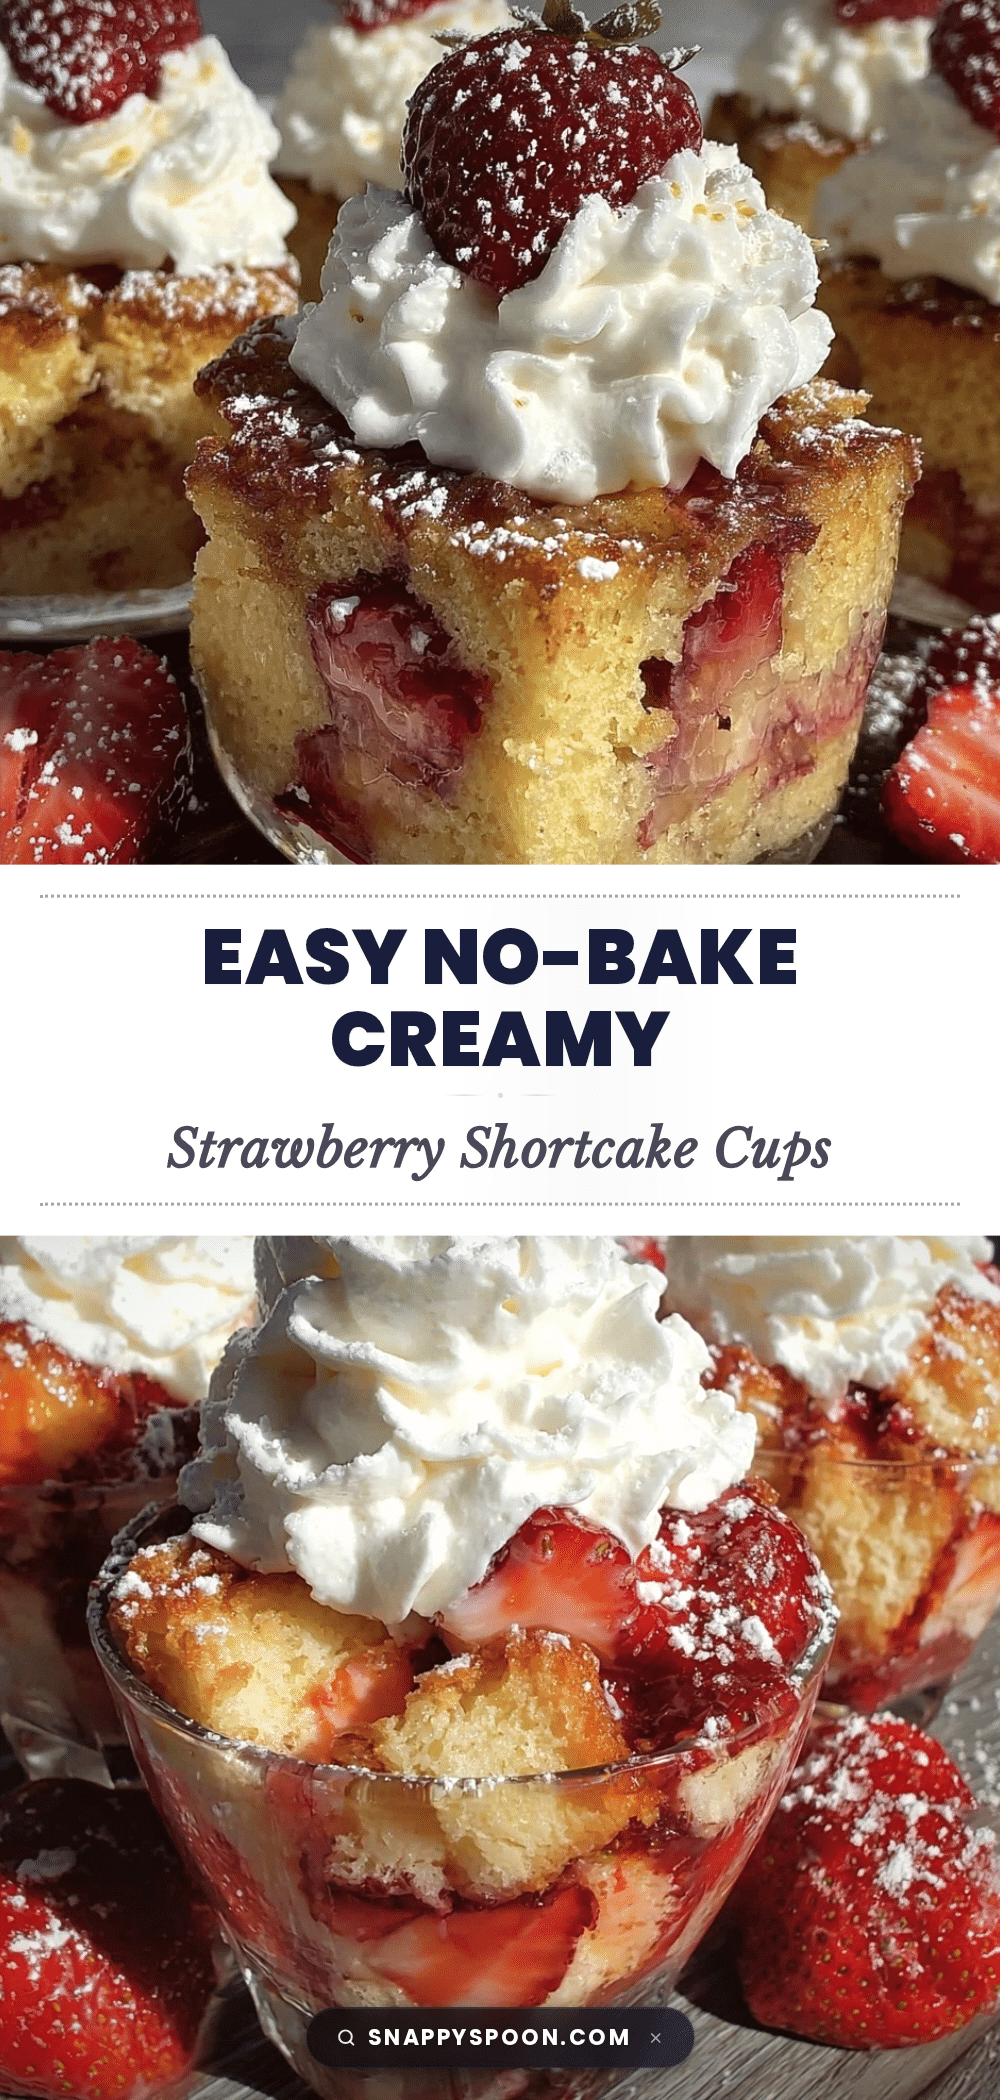
Easy No-Bake Strawberry Shortcake Cups
A quick and simple no-bake dessert featuring layers of buttery biscuit crumbs, macerated fresh strawberries, and airy whipped cream, ready in just 10 minutes.
- Prep Time: 10 minutes
- Cook Time: 0 minutes
- Total Time: 10 minutes
- Yield: 4 servings 1x
- Category: Dessert
- Cuisine: American
Ingredients
- 2 cups fresh strawberries, hulled and sliced
- 2 tablespoons granulated sugar
- 1 ½ cups crushed buttery biscuits (such as shortbread or graham crackers)
- 1 cup cold heavy whipping cream
- 1 teaspoon vanilla extract
- 2 tablespoons powdered sugar
- 1 teaspoon lemon zest (optional)
Instructions
- In a medium bowl, toss the sliced strawberries with granulated sugar and optional lemon zest. Let sit for about 10 minutes at room temperature to macerate and release juices.
- Place the biscuits in a zip-top bag and crush with a rolling pin until fine crumbs with some small chunks remain, about 1 ½ cups.
- Pour cold heavy cream into a chilled mixing bowl. Add vanilla extract and powdered sugar. Whip with an electric mixer or whisk until soft peaks form, being careful not to overwhip.
- Assemble the cups by layering about 2 tablespoons of biscuit crumbs at the bottom, followed by a generous layer of macerated strawberries with syrup, then about 3 tablespoons of whipped cream. Repeat layering if cups are tall enough.
- Refrigerate the assembled cups for at least 10 minutes before serving to let flavors meld.
Notes
Use cold cream and chilled bowls for best whipped cream results. Assemble cups shortly before serving to prevent biscuit crumbs from becoming soggy. For dairy-free, substitute coconut cream and gluten-free biscuits. Adjust sugar to taste.
Nutrition
- Serving Size: 1 cup serving
- Calories: 250
- Sugar: 18
- Sodium: 150
- Fat: 15
- Saturated Fat: 9
- Carbohydrates: 28
- Fiber: 2
- Protein: 3
Keywords: no-bake dessert, strawberry shortcake, quick dessert, easy recipe, summer dessert, whipped cream, biscuit crumbs