Love this? Save it for later!
Share the inspiration with your friends
“I wasn’t expecting to be scrambling in my kitchen the night before graduation, but there I was, staring at an empty fridge and a growing guest list of twenty.” That night, I realized I needed a dessert that was quick, fuss-free, and crowd-worthy — enter the Easy No-Bake Graduation Oreo Cheesecake for 20. Honestly, it felt like a lifesaver.
The sound of the Oreo crumbs crunching in the mixing bowl was oddly comforting amidst the chaos of last-minute decorations and invitations. I remember thinking, “Could a no-bake cheesecake really impress this many people?” Turns out, yes — and then some.
Maybe you’ve been there, too: juggling a busy schedule while wanting to make something special for a big celebration. This recipe is my answer to those moments when you want impressive flavor without the oven on or hours of prep. Plus, it’s perfect for graduation parties, where you want your hands free to take photos and catch all the proud smiles.
What started as a last-minute experiment quickly became a favorite, and I keep coming back to this version every spring when the caps and gowns come out. Let me tell you, the creamy Oreo filling with that buttery crust is the kind of dessert that makes folks close their eyes with the first bite. It’s simple, satisfying, and made for sharing with a crowd — exactly what you need for a graduation bash.
Why You’ll Love This Recipe
This Easy No-Bake Graduation Oreo Cheesecake for 20 isn’t just a dessert; it’s a party hero. I’ve tested this recipe multiple times, making tweaks to nail the perfect texture and flavor balance. Whether you’re a seasoned baker or a kitchen newbie, this cheesecake comes together effortlessly and reliably every time.
- Quick & Easy: Ready in under 30 minutes, it’s perfect for busy hosts juggling other graduation party tasks.
- Simple Ingredients: No fancy or hard-to-find items — just Oreos, cream cheese, and a handful of pantry staples.
- Perfect for Graduation Parties: Made to serve 20 guests, so no one misses out on dessert.
- Crowd-Pleaser: Kids, adults, and even the skeptical cheesecake fans will ask for seconds.
- Unbelievably Delicious: The rich Oreo flavor combined with the smooth, creamy filling hits that nostalgic comfort note just right.
This isn’t your average no-bake cheesecake. By folding crushed Oreos right into the filling and layering a generous Oreo crust, the texture is heavenly — not too dense, not too light. Plus, the no-bake method means no oven heat messing with your party prep or the summer weather. Trust me, once you make this, you’ll understand why it’s become my go-to graduation dessert for years.
What Ingredients You Will Need
This recipe uses simple, wholesome ingredients to deliver bold flavor and satisfying texture without the fuss. Most of these are pantry staples, and the Oreos add that classic chocolate-vanilla twist everyone loves.
- For the Oreo Crust:
- 40 Oreo cookies, crushed (I prefer Nabisco Oreos for the perfect crunch)
- 1/2 cup (115g) unsalted butter, melted (adds richness and helps bind the crust)
- For the Cheesecake Filling:
- 32 oz (900g) cream cheese, softened (use full-fat for best creaminess)
- 1 1/4 cups (150g) powdered sugar (balances the tang of cream cheese)
- 2 teaspoons vanilla extract (real vanilla makes a noticeable difference)
- 2 cups (480ml) heavy whipping cream, cold (for that luscious, airy texture)
- 20 Oreo cookies, roughly chopped (folded into the filling for texture and flavor bursts)
If you want to swap ingredients, you can use a dairy-free cream cheese and coconut cream for a vegan take, or almond flour in the crust for a gluten-free option. Just make sure to adjust the butter quantity slightly if using almond flour to get that perfect crust firmness.
Equipment Needed
- Large mixing bowls: For combining crust and filling ingredients. I like using glass bowls for easy mixing and visibility.
- Electric mixer or stand mixer: Whipping the cream and cream cheese is a breeze with one. Hand mixers work too, but might take longer.
- Springform pan (12-inch): Ideal for this cheesecake size, making it easier to release and serve. If you don’t have one, a deep 9×13 inch baking dish can work, but the presentation changes.
- Food processor or plastic bag and rolling pin: For crushing Oreos. I use a food processor for speed, but a zip-top bag and rolling pin work fine if you don’t own one.
- Rubber spatula: Helps fold the Oreos into the filling without deflating the whipped cream.
For budget-friendly options, I recommend a basic hand mixer and a sturdy glass pie dish if a springform pan isn’t available. Just be gentle when serving to keep the layers intact. Also, keep your equipment chilled (especially the bowl and beaters) for best whipping results with the cream.
Preparation Method
- Prepare the crust: Crush 40 Oreos into fine crumbs using a food processor or by placing them in a zip-top bag and crushing with a rolling pin. Transfer crumbs to a large bowl and stir in 1/2 cup (115g) melted unsalted butter until fully combined. The mixture should feel like wet sand.
Press this mixture evenly into the bottom of a 12-inch springform pan, creating a firm, even layer. Use the back of a spoon or the bottom of a flat glass to press down firmly. Chill in the fridge for at least 15 minutes to set. - Make the cheesecake filling: In a large bowl, beat 32 oz (900g) softened cream cheese with 1 1/4 cups (150g) powdered sugar and 2 teaspoons vanilla extract until smooth and creamy. This should take about 3-4 minutes on medium speed.
In a separate chilled bowl, whip 2 cups (480ml) cold heavy cream until stiff peaks form — you’ll know it’s ready when the cream stands tall on the beaters without drooping. - Combine filling and Oreos: Gently fold the whipped cream into the cream cheese mixture using a rubber spatula. Be careful not to overmix; you want to keep it light and airy.
Fold in 20 roughly chopped Oreos to add texture and bursts of chocolate cookie flavor throughout the filling. - Assemble the cheesecake: Pour the filling over the chilled Oreo crust and spread evenly with a spatula. Smooth the top gently to avoid crushing the crust.
Cover with plastic wrap and refrigerate for at least 4 hours, or overnight for best results. The longer it chills, the firmer and more sliceable it becomes. - Serving: Run a warm knife around the edges of the pan before releasing the springform to get clean slices. Cut into 20 generous pieces — perfect for celebrating a big crowd!
Pro tip: If you forget to chill the bowl for whipping cream, just pop it in the freezer for 10 minutes before starting. It makes a big difference in how well the cream whips. Also, don’t rush folding — folding gently keeps the filling fluffy and not dense.
Cooking Tips & Techniques
Let me share some tricks I’ve picked up making this cheesecake several times. First, always use room temperature cream cheese; cold cream cheese lumps up and won’t blend smoothly. Trust me, I learned this the hard way when a batch ended up grainy.
When crushing Oreos, aim for mostly fine crumbs with some small chunks for texture — too fine, and the crust feels dry; too chunky, and it won’t stick together well.
Whipping the cream to stiff peaks is essential. Under-whipped cream won’t provide enough structure, and over-whipping turns it grainy and buttery — been there, done that! Stop whipping once it holds a firm peak but still looks silky.
Folding is an art: use a rubber spatula and fold by cutting down through the center and sweeping around the bowl gently. No beating or stirring — you want to keep the air in the mixture for that light texture.
Timing-wise, chill the crust for at least 15 minutes and the finished cheesecake for 4 hours minimum. Overnight chilling is ideal if you can plan ahead. If you’re short on time, a quick 1-hour freeze can help, but don’t skip the fridge step afterward.
Variations & Adaptations
Looking to switch things up? Here are a few ways to customize this cheesecake for your taste or dietary needs:
- Fruit Twist: Add a layer of sliced strawberries or raspberries on top before chilling for a fresh contrast to the rich Oreo flavor.
- Peanut Butter Oreo: Mix 1/2 cup peanut butter into the cream cheese filling for a nutty surprise that pairs perfectly with the Oreos.
- Gluten-Free Option: Use gluten-free chocolate sandwich cookies instead of Oreos and almond flour mixed with butter for the crust.
- Chocolate Lovers: Stir in 1/2 cup mini chocolate chips into the filling or drizzle melted chocolate over the top just before serving.
- Dairy-Free Version: Swap cream cheese for a dairy-free cream cheese alternative and use coconut cream whipped to stiff peaks instead of heavy cream.
One time, I tried adding espresso powder to the filling for a coffee Oreo cheesecake—it was a hit at a friend’s brunch and totally woke up the flavors. Feel free to experiment and make this your own!
Serving & Storage Suggestions
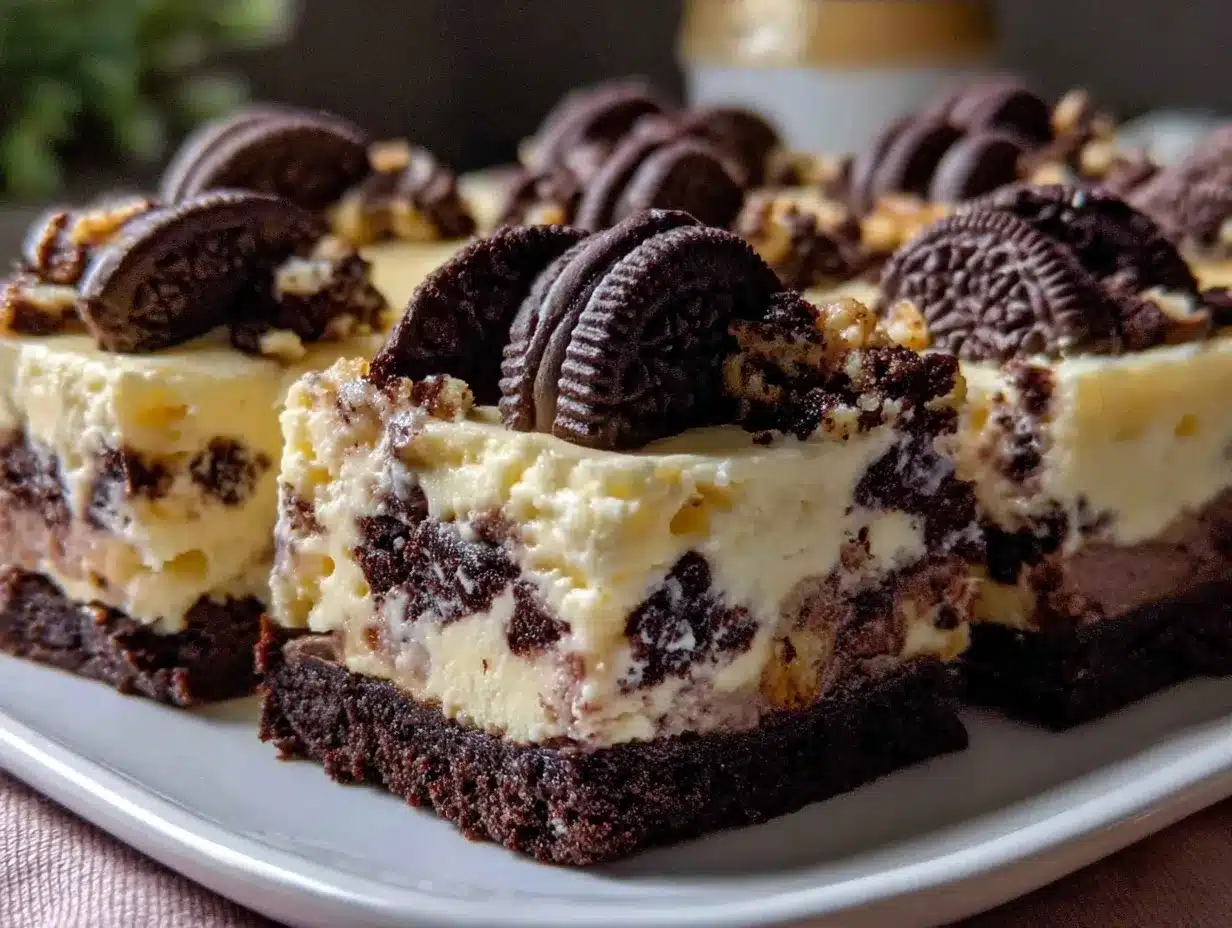
This cheesecake is best served chilled, straight from the fridge. The creamy texture and Oreo chunks are at their peak when cool and firm. I like to garnish with a few extra Oreo halves on top for a festive look — especially for graduation celebrations.
Pair it with a light coffee or sparkling lemonade to balance the richness. For a party, slice into 20 pieces and serve on a large platter to make sharing easy.
To store, cover the cheesecake tightly with plastic wrap and keep refrigerated for up to 4 days. It also freezes well; wrap securely and freeze for up to 1 month. When ready to eat, thaw overnight in the fridge.
Reheating isn’t recommended — this cheesecake shines cold. Interestingly, the flavors meld beautifully after a day, so if you can prepare it a day ahead, you’ll be rewarded with even better taste.
Nutritional Information & Benefits
This Easy No-Bake Graduation Oreo Cheesecake is indulgent but made with straightforward ingredients you can trust. Each slice (1/20th of the cake) roughly contains:
| Calories | 350-400 kcal |
|---|---|
| Fat | 25g (mostly from cream cheese and butter) |
| Carbohydrates | 30g |
| Protein | 5g |
While it’s a treat, cream cheese and heavy cream provide calcium and vitamin A. Oreos add a nostalgic, chocolaty touch, but watch portions if you’re monitoring sugar intake.
Dairy-free and gluten-free adaptations make this recipe accessible for various dietary needs. It’s a great option when you want to satisfy a crowd with different preferences without making multiple desserts.
From a wellness perspective, I believe in balance — enjoy this cheesecake as a part of your celebration, and pair it with fresh fruit or lighter meals throughout the day.
Conclusion
The Easy No-Bake Graduation Oreo Cheesecake for 20 is more than just a dessert — it’s a stress-saving, crowd-pleasing centerpiece that brings smiles and satisfied bellies. Whether you’re new to cheesecake or a seasoned host, this recipe makes serving a large group feel manageable and fun.
Feel free to customize and tweak based on your favorite flavors or dietary needs. Honestly, it’s the kind of recipe that invites creativity without demanding perfection.
I love it because it brings people together with minimal fuss and maximum flavor — exactly what a graduation party calls for. If you try it, please share your adaptations or how it went in the comments; I’m always excited to hear your stories.
Here’s to celebrating milestones with delicious, easy desserts that everyone remembers!
FAQs
Can I make this cheesecake a day ahead?
Absolutely! In fact, chilling it overnight helps the flavors meld and the texture firm up perfectly.
What if I don’t have a springform pan?
You can use a deep 9×13 inch baking dish or any similar-sized dish, but serving slices might be less tidy.
Can I use low-fat cream cheese or milk to make it lighter?
Low-fat cream cheese can affect the texture, making it less creamy. Full-fat options yield the best results, but you can try substitutions if needed.
How do I keep the crust from getting soggy?
Press the crust firmly and chill it well before adding the filling. This helps it set and stay crunchy longer.
Can I freeze leftover cheesecake?
Yes, wrap it tightly in plastic wrap and foil, then freeze for up to one month. Thaw in the fridge overnight before serving.
Pin This Recipe!

Easy No-Bake Graduation Oreo Cheesecake Recipe for 20 Guests

A quick, fuss-free no-bake Oreo cheesecake perfect for serving 20 guests at graduation parties. Creamy, rich, and crowd-pleasing with a buttery Oreo crust and Oreo-filled cheesecake filling.
- Prep Time: 20 minutes
- Cook Time: 0 minutes
- Total Time: 4 hours 20 minutes
- Yield: 20 servings 1x
- Category: Dessert
- Cuisine: American
Ingredients
- 40 Oreo cookies, crushed
- 1/2 cup (115g) unsalted butter, melted
- 32 oz (900g) cream cheese, softened
- 1 1/4 cups (150g) powdered sugar
- 2 teaspoons vanilla extract
- 2 cups (480ml) heavy whipping cream, cold
- 20 Oreo cookies, roughly chopped
Instructions
- Crush 40 Oreos into fine crumbs using a food processor or by placing them in a zip-top bag and crushing with a rolling pin.
- Transfer crumbs to a large bowl and stir in 1/2 cup melted unsalted butter until fully combined. The mixture should feel like wet sand.
- Press this mixture evenly into the bottom of a 12-inch springform pan, creating a firm, even layer. Chill in the fridge for at least 15 minutes to set.
- In a large bowl, beat 32 oz softened cream cheese with 1 1/4 cups powdered sugar and 2 teaspoons vanilla extract until smooth and creamy (3-4 minutes on medium speed).
- In a separate chilled bowl, whip 2 cups cold heavy cream until stiff peaks form.
- Gently fold the whipped cream into the cream cheese mixture using a rubber spatula, being careful not to overmix.
- Fold in 20 roughly chopped Oreos to the filling.
- Pour the filling over the chilled Oreo crust and spread evenly with a spatula.
- Cover with plastic wrap and refrigerate for at least 4 hours or overnight for best results.
- Before serving, run a warm knife around the edges of the pan, release the springform, and cut into 20 pieces.
Notes
Use room temperature cream cheese for smooth blending. Chill bowls and beaters before whipping cream for best results. Fold whipped cream gently to keep filling light and airy. Chill crust at least 15 minutes and cheesecake at least 4 hours or overnight for best texture. For gluten-free, use gluten-free cookies and almond flour crust. For dairy-free, substitute cream cheese and heavy cream with dairy-free alternatives.
Nutrition
- Serving Size: 1 slice (1/20th of c
- Calories: 375
- Sugar: 22
- Sodium: 250
- Fat: 25
- Saturated Fat: 15
- Carbohydrates: 30
- Fiber: 1
- Protein: 5
Keywords: no-bake cheesecake, Oreo cheesecake, graduation dessert, easy cheesecake, crowd-pleaser, Oreo crust, no oven dessert