Love this? Save it for later!
Share the inspiration with your friends
Introduction
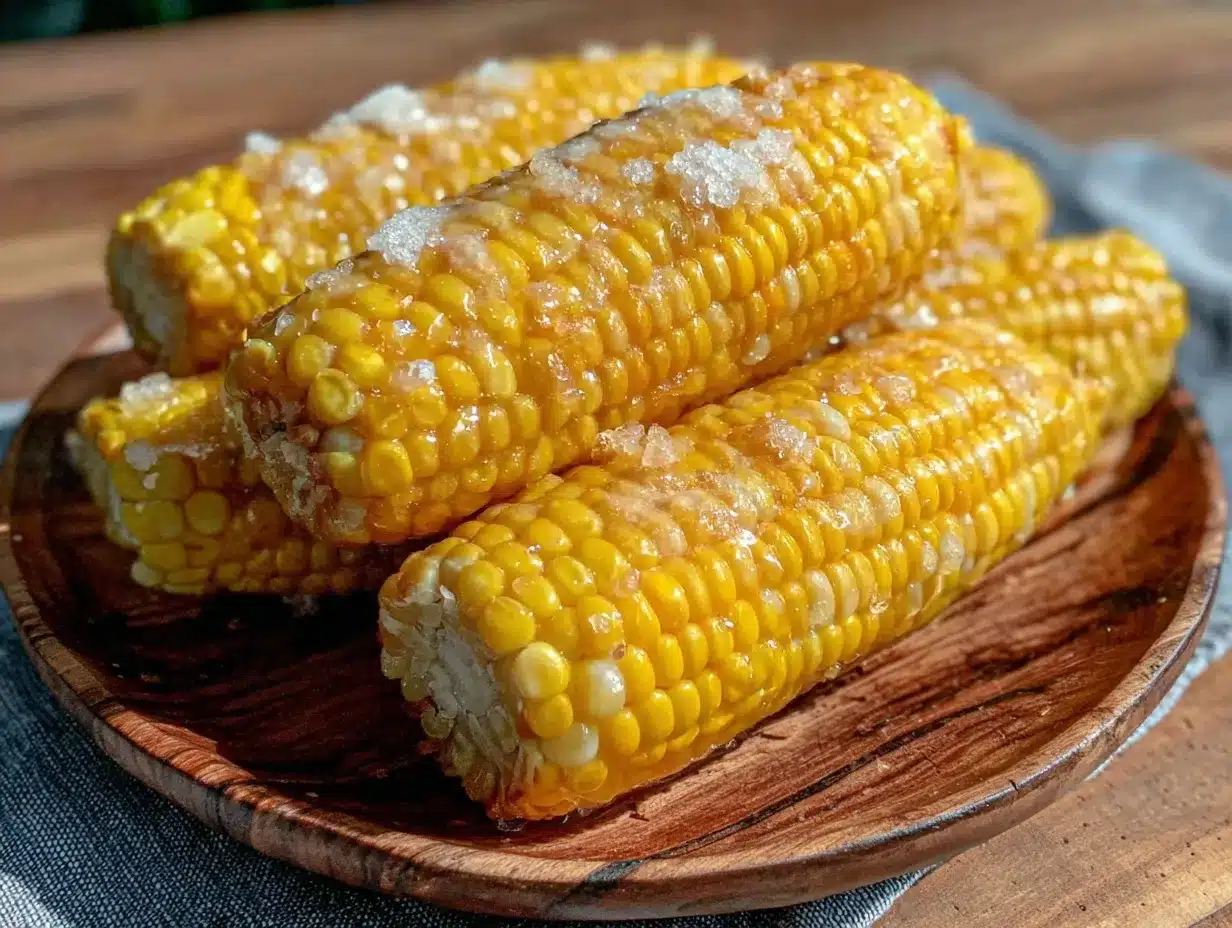
“You gotta try my boiled corn on the cob,” my next-door neighbor, Mrs. Jensen, said one humid Saturday afternoon as I lugged groceries inside. Honestly, I wasn’t expecting much—corn seemed pretty straightforward, right? But as I watched her peel back the husks with casual expertise, I realized there was an art to it. The way the kernels glistened in the sunlight, plump and juicy, made me pause. I mean, I’ve made corn a hundred times, but never quite like this.
That afternoon, while the kettle hummed on the stove and a stray cat wandered past the window, I learned that boiling corn on the cob can be both deceptively simple and surprisingly satisfying. Mrs. Jensen’s recipe wasn’t about fancy spices or elaborate steps—it was about timing, technique, and knowing exactly when to take that ear out of the bubbling water. Maybe you’ve been there, staring at a pot of corn, wondering if it’s done or if you’ve overcooked it into mush.
Since that day, I’ve made this easy simple corn on the cob boiled to perfection more times than I can count. It’s the kind of recipe that feels like a small victory every time—perfectly tender, sweet, and ready to soak up butter like a dream. Let me tell you, it’s a summer side that’s earned a permanent spot in my kitchen rotation.
Why You’ll Love This Recipe
After trying countless methods, this boiled corn on the cob recipe stands out for all the right reasons. It’s straightforward, fuss-free, and consistently delicious—just what you want when summer rolls around and you need a reliable side dish.
- Quick & Easy: Ready in about 15 minutes, making it ideal for busy weeknights or spontaneous backyard cookouts.
- Simple Ingredients: You only need fresh corn, water, and a pinch of salt—no complicated marinades or secret sauces.
- Perfect for Summer Gatherings: Whether it’s a picnic, barbecue, or casual family dinner, this corn fits right in.
- Crowd-Pleaser: Kids love it, adults crave it, and it pairs beautifully with just about any main course.
- Unbelievably Delicious: The natural sweetness of the corn really shines through, especially when cooked just right.
What makes this recipe different? It’s all about patience and exact timing. I learned to avoid the common mistake of boiling corn too long, which turns those golden kernels into a sad, mushy mess. Instead, this method keeps the corn crisp-tender and juicy. Plus, I like to add a tiny pinch of sugar to the water sometimes—it’s a little trick I picked up from a farmer’s market stand that really brings out the sweetness without making it taste odd.
This isn’t just another boiled corn recipe—it’s the one that keeps me coming back every summer. I bet once you try it, you’ll find yourself craving it on lazy weekend afternoons too.
What Ingredients You Will Need
This recipe uses simple, wholesome ingredients to deliver bold flavor and satisfying texture without the fuss. Most are pantry staples or fresh from your local market, making it super accessible.
- Fresh Corn on the Cob: 4 ears, husked and cleaned (look for bright green husks and moist silk for the freshest corn)
- Water: Enough to fill your pot and cover the corn completely (about 8 cups/1.9 liters)
- Salt: 1 tablespoon kosher or sea salt (helps season the corn while boiling)
- Optional – Sugar: 1 teaspoon (a little secret to enhance natural sweetness, but totally optional)
- Butter: For serving, unsalted and softened (I prefer Land O’Lakes for that creamy finish)
- Freshly Ground Black Pepper: To taste, if desired
If you want to swap butter for a dairy-free option, coconut oil or olive oil works nicely too. For a touch of herb flavor, a sprinkle of chopped fresh parsley or chives on top is great. And hey, if you can get your hands on locally grown corn, it will taste even better—I always recommend supporting local farmers when you can.
Equipment Needed
- Large Pot: Big enough to hold all ears of corn comfortably with water covering them (a 6-quart/5.7-liter pot works well)
- Tongs: For safely removing hot corn from boiling water
- Colander or Strainer: To drain the corn after boiling
- Butter Knife or Spreaders: For applying butter evenly on hot corn
- Optional: Kitchen timer (though your phone timer works perfectly fine!)
If you don’t have a large pot, a deep skillet can substitute for fewer ears. I once had to boil corn in my wok (not ideal, but it did the job in a pinch). Just make sure the corn is fully submerged for even cooking. Also, I’d recommend tongs with silicone tips for a better grip and less risk of slipping, especially when the corn is slippery from butter.
Preparation Method
- Prepare the Corn: Start by peeling back the husks and removing all silk threads. Rinse each ear under cool running water to wash away any stubborn silk. This usually takes about 5 minutes for 4 ears.
- Fill the Pot: Pour about 8 cups (1.9 liters) of water into your large pot. Add 1 tablespoon of kosher salt and the optional 1 teaspoon of sugar. Stir gently to dissolve. The salt seasons the corn during cooking, while sugar enhances its natural sweetness.
- Bring to a Boil: Place the pot on the stove over high heat. Let the water come to a rolling boil—this usually takes around 7-10 minutes depending on your stove.
- Add the Corn: Carefully lower the ears into the boiling water using tongs. Be cautious to avoid splashing hot water. The water will stop boiling briefly.
- Boil for Exactly 4-6 Minutes: Set your timer. Four minutes yields slightly crisp kernels, while six minutes produces more tender corn. Resist the urge to overcook—the difference is noticeable. You want the kernels to pop with juice, not turn mushy.
- Remove and Drain: Use tongs to lift the corn out of the pot. Place them in a colander to drain any excess water. At this stage, the corn should look bright yellow and smell sweet.
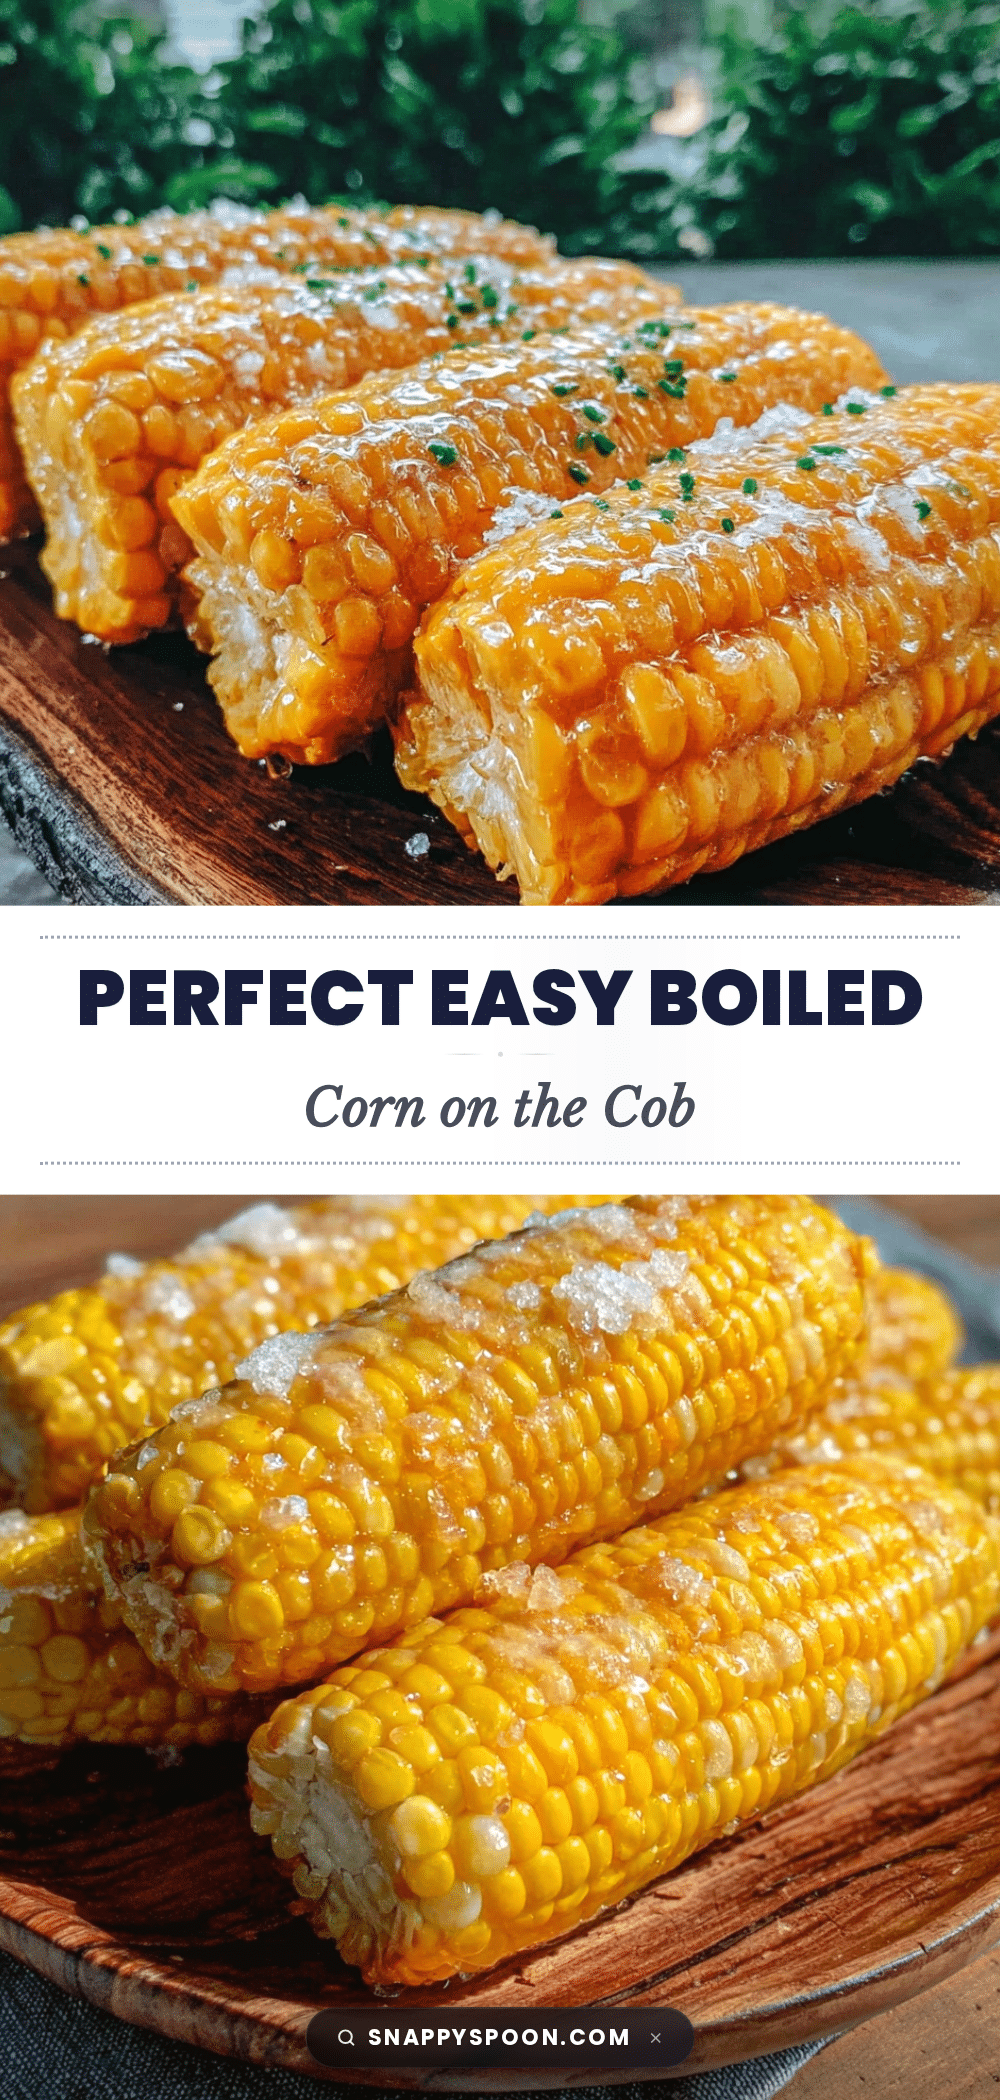
- Serve Immediately: While still hot, slather each ear with softened butter and sprinkle with freshly ground black pepper if you like. The heat helps the butter melt perfectly into each kernel.
Pro Tip: If you’re boiling larger batches, work in batches to avoid overcrowding the pot, which can extend cooking time and lead to uneven results. Also, keep an eye on the water level—add a splash if it drops too low during cooking.
Cooking Tips & Techniques
Getting corn boiled just right takes a little practice, but here are some tips I’ve picked up along the way:
- Don’t Overcook: This is the biggest pitfall. Overcooked corn loses its pop and becomes mealy. Set your timer and trust it!
- Use Fresh Corn: The fresher, the sweeter. Corn starts losing sugar soon after being picked, so try to cook it within a day or two.
- Salt Your Water: This seasons the kernels from the inside out. Without salt, boiled corn can taste bland.
- Optional Sugar: I was skeptical at first, but a little sugar in the boiling water really amps up the sweetness without being detectable itself.
- Keep the Husk for Storage: If not eating immediately, you can leave the husks on to retain moisture when reheating.
- Multitask: While the corn boils, use the time to prep other sides or set the table—this keeps your kitchen flow smooth.
I once forgot about the corn on the stove while distracted by a phone call—by the time I remembered, it was a bit overdone. Lesson learned: timers are your friend, and so is staying present in the kitchen!
Variations & Adaptations
While this recipe is perfect as is, it’s also a great canvas for tweaks:
- Spicy Kick: After buttering, sprinkle smoked paprika or cayenne pepper for a subtle heat.
- Herbed Butter: Mix softened butter with chopped fresh herbs like basil, thyme, or cilantro to spread on warm corn.
- Grilled Finish: After boiling, toss the ears on a hot grill for 2-3 minutes to add smoky char and texture.
- Dairy-Free: Swap butter for olive oil or a vegan spread; toss with a touch of lemon zest for brightness.
- Mexican Style: Top with crumbled cotija cheese, a squeeze of lime, and chili powder for a classic street food vibe.
One time, I tried boiling the corn with a couple of garlic cloves for a hint of aroma—odd, but surprisingly tasty! Feel free to get creative based on what’s in your pantry or what flavor you’re craving.
Serving & Storage Suggestions
Serve this corn on the cob hot, right after boiling, for that melt-in-your-mouth experience. It pairs wonderfully with grilled meats, fresh salads, or even a hearty crispy garlic chicken for a complete meal.
If you have leftovers, wrap the ears tightly in plastic wrap or place in an airtight container and refrigerate for up to 3 days. Reheat by warming in a microwave for 30-45 seconds or briefly steaming in a covered skillet with a splash of water. Avoid boiling again, as that can toughen the kernels.
The flavors actually mellow and deepen a bit if you let the corn rest overnight in the fridge, especially when dressed with butter and herbs. So if you’re making ahead for a picnic, that’s a handy tip.
Nutritional Information & Benefits
This easy simple corn on the cob boiled to perfection is a naturally nutritious side dish. One ear of medium-sized corn (about 90 grams) provides approximately:
| Nutrient | Amount |
|---|---|
| Calories | 90 kcal |
| Carbohydrates | 20 grams |
| Fiber | 2 grams |
| Protein | 3 grams |
| Fat | 1 gram (without butter) |
| Vitamin C | 6% of daily value |
| Magnesium | 5% of daily value |
Corn is a good source of fiber and antioxidants, supporting digestion and overall health. While it contains natural sugars, it’s a whole grain when eaten fresh and fits well into balanced diets. Just be mindful of butter portions if watching fat intake.
For gluten-free eaters, corn is naturally safe, making this recipe a friendly option for many dietary needs.
Conclusion
Boiling corn on the cob might seem like one of the simplest kitchen tasks, but getting it just right is a small art. This easy simple corn on the cob boiled to perfection recipe takes the guesswork out and delivers sweet, tender corn every time. You can customize it with your favorite toppings or keep it classic—the point is, it’s reliable and delicious.
I keep coming back to this method because it never lets me down. It’s the kind of recipe that makes summer dinners feel special without adding stress. Give it a try, and I’d love to hear how you make it your own—drop a comment or share your twists!
Remember, great food is about joy and sharing, so enjoy every bite and happy cooking!
FAQs About Boiled Corn on the Cob
How long should I boil corn on the cob for the best texture?
Boil fresh corn for 4 to 6 minutes. Shorter time keeps the kernels crisp-tender, while longer time softens them slightly. Avoid boiling beyond 6 minutes to prevent mushiness.
Is it necessary to add salt or sugar to the boiling water?
Salt is recommended to season the corn evenly. Adding a small amount of sugar is optional but can enhance the corn’s natural sweetness without altering flavor.
Can I boil frozen corn on the cob using this method?
Yes, but frozen corn may need a couple of extra minutes to heat through. Keep an eye to avoid overcooking, as frozen corn is often blanched before freezing.
What’s the best way to store leftover corn on the cob?
Wrap leftovers tightly in plastic wrap or place in an airtight container. Store in the fridge for up to 3 days and reheat gently to retain moisture.
Can I use this boiling method for sweet corn varieties?
Absolutely! In fact, sweet corn benefits most from this gentle boiling method, which preserves its natural sugars and tender texture.
Pin This Recipe!
Easy Simple Corn on the Cob Boiled to Perfection Recipe for Perfect Summer Side

A straightforward, fuss-free boiled corn on the cob recipe that yields perfectly tender, sweet, and juicy corn, ideal for summer gatherings and quick meals.
- Prep Time: 5 minutes
- Cook Time: 10 minutes
- Total Time: 15 minutes
- Yield: 4 servings 1x
- Category: Side Dish
- Cuisine: American
Ingredients
- 4 ears fresh corn on the cob, husked and cleaned
- 8 cups (1.9 liters) water
- 1 tablespoon kosher or sea salt
- 1 teaspoon sugar (optional)
- Butter, unsalted and softened, for serving
- Freshly ground black pepper, to taste
Instructions
- Peel back the husks and remove all silk threads from the corn. Rinse each ear under cool running water to wash away any stubborn silk (about 5 minutes for 4 ears).
- Pour 8 cups (1.9 liters) of water into a large pot. Add 1 tablespoon kosher salt and optional 1 teaspoon sugar. Stir gently to dissolve.
- Place the pot on the stove over high heat and bring the water to a rolling boil (7-10 minutes).
- Carefully lower the ears of corn into the boiling water using tongs. The water will stop boiling briefly.
- Boil the corn for exactly 4-6 minutes: 4 minutes for slightly crisp kernels, 6 minutes for more tender corn.
- Use tongs to lift the corn out of the pot and place in a colander to drain excess water.
- Serve immediately while hot, slathered with softened butter and sprinkled with freshly ground black pepper if desired.
Notes
Do not overcook the corn to avoid mushy kernels. Use fresh corn for best sweetness. Adding a teaspoon of sugar to the boiling water is optional but enhances natural sweetness. Work in batches if boiling large quantities to avoid overcrowding. Keep an eye on water level and add more if needed during cooking.
Nutrition
- Serving Size: 1 ear of corn (appro
- Calories: 90
- Fat: 1
- Carbohydrates: 20
- Fiber: 2
- Protein: 3
Keywords: boiled corn on the cob, summer side dish, easy corn recipe, simple corn, quick corn recipe, sweet corn, corn on the cob