Love this? Save it for later!
Share the inspiration with your friends
I was at a farm stand last fall, juggling a bag of apples and a pumpkin I had no business carrying, when the elderly woman running the register started talking about pears. Not just any pears, but the ones sitting in a cardboard box by the door—slightly bruised, incredibly fragrant, and clearly past their prime. “Nobody buys these,” she said, “but they’re the best ones for cooking.” She was right, and honestly, that chance encounter changed how I think about dessert. I bought a bag of those imperfect pears, went home, and threw together something that made my kitchen smell like a bakery in about fifteen minutes. That was the birth of this quick spiced vanilla pears recipe, and let me tell you, it’s become my secret weapon for nights when I need something sweet without the fuss.
You know that feeling when you want dessert but don’t want to turn on the mixer or wait for something to bake? That’s exactly where this recipe lives. It’s simple, it’s fast, and it uses ingredients you probably already have sitting in your pantry. I’ve made these quick spiced vanilla pears on a Tuesday night after a long workday, and I’ve served them to guests who thought I’d spent hours in the kitchen. The secret is in the combination of warm spices and real vanilla—it transforms humble fruit into something that feels special. The best part? You don’t need any fancy equipment or special skills. Just a pan, some pears, and about twenty minutes of your time.
Maybe you’ve been there—staring at a bowl of fruit that’s about to go soft, wondering what to do with it before it ends up in the compost. This recipe was made for exactly those moments. It’s the kind of thing you’ll make once, then find yourself making again and again, because it’s just that good. I mean, I’ve made it so many times now that I don’t even need to look at the recipe anymore. That’s the mark of a keeper, right?
Why You’ll Love This Recipe
Let’s be real for a second—I’ve tested this recipe more times than I care to admit. I’ve made it with different types of pears, tried various spice combinations, and even messed up the timing once or twice (okay, more than once). But through all those trials, this version emerged as the clear winner. Here’s why I think you’ll love it too:
- Quick & Easy: From start to finish, you’re looking at about 20 minutes. That’s less time than it takes to order takeout, and trust me, your kitchen will smell way better.
- Simple Ingredients: You probably have everything in your kitchen right now. Pears, butter, sugar, vanilla, cinnamon, and a few other spices. No special trips to the store required.
- Perfect for Any Occasion: Weeknight dessert, fancy dinner party, holiday brunch—these pears fit everywhere. I’ve even served them over pancakes for breakfast, and nobody complained.
- Crowd-Pleaser: I’ve served these to kids, adults, picky eaters, and dessert snobs. The reaction is always the same—the “wait, this is just fruit?” look of surprise.
- Unbelievably Delicious: The combination of tender pears, warm spices, and rich vanilla syrup creates something that tastes way more complicated than it actually is. It’s comfort food at its finest.
What makes this recipe different from all the other pear desserts out there? It’s the technique. Instead of baking the pears for an hour, you cook them gently on the stovetop, which means they stay tender without turning mushy. The vanilla bean paste (or good-quality extract) makes a real difference here—it adds a depth of flavor that artificial stuff just can’t match. And the spice blend? I spent weeks tweaking it until it was just right. Not too cinnamon-heavy, not too clove-forward, just perfectly balanced.
This isn’t just another recipe—it’s the kind that makes you close your eyes after the first bite. It’s comfort food reimagined, faster and simpler, but with the same soul-soothing satisfaction. Perfect for impressing guests without stress, or turning a simple Tuesday night into something memorable.
What Ingredients You Will Need
This recipe uses simple, wholesome ingredients to deliver bold flavor and satisfying texture without the fuss. Most of these are pantry staples, which is exactly why I love this recipe for those “I need dessert now” moments.
For the Pears
- 4 firm but ripe pears, such as Bosc or Anjou (Bosc hold their shape beautifully, Anjou are slightly sweeter—both work great)
- 2 tablespoons unsalted butter (I prefer Kerrygold for its rich flavor)
- 3 tablespoons brown sugar, packed (light or dark both work; dark gives a deeper molasses flavor)
- 1 tablespoon granulated sugar (adds a bit of extra sweetness and helps with caramelization)
- 1 teaspoon vanilla bean paste (or 2 teaspoons pure vanilla extract—I use Nielsen-Massey vanilla bean paste for those beautiful vanilla specks)
- 1/2 teaspoon ground cinnamon
- 1/4 teaspoon ground ginger
- 1/8 teaspoon ground nutmeg (freshly grated if you have it, pre-ground works fine)
- 1/8 teaspoon ground cloves (go easy here—cloves are potent)
- Pinch of salt (enhances all the flavors, trust me)
- 1/4 cup water or apple cider (apple cider adds a lovely autumnal note)
For Serving (Optional but Recommended)
- Vanilla ice cream or whipped cream
- Chopped nuts, such as pecans or walnuts (toasted for extra crunch)
- Fresh mint leaves for garnish
- Greek yogurt for a lighter option
Ingredient Notes and Substitutions
Pears: Look for pears that are ripe but still firm. If they’re too soft, they’ll turn to mush during cooking. Bartlett pears work too, but they’re softer, so watch the cooking time closely. For a firmer texture, try slightly underripe pears—they’ll hold their shape even better.
Butter: Unsalted butter lets you control the salt level. If you only have salted butter, skip the pinch of salt in the recipe. For a dairy-free version, use coconut oil or vegan butter—I’ve tested it with both, and they work beautifully.
Sugars: The combination of brown and granulated sugar gives you both depth and caramelization. You can use all brown sugar if that’s what you have, or substitute coconut sugar for a less refined option. Maple syrup works too, but reduce the water slightly since syrup adds liquid.
Vanilla: This is where I don’t recommend skimping. Real vanilla makes a noticeable difference. Vanilla bean paste gives you those gorgeous specks, but pure extract works perfectly. Avoid imitation vanilla—it has a chemical aftertaste that’s especially noticeable in simple recipes like this one.
Spices: Feel free to adjust the spice blend to your taste. Love cinnamon? Add another 1/4 teaspoon. Not a fan of cloves? Leave them out. A pinch of cardamom or allspice would be lovely additions too. I’ve made this with a pumpkin pie spice blend in a pinch, and it turned out great.
Equipment Needed
One of the things I love most about this recipe is how little equipment it requires. You don’t need a stand mixer, a food processor, or any fancy gadgets. Here’s what you’ll need:
- Large skillet or frying pan (12-inch works best—gives the pears room to cook without crowding)
- Sharp knife and cutting board (for prepping the pears)
- Measuring spoons and measuring cups
- Wooden spoon or silicone spatula (for stirring without scratching your pan)
- Small bowl (for mixing the spices)
- Vegetable peeler (optional—I sometimes leave the skin on for texture and color)
If you don’t have a large skillet, a wide saucepan or Dutch oven works fine. Just make sure the pears are in a single layer so they cook evenly. I’ve even made this in a cast-iron skillet, which gives the pears a lovely caramelized edge—highly recommended if you have one.
For the vanilla bean paste, I keep mine in the pantry at room temperature. If you’re using a vanilla bean instead, you’ll need a small sharp knife to split it and scrape out the seeds. That’s an extra step, but the flavor is incredible.
Preparation Method
Alright, let’s get cooking. This recipe comes together quickly, so I recommend having everything prepped and measured before you start. Trust me on this—once those pears hit the pan, things move fast.
- Prep the pears: Wash and dry your pears. If you want to peel them, do it now—I sometimes leave the skin on for a rustic look and extra fiber, but peeled pears are more elegant. Cut each pear in half lengthwise, then use a melon baller or small spoon to scoop out the core and seeds. If you prefer, you can cut them into quarters or slices instead. I like halves because they look gorgeous on the plate, but slices cook faster and are easier to eat.
- Mix the spices: In a small bowl, combine the cinnamon, ginger, nutmeg, cloves, and salt. Stir them together with a fork so everything is evenly distributed. This step might seem small, but it ensures you don’t get a clump of cinnamon in one bite and nothing in another.
- Heat the pan: Place your large skillet over medium heat and add the butter. Let it melt completely, swirling the pan occasionally so it doesn’t burn. You want the butter to be foamy but not brown—about 1-2 minutes. If it starts to brown, that’s okay too; it adds a nutty flavor, but be careful not to let it burn.
- Add the sugars: Sprinkle both sugars evenly over the melted butter. Stir with your wooden spoon until the sugar dissolves and starts to bubble. This creates the base for your caramel sauce. Don’t walk away at this point—sugar can go from melted to burnt in seconds.
- Add the pears: Place the pear halves cut-side down in the pan. They should sizzle when they hit the butter-sugar mixture. If they don’t, your pan isn’t hot enough. Let them cook undisturbed for 3-4 minutes, until the cut sides are golden brown and caramelized. This is where the magic happens.
- Add the spices and liquid: Sprinkle the spice mixture over the pears, then pour in the water or apple cider. Add the vanilla bean paste (or extract) at this point. The liquid will sizzle and steam—that’s normal. Gently stir the liquid to combine everything into a cohesive sauce.
- Simmer and baste: Reduce the heat to medium-low. Using a spoon, baste the pears with the spiced liquid every minute or so. This keeps them moist and infuses them with flavor. Cook for 8-10 minutes, until the pears are tender when pierced with a fork but still hold their shape. The sauce should be slightly thickened and syrupy.
- Check for doneness: The pears are ready when a knife slides in easily but the pear still offers slight resistance. If they’re falling apart, you’ve cooked them too long. If they’re still hard, give them another 2-3 minutes. Remember, they’ll continue cooking slightly after you remove them from the heat.
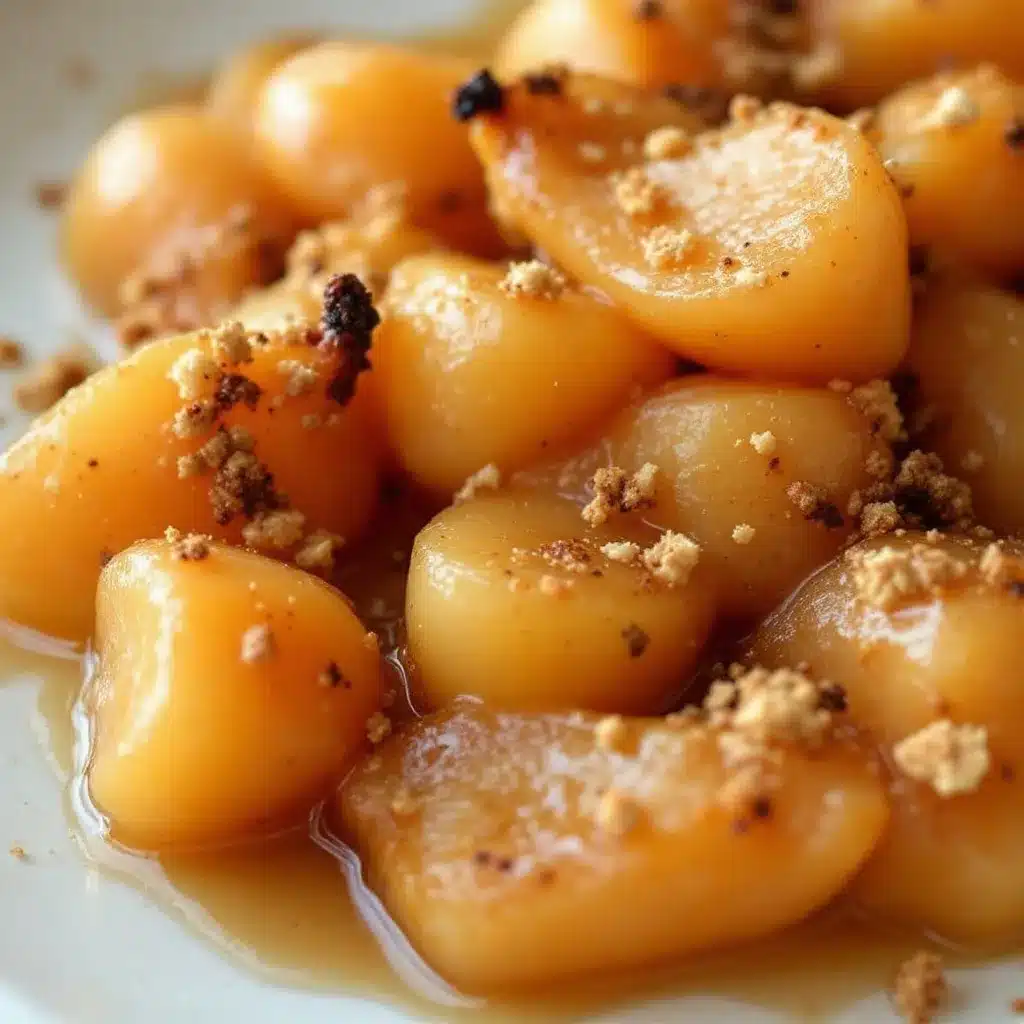
- Rest and serve: Remove the pan from the heat and let the pears rest for 2-3 minutes. This allows the sauce to thicken slightly and the flavors to meld. Serve warm, with a generous drizzle of the spiced syrup over the top.
Pro tip: If the sauce seems too thin at the end, remove the pears to a plate and let the sauce simmer on its own for 2-3 minutes. It will reduce and thicken into a beautiful syrup. If it’s too thick, add a splash of water or cider to loosen it up.
Cooking Tips & Techniques
I’ve made this recipe enough times to know exactly where things can go wrong. Let me save you some trouble.
Don’t overcrowd the pan. This is probably the most common mistake I see. If your pears are crammed together, they’ll steam instead of caramelize. Use the biggest pan you have, or cook the pears in batches. I know it’s tempting to do them all at once, but trust me—crowding leads to soggy pears.
Watch your heat. Medium heat is your friend here. Too high, and the sugar will burn before the pears are cooked through. Too low, and the pears will release too much liquid and turn mushy. I learned this the hard way when I tried to rush things and ended up with burnt syrup and raw pears. Not my finest moment.
Use the right pears. I mentioned this earlier, but it bears repeating: firm but ripe is the goal. If your pears are rock-hard, they won’t have any flavor. If they’re squishy, they’ll disintegrate. Give them a gentle squeeze at the store—they should yield slightly but not feel mushy.
Baste, baste, baste. This is the secret to perfectly flavored pears. Every time you baste, you’re coating the pears in that spiced syrup, building layers of flavor. I set a timer for every 2 minutes and make it a point to baste each pear half individually.
Let them rest. I know you want to eat them immediately, but those 2-3 minutes of resting time make a real difference. The pears absorb some of the syrup, the flavors meld together, and the texture becomes perfect. Use that time to scoop your ice cream or whip your cream.
Variations & Adaptations
One of the things I love about this recipe is how versatile it is. Here are some variations I’ve tried and loved:
Dietary Variations
- Vegan: Substitute the butter with coconut oil or vegan butter. Use maple syrup instead of honey if you were planning to add any. The recipe works beautifully with these swaps—I’ve tested it multiple times.
- Gluten-Free: This recipe is naturally gluten-free, so no changes needed. Just double-check your vanilla extract if you’re highly sensitive, as some brands use gluten-containing alcohol.
- Low-Sugar: Reduce the sugar to 2 tablespoons total, or use a sugar substitute like monk fruit sweetener. The pears will be less caramelized but still delicious. Add an extra pinch of cinnamon to compensate for the lost sweetness.
Flavor Variations
- Citrus Twist: Add the zest of one orange or lemon along with the spices. The citrus brightens up the flavors and adds a lovely freshness. I tried this on a whim one winter, and it’s become one of my favorite versions.
- Boozy Pears: Replace the water or cider with 1/4 cup of bourbon, rum, or brandy. Cook for an extra minute to burn off the alcohol. These are fantastic for grown-up dinner parties.
- Chai-Spiced: Swap the individual spices for 1 teaspoon of chai spice blend. Add a cinnamon stick and a star anise to the pan for extra flavor. This version tastes like fall in a bowl.
Cooking Method Variations
- Baked: Arrange the pears in a baking dish, pour the sauce over them, and bake at 375°F for 20-25 minutes. This method is more hands-off and works well if you’re making a larger batch.
- Grilled: For a smoky twist, grill the pear halves cut-side down over medium heat for 3-4 minutes, then finish them in a foil packet with the sauce. This is amazing for summer barbecues.
- Instant Pot: Use the sauté function to caramelize the pears, then pressure cook on high for 2 minutes with the sauce. Quick release and serve. This is my go-to when I’m short on time.
Serving & Storage Suggestions
These pears are incredibly versatile when it comes to serving. Here are some of my favorite ways to enjoy them:
Serving Ideas
- Classic: Serve warm with a scoop of vanilla ice cream and a drizzle of the spiced syrup. Add a sprinkle of chopped toasted pecans for crunch.
- Breakfast: Spoon the pears and syrup over Greek yogurt or oatmeal. Top with granola for extra texture. Honestly, this might be my favorite way to eat them.
- Elegant: Arrange the pear halves on a plate with a dollop of mascarpone or crème fraîche. Drizzle with the syrup and garnish with fresh mint. This presentation looks like it came from a fancy restaurant.
- Over cake: Use the pears and syrup as a topping for pound cake, cheesecake, or even pancakes. The syrup soaks into the cake beautifully.
- With cheese: Serve the pears alongside a cheese board with blue cheese, brie, or aged gouda. The sweet-spiced pears pair perfectly with savory, funky cheeses.
Storage Instructions
Refrigerator: Store leftover pears and syrup in an airtight container in the refrigerator for up to 5 days. The flavors actually deepen over time, so they might taste even better the next day.
Freezer: These pears freeze beautifully. Place them in a freezer-safe container with the syrup, leaving a little headroom for expansion. They’ll keep for up to 3 months. Thaw overnight in the refrigerator before reheating.
Reheating: Gently reheat the pears in a skillet over low heat, adding a splash of water or cider if the sauce has thickened too much. You can also microwave them in 30-second bursts, but be careful not to overheat them or they’ll turn mushy.
Flavor development: These pears are one of those rare dishes that actually improve with time. The spices meld into the fruit, and the syrup becomes more complex. I often make a double batch on Sunday and enjoy them throughout the week.
Nutritional Information & Benefits
While this is definitely a dessert, it’s a relatively wholesome one. Here’s the estimated nutritional breakdown per serving (one pear half with syrup, without toppings):
| Nutrient | Amount |
|---|---|
| Calories | 145 |
| Total Fat | 6g |
| Saturated Fat | 3.5g |
| Carbohydrates | 24g |
| Fiber | 3g |
| Sugar | 18g |
| Protein | 1g |
| Vitamin C | 6% DV |
| Potassium | 4% DV |
Health benefits: Pears are an excellent source of dietary fiber, which supports digestive health and helps you feel full longer. They also contain vitamin C, vitamin K, and copper. The spices in this recipe—cinnamon, ginger, and nutmeg—are known for their anti-inflammatory properties and can help regulate blood sugar levels.
Dietary considerations: This recipe is naturally gluten-free, nut-free, and egg-free. It can easily be made vegan and low-sugar with the substitutions mentioned above. If you’re watching your sugar intake, I recommend serving the pears with unsweetened Greek yogurt instead of ice cream.
Personal note: I love that this dessert feels indulgent but is actually made from whole food ingredients. It’s the kind of treat I feel good about serving to my family—delicious enough to satisfy a sweet tooth, but wholesome enough to eat on a regular basis.
Conclusion
Look, I’m not going to tell you that this recipe will change your life. But I will tell you that it’s become a staple in my kitchen for a reason. It’s quick, it’s simple, and it turns ordinary fruit into something genuinely special. Whether you’re looking for a last-minute dessert, a way to use up pears that are about to go soft, or just something warm and comforting on a cold evening, this recipe has you covered.
The best part? You can make it your own. Add more spice, less sugar, different fruit—the possibilities are endless. I’ve made this with apples, plums, and even peaches, and each version has been delicious in its own way. So go ahead, experiment, and find your perfect combination.
I’d love to hear how these quick spiced vanilla pears turn out for you. Did you try a variation? Serve them with something unexpected? Have a kitchen mishap that taught you something new? Drop a comment below and let me know. And if you loved this recipe as much as I do, share it with a friend who needs a little sweetness in their life. Happy cooking!
Frequently Asked Questions
Can I use canned pears instead of fresh?
You can, but the texture will be different. Canned pears are already cooked and much softer, so they’ll break down more easily. If you use canned pears, drain them well and reduce the cooking time to about 5 minutes. The flavor won’t be as intense, but it’s a decent shortcut in a pinch.
What’s the best type of pear for this recipe?
Bosc pears are my top choice because they hold their shape beautifully during cooking. Anjou pears are a close second—they’re slightly sweeter but still firm enough to work well. Avoid Bartlett pears unless they’re still quite firm, as they tend to get mushy quickly. Conference pears also work great if you can find them.
Can I make this recipe ahead of time?
Absolutely! In fact, I often make these pears a day or two in advance because the flavors meld and deepen over time. Just cook them as directed, let them cool completely, and store them in an airtight container in the refrigerator. Reheat gently before serving, adding a splash of water if the sauce has thickened too much.
How do I prevent the pears from turning brown?
Pears naturally oxidize and turn brown when cut, but the cooking process prevents this. If you’re prepping the pears ahead of time, toss them with a little lemon juice to slow down browning. Once they hit the hot pan, the color will set beautifully. The spices also help mask any slight discoloration.
Can I double this recipe?
Yes, but you’ll need a larger pan or you’ll have to cook the pears in batches. Crowding the pan leads to steaming instead of caramelization, which means less flavor. If you’re making a double batch, I recommend using two pans or cooking in two rounds. The sauce recipe doubles easily—just adjust the spices to taste.
Pin This Recipe!
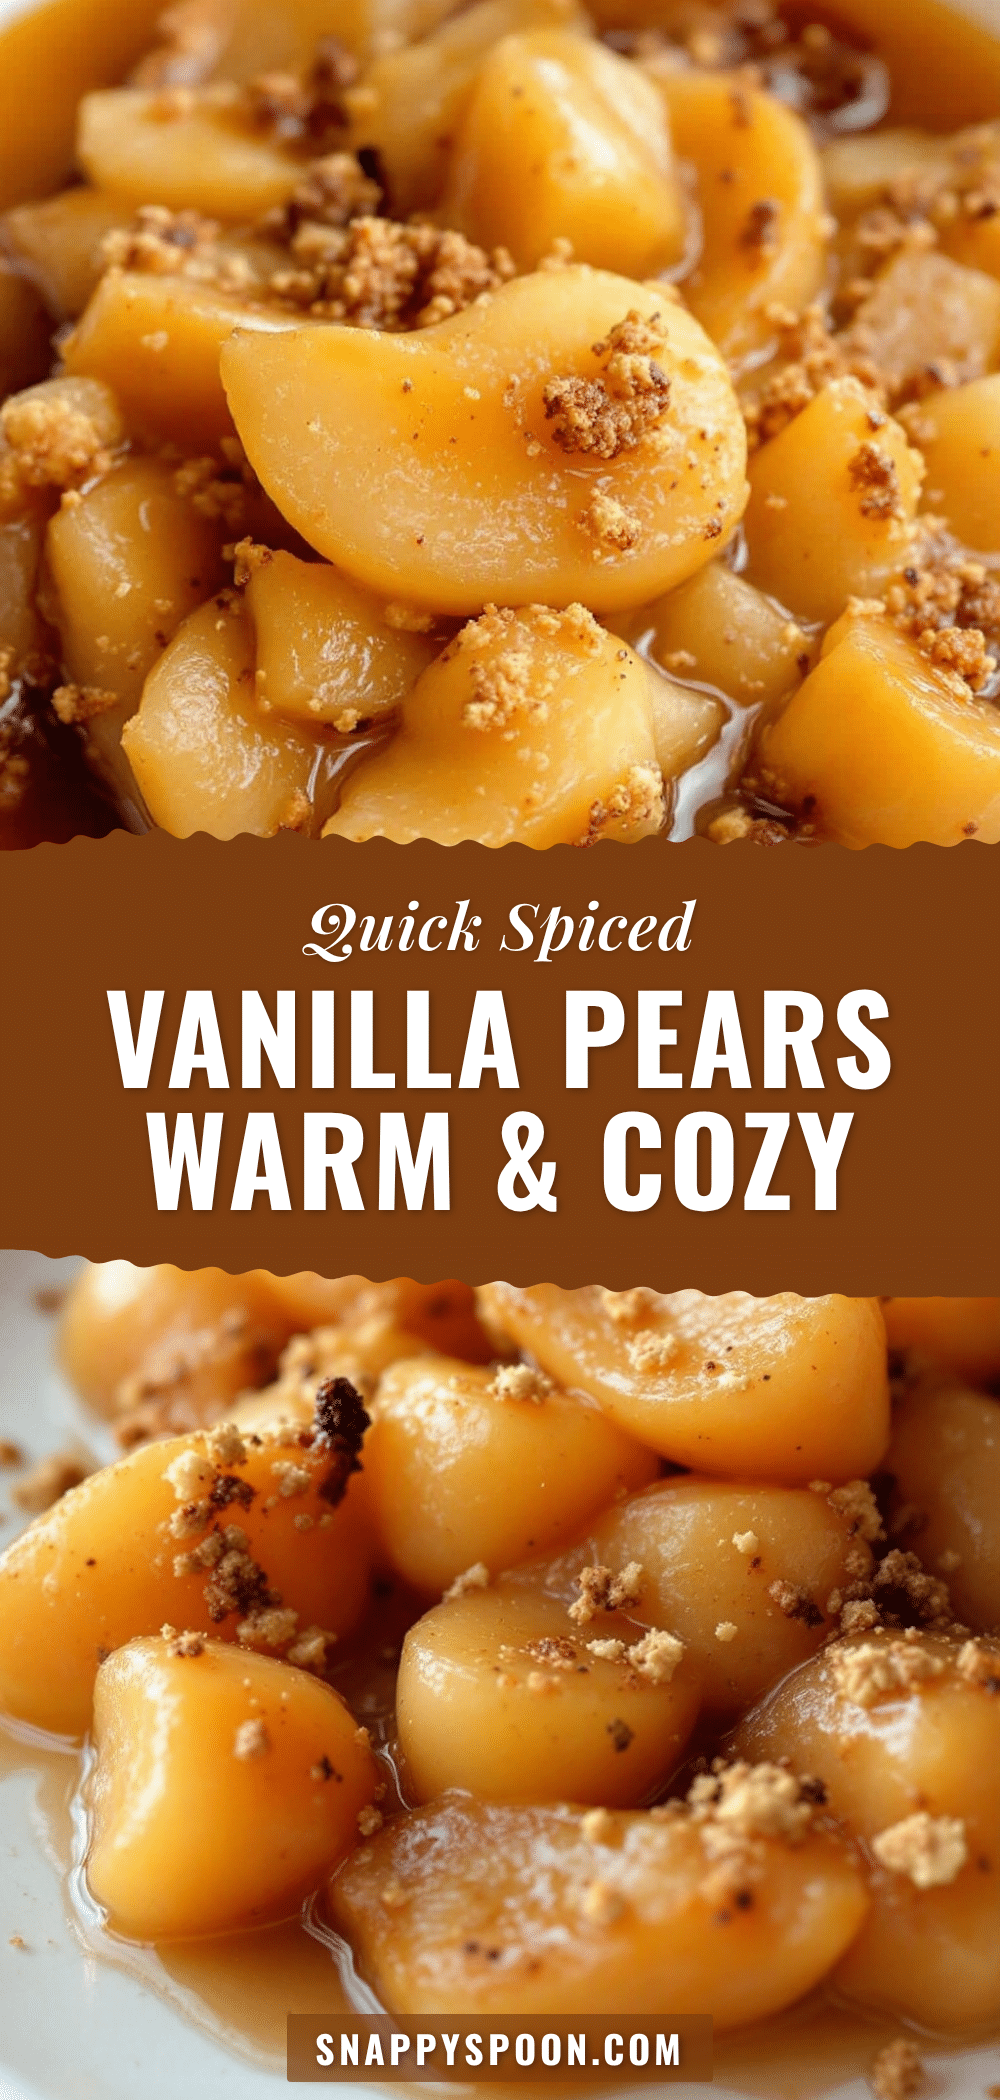
Quick Spiced Vanilla Pears Recipe – Easy Homemade Dessert
This quick spiced vanilla pears recipe transforms humble fruit into a warm, comforting dessert in about 20 minutes. With simple pantry ingredients and a stovetop technique, it’s perfect for weeknight treats or impressing guests without the fuss.
- Prep Time: 5 minutes
- Cook Time: 15 minutes
- Total Time: 20 minutes
- Yield: 4 servings 1x
- Category: Dessert
- Cuisine: American
Ingredients
- 4 firm but ripe pears, such as Bosc or Anjou
- 2 tablespoons unsalted butter
- 3 tablespoons brown sugar, packed
- 1 tablespoon granulated sugar
- 1 teaspoon vanilla bean paste (or 2 teaspoons pure vanilla extract)
- 1/2 teaspoon ground cinnamon
- 1/4 teaspoon ground ginger
- 1/8 teaspoon ground nutmeg
- 1/8 teaspoon ground cloves
- Pinch of salt
- 1/4 cup water or apple cider
- Vanilla ice cream or whipped cream (for serving, optional)
- Chopped nuts, such as pecans or walnuts (for serving, optional)
- Fresh mint leaves (for garnish, optional)
- Greek yogurt (for serving, optional)
Instructions
- Wash and dry the pears. Peel if desired, then cut each pear in half lengthwise and remove the core and seeds. Alternatively, cut into quarters or slices.
- In a small bowl, combine the cinnamon, ginger, nutmeg, cloves, and salt. Stir together.
- Place a large skillet over medium heat and add the butter. Let it melt until foamy but not brown, about 1-2 minutes.
- Sprinkle both sugars evenly over the melted butter and stir until dissolved and bubbling.
- Place the pear halves cut-side down in the pan. Cook undisturbed for 3-4 minutes until golden brown and caramelized.
- Sprinkle the spice mixture over the pears, then pour in the water or apple cider. Add the vanilla bean paste (or extract). Stir the liquid to combine.
- Reduce heat to medium-low. Baste the pears with the spiced liquid every minute or so. Cook for 8-10 minutes until tender but still holding their shape, and the sauce is slightly thickened.
- Check for doneness: a knife should slide in easily but the pear still offers slight resistance.
- Remove from heat and let rest for 2-3 minutes. Serve warm with a drizzle of the spiced syrup.
Notes
For best results, use firm but ripe pears like Bosc or Anjou. Don’t overcrowd the pan; cook in batches if needed. Baste frequently for maximum flavor. Let the pears rest after cooking to allow the sauce to thicken. The recipe can be made vegan by substituting butter with coconut oil or vegan butter, and low-sugar by reducing sugar to 2 tablespoons total.
Nutrition
- Serving Size: 1 pear half with syr
- Calories: 145
- Sugar: 18
- Fat: 6
- Saturated Fat: 3.5
- Carbohydrates: 24
- Fiber: 3
- Protein: 1
Keywords: spiced pears, vanilla pears, quick dessert, easy dessert, stovetop pears, pear recipe, fall dessert, healthy dessert