Love this? Save it for later!
Share the inspiration with your friends
My daughter came home from school last October clutching a crumpled piece of wax paper. “Look what Mrs. Patterson made for the class party!” she announced, carefully peeling back the edges. Inside was this messy, gorgeous slab of white chocolate studded with candy corn and sprinkles. She offered me a tiny piece, and honestly? I was hooked after one bite. The crunch of the candy corn against the smooth white chocolate was something I hadn’t experienced before.
I asked her if Mrs. Patterson would share the recipe, and a few days later, a handwritten note came back in my daughter’s backpack. The instructions were simple—almost too simple. Melt chocolate, add candy, let it set. But there was something about the way she described letting the chocolate cool just enough before adding the toppings that stuck with me. That tiny detail made all the difference.
I tweaked it a little over the years. I added a sprinkle of sea salt because, well, I add sea salt to almost everything. I swapped out some of the candy corn for autumn-colored M&Ms one year when I ran out. And somewhere along the way, this Easy Candy Corn White Chocolate Halloween Bark became our family’s go-to Halloween treat. It’s the kind of recipe you don’t have to think too hard about, but everyone gets excited when they see it on the counter.
Maybe you’ve been there—scrambling for a last-minute classroom treat or a quick dessert for a Halloween gathering. This bark solves that problem. It looks impressive, takes about ten minutes of actual work, and uses ingredients you can find at any grocery store. Let me tell you, there’s something deeply satisfying about breaking that slab of chocolate into jagged pieces and hearing everyone ooh and aah over something so simple.
Why You’ll Love This Recipe
This Halloween bark has saved me more times than I can count. I’ve brought it to potlucks, mailed it to college kids, and set it out for trick-or-treaters who look a little disappointed with just candy. It always gets the same reaction—surprise followed by a second piece. Here is why this recipe works so well:
- Five Minutes of Prep : You read that right. Melt the chocolate, sprinkle the toppings, and walk away. This is the kind of recipe you can make while helping with homework or waiting for the pizza delivery.
- No Special Equipment : A microwave and a baking sheet are all you need. No double boiler, no candy thermometer, no fancy molds. If you own a spatula, you are ready to go.
- Perfect for Halloween Parties : This bark looks like a million bucks on a dessert table. The candy corn and sprinkles give it that festive Halloween vibe without requiring any piping skills or fondant work.
- Kid-Friendly to Make : My kids have been helping with this recipe since they were old enough to hold a spoon. There is no hot sugar to worry about, just melted chocolate that cools quickly.
- Endlessly Customizable : I have made this with dark chocolate, added pretzels for saltiness, and even drizzled caramel on top. It handles substitutions like a champ.
What makes this bark different from other Halloween treats is the texture combination. The candy corn stays crunchy inside the smooth white chocolate, and the sea salt cuts through the sweetness just enough. It is not cloying like some candy-based desserts can be. The first time I added flaky sea salt, my husband said, “What did you do? This is better than the store-bought stuff.” That comment stuck with me because he is not easy to impress.
This recipe is the kind that makes you look like you spent hours in the kitchen when you really just melted some chocolate and threw candy on top. It is comfort food for the Halloween season—easy, forgiving, and guaranteed to make people smile.
What Ingredients You Will Need
This recipe uses simple ingredients that come together to create something greater than the sum of their parts. Most of these are pantry staples during the Halloween season, but I have included notes on substitutions in case you need them.
- White chocolate chips or melting wafers (24 ounces) : I prefer Ghirardelli white chocolate chips for their creamy texture and reliable melting. Melting wafers work great too and sometimes set up a little firmer. Avoid white chocolate that contains vegetable oils if you can—it doesn’t melt as smoothly. (adds richness and structure)
- Candy corn (1 cup) : The star of the show. Regular candy corn works best, but I have used the autumn mix with the little pumpkins and it looks adorable. Brach’s is my go-to brand because the texture holds up well in the chocolate. (adds crunch and sweetness)
- Halloween sprinkles (¼ cup) : Any festive mix works here. I like the ones with orange, black, and purple shapes. The sprinkles add color and make the bark look more polished. (adds visual appeal)
- Flaky sea salt (½ teaspoon) : This is optional but highly recommended. Maldon sea salt is my favorite because the flakes are delicate and distribute evenly. The salt balances the sweetness of the white chocolate and candy corn perfectly. (adds balance and complexity)
- Optional add-ins : Mini pretzels (½ cup crushed), dried cranberries (¼ cup), or chopped nuts (¼ cup) can be added for texture variation. I sometimes throw in a handful of salted peanuts for a sweet-and-salty combo.
When selecting your white chocolate, look for chips that are uniform in color and free from any whitish streaks or spots. That discoloration indicates the chocolate has been exposed to temperature fluctuations and may not melt as smoothly. I learned this the hard way after a batch seized up on me right before a party. Store your chocolate in a cool, dry place away from direct sunlight.
For the candy corn, freshness matters. Stale candy corn gets hard and chewy in an unpleasant way. Check the expiration date on the bag and give a piece a quick taste test before using it. Fresh candy corn should have a slight give when you bite into it, not a hard snap.
If you need to make this recipe dairy-free, look for dairy-free white chocolate chips. Enjoy Life makes a good option that melts and sets well. The rest of the ingredients are naturally dairy-free, so the swap is straightforward.
Equipment Needed
The beauty of this recipe is that it requires minimal equipment. I have made this in a college dorm kitchen and in a fully stocked home kitchen, and it turned out great both times.
- Baking sheet or large tray (13×18 inch) : A rimmed baking sheet works best to contain the melted chocolate. Line it with parchment paper or a silicone baking mat for easy removal.
- Microwave-safe bowl : A large glass bowl works perfectly. I use a 4-cup Pyrex measuring cup because the spout makes pouring easier, but any microwave-safe bowl will do.
- Spatula or offset spatula : For spreading the melted chocolate into an even layer. A rubber spatula works fine, but an offset spatula gives you more control over the thickness.
- Parchment paper or silicone baking mat : Essential for preventing sticking. Parchment paper is cheaper and disposable, while silicone mats are reusable and eco-friendly. Both work equally well.
- Measuring cups and spoons : For portioning out the candy corn and sprinkles. I eyeball it most of the time, but measuring ensures consistent results.
If you don’t have a microwave, you can melt the white chocolate using a double boiler on the stovetop. Fill a small saucepan with an inch of water, bring it to a simmer, and place a heatproof bowl on top. Stir the chocolate until melted, being careful not to let any steam or water get into the bowl. Water is white chocolate’s worst enemy—it will cause the chocolate to seize and turn grainy.
A budget-friendly alternative to an offset spatula is the back of a spoon. It takes a little more effort to spread the chocolate evenly, but it gets the job done. I have also used a butter knife in a pinch.
Preparation Method
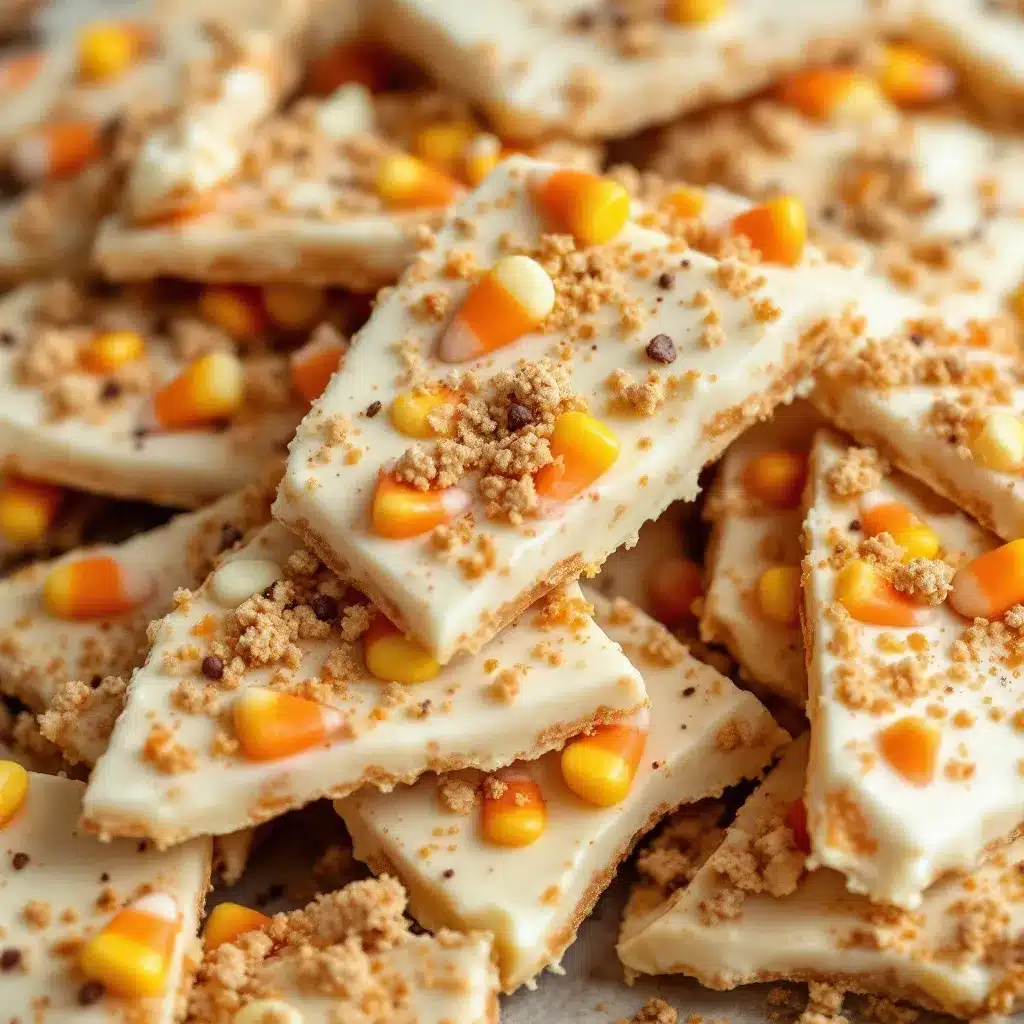
This recipe comes together quickly, so I recommend having all your ingredients measured and ready before you start melting the chocolate. The entire process takes about 10 minutes of active time, plus 30 minutes for the bark to set.
Step 1: Prepare your baking sheet. Line a 13×18 inch baking sheet with parchment paper or a silicone baking mat. Make sure the paper extends up the sides slightly to catch any melted chocolate that spreads. Set the sheet aside where it can sit undisturbed for at least 30 minutes after you pour the chocolate.
Step 2: Melt the white chocolate. Place 24 ounces of white chocolate chips or melting wafers in a microwave-safe bowl. Microwave on high power for 30 seconds, then stir. Repeat this process in 20-second intervals, stirring thoroughly between each interval. White chocolate burns easily because of its high sugar and milk content, so do not walk away during this step. The chocolate is ready when most of the chips are melted and only a few small lumps remain. Stir until the residual heat melts the remaining lumps. The melted chocolate should be smooth, glossy, and warm to the touch but not hot. If you see any scorched spots, stop immediately and transfer the unburned chocolate to a clean bowl.
Step 3: Pour and spread the chocolate. Pour the melted white chocolate onto the center of your prepared baking sheet. Use a spatula or offset spatula to spread it into an even layer about ¼ inch thick. Do not spread it too thin, or the bark will be fragile and break into tiny pieces. Aim for a rectangle shape, but don’t stress about perfection—the jagged edges are part of the charm. The chocolate should cover most of the baking sheet, leaving about an inch of space around the edges.
Step 4: Add the toppings. While the chocolate is still wet and warm, sprinkle 1 cup of candy corn evenly over the surface. Press each piece gently into the chocolate so they stick. Follow with ¼ cup of Halloween sprinkles, scattering them randomly across the bark. If you are using the flaky sea salt, sprinkle it lightly over the top now. Work quickly because white chocolate sets faster than you might expect. I usually do the candy corn first, then the sprinkles, then the salt last.
Step 5: Let the bark set. Place the baking sheet in the refrigerator for at least 30 minutes, or until the chocolate is completely firm and no longer sticky to the touch. If you are in a hurry, you can speed this up by placing the sheet in the freezer for 15 minutes. Just keep an eye on it—freezer temperatures can cause condensation, which will make the chocolate look dull. Once set, remove the bark from the refrigerator and let it sit at room temperature for 5 minutes before breaking it apart.
Step 6: Break into pieces. Lift the parchment paper or silicone mat off the baking sheet and place it on a cutting board. Use your hands to break the bark into irregular pieces. I aim for pieces that are about 2 to 3 inches across, but some people prefer smaller bite-sized pieces. The jagged edges and random shapes make the bark look homemade and rustic. If you prefer clean edges, use a sharp knife to cut the bark into squares before it fully sets, but I think the broken pieces look more authentic.
Sensory cues to watch for: The melted chocolate should look like thick cream when it is ready—smooth, glossy, and flowing slowly off the spatula. When you press a candy corn into the chocolate, it should sink slightly without disappearing. The finished bark should snap cleanly when broken, not bend or feel soft. If the chocolate bends, it needs more time to set.
Cooking Tips & Techniques
I have made this bark at least two dozen times over the past few years, and I have learned a few things the hard way. Here are the tips that make the difference between good bark and great bark.
Don’t overheat the chocolate. White chocolate is sensitive. It burns at a lower temperature than dark or milk chocolate because of the milk solids. If your chocolate looks grainy or thick, you have overheated it. The fix is to stir in a tablespoon of coconut oil or vegetable shortening to smooth it out. I keep a jar of coconut oil in my pantry specifically for chocolate emergencies.
Let the chocolate cool slightly before adding toppings. This was the tip from Mrs. Patterson’s handwritten note that changed everything. If you add candy corn to piping hot chocolate, the candy corn can start to melt and lose its shape. Wait about 60 seconds after spreading the chocolate before adding the toppings. The chocolate should still be wet but not steaming.
Press toppings in gently. Candy corn and sprinkles will fall off if you don’t press them into the chocolate. Use your fingertips to gently push each piece into the surface. Don’t press so hard that the candy corn sinks to the bottom, but make sure it is anchored. I learned this after a batch where half the toppings fell off during breaking.
Use a silicone mat for easy release. Parchment paper works fine, but silicone baking mats make removal effortless. The chocolate slides right off without any sticking. If you use parchment paper, choose a good quality brand that doesn’t curl up at the edges.
Break the bark while it is still cold. The cleanest breaks happen when the chocolate is cold and firm. If the bark warms up too much, it becomes soft and bends instead of snapping. Work in batches if you are making a large quantity, keeping the unused portion in the refrigerator until you are ready to break it.
One mistake I still make: I sometimes get distracted and let the chocolate sit too long before adding the toppings. By the time I remember, the chocolate has started to set and the candy corn won’t stick. The solution is to have all your toppings measured and ready before you even start melting the chocolate. Prep work saves the day every time.
Variations & Adaptations
This bark is incredibly forgiving and adapts well to different tastes and dietary needs. Here are some variations I have tried and loved.
Dark Chocolate Halloween Bark: Swap the white chocolate for dark chocolate chips (60% to 70% cacao works best). The bitterness of the dark chocolate balances the sweetness of the candy corn beautifully. I made this version for a friend who doesn’t like white chocolate, and she asked for the recipe on the spot. Use the same melting method and topping amounts.
Salty Pretzel Bark: Add ½ cup of crushed mini pretzels along with the candy corn and sprinkles. The saltiness of the pretzels cuts through the sweetness and adds a satisfying crunch. I sometimes drizzle a little melted caramel over the top for extra indulgence. This version disappears fastest at parties.
Halloween Candy Bark: Replace half of the candy corn with other Halloween candies like chopped Reese’s cups, M&Ms, or chopped Kit Kats. The variety of textures and flavors makes each piece different. My kids love hunting for their favorite candy in the bark.
Dairy-Free Version: Use dairy-free white chocolate chips and skip any optional add-ins that contain dairy. Enjoy Life makes a reliable dairy-free white chocolate that melts and sets well. The rest of the ingredients are naturally dairy-free, so this is an easy swap.
Nut-Free Version: Skip any nut-based add-ins and double-check that your candy corn and sprinkles are manufactured in a nut-free facility if allergies are a concern. Most major brands of candy corn are nut-free, but always read the label.
Gluten-Free Version: This recipe is naturally gluten-free as written, but double-check your candy corn and sprinkle labels for any gluten-containing ingredients. Some sprinkles use wheat-based stabilizers, so look for certified gluten-free options if needed.
I have also made this bark with a layer of melted caramel swirled into the white chocolate before adding the toppings. The caramel adds a chewy texture that contrasts nicely with the crunchy candy corn. Just be careful not to over-swirl, or the caramel will blend completely into the chocolate.
Serving & Storage Suggestions
This bark is best served at room temperature, where the white chocolate has a creamy snap and the candy corn maintains its crunch. I like to arrange the pieces on a platter or in a decorative jar for Halloween parties. The colorful toppings make it look festive without any extra effort.
Serving ideas:
- Place pieces in a clear cellophane bag tied with orange ribbon for party favors
- Arrange on a cake stand surrounded by mini pumpkins and autumn leaves
- Layer in a mason jar for a homemade gift that looks thoughtful
- Crush into smaller pieces and sprinkle over vanilla ice cream for a quick dessert
Storage instructions: Store the bark in an airtight container at room temperature for up to 2 weeks. Separate layers with parchment paper to prevent sticking. Do not refrigerate the bark once it has set, as condensation can make the chocolate look dull and cause the candy corn to soften. If you live in a warm climate, store the container in a cool, dark cabinet away from direct sunlight.
Freezing instructions: This bark freezes beautifully for up to 3 months. Place the pieces in a single layer on a baking sheet and freeze until solid, then transfer to a freezer-safe bag or container. Thaw at room temperature for about 15 minutes before serving. The texture remains nearly identical to fresh bark. I always keep a bag in the freezer for unexpected guests or last-minute Halloween cravings.
Flavor development note: The bark actually tastes better after a day or two. The flavors meld together, and the candy corn softens slightly, creating a more cohesive texture. I try to make this at least 24 hours before I plan to serve it. The difference is subtle but noticeable.
Nutritional Information & Benefits
This Halloween bark is a treat, not a health food, but knowing what is in each piece helps with portion control. Here is the approximate nutritional breakdown for a 2-ounce serving (about one medium piece):
- Calories: 220
- Total Fat: 12g
- Saturated Fat: 7g
- Carbohydrates: 28g
- Sugar: 24g
- Protein: 2g
- Sodium: 65mg (with sea salt)
White chocolate contains calcium from milk solids, which supports bone health. Candy corn is made primarily from sugar and corn syrup, so it provides quick energy but should be enjoyed in moderation. The flaky sea salt adds trace minerals like magnesium and potassium.
Dietary considerations: This recipe is gluten-free and nut-free as written, making it accessible for many common dietary restrictions. It is not dairy-free unless you use dairy-free white chocolate. Always check ingredient labels if you are serving guests with allergies, as manufacturing processes vary by brand.
I personally view this bark as a celebration treat. Halloween comes once a year, and a few pieces of this bark are worth every calorie. The joy it brings to kids and adults alike makes it a worthwhile indulgence in my book.
Conclusion
This Easy Candy Corn White Chocolate Halloween Bark has become a staple in our home for good reason. It is simple enough to make on a busy weekday, impressive enough to bring to any party, and delicious enough that people ask for the recipe every single time. The combination of creamy white chocolate, crunchy candy corn, and festive sprinkles captures everything I love about Halloween treats.
I encourage you to make this recipe your own. Add your favorite Halloween candies, experiment with different chocolate types, or throw in some crushed pretzels for saltiness. The bark is forgiving and welcomes creativity. That is the beauty of a recipe this simple—it becomes a canvas for whatever you have on hand.
I still think about Mrs. Patterson and that crumpled piece of wax paper every time I make this bark. It reminds me that the best recipes often come from unexpected places and that sharing food with others is one of the simplest ways to connect. I hope this bark brings you and your family as much joy as it has brought mine.
Have you tried this recipe? I would love to hear about your variations and how it turned out. Drop a comment below and let me know what Halloween candies you added. And if you share a photo on social media, tag me so I can see your beautiful bark creations. Happy Halloween, friends!
Frequently Asked Questions
Can I use chocolate chips instead of melting wafers?
Yes, chocolate chips work perfectly. Just be aware that some chocolate chips contain stabilizers that help them hold their shape, so they may not melt as smoothly as melting wafers. Stir in a teaspoon of coconut oil or vegetable shortening if the melted chocolate seems too thick.
Why did my white chocolate seize up and turn grainy?
White chocolate seizes when it comes into contact with moisture or gets overheated. Make sure all your bowls and utensils are completely dry before you start melting. If the chocolate does seize, stir in a tablespoon of warm coconut oil or heavy cream to bring it back to a smooth consistency.
How long does this Halloween bark stay fresh?
Stored in an airtight container at room temperature, the bark stays fresh for up to 2 weeks. The candy corn may soften slightly over time, but the flavor remains great. For longer storage, freeze the bark for up to 3 months.
Can I double this recipe?
Absolutely. Double all the ingredients and use a larger baking sheet or two separate sheets. Work in batches if your microwave isn’t large enough to melt the full amount of chocolate at once. The bark freezes well, so I often make a double batch and save half for later.
What can I use instead of candy corn?
You can substitute candy corn with other Halloween candies like candy pumpkins, chopped candy bars, or seasonal M&Ms. Dried fruit like cranberries or apricots also work well if you want a less sugary option. The bark is versatile, so feel free to use whatever you have on hand.
Pin This Recipe!
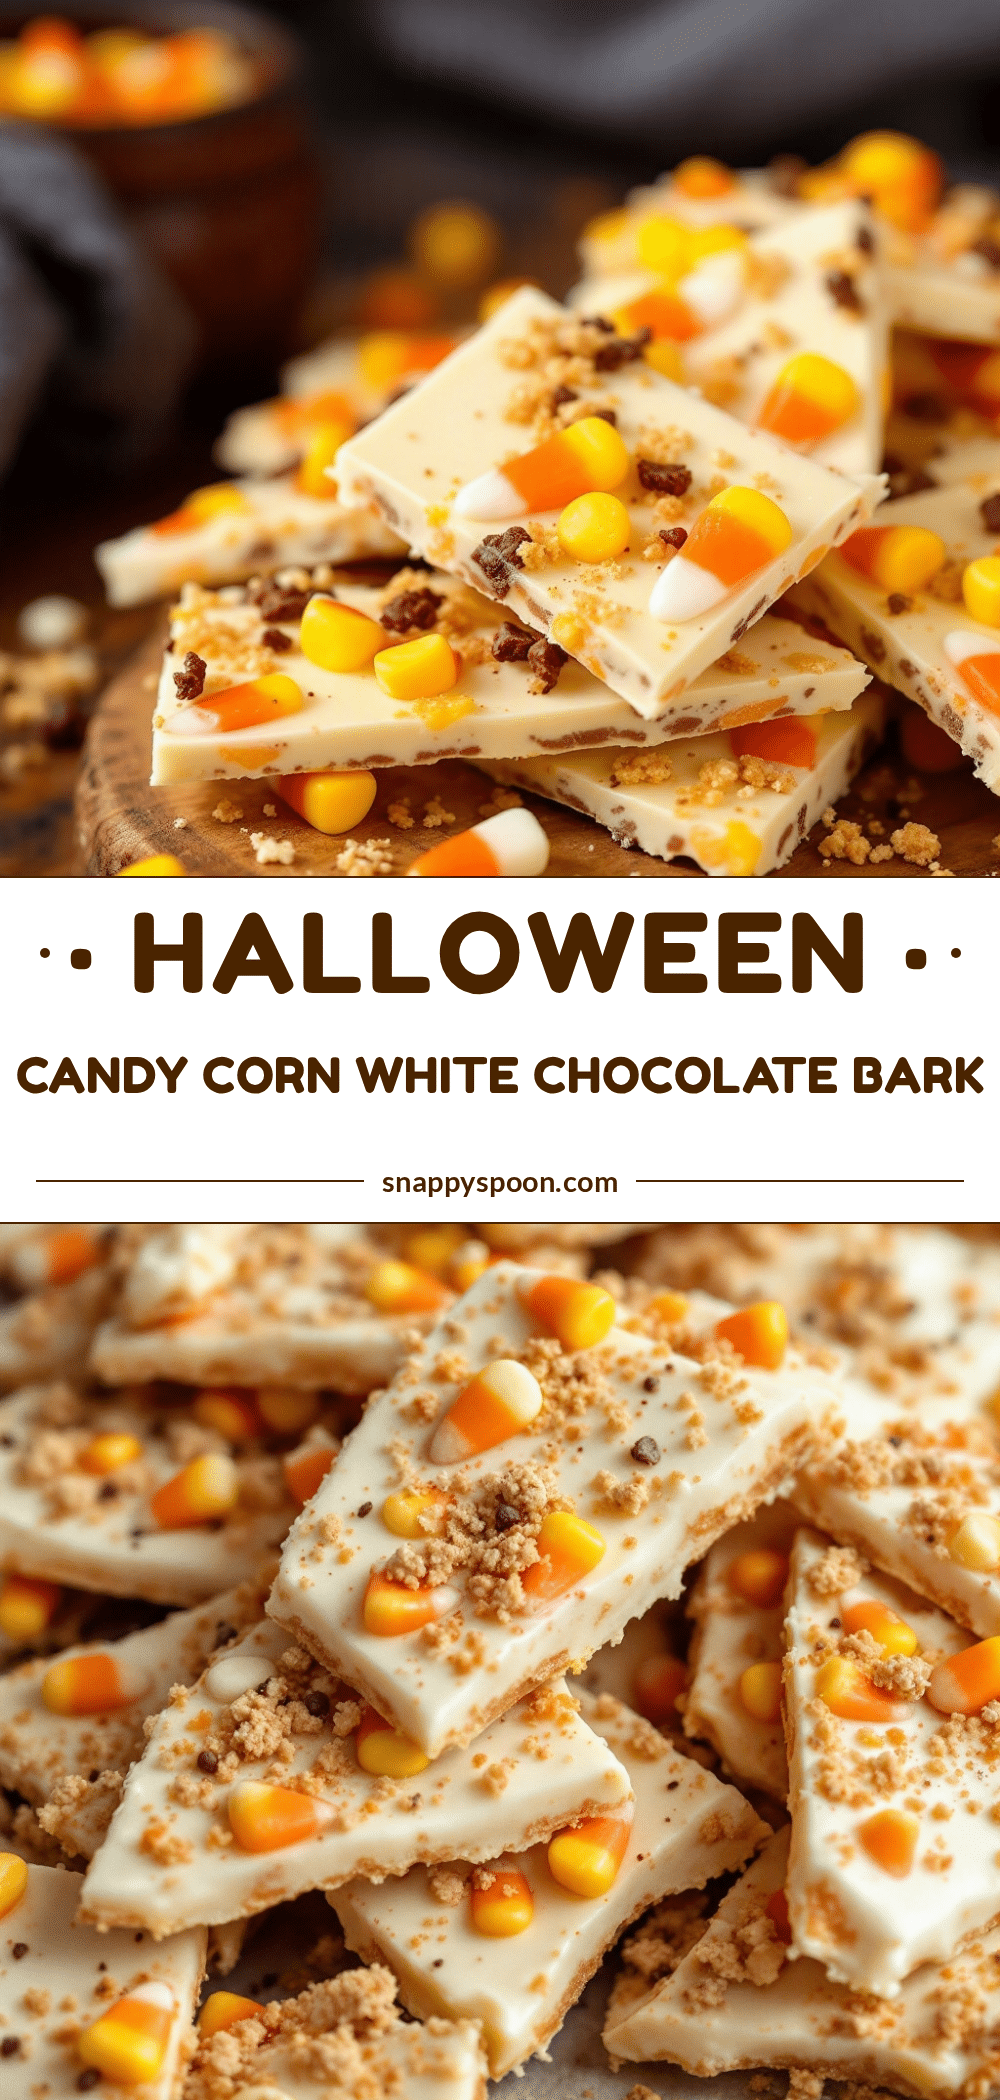
Easy Candy Corn White Chocolate Halloween Bark
A quick and easy Halloween treat featuring creamy white chocolate studded with crunchy candy corn and festive sprinkles. This no-bake bark comes together in minutes and is perfect for parties, gifting, or satisfying a sweet tooth.
- Prep Time: 10 minutes
- Cook Time: 0 minutes
- Total Time: 40 minutes
- Yield: 12 servings 1x
- Category: Dessert
- Cuisine: American
Ingredients
- 24 ounces white chocolate chips or melting wafers
- 1 cup candy corn
- 1/4 cup Halloween sprinkles
- 1/2 teaspoon flaky sea salt (optional)
- 1/2 cup crushed mini pretzels (optional)
- 1/4 cup dried cranberries (optional)
- 1/4 cup chopped nuts (optional)
Instructions
- Line a 13×18 inch baking sheet with parchment paper or a silicone baking mat.
- Place 24 ounces of white chocolate chips or melting wafers in a microwave-safe bowl. Microwave on high for 30 seconds, then stir. Repeat in 20-second intervals, stirring thoroughly between each, until most chips are melted and only a few small lumps remain. Stir until smooth.
- Pour the melted white chocolate onto the center of the prepared baking sheet. Use a spatula or offset spatula to spread it into an even layer about 1/4 inch thick.
- While the chocolate is still wet and warm, sprinkle 1 cup of candy corn evenly over the surface, pressing each piece gently into the chocolate. Follow with 1/4 cup of Halloween sprinkles and 1/2 teaspoon of flaky sea salt (if using).
- Place the baking sheet in the refrigerator for at least 30 minutes, or until the chocolate is completely firm and no longer sticky. Alternatively, freeze for 15 minutes.
- Remove the bark from the refrigerator and let it sit at room temperature for 5 minutes. Lift the parchment or silicone mat onto a cutting board and break the bark into irregular pieces with your hands.
Notes
White chocolate burns easily; melt in short intervals and stir frequently. Let the chocolate cool slightly (about 60 seconds) before adding toppings to prevent candy corn from melting. Press toppings gently into the chocolate to ensure they stick. For clean breaks, break the bark while it is still cold. Store in an airtight container at room temperature for up to 2 weeks, or freeze for up to 3 months. The bark tastes even better after a day or two as flavors meld.
Nutrition
- Serving Size: 1 piece (about 2 oun
- Calories: 220
- Sugar: 24
- Sodium: 65
- Fat: 12
- Saturated Fat: 7
- Carbohydrates: 28
- Protein: 2
Keywords: Halloween bark, candy corn, white chocolate, easy dessert, no-bake, Halloween treat, festive, kid-friendly