Love this? Save it for later!
Share the inspiration with your friends
The neighborhood salsa competition was in three days and I’d completely forgotten. My neighbor Carlos had been talking about his entry for weeks—some secret family recipe he’d been perfecting for years. Another friend was bringing a mango-habanero blend that she’d actually won awards for at the county fair. And me? I had a bag of Hatch chiles sitting in my fridge and absolutely no plan.
I mean, I’d bought those chiles on a whim during a trip to the farmer’s market. The smell of them roasting had pulled me in from across the parking lot, and before I knew it, I was walking home with a paper sack full of them and no idea what I was going to do. Classic me—impulse buy first, figure it out later.
So there I was, staring at my sad little bag of chiles, scrolling through recipe after recipe online, getting more stressed by the minute. Everyone else was bringing these elaborate, multi-day preparations. I had maybe two hours total, and honestly, I was about to just grab a jar of store-bought salsa and pretend.
But then I remembered something my abuela used to say—that the best food comes from working with what you’ve got, not from stressing about what you don’t. So I grabbed those chiles, some tomatillos from the back of my fridge, and started roasting. I figured if it turned out terrible, at least I’d have chips and salsa for myself while everyone else ate the good stuff.
Spoiler alert: I won. Not just placed—I won the whole thing. Carlos actually asked for the recipe, which felt like winning an Olympic medal, honestly. People kept coming back to the bowl, scooping up more with chips, asking what “secret ingredient” I’d used. There was no secret ingredient. Just smoky roasted Hatch chiles, a little patience, and the kind of desperation that makes you stop overthinking and just cook.
That’s the thing about this smoky roasted Hatch chili salsa verde—it doesn’t try to be fancy. It just shows up, does its job, and makes everything around it better. Maybe you’ve been there, staring at a bag of chiles with no plan. Let me tell you, this recipe is exactly what you need.
Why You’ll Love This Recipe
I’ve made this salsa verde more times than I can count now, and every single time, it delivers. Here’s why this smoky roasted Hatch chili salsa verde has become my go-to recipe for everything from taco nights to lazy Sunday snacking:
- Incredible depth of flavor: The roasting process brings out this amazing smokiness that you just can’t get from raw ingredients. It’s complex without being complicated.
- Simple, whole ingredients: No weird additives, no preservatives, nothing you can’t pronounce. Just real food that tastes like real food.
- Perfect for meal prep: This stuff actually gets better after a day or two in the fridge. Make it Sunday, enjoy it all week.
- Naturally gluten-free and dairy-free: It works for pretty much any dietary restriction without tasting like a compromise.
- Budget-friendly: A little goes a long way, and most of these ingredients cost pennies compared to store-bought salsa.
- Endlessly versatile: Use it as a dip, a sauce, a marinade, or a topping. It does it all.
What makes this recipe different from all the other salsa verdes out there? It’s the roasting method. Most recipes just throw everything in a blender raw and call it a day. But taking the time to roast the chiles, tomatillos, and aromatics until they’re charred and blistered transforms the entire dish. You get this deep, smoky sweetness that balances perfectly with the bright acidity of the tomatillos.
This isn’t just another salsa recipe—it’s the one that’ll make you stop buying the jarred stuff forever. It’s the kind of recipe that makes you close your eyes after the first bite and just appreciate what food can be when you let the ingredients do the talking.
What Ingredients You Will Need
This smoky roasted Hatch chili salsa verde uses simple, wholesome ingredients that work together to create something truly special. Most of these are pantry staples or easy to find at any grocery store, especially during Hatch chile season.
For the Salsa Base
- 1 pound fresh Hatch chiles (about 6-8 medium chiles, preferably roasted and peeled) — These are the star of the show. Look for Hatch chiles labeled “hot” or “medium” depending on your heat preference. I personally love the medium heat for a balanced flavor that still has a kick.
- 1 pound tomatillos (about 6-8 medium, husks removed and rinsed) — Choose tomatillos that feel firm and heavy for their size. The papery husks should be tight and dry, not mushy.
- 1 medium white onion (about 8 ounces, quartered) — White onion gives the best flavor here. Red or yellow will work in a pinch, but white has that classic savory note that really shines.
- 4 cloves garlic (unpeeled) — Roasting garlic in its skin mellows out the sharpness and adds a sweet, nutty flavor. Trust me on this one.
- 1-2 jalapeños (optional, for extra heat) — If you’re feeling brave or feeding spice lovers, throw these on the grill too.
For Seasoning

- 1/2 cup fresh cilantro (packed, stems and all) — Don’t bother picking off the leaves. The stems have tons of flavor and blend up just fine.
- Juice of 2 limes (about 3-4 tablespoons) — Fresh lime juice only, please. The bottled stuff has a weird metallic taste that throws off the whole salsa.
- 1 teaspoon ground cumin — This adds that warm, earthy undertone that makes the salsa taste complete.
- 1 teaspoon salt (plus more to taste) — I use kosher salt for its clean flavor and easy pinch-ability.
- 1/2 teaspoon black pepper — Freshly ground is always better, but pre-ground works fine in a pinch.
Ingredient Tips & Substitutions
If you can’t find fresh Hatch chiles, you can use frozen or canned roasted Hatch chiles. I’ve used both, and while fresh is best, the frozen ones from brands like Bueno or 505 Southwestern work surprisingly well. Just thaw them and pat them dry before using.
For a milder version, remove all the seeds and membranes from the chiles before blending. For extra heat, leave them in or add a serrano pepper to the mix.
If tomatillos aren’t available, you can substitute green tomatoes, though the flavor will be slightly different. The tomatillos give that signature tanginess that makes salsa verde what it is.
Equipment Needed
You don’t need a fancy kitchen to make this smoky roasted Hatch chili salsa verde. Here’s what you’ll need:
- Sheet pan or cast iron skillet: For roasting the chiles and tomatillos. A sheet pan works great, but a cast iron skillet gives you even better char marks and heat distribution.
- Tongs: For flipping the roasting vegetables without burning your fingers.
- Blender or food processor: A high-powered blender like a Vitamix will give you the smoothest results, but a standard blender or food processor works perfectly fine. I’ve used my old Oster for years and it’s never let me down.
- Cutting board and knife: For prepping the ingredients before roasting.
- Large bowl: For mixing and storing the finished salsa.
- Spatula or wooden spoon: For scraping down the blender and stirring everything together.
If you don’t have a blender, you can chop everything by hand for a chunkier, more rustic salsa. It’ll take longer, but the texture is actually really nice that way. Just be prepared for some serious knife work.
For the roasting, I prefer using my broiler setting because it gets super hot and creates that perfect char quickly. But a grill works beautifully too, especially if you’re already firing it up for dinner. Just keep an eye on things—those chiles can go from perfectly charred to burnt in about thirty seconds.
Preparation Method
Making this smoky roasted Hatch chili salsa verde is surprisingly straightforward. The roasting does most of the work for you. Here’s how to do it:
- Preheat your broiler or grill to high heat. If using the oven, place the rack about 4-6 inches from the heating element. You want it screaming hot.
- Prepare the chiles and tomatillos: Remove the husks from the tomatillos and rinse them under warm water to remove the sticky residue. Cut the stems off the Hatch chiles (leave the tops on for now—it helps contain the steam during roasting). Quarter the onion and leave the garlic cloves whole and unpeeled.
- Arrange everything on the sheet pan: Place the chiles, tomatillos, onion quarters, and garlic cloves in a single layer. Don’t overcrowd—give them room to breathe so they char evenly. If they’re too crowded, they’ll steam instead of roast.
- Roast until charred: Slide the pan under the broiler and roast for 5-7 minutes. Keep a close eye on them—every oven is different. You want the skins to blister and blacken in spots. When you see good char marks, flip everything with tongs and roast for another 4-5 minutes on the other side. The tomatillos should be soft and slightly collapsed, and the garlic should feel soft when squeezed gently.
- Let everything cool slightly: Transfer the roasted vegetables to a bowl or cutting board. Let them sit for about 5 minutes until they’re cool enough to handle. This is a good time to pour yourself a glass of water—your kitchen is going to smell amazing.
- Peel the chiles: Once the chiles are cool enough to handle, peel off the blackened skins. They should come off easily in large strips. Don’t worry about getting every last bit of char—a little adds flavor. Remove the stems and seeds if you want a milder salsa.
- Peel the garlic: Squeeze the roasted garlic cloves out of their skins. They should pop right out, soft and golden. This is one of the most satisfying steps in the whole process, honestly.
- Combine everything in the blender: Add the peeled chiles, roasted tomatillos (including any juices on the pan—that’s pure flavor), roasted onion, roasted garlic, fresh cilantro, lime juice, cumin, salt, and pepper. Don’t add all the lime juice at once—start with half and adjust later.
- Blend to your desired consistency: Pulse the blender a few times to break everything up, then blend on low speed for about 30 seconds. For a chunkier salsa, pulse less. For a smoother sauce, let it run a bit longer. I like mine somewhere in between—smooth enough to pour but with little bits of texture throughout.
- Taste and adjust: This is the most important step. Dip a chip in, taste it, and think about what it needs. More salt? Another squeeze of lime? A pinch more cumin? Trust your taste buds here—they know what they’re doing.
- Chill before serving: Transfer the salsa to a bowl and refrigerate for at least 30 minutes before serving. The flavors need time to marry and mellow out. I know it’s hard to wait, but trust me—it’s worth it.
A few things to watch for: If your salsa tastes a little bitter, it might be from over-charring the chiles. Next time, pull them out a minute or two earlier. If it’s too thin, you can simmer it on the stove for 5-10 minutes to reduce and concentrate the flavors. If it’s too thick, add a splash of water or more lime juice to thin it out.
Cooking Tips & Techniques
After making this smoky roasted Hatch chili salsa verde probably fifty times by now, I’ve learned a few things the hard way. Here are my best tips:
Don’t skip the roasting step. I know it’s tempting to just throw everything in the blender raw when you’re short on time. I’ve done it. It’s not the same. The roasting transforms the flavors completely—it brings out natural sweetness, adds smokiness, and deepens the whole profile. It’s worth the extra ten minutes.
Watch your chiles like a hawk. The line between beautifully charred and burnt is razor thin. Set a timer and check them every couple of minutes. If you see black smoke, you’ve gone too far. That acrid, burnt flavor will ruin your whole batch.
Use a damp paper towel to peel chiles. If the skins are being stubborn, cover the roasted chiles with a damp paper towel for a few minutes. The steam helps loosen the skins so they slide right off. It’s a game-changer.
Don’t over-blend. I made this mistake the first few times. I wanted it smooth, so I just let the blender run. Ended up with something closer to a puree than a salsa. A few pulses is all you need. You want some texture—little bits of chile and onion that give the salsa body.
Let it rest overnight. This is the best advice I can give you. The salsa is good right after you make it. But after 24 hours in the fridge? It’s incredible. The flavors meld together, the heat settles down, and everything becomes more harmonious. Make it the day before you need it if you can.
Taste as you go. I can’t stress this enough. Salt levels vary, chiles vary in heat, limes vary in acidity. Your taste buds are the only reliable guide. Add a little, taste, add more if needed. You can always add more—you can’t take it out.
Variations & Adaptations
One of the best things about this smoky roasted Hatch chili salsa verde is how adaptable it is. Here are some variations I’ve tried and loved:
Smoky Chipotle Version
Add 1-2 chipotle peppers in adobo sauce to the blender along with the other ingredients. This amps up the smokiness and adds a deep, complex heat that’s totally different from the fresh chiles. I did this on a whim one night when I was craving extra smokiness, and it was incredible. Just go easy—chipotle can be intense.
Mango Hatch Salsa
Add one ripe mango, peeled and cubed, to the blender. The sweetness of the mango balances the heat of the chiles beautifully. This is my go-to for summer parties and it always disappears first. The mango adds a tropical note that works surprisingly well with the smoky chiles.
Creamy Salsa Verde
Blend in half an avocado or a quarter cup of Greek yogurt for a creamy, dreamy version. This is perfect for tacos or as a salad dressing. The creaminess mellows out the heat and makes the texture velvety smooth. Just note that if you use yogurt, the salsa won’t keep as long—eat it within two days.
Roasted Tomatillo and Pine Nut Version
Toast a quarter cup of pine nuts in a dry skillet until golden, then add them to the blender. This adds richness and a subtle nuttiness that’s absolutely luxurious. I discovered this accidentally when I was making a different sauce and thought, “Why not?” It works.
Mild Version for Kids
Remove all seeds and membranes from the chiles before roasting, skip the jalapeños entirely, and add a quarter cup of roasted red bell pepper for sweetness. My niece, who thinks black pepper is spicy, actually asked for seconds of this version. That’s a win in my book.
Serving & Storage Suggestions
This smoky roasted Hatch chili salsa verde is incredibly versatile. Here’s how to serve and store it:
Serving temperature: Serve it chilled or at room temperature. I prefer it cold straight from the fridge, but letting it sit out for 15-20 minutes before serving takes the chill off and lets the flavors open up more.
Presentation ideas: Serve in a colorful bowl with a lip, because this salsa can be juicy. Garnish with a few cilantro leaves and a lime wedge for visual appeal. If you’re feeling fancy, serve it in a molcajete (the traditional stone mortar and pestle) for that authentic touch.
What to serve with it: Obviously, tortilla chips are the classic choice. But this salsa is so much more than a dip. Use it on tacos, burritos, nachos, or quesadillas. Spoon it over grilled chicken, fish, or steak. Use it as a sauce for eggs at breakfast. Stir it into rice or quinoa for an instant flavor boost. I’ve even used it as a salad dressing—just thin it with a little olive oil and vinegar.
Storage instructions: Store in an airtight container in the refrigerator for up to one week. The flavors will actually improve over the first 24-48 hours. I’ve kept it for up to 10 days and it was still good, though the color started to darken a bit.
Freezer instructions: This salsa freezes beautifully. Pour it into a freezer-safe container or zip-top bag, leaving some headroom for expansion. It’ll keep for up to 3 months. Thaw in the refrigerator overnight, give it a good stir, and it’s ready to go. The texture might be slightly more watery after freezing, so you can simmer it for a few minutes to thicken it back up.
Reheating tips: If you prefer your salsa warm, heat it gently in a saucepan over medium-low heat, stirring occasionally. Don’t boil it—that can make the flavors flat and dull. Just warm it through until it’s steaming.
Nutritional Information & Benefits
This smoky roasted Hatch chili salsa verde is not just delicious—it’s actually good for you. Here’s the estimated nutritional breakdown per serving (about 1/4 cup):
- Calories: 25-35
- Fat: 0.5g
- Carbohydrates: 5-7g
- Fiber: 1-2g
- Sugar: 3-4g (natural)
- Protein: 1g
- Sodium: 150-200mg (adjustable with salt)
- Vitamin C: 15-20% of daily value
- Vitamin A: 8-10% of daily value
Health benefits: Hatch chiles are packed with capsaicin, which has anti-inflammatory properties and can boost metabolism. Tomatillos are a great source of vitamin C and antioxidants. Garlic and onions support immune health. And cilantro helps with heavy metal detoxification. So you can feel good about eating this salsa by the spoonful—which, let’s be honest, you probably will.
Dietary considerations: This recipe is naturally gluten-free, dairy-free, vegan, and paleo-friendly. It’s also Whole30 compliant if you skip the corn chips. The only potential allergen concern is for people with nightshade sensitivities, since chiles and tomatillos are both nightshades.
I’m not a nutritionist, but I’ve done my research and I feel good about feeding this to my family. It’s real food made from real ingredients, and that’s always a win in my book.
FAQs
Can I use canned Hatch chiles instead of fresh?
Absolutely. Canned or jarred roasted Hatch chiles work great in this recipe. Just drain them well and pat them dry before using. The flavor won’t be quite as smoky since they’re already processed, but it’s still delicious. I’ve used canned Hatch chiles in a pinch and nobody complained.
How long does this salsa verde last in the fridge?
Stored in an airtight container, this salsa will stay fresh for up to a week. The flavors actually get better after a day or two as they meld together. Just give it a stir before serving, and if it seems a little thick, add a splash of water or lime juice to loosen it up.
Can I make this salsa less spicy?
Yes! The heat comes from the seeds and membranes of the chiles. To make a milder salsa, remove all the seeds and white membranes from the Hatch chiles before blending. You can also skip any additional jalapeños or serranos. If it’s still too spicy, add a little more tomatillo or a splash of lime juice to balance it out.
What’s the best way to roast Hatch chiles without a broiler?
You’ve got options! Roast them on a gas grill over high heat, turning frequently until the skins are charred. You can also use a cast iron skillet on the stovetop, or even roast them directly over a gas burner using tongs. If all else fails, you can roast them in a 400°F oven for 15-20 minutes, though you won’t get as much char. The key is getting those skins blistered and blackened.
Can I use this salsa verde for canning?
I don’t recommend canning this recipe as written because the vinegar and lime juice levels aren’t high enough for safe water bath canning. If you want to preserve it, freeze it instead. It freezes beautifully and will keep for up to 3 months. Just thaw in the refrigerator overnight and give it a good stir before serving.
Conclusion
This smoky roasted Hatch chili salsa verde has become a staple in my kitchen for good reason. It’s simple enough for a Tuesday night snack but impressive enough for a party. It’s healthy without trying too hard. And most importantly, it tastes like something you’d get at a really good taqueria—the kind where the salsa is the star of the meal.
The first time I made this, I was just trying to use up some chiles before they went bad. I had no idea it would become the recipe that won me a neighborhood competition and changed how I thought about salsa forever. That’s the thing about cooking, isn’t it? Sometimes the best dishes come from the most unplanned moments.
I’d love to hear how yours turns out. Did you add your own twist? Did it disappear at your party as fast as mine did? Drop a comment below and let me know—I read every single one and I genuinely love hearing about your kitchen adventures. And if you make this smoky roasted Hatch chili salsa verde, tag me in your photos. Nothing makes my day like seeing someone else fall in love with a recipe I created.
Happy cooking, friends. Go make something delicious.
Pin This Recipe!
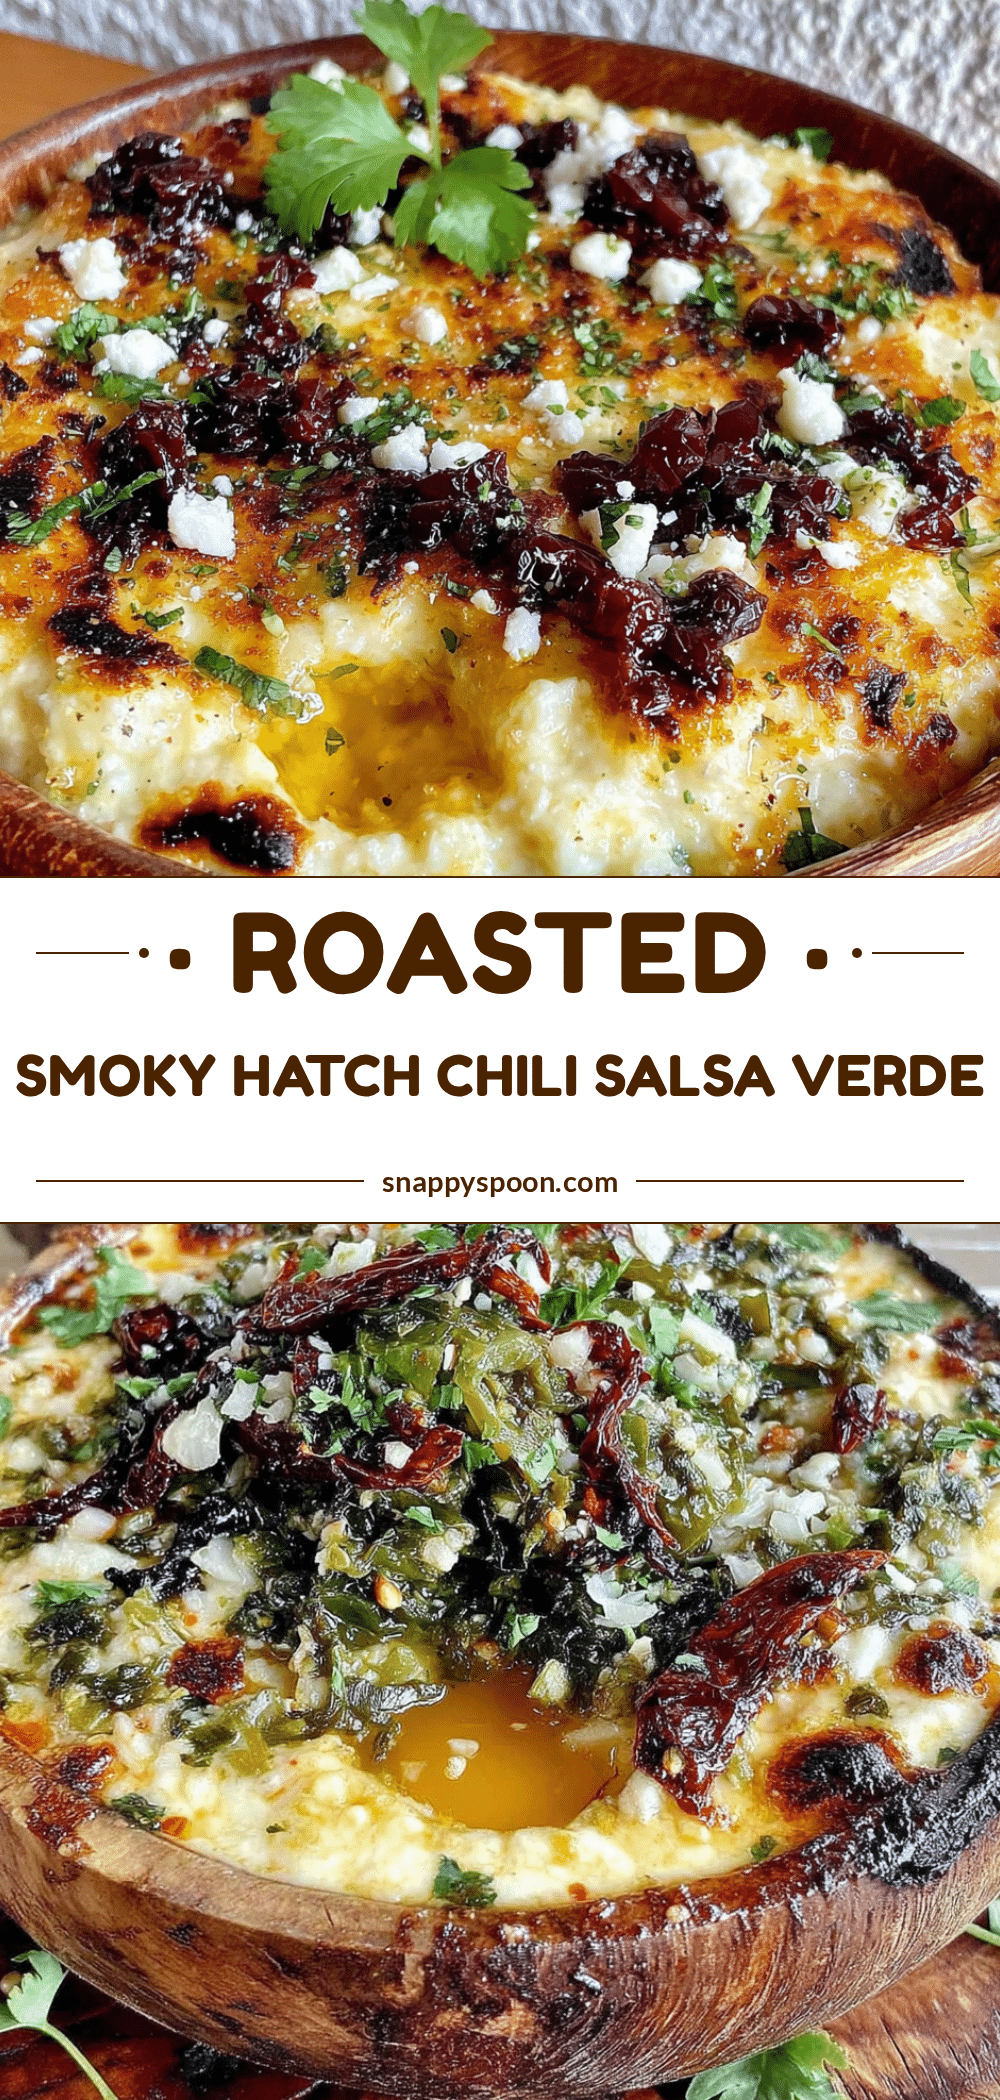
Smoky Roasted Hatch Chili Salsa Verde (Easy Homemade Recipe)

This smoky roasted Hatch chili salsa verde is made with simple, wholesome ingredients and delivers incredible depth of flavor. Perfect for dipping, topping tacos, or as a marinade, it’s naturally gluten-free, dairy-free, and vegan.
- Prep Time: 15 minutes
- Cook Time: 15 minutes
- Total Time: 30 minutes
- Yield: 8 servings 1x
- Category: Appetizer
- Cuisine: Mexican
Ingredients
- 1 pound fresh Hatch chiles (about 6–8 medium, roasted and peeled)
- 1 pound tomatillos (about 6–8 medium, husks removed and rinsed)
- 1 medium white onion (about 8 ounces, quartered)
- 4 cloves garlic (unpeeled)
- 1–2 jalapeños (optional, for extra heat)
- 1/2 cup fresh cilantro (packed, stems and all)
- Juice of 2 limes (about 3–4 tablespoons)
- 1 teaspoon ground cumin
- 1 teaspoon salt (plus more to taste)
- 1/2 teaspoon black pepper
Instructions
- Preheat your broiler or grill to high heat. If using the oven, place the rack about 4-6 inches from the heating element.
- Prepare the chiles and tomatillos: Remove the husks from the tomatillos and rinse them under warm water. Cut the stems off the Hatch chiles (leave the tops on). Quarter the onion and leave the garlic cloves whole and unpeeled.
- Arrange everything on the sheet pan: Place the chiles, tomatillos, onion quarters, and garlic cloves in a single layer. Don’t overcrowd.
- Roast until charred: Slide the pan under the broiler and roast for 5-7 minutes. Flip everything with tongs and roast for another 4-5 minutes on the other side. The tomatillos should be soft and slightly collapsed, and the garlic should feel soft when squeezed gently.
- Let everything cool slightly: Transfer the roasted vegetables to a bowl or cutting board. Let them sit for about 5 minutes until cool enough to handle.
- Peel the chiles: Once cool enough to handle, peel off the blackened skins. Remove the stems and seeds if you want a milder salsa.
- Peel the garlic: Squeeze the roasted garlic cloves out of their skins.
- Combine everything in the blender: Add the peeled chiles, roasted tomatillos (including any juices on the pan), roasted onion, roasted garlic, fresh cilantro, lime juice, cumin, salt, and pepper. Start with half the lime juice and adjust later.
- Blend to your desired consistency: Pulse a few times to break everything up, then blend on low speed for about 30 seconds. For chunkier salsa, pulse less; for smoother, blend longer.
- Taste and adjust: Add more salt, lime juice, or cumin as needed.
- Chill before serving: Transfer to a bowl and refrigerate for at least 30 minutes before serving.
Notes
For best flavor, let the salsa rest overnight in the refrigerator. The flavors meld and improve after 24 hours. If the salsa is too thin, simmer on the stove for 5-10 minutes to reduce. If too thick, add a splash of water or more lime juice.
Nutrition
- Serving Size: 1/4 cup
- Calories: 30
- Sugar: 3.5
- Sodium: 175
- Fat: 0.5
- Carbohydrates: 6
- Fiber: 1.5
- Protein: 1
Keywords: Hatch chile salsa, salsa verde, roasted salsa, homemade salsa, gluten-free, vegan, dairy-free, easy salsa recipe