Love this? Save it for later!
Share the inspiration with your friends
I was standing in the grocery store aisle last Tuesday, staring at a box of rice mix, when the smell of something savory and cheesy hit me from the hot deli counter nearby. And just like that, I was twenty-three again, living in that tiny apartment with the cracked linoleum floor, watching my neighbor across the hall cook dinner. Her door was always open, and the smell of her cooking would drift down the hallway like a promise. She made this one-pan thing with beef and rice and so much cheese it practically bubbled over the sides of the skillet. I never asked for the recipe—I was too shy, honestly—but I watched her make it once from my doorway, and I’ve been trying to recreate it ever since. Last Tuesday, standing there with my cart half-full and my stomach growling, I decided I was done guessing. I bought the ingredients, went home, and didn’t stop testing until I got it right. This recipe is the result of all those attempts—the burnt ones, the soupy ones, the ones where the rice stuck to the bottom like cement. You know that feeling when you finally nail something you’ve been chasing for years? That’s this skillet for me. It’s simple, it’s forgiving, and it tastes like the kind of meal someone makes for you when they want you to feel taken care of.
Why You’ll Love This Recipe
Let me tell you why this Easy One-Pan Cheesy Beef Rice Skillet is about to become your new weeknight hero. I’ve tested this recipe about seven times to get the rice-to-liquid ratio perfect so you don’t end up with mushy grains or a dry pan. It’s the kind of recipe that feels like a warm hug after a long day, and honestly, it’s hard to mess up.
- Quick & Easy: From start to finish, this comes together in about 30 minutes. That’s faster than takeout delivery in most neighborhoods.
- Simple Ingredients: Ground beef, rice, cheese, a few pantry staples. You probably have most of this stuff already, no fancy grocery run required.
- Perfect for Busy Weeknights: One pan means less cleanup, and less cleanup means more time to actually sit down and enjoy your meal.
- Crowd-Pleaser: My picky-eating nephew asked for seconds, and my dad went back for thirds. Kids and adults both love this one.
- Unbelievably Delicious: The cheese gets all melty and stretches when you scoop it up. The rice absorbs all the beefy flavor. It’s comfort food at its finest.
What makes this version different from the others you might have tried? It’s the way the rice cooks right in the pan with the beef, soaking up all those seasoned juices instead of being boiled separately and losing flavor. I also add a little Worcestershire sauce for depth—a trick I picked up from watching my neighbor all those years ago. This isn’t just another skillet dinner. It’s the one you’ll keep coming back to.
What Ingredients You Will Need
This recipe uses simple, wholesome ingredients that work together to create something truly satisfying. Most of these are kitchen staples, which makes this dish perfect for those nights when you don’t feel like planning ahead.
- For the Beef and Rice Base:
- 1 pound ground beef (80/20 works great for flavor, but you can use lean if you prefer)
- 1 tablespoon olive oil (for browning the beef)
- 1 medium yellow onion, diced (about 1 cup)
- 3 cloves garlic, minced (fresh is best, but jarred works in a pinch)
- 1 cup long-grain white rice (uncooked—I recommend a brand like Mahatma or Carolina for consistent results)
- 2 cups beef broth (low-sodium so you can control the salt)
- 1 can (14.5 ounces) diced tomatoes, undrained (fire-roasted adds a nice smoky note)
- 1 tablespoon Worcestershire sauce (this is my secret ingredient for depth)
- 1 teaspoon paprika (smoked paprika is even better if you have it)
- 1/2 teaspoon garlic powder
- 1/2 teaspoon onion powder
- 1/2 teaspoon salt (adjust to taste)
- 1/4 teaspoon black pepper
- For the Cheesy Finish:
- 1 1/2 cups shredded cheddar cheese (sharp cheddar gives the best flavor, but mild works too)
- 1/2 cup shredded mozzarella cheese (for that stretchy, gooey texture)
- 2 tablespoons chopped fresh parsley (optional, for garnish)
Ingredient selection tips: Look for ground beef that’s not too lean—the fat adds flavor and keeps the rice from drying out. If you want to use brown rice, you’ll need to adjust the cooking time and add about 1/2 cup more broth since brown rice takes longer to absorb liquid. For a dairy-free version, use your favorite shredded vegan cheese blend, though the texture will be slightly different. I’ve tried this with ground turkey too, and it works well—just add an extra tablespoon of olive oil since turkey is leaner.
Equipment Needed
You don’t need much for this recipe, and that’s part of the beauty. Here’s what you’ll want to have on hand:
- A Large Skillet: A 12-inch skillet with a lid is ideal. I use my trusty cast-iron skillet for this—it holds heat beautifully and gives the beef a nice sear. A stainless steel or non-stick pan works just as well. If you don’t have a lid, a baking sheet or aluminum foil can cover the pan in a pinch.
- A Wooden Spoon or Spatula: For breaking up the ground beef and stirring everything together. I prefer a wooden spoon because it won’t scratch your pan.
- A Sharp Knife and Cutting Board: For dicing the onion and mincing the garlic. A good chef’s knife makes this step quick and easy.
- Measuring Cups and Spoons: Accuracy matters with rice, so use proper measuring tools.
- A Cheese Grater: Pre-shredded cheese works, but freshly grated melts more smoothly. I learned this the hard way after a few clumpy cheese disasters.
Budget-friendly tip: You don’t need an expensive skillet. A basic non-stick pan from the grocery store will do the job. Just make sure it’s deep enough to hold everything without spilling over.
Preparation Method
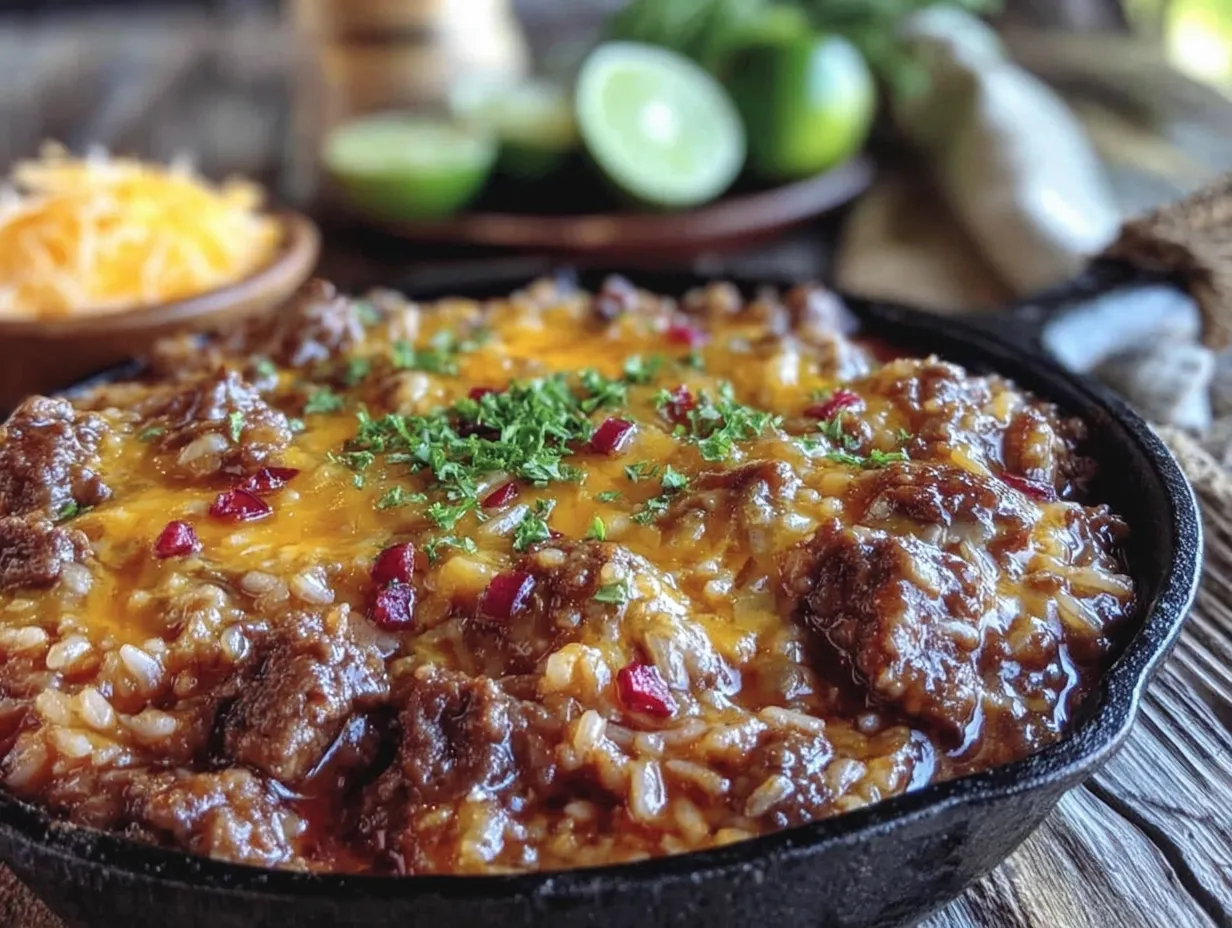
Let’s get cooking. This whole process takes about 30 minutes, and most of it is hands-off while the rice cooks.
- Brown the Beef (5 minutes): Heat the olive oil in your large skillet over medium-high heat. Add the ground beef and cook, breaking it up with your wooden spoon, until it’s browned all over—about 4 to 5 minutes. Don’t drain all the fat; leave about a tablespoon in the pan for flavor. If you’re using lean beef, you might need to add a little extra oil.
- Sauté the Aromatics (2 minutes): Add the diced onion to the skillet with the beef. Cook for about 2 minutes until the onion starts to soften and turn translucent. Stir in the minced garlic and cook for another 30 seconds until it smells amazing. Don’t let the garlic burn—it turns bitter fast.
- Add the Rice and Seasonings (1 minute): Sprinkle the uncooked rice over the beef and onion mixture. Add the paprika, garlic powder, onion powder, salt, and pepper. Stir everything together for about a minute, letting the rice toast slightly in the pan. This step helps the rice keep its texture during cooking.
- Pour in the Liquids (1 minute): Add the beef broth, diced tomatoes (with their juices), and Worcestershire sauce. Stir everything together, scraping up any browned bits from the bottom of the pan. Those bits are pure flavor, so don’t leave them behind.
- Bring to a Boil, Then Simmer (18-20 minutes): Turn the heat to high and bring the mixture to a rolling boil. Once it’s boiling, reduce the heat to low, cover the skillet with a tight-fitting lid, and let it simmer. Don’t peek too often—lifting the lid lets steam escape and can make the rice take longer to cook. After about 18 minutes, check the rice. It should be tender and most of the liquid should be absorbed. If it’s still a little soupy, cook for another 2 to 3 minutes with the lid on.
- Add the Cheese (2 minutes): Once the rice is cooked, remove the lid. Sprinkle the shredded cheddar and mozzarella cheese evenly over the top. Cover the skillet again and let it sit off the heat for about 2 minutes. The residual heat will melt the cheese into a glorious, gooey blanket.
- Garnish and Serve (1 minute): Sprinkle fresh parsley over the top if you’re using it. Scoop the skillet right onto plates or bowls. Serve hot, and try not to burn your tongue on the cheese—I still do this almost every time.
Sensory cues: When the beef is browning, you should hear a steady sizzle. The onions should smell sweet as they cook. The rice will look plump and tender when it’s done, and the cheese should stretch when you lift it with a spoon.
Cooking Tips & Techniques
I’ve made this skillet more times than I can count, and I’ve definitely learned a few things along the way. Here are my best tips for getting it right every time.
Don’t rush the browning. Let the beef get a nice crust on it before you start stirring. That browning adds so much flavor. I used to rush this step and ended up with gray, flavorless meat. Give it time.
Use long-grain rice. Short-grain or medium-grain rice can get sticky and clumpy in this dish. Long-grain stays separate and fluffy. I learned this after a particularly gluey batch that nobody wanted to eat.
Resist the urge to stir too much. Once you add the rice and liquid and put the lid on, leave it alone. Stirring releases starch and can make the rice mushy. Trust the process.
If the rice is still hard but the liquid is gone, add a splash more broth or water—about 1/4 cup—and continue cooking with the lid on. This has saved me more than once when I got distracted.
For extra cheesy goodness, stir half the cheese into the rice before topping with the rest. I tried this on a whim one night and never went back. It creates a cheesy layer throughout the dish instead of just on top.
One time, I forgot to buy cheddar and used only mozzarella. It was still delicious, just less sharp. So don’t stress if you need to improvise. This recipe is pretty forgiving.
Variations & Adaptations
This skillet is a great base recipe, and you can change it up in so many ways. Here are some of my favorites.
- Spicy Southwest Version: Add 1 teaspoon of chili powder and 1/2 teaspoon of cumin with the other seasonings. Stir in a can of drained black beans and a can of corn kernels (drained) before adding the cheese. Top with sliced jalapeños if you like heat.
- Vegetarian Option: Swap the ground beef for two cans of drained and rinsed black beans or a package of plant-based crumbles. Use vegetable broth instead of beef broth. The cooking time stays about the same.
- Low-Carb Adaptation: Replace the rice with cauliflower rice. Sauté the cauliflower rice in the pan after cooking the beef and onions, then add the broth and tomatoes. Cook for about 5 to 7 minutes, until the cauliflower is tender. The cheese still melts beautifully over the top.
- Italian-Inspired Twist: Use Italian seasoning instead of paprika, and swap the cheddar for provolone or fontina. Add a handful of fresh spinach right before adding the cheese and let it wilt. Serve with a sprinkle of Parmesan.
I once made a version with leftover taco meat and added a can of diced green chiles. It was messy and wonderful. Don’t be afraid to experiment—that’s how the best recipes are born.
Serving & Storage Suggestions
This skillet is best served hot, right off the stove, while the cheese is still stretchy and the rice is fluffy. Scoop it into bowls and eat it as is, or serve it with a simple side salad dressed with lemon and olive oil to cut through the richness. A dollop of sour cream on top is also a nice touch, especially if you made the spicy version.
For leftovers, let the skillet cool completely before transferring to an airtight container. It will keep in the refrigerator for up to 4 days. The flavors actually meld together overnight and taste even better the next day—if you can resist eating it all the first night.
To reheat: The microwave works fine for a quick lunch. Just microwave individual portions for 1 to 2 minutes, stirring halfway through. For best results, reheat in a skillet on the stove over medium-low heat with a splash of broth or water to loosen up the rice. Cover and heat for about 5 minutes, stirring occasionally.
Freezer instructions: This skillet freezes surprisingly well. Portion it into freezer-safe containers and freeze for up to 3 months. Thaw overnight in the refrigerator before reheating. The rice might be slightly softer after freezing, but the flavor is still fantastic.
One note: The cheese won’t be as stretchy after reheating, but it’ll still taste amazing. I’ve eaten this for lunch three days in a row and enjoyed it every time.
Nutritional Information & Benefits
Here’s an approximate nutritional breakdown for one serving (based on 6 servings per recipe):
- Calories: 420
- Protein: 28g
- Fat: 18g
- Carbohydrates: 38g
- Fiber: 2g
- Sugar: 4g
- Sodium: 680mg
This recipe offers a good balance of protein from the beef and cheese, plus carbohydrates from the rice for energy. The tomatoes provide vitamin C and antioxidants like lycopene. If you’re watching your sodium, use low-sodium broth and reduce the added salt—you can always season at the table.
For a lighter version, use lean ground beef (90/10) and reduce the cheese to 1 cup total. You’ll save about 80 calories and 8 grams of fat per serving. I’ve made it both ways, and honestly, the full-fat version is more satisfying, but the lighter one still hits the spot when I’m being more careful.
Potential allergens: This recipe contains dairy (cheese) and gluten (Worcestershire sauce typically contains gluten, though some brands are gluten-free). Check labels if you have sensitivities.
Conclusion
This Easy One-Pan Cheesy Beef Rice Skillet is exactly what weeknight dinners should be: simple, satisfying, and full of flavor. It’s the kind of meal that makes you feel like you’ve got your life together, even when you’re just barely hanging on. I love that I can make it with my eyes half-closed after a long day, and it still comes out perfect every time.
I hope you give this recipe a try and make it your own. Add your favorite spices, throw in whatever vegetables are languishing in your fridge, or double the cheese because why not. Cooking should be fun, not stressful. And when you make it, I’d love to hear how it turned out. Drop a comment below and let me know if your family loved it as much as mine does. Happy cooking!
Frequently Asked Questions
Can I use ground turkey instead of beef?
Absolutely. Ground turkey works great in this recipe. Just add an extra tablespoon of olive oil since turkey is leaner, and consider adding a little extra Worcestershire sauce for flavor depth.
Can I make this in a slow cooker?
You can, but the texture will be different. Brown the beef and onions first, then transfer everything except the cheese to a slow cooker. Cook on low for 2 to 3 hours, until the rice is tender. Add the cheese at the end and let it melt before serving.
Why is my rice still hard after 20 minutes?
This usually happens if the heat was too low or the lid wasn’t tight enough. Add 1/4 cup of broth or water, cover tightly, and cook for another 5 minutes. Also, make sure you’re using long-grain rice—brown rice takes longer to cook.
Can I use frozen ground beef?
It’s best to thaw frozen ground beef completely in the refrigerator before cooking. Cooking from frozen will release too much water and make the rice mushy. If you’re in a hurry, thaw it in the microwave using the defrost setting.
How do I prevent the cheese from clumping?
Shred your own cheese from a block instead of using pre-shredded bags. Pre-shredded cheese has anti-caking agents that prevent it from melting smoothly. Also, add the cheese off the heat so it melts gently without separating.
Pin This Recipe!
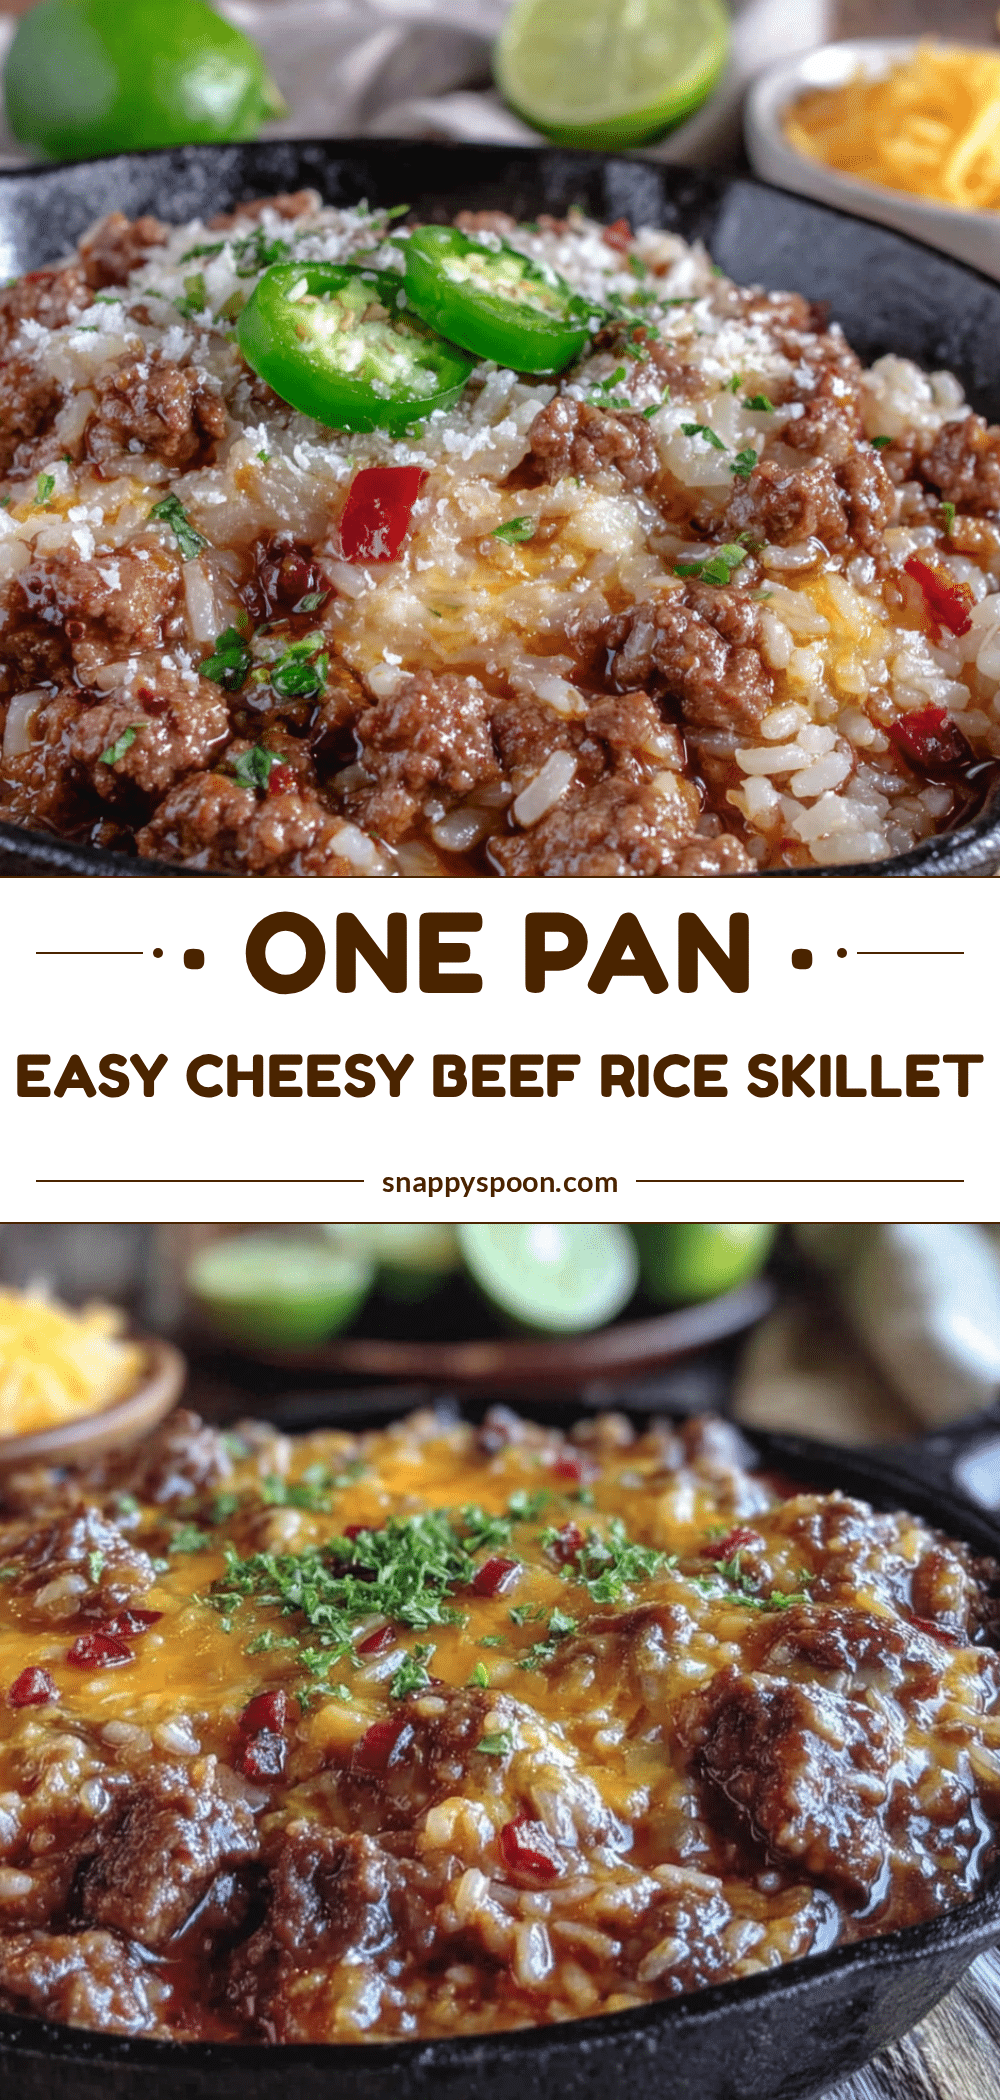
Easy One-Pan Cheesy Beef Rice Skillet Recipe

A quick and easy one-pan meal with ground beef, rice, and plenty of melted cheese. Perfect for busy weeknights, this comforting skillet dinner comes together in about 30 minutes with simple ingredients.
- Prep Time: 10 minutes
- Cook Time: 20 minutes
- Total Time: 30 minutes
- Yield: 6 servings 1x
- Category: Main Course
- Cuisine: American
Ingredients
- 1 pound ground beef (80/20 works great for flavor, but you can use lean if you prefer)
- 1 tablespoon olive oil (for browning the beef)
- 1 medium yellow onion, diced (about 1 cup)
- 3 cloves garlic, minced (fresh is best, but jarred works in a pinch)
- 1 cup long-grain white rice (uncooked—I recommend a brand like Mahatma or Carolina for consistent results)
- 2 cups beef broth (low-sodium so you can control the salt)
- 1 can (14.5 ounces) diced tomatoes, undrained (fire-roasted adds a nice smoky note)
- 1 tablespoon Worcestershire sauce (this is my secret ingredient for depth)
- 1 teaspoon paprika (smoked paprika is even better if you have it)
- 1/2 teaspoon garlic powder
- 1/2 teaspoon onion powder
- 1/2 teaspoon salt (adjust to taste)
- 1/4 teaspoon black pepper
- 1 1/2 cups shredded cheddar cheese (sharp cheddar gives the best flavor, but mild works too)
- 1/2 cup shredded mozzarella cheese (for that stretchy, gooey texture)
- 2 tablespoons chopped fresh parsley (optional, for garnish)
Instructions
- Brown the Beef (5 minutes): Heat the olive oil in your large skillet over medium-high heat. Add the ground beef and cook, breaking it up with your wooden spoon, until it’s browned all over—about 4 to 5 minutes. Don’t drain all the fat; leave about a tablespoon in the pan for flavor. If you’re using lean beef, you might need to add a little extra oil.
- Sauté the Aromatics (2 minutes): Add the diced onion to the skillet with the beef. Cook for about 2 minutes until the onion starts to soften and turn translucent. Stir in the minced garlic and cook for another 30 seconds until it smells amazing. Don’t let the garlic burn—it turns bitter fast.
- Add the Rice and Seasonings (1 minute): Sprinkle the uncooked rice over the beef and onion mixture. Add the paprika, garlic powder, onion powder, salt, and pepper. Stir everything together for about a minute, letting the rice toast slightly in the pan. This step helps the rice keep its texture during cooking.
- Pour in the Liquids (1 minute): Add the beef broth, diced tomatoes (with their juices), and Worcestershire sauce. Stir everything together, scraping up any browned bits from the bottom of the pan. Those bits are pure flavor, so don’t leave them behind.
- Bring to a Boil, Then Simmer (18-20 minutes): Turn the heat to high and bring the mixture to a rolling boil. Once it’s boiling, reduce the heat to low, cover the skillet with a tight-fitting lid, and let it simmer. Don’t peek too often—lifting the lid lets steam escape and can make the rice take longer to cook. After about 18 minutes, check the rice. It should be tender and most of the liquid should be absorbed. If it’s still a little soupy, cook for another 2 to 3 minutes with the lid on.
- Add the Cheese (2 minutes): Once the rice is cooked, remove the lid. Sprinkle the shredded cheddar and mozzarella cheese evenly over the top. Cover the skillet again and let it sit off the heat for about 2 minutes. The residual heat will melt the cheese into a glorious, gooey blanket.
- Garnish and Serve (1 minute): Sprinkle fresh parsley over the top if you’re using it. Scoop the skillet right onto plates or bowls. Serve hot, and try not to burn your tongue on the cheese—I still do this almost every time.
Notes
For extra cheesy goodness, stir half the cheese into the rice before topping with the rest. If the rice is still hard but the liquid is gone, add a splash more broth or water (about 1/4 cup) and continue cooking with the lid on. Use long-grain white rice for best results; brown rice requires more liquid and longer cooking time. Leftovers keep in the refrigerator for up to 4 days and freeze well for up to 3 months.
Nutrition
- Serving Size: 1 serving (based on
- Calories: 420
- Sugar: 4
- Sodium: 680
- Fat: 18
- Saturated Fat: 8
- Carbohydrates: 38
- Fiber: 2
- Protein: 28
Keywords: one-pan meal, cheesy beef rice skillet, easy weeknight dinner, ground beef recipe, comfort food, 30-minute meal