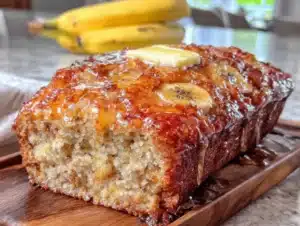
Love this? Save it for later!
Share the inspiration with your friends
I swore I hated banana bread. For years. Like, actively turned my nose up at it whenever someone brought a loaf to a potluck or left a slice on the breakroom counter. It always seemed so… predictable. Dense, sweet in a one-note way, and somehow never as moist as everyone claimed it was. Honestly, I thought banana bread was just a polite way to use up fruit nobody wanted to eat.
Then last Tuesday—a rainy, nothing-special sort of afternoon—my neighbor Linda knocked on my door holding a still-warm loaf wrapped in a tea towel. “It’s the only thing I know how to bake,” she said with a shrug. I took a slice to be polite. Two slices later, I was asking for the recipe, and she looked almost embarrassed. “There’s no kneading,” she said. “And you only need one bowl.”
That was the crack in my banana bread wall. A one-bowl, no-knead situation that actually delivered on flavor and texture? I had to see if it was real. And let me tell you, it was. This homemade no-knead one-bowl banana bread changed my mind so completely that I now keep a stash of overripe bananas in the freezer at all times. Just in case. Maybe you’ve been there—skeptical of a classic, convinced it’s overrated, only to find the version that proves you wrong. This is that version for me.
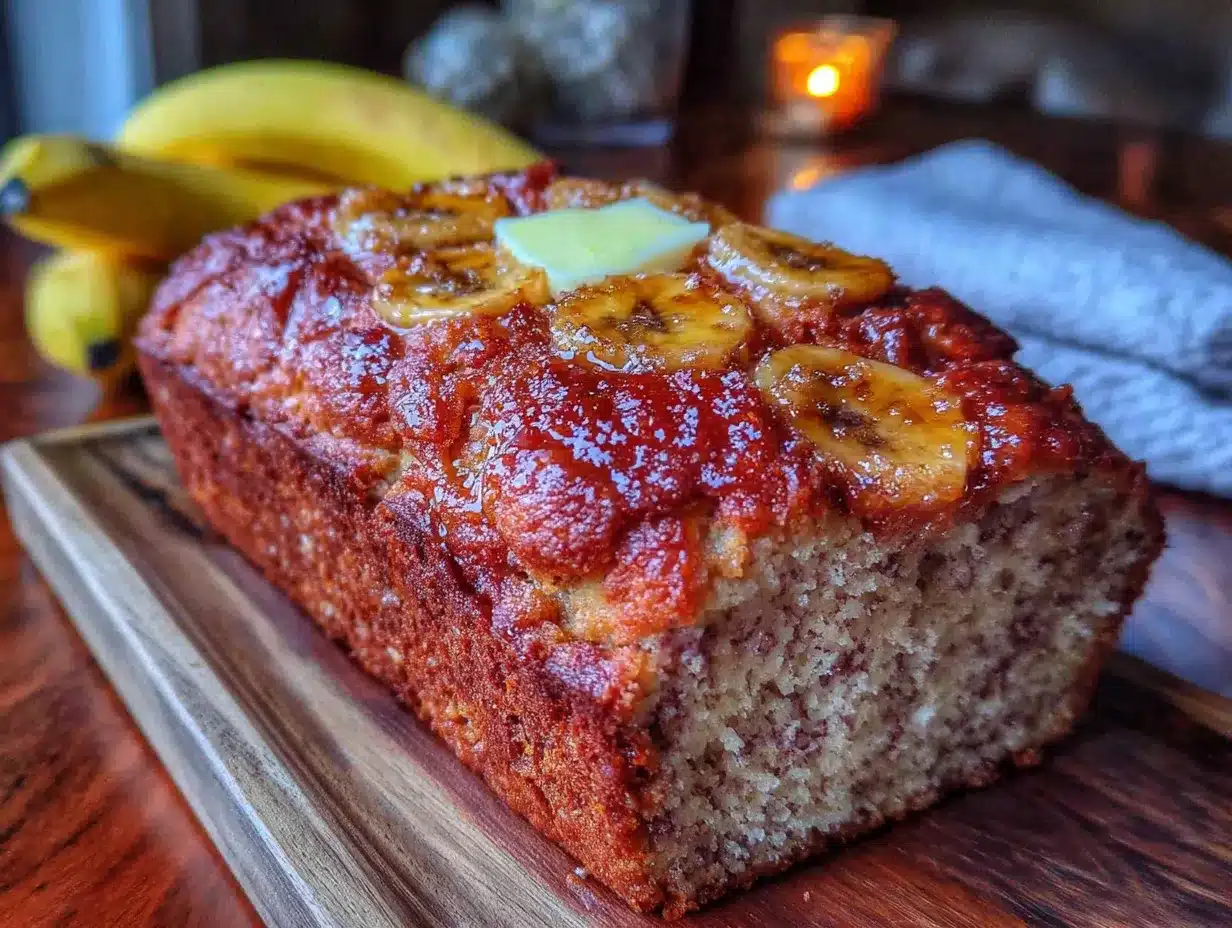
What makes this recipe stick is how unfussy it is. No stand mixer. No sifting. No separate bowls for wet and dry ingredients. Just one bowl, a fork, and about ten minutes of hands-on time before the oven does the rest. The result is a loaf that’s tender, perfectly sweet, and speckled with those deep, caramelized banana pockets that make every slice feel like a little treasure hunt. I keep making it because it works every single time, and because it reminds me that sometimes the best recipes come from the most humble beginnings—and a neighbor who doesn’t even realize she’s a great baker.
Why You’ll Love This Recipe
Let me tell you why this banana bread has earned a permanent spot in my baking rotation. I’ve tested versions with three bowls, with melted butter, with yogurt, with sour cream—and this one-bowl method wins every time. It’s not just convenient; it’s genuinely better.
- Quick & Easy: From start to oven in about 10 minutes. No stand mixer, no complicated steps. Just mash, stir, and pour.
- Simple Ingredients: You likely have everything in your kitchen right now. Bananas, flour, sugar, eggs, butter, baking soda, salt—that’s it. No fancy extracts or specialty flours required.
- Perfect for Any Occasion: Great for breakfast on the go, an afternoon snack with coffee, or a last-minute contribution to a brunch or bake sale. It’s never out of place.
- Crowd-Pleaser: I’ve brought this to family dinners, office potlucks, and neighbor meetups. It disappears fast, and people always ask for the recipe.
- Unbelievably Delicious: The texture is what gets me every time—tender, moist, with a slightly crisp crust. The flavor is deeply banana-forward without being cloying. It’s comfort food in loaf form.
What makes this recipe different from the rest is the technique. By mashing the bananas thoroughly and mixing everything in one bowl, you get a batter that’s perfectly homogeneous without overworking the gluten. That means a tender crumb every time, not a tough or rubbery loaf. Plus, the no-knead aspect isn’t just about saving effort—it’s about preserving that delicate texture.
This recipe isn’t just good—it’s the kind that makes you close your eyes after the first bite. It’s the banana bread I now judge all others by. And honestly, it’s the one that turned me from a skeptic into someone who keeps a freezer bag of spotty bananas just waiting for the next baking day.
What Ingredients You Will Need
This recipe uses simple, everyday ingredients to create something truly special. The beauty is in the simplicity—no weird add-ins, no obscure pantry items. Here’s what you’ll need and why each one matters.
For the Banana Bread
- 3 large ripe bananas, mashed (about 1 ½ cups or 360 ml)—The riper, the better. Look for bananas with lots of brown spots; they’re sweeter and easier to mash. I’ve used bananas that were almost entirely black, and they worked beautifully.
- ⅓ cup (75 g) unsalted butter, melted—Adds richness and moisture. I prefer unsalted so I can control the salt level, but salted butter works too—just reduce the added salt slightly.
- ¾ cup (150 g) granulated sugar—Provides sweetness and helps create that tender crumb. You can use brown sugar for a deeper, more molasses-like flavor.
- 1 large egg, at room temperature—Binds everything together and adds structure. A room-temperature egg incorporates more evenly into the melted butter.
- 1 teaspoon vanilla extract—Enhances the banana flavor without overpowering it. I use pure vanilla extract when I have it, but imitation works fine too.
- 1 ½ cups (190 g) all-purpose flour—The base of the bread. Spoon and level your flour for accuracy—scooping directly from the bag can pack it down and lead to a dry loaf.
- 1 teaspoon baking soda—The leavening agent. It reacts with the acidity in the bananas to help the bread rise. Make sure it’s fresh—test it by dropping a bit into vinegar; it should fizz vigorously.
- ½ teaspoon salt—Balances the sweetness and enhances all the flavors. I use fine sea salt.
Optional Add-Ins
- ½ cup (60 g) chopped walnuts or pecans—Adds a nice crunch. Toast them lightly first for extra flavor.
- ½ cup (90 g) chocolate chips—Because chocolate and banana are a classic combo. Dark, milk, or semi-sweet all work.
- 1 teaspoon cinnamon—Warms up the flavor profile. I add this about half the time, depending on my mood.
Ingredient Selection Tips: For the best texture, use bananas that are soft and heavily spotted. If your bananas aren’t ripe enough, you can speed things up by placing them on a baking sheet in a 300°F (150°C) oven for 15-20 minutes until the skins darken. Let them cool before mashing. I’ve also used frozen-thawed bananas with great results—just drain off any excess liquid before mashing.
Substitution Guidance: For a dairy-free version, swap the butter with coconut oil or a neutral vegetable oil. For a gluten-free option, use a 1:1 gluten-free flour blend (I’ve had good luck with Bob’s Red Mill). You can also reduce the sugar to ½ cup (100 g) if you prefer a less sweet bread, or use coconut sugar for a lower-glycemic option.
Equipment Needed
The beauty of this recipe is how little equipment it requires. Here’s what you’ll need:
- One large mixing bowl—Any bowl will do, but a wide, shallow one makes mashing and mixing easier. I use a ceramic mixing bowl that’s about 3 quarts.
- A fork or potato masher—For mashing the bananas. A fork works perfectly; a potato masher is even faster.
- A whisk or wooden spoon—For combining the ingredients. I prefer a wooden spoon because it feels sturdy and doesn’t overmix the batter.
- A 9×5-inch (23×13 cm) loaf pan—Standard size works best. If you only have an 8×4-inch pan, increase the baking time by 5-10 minutes.
- Parchment paper—Optional but helpful for easy removal. I cut a strip that hangs over the long sides of the pan as handles.
- Measuring cups and spoons—For accuracy. I’ve learned the hard way that eyeballing ingredients leads to inconsistent results.
- Cooling rack—For cooling the bread properly. If you don’t have one, you can use the rack from your oven (just make sure it’s cool).
Budget-Friendly Options: If you don’t have a loaf pan, you can bake this in an 8×8-inch square pan—just reduce the baking time to about 35-40 minutes. No cooling rack? A wire cooling rack from a toaster oven works, or you can gently tilt the loaf on its side on a cutting board to allow air to circulate.
I’ve made this recipe in a cheap aluminum loaf pan and a fancy ceramic one, and honestly, the results were nearly identical. Don’t stress about having the perfect equipment. A bowl, a fork, and an oven are really all you need.
Preparation Method
This is where the magic happens. Follow these steps, and you’ll have a beautiful loaf of banana bread with minimal effort.
- Preheat your oven to 350°F (175°C). Position a rack in the center of the oven. While it’s heating, grease your loaf pan with butter or non-stick spray, or line it with parchment paper. I like to leave a little overhang on the long sides—it makes lifting the bread out so much easier.
- Mash the bananas in your mixing bowl. Peel the bananas and add them to the bowl. Use a fork or potato masher to mash them until they’re mostly smooth with a few small lumps. You want some texture, not a puree. This should take about 1-2 minutes. The smell alone will make you hungry.
- Add the melted butter and sugar. Pour in the melted butter and sugar. Stir with your wooden spoon or whisk until combined. The mixture will look a bit greasy at first—that’s normal. Keep stirring until it comes together into a smooth, shiny paste.
- Add the egg and vanilla. Crack the egg into the bowl and add the vanilla extract. Stir until the egg is fully incorporated. The batter will become smoother and more cohesive. If you’re using room-temperature ingredients, this should come together in about 30 seconds.
- Add the dry ingredients. Sprinkle the flour, baking soda, and salt over the wet mixture. Stir gently until just combined—about 10-15 strokes. A few streaks of flour are fine. Overmixing at this stage will develop the gluten and make your bread tough. Trust me, I’ve made that mistake. Stop when you can’t see any more dry flour.
- Fold in any add-ins (optional). If you’re using nuts, chocolate chips, or cinnamon, gently fold them in now. Use a spatula or your wooden spoon, and be gentle. You want them evenly distributed without overworking the batter.
- Pour the batter into the prepared pan. Scrape every last bit out of the bowl—that’s the baker’s privilege. Spread the batter evenly with your spatula. It will be thick, not runny. Tap the pan gently on the counter a couple of times to release any air bubbles.
- Bake for 50-60 minutes. Place the pan in the preheated oven. Bake until a toothpick inserted into the center comes out clean or with just a few moist crumbs. The top should be golden brown and cracked in a few places. Start checking at 50 minutes. Every oven is different—mine runs a little hot, so I usually start checking at 45 minutes.
- Cool in the pan for 10 minutes. Set the pan on a cooling rack. Let it rest for 10 minutes—this helps the bread set and makes it easier to remove. Don’t skip this step, or your bread might fall apart.
- Remove from the pan and cool completely. Use the parchment paper handles to lift the bread out of the pan. Transfer it to the cooling rack and let it cool completely before slicing. I know it’s tempting to cut into it warm, but it will slice much cleaner when fully cooled. If you can’t wait, at least let it cool for 20-30 minutes.
Sensory Cues: At the mashing stage, you should smell that sweet, almost winey banana aroma. When you add the butter and sugar, the mixture should look glossy and smell like caramel. During baking, your kitchen will fill with a warm, comforting scent that’s impossible to resist. The finished loaf should be deep golden brown, with a crackled top that looks almost rustic.
Troubleshooting Tip: If your bread is browning too quickly on top but still raw in the center, tent it loosely with aluminum foil for the last 15-20 minutes of baking. This happened to me the first time I used a dark non-stick pan—the foil saved it.
Cooking Tips & Techniques
After making this banana bread more times than I can count, I’ve picked up a few tricks that make a real difference. Here are my best tips for consistent, perfect results.
Don’t overmix the batter. This is the most common mistake I see. Once you add the flour, stir only until it disappears into the batter. Overmixing develops gluten, which leads to a dense, tough loaf instead of that tender, cake-like crumb. I’ve definitely made rubbery banana bread before—it’s not fun. Gentle, minimal stirring is the key.
Use ripe bananas—really ripe. I cannot stress this enough. The bananas should be so spotty they look almost brown. The sugar in overripe bananas is more concentrated, which means sweeter bread with deeper flavor. If your bananas aren’t ripe enough, your bread will be less sweet and more starchy. I keep a bag of overripe bananas in my freezer specifically for this recipe. They thaw in about 20 minutes on the counter, and they mash up perfectly.
Room temperature ingredients matter. Cold egg and cold butter can cause the batter to seize up, leading to uneven mixing and a denser texture. Take the egg out of the fridge about 30 minutes before you start. Melt the butter and let it cool slightly—you want it warm, not hot. This small step makes a noticeable difference in how smoothly everything comes together.
Measure flour correctly. Scooping flour directly from the bag with your measuring cup can pack in up to 25% more flour than intended. Instead, spoon the flour into your measuring cup and level it off with a knife. Or use a kitchen scale for the most accuracy—190 grams is your target. I learned this lesson after a few dry loaves that made me question my baking skills.
Let it cool before slicing. I know the smell is intoxicating, and you want to dig in immediately. But slicing warm banana bread often results in a gummy, crumbly mess. The bread continues to set as it cools, and the texture improves significantly. If you absolutely must have a warm slice, wait at least 30 minutes. Your patience will be rewarded.
Check for doneness properly. A toothpick inserted into the center should come out clean or with just a few moist crumbs. If it comes out with wet batter, it needs more time. If the top is browning too fast, use that foil tent trick I mentioned. Every oven is different, so start checking a few minutes before the recipe suggests.
Variations & Adaptations
One of the best things about this banana bread is how adaptable it is. Here are some variations I’ve tried and loved.
Chocolate Chip Banana Bread
Fold in ½ cup (90 g) of chocolate chips along with the dry ingredients. I prefer dark chocolate chips for a slightly bitter contrast to the sweet banana, but milk chocolate works too. This version is always a hit with kids—and let’s be honest, adults too.
Vegan Banana Bread
Replace the butter with ⅓ cup (80 ml) coconut oil or a neutral vegetable oil. Use a flax egg (1 tablespoon ground flaxseed mixed with 3 tablespoons water, let sit for 5 minutes) instead of the egg. The texture will be slightly denser but still delicious. I’ve made this for vegan friends, and they always ask for seconds.
Gluten-Free Banana Bread
Substitute the all-purpose flour with a 1:1 gluten-free flour blend that contains xanthan gum. I’ve had great results with Bob’s Red Mill 1-to-1 Baking Flour. The crumb will be a bit more delicate, so let it cool completely before slicing. This version has saved many a brunch for guests with gluten sensitivities.
Spiced Banana Bread
Add 1 teaspoon of cinnamon, ½ teaspoon of nutmeg, and ¼ teaspoon of ground ginger to the dry ingredients. This gives the bread a warm, cozy flavor that’s perfect for fall or winter mornings. I made this variation last November, and it smelled like a holiday candle while baking.
Nutty Banana Bread
Fold in ½ cup (60 g) of chopped walnuts or pecans. For extra flavor, toast the nuts in a dry skillet over medium heat for 3-4 minutes until fragrant before adding them to the batter. The crunch contrasts beautifully with the soft crumb.
Personal Variation: My favorite adaptation combines chocolate chips and a sprinkle of flaky sea salt on top before baking. The salt enhances the sweetness and gives each slice a little savory pop. It’s my go-to when I want to feel a bit fancy without extra effort.
Serving & Storage Suggestions
This banana bread is versatile enough for any time of day. Here’s how I like to serve and store it.
Serving: Serve at room temperature or slightly warm. For a treat, toast a slice and spread it with a little butter or a drizzle of honey. It’s wonderful with a cup of coffee in the morning or as an afternoon snack with tea. For dessert, try it with a scoop of vanilla ice cream or a dollop of whipped cream—trust me on this one.
Storage: Store the bread in an airtight container at room temperature for up to 4 days. I wrap it tightly in plastic wrap or aluminum foil and then place it in a zip-top bag. The flavor actually improves after a day—the banana flavor becomes more pronounced and the texture softens beautifully.
Freezing: This bread freezes exceptionally well. Wrap the cooled loaf tightly in plastic wrap, then in a layer of aluminum foil, and freeze for up to 3 months. To thaw, leave it at room temperature for a few hours or overnight in the refrigerator. You can also slice the bread before freezing and grab individual slices as needed—perfect for quick breakfasts.
Reheating: For that fresh-baked taste, reheat slices in a toaster or toaster oven for a few minutes. You can also warm individual slices in the microwave for 15-20 seconds, but the texture won’t be as crisp. If reheating a whole loaf, wrap it in foil and warm in a 300°F (150°C) oven for 10-15 minutes.
Flavor Development: I’ve noticed that this banana bread tastes even better on the second day. The flavors meld together, and the moisture distributes more evenly throughout the loaf. So if you can resist eating it all on day one, you’re in for a treat on day two.
Nutritional Information & Benefits
While this is definitely a treat, it does offer some nutritional perks thanks to the bananas. Here’s a rough breakdown per slice (assuming 10 slices per loaf):
| Nutrient | Amount per Slice |
|---|---|
| Calories | 220-250 |
| Total Fat | 8-10g |
| Saturated Fat | 4-5g |
| Carbohydrates | 35-40g |
| Sugar | 18-22g |
| Fiber | 1-2g |
| Protein | 3-4g |
| Potassium | 150-200mg |
Health Benefits: Bananas are a good source of potassium, which supports heart health and muscle function. They also provide vitamin B6 and vitamin C. The fiber content, while modest, can aid digestion. Using whole wheat flour instead of all-purpose would boost the fiber significantly.
Dietary Considerations: This recipe is vegetarian. For vegan and gluten-free adaptations, see the variations section above. It contains gluten, dairy, and eggs in its standard form. The sugar content is moderate—you can reduce it to ½ cup if you prefer a less sweet bread, especially if your bananas are very ripe.
Personal Perspective: I don’t pretend this is health food, but I feel good about serving it to my family because I know exactly what’s in it. No preservatives, no weird additives. It’s real food made from real ingredients. And honestly, a slice of homemade banana bread feels more nourishing than any packaged snack.
Conclusion
This homemade no-knead one-bowl banana bread is proof that you don’t need fancy techniques or a sink full of dishes to bake something truly wonderful. It’s the recipe that changed my mind about banana bread entirely, and I hope it does the same for you.
What I love most about this recipe is how forgiving it is. You can swap ingredients, adjust the sweetness, add your favorite mix-ins, and it still turns out beautifully. It’s the kind of recipe that builds confidence in the kitchen, even if you’re a total beginner. And when you pull that golden loaf out of the oven and the smell fills your house, you’ll feel like a pro.
I encourage you to make this recipe your own. Use chocolate chips one time and walnuts the next. Try it with a sprinkle of cinnamon or a handful of dried cranberries. The base is so solid that every variation works. And when you find your favorite version, I’d love to hear about it.
So grab those spotty bananas, pull out your biggest bowl, and get baking. You’ve got this. And if you make a mess or forget an ingredient—I’ve done both—just laugh it off and try again. That’s what real home cooking is all about.
Drop a comment below and let me know how your banana bread turned out. What add-ins did you use? Did you sneak a slice while it was still warm? I want to hear it all. Happy baking!
Frequently Asked Questions
Can I use frozen bananas for this recipe?
Absolutely. Frozen bananas work great. Thaw them completely at room temperature, then drain off any excess liquid before mashing. The texture might be slightly softer, but the flavor is just as good—sometimes even better because freezing concentrates the sweetness.
Why did my banana bread turn out dry?
Dry banana bread usually comes from overmixing the batter, using too much flour, or baking it too long. Make sure you’re measuring your flour correctly (spoon and level, don’t scoop) and check for doneness a few minutes early. Also, make sure your bananas are very ripe—underripe bananas contribute less moisture.
Can I make this recipe without eggs?
Yes! Use a flax egg (1 tablespoon ground flaxseed mixed with 3 tablespoons water, let sit for 5 minutes) or a commercial egg replacer. The texture will be slightly denser, but it will still be delicious. I’ve done this for vegan friends, and no one complained.
How do I know when the banana bread is fully baked?
Insert a toothpick or a thin knife into the center of the loaf. If it comes out clean or with just a few moist crumbs, it’s done. If it has wet batter on it, bake for another 5 minutes and check again. The top should also be golden brown and slightly cracked.
Can I double this recipe?
Yes, you can easily double it. Use a larger bowl and bake in two loaf pans. The baking time will be about the same, but check at 50 minutes to be safe. If you only have one pan, you can bake the batter in batches—just keep the extra batter at room temperature while the first loaf bakes.
Pin This Recipe!
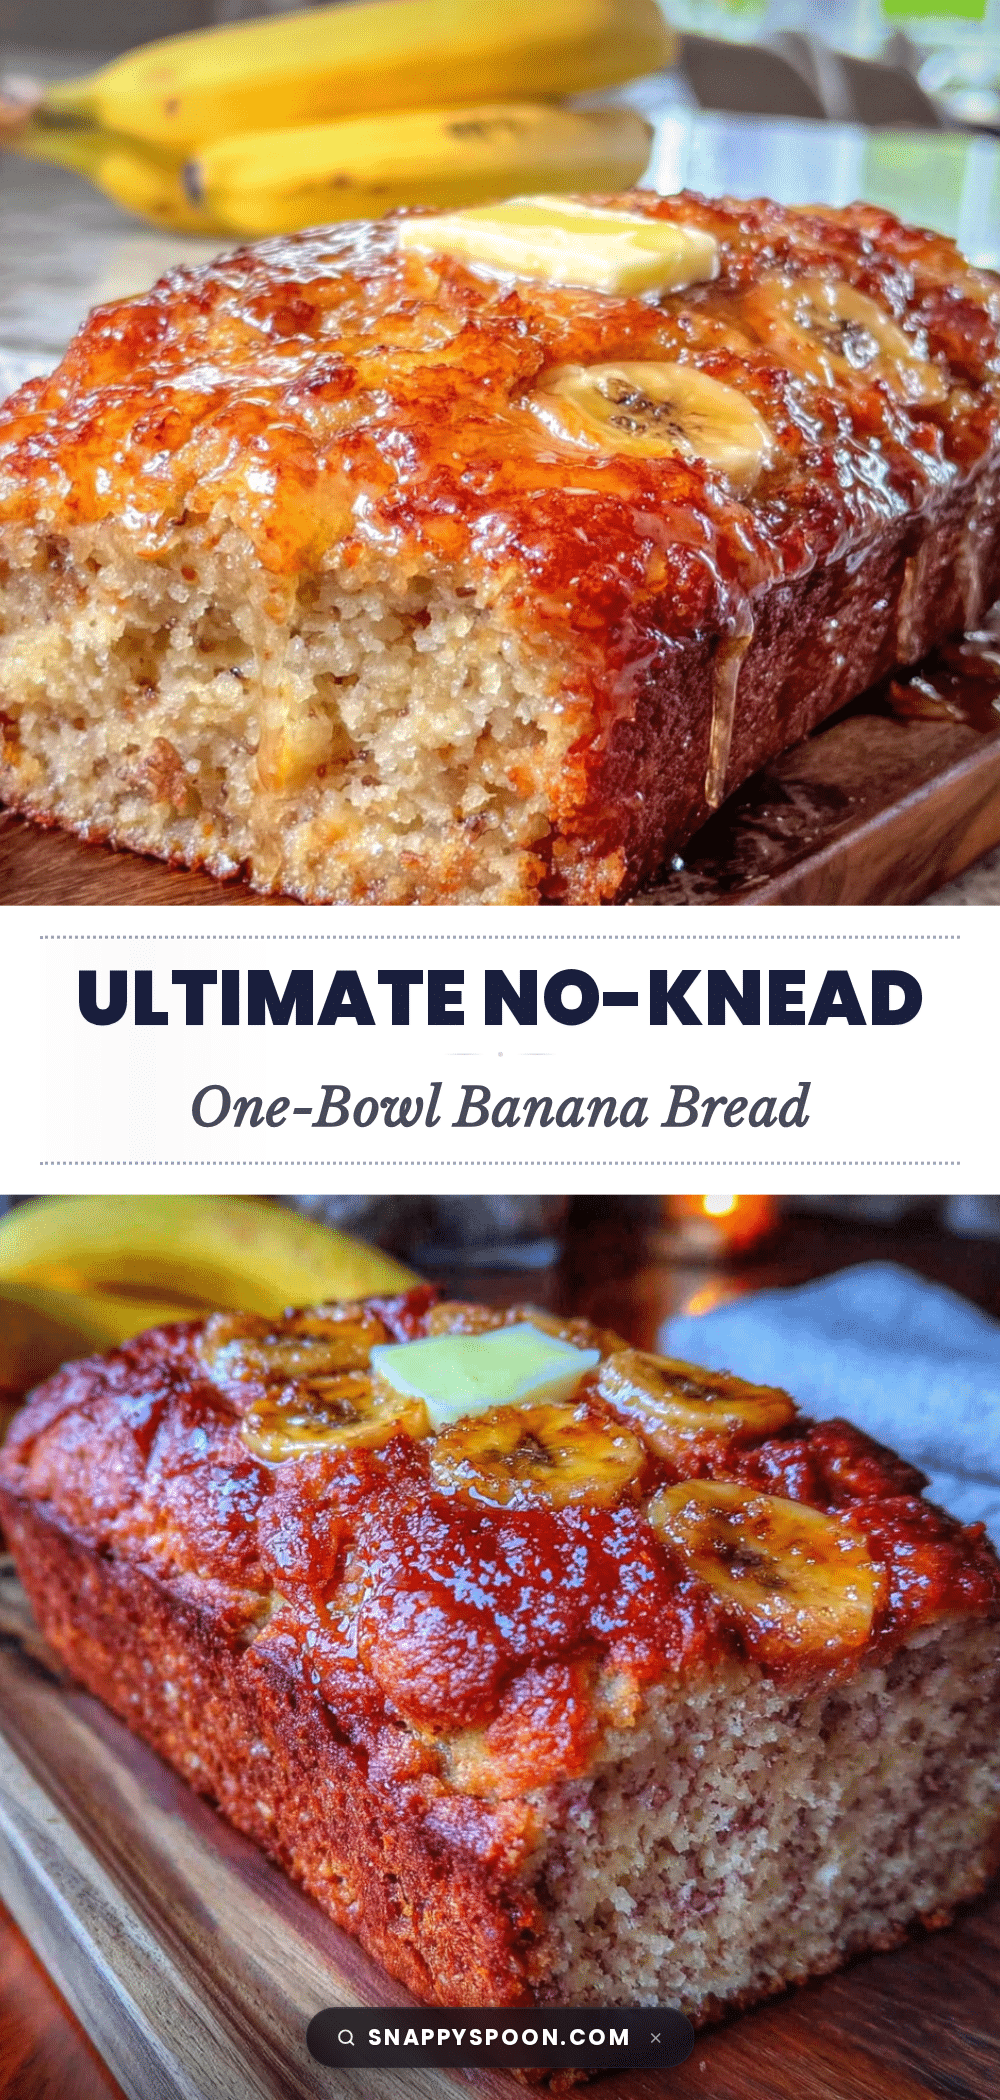
Easy One-Bowl Homemade Banana Bread Recipe
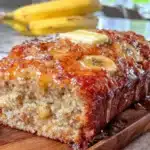
This no-knead, one-bowl banana bread is tender, perfectly sweet, and speckled with caramelized banana pockets. It’s the unfussy recipe that turns skeptics into believers, requiring just one bowl and about 10 minutes of hands-on time.
- Prep Time: 10 minutes
- Cook Time: 50-60 minutes
- Total Time: 1 hour 10 minutes
- Yield: 10 servings 1x
- Category: Dessert
- Cuisine: American
Ingredients
- 3 large ripe bananas, mashed (about 1 ½ cups or 360 ml)
- ⅓ cup (75 g) unsalted butter, melted
- ¾ cup (150 g) granulated sugar
- 1 large egg, at room temperature
- 1 teaspoon vanilla extract
- 1 ½ cups (190 g) all-purpose flour
- 1 teaspoon baking soda
- ½ teaspoon salt
- ½ cup (60 g) chopped walnuts or pecans (optional)
- ½ cup (90 g) chocolate chips (optional)
- 1 teaspoon cinnamon (optional)
Instructions
- Preheat your oven to 350°F (175°C). Grease a 9×5-inch loaf pan with butter or non-stick spray, or line it with parchment paper, leaving overhang on the long sides.
- Mash the bananas in a large mixing bowl with a fork or potato masher until mostly smooth with a few small lumps.
- Add the melted butter and sugar to the mashed bananas. Stir until combined into a smooth, shiny paste.
- Add the egg and vanilla extract. Stir until the egg is fully incorporated and the batter is smooth.
- Sprinkle the flour, baking soda, and salt over the wet mixture. Stir gently until just combined—about 10-15 strokes. A few streaks of flour are fine; do not overmix.
- If using, gently fold in nuts, chocolate chips, or cinnamon until evenly distributed.
- Pour the batter into the prepared loaf pan and spread evenly. Tap the pan gently on the counter to release air bubbles.
- Bake for 50-60 minutes, until a toothpick inserted into the center comes out clean or with a few moist crumbs. If browning too quickly, tent with foil for the last 15-20 minutes.
- Cool in the pan for 10 minutes, then lift out using parchment handles and transfer to a cooling rack. Cool completely before slicing.
Notes
Use very ripe bananas with lots of brown spots for best sweetness and moisture. Do not overmix the batter once flour is added to avoid a tough loaf. For best results, let the bread cool completely before slicing. The flavor improves on the second day. For a dairy-free version, substitute butter with coconut oil or vegetable oil. For gluten-free, use a 1:1 gluten-free flour blend.
Nutrition
- Serving Size: 1 slice (1/10 of loa
- Calories: 235
- Sugar: 20
- Sodium: 200
- Fat: 9
- Saturated Fat: 4.5
- Carbohydrates: 37
- Fiber: 1.5
- Protein: 3.5
Keywords: banana bread, one-bowl banana bread, easy banana bread, no-knead banana bread, homemade banana bread, moist banana bread