Love this? Save it for later!
Share the inspiration with your friends
My daughter had refused Halloween dinner for three years. Not the candy part—she was an expert at that. The actual dinner part, the part you eat before you go collect enough sugar to power a small city. She claimed hot dogs were “fine” and that Halloween food was just regular food with food coloring, which, honestly, she had a point. Then I made this version one Tuesday night in October, just to test the concept, and I found her standing at the kitchen counter at 4:47 PM, eating a mummy hot dog before I’d even finished arranging the board. Caught in the act, ketchup on her chin, trying to look innocent. “I was just checking if they were safe,” she said. She ate four.
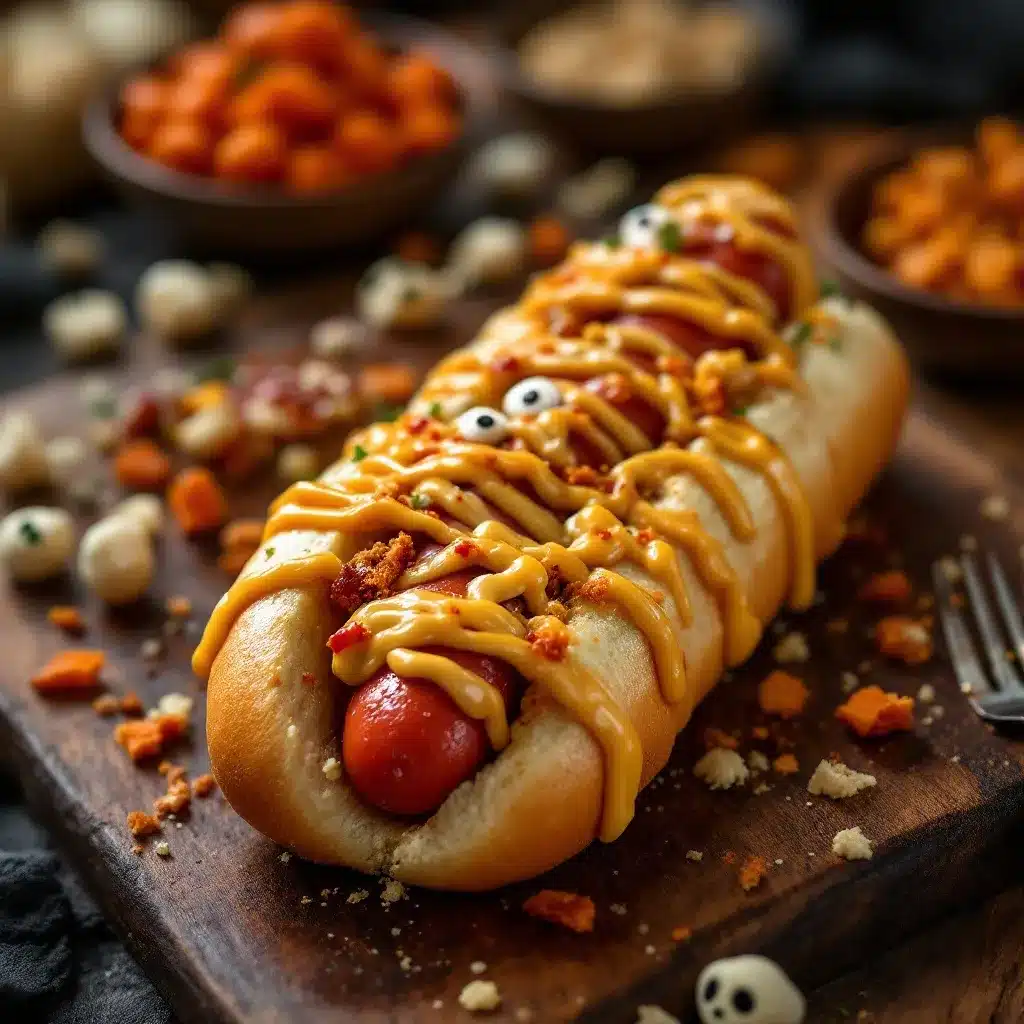
That’s the thing about this Easy Mummy Hot Dogs Halloween Dinner Board. It doesn’t try to be fancy. It doesn’t use black food coloring or pretend to be anything it’s not. It’s crescent roll dough wrapped around hot dogs with little mustard eyes, and somehow that’s exactly what Halloween dinner needed. I mean, I’ve tried the elaborate Halloween charcuterie boards with the cheese skulls and the olive spiders. They look amazing for about twelve minutes, and then someone knocks over the eyeball grapes and it’s chaos. This board is chaos-proof. It’s the dinner that lets everyone eat with their hands while standing up, which is basically the official dinner posture of Halloween night.
Maybe you’ve been there—staring down a Halloween evening where dinner is either rushed takeout or something that takes an hour to prepare while the kids are vibrating with costume energy. This board solves that. It comes together in under 30 minutes, it looks genuinely spooky, and the best part? The kids can help wrap the mummies. My son, who has the fine motor skills of a golden retriever in socks, managed to make mummies that looked like they’d been through a blender. They were the best ones on the board. That’s the energy we’re going for here.
I keep making this board because it’s the one Halloween dinner that doesn’t feel like a compromise. It feels like a celebration, even if the celebration involves hot dogs wrapped in canned dough. And honestly? That’s exactly what Halloween should be.
Why You’ll Love This Recipe
Let’s be real for a second. Halloween dinner has always been the awkward stepchild of the holiday. You want something festive, but you also need it to be fast because the costumes aren’t going to put themselves on and the face paint situation is about to get real. This board solves every single one of those problems, and it does it with a smile.
- Quick & Easy: This whole board comes together in under 30 minutes, start to finish. We’re talking 15 minutes of active prep and 10-12 minutes in the oven. That leaves you plenty of time to wrestle a tiny ghost into a costume.
- Simple Ingredients: You need exactly five ingredients for the mummy hot dogs themselves—hot dogs, crescent roll dough, mustard, ketchup, and cream cheese. Chances are you already have most of these in your kitchen right now.
- Perfect for Halloween Parties: This board works for a family dinner on October 31st, a classroom party, a neighborhood gathering, or even a spooky movie night. It’s portable, shareable, and impossible to resist.
- Crowd-Pleaser: I’ve served this to kids, adults, picky eaters, and that one friend who claims they don’t like hot dogs. Every single person went back for seconds. The mummy wrapping makes them fun, but the hot dog and crescent roll combo is pure comfort food magic.
- Unbelievably Delicious: The crescent roll dough gets golden and flaky in the oven, while the hot dog stays juicy inside. The little mustard eyes add a tangy pop, and the cream cheese dip balances everything out. It’s simple, but it hits every single note.
What makes this recipe different from every other Halloween hot dog idea out there? It’s the board format. Instead of serving mummy hot dogs on a plate where they look a little sad and lonely, we’re building a full spread. The mummies become the centerpiece, surrounded by dips, veggies, and snacks that make the whole thing feel like an event. It’s not just dinner—it’s a Halloween experience.
This is the kind of recipe that makes you close your eyes after the first bite. Not because it’s gourmet, but because it’s exactly what you needed. It’s comfort food reimagined for the spookiest night of the year—faster than takeout, more fun than a regular dinner, and with the same soul-soothing satisfaction that only hot dogs and crescent rolls can deliver. Perfect for impressing your kids without stress, or turning a chaotic Halloween evening into something memorable.
What Ingredients You Will Need
This recipe uses simple, pantry-friendly ingredients to create something that looks way more impressive than it actually is. That’s the secret—let the presentation do the heavy lifting while the ingredients stay humble and accessible.
For the Mummy Hot Dogs
- 1 package (8-count) hot dogs (I prefer beef hot dogs for flavor, but turkey or chicken work great too. Look for full-size hot dogs, not the cocktail size—you need room for the wrapping.)
- 1 can (8 oz) refrigerated crescent roll dough (Pillsbury is my go-to for consistent texture, but any brand works. You can also use crescent dough sheets if you want to cut your own strips.)
- Mustard (Yellow mustard works best for the eyes—it’s the right color and consistency. Dijon is too runny, and honey mustard is too dark.)
- Ketchup (For dipping and for adding little blood spatters on the board. Heinz is my personal preference, but use whatever you have.)
For the Board Spread
- 4 oz cream cheese, softened (This becomes the base for your dip. Full-fat cream cheese gives the best texture, but reduced-fat works in a pinch.)
- 1/2 cup sour cream (Adds tanginess to the dip. Greek yogurt works as a substitute if you’re watching calories.)
- 1/2 teaspoon garlic powder (For savory depth in the dip.)
- 1/4 teaspoon salt (To balance the flavors.)
- Fresh vegetables for dipping (Carrot sticks, celery, bell pepper strips, cucumber rounds—whatever your family enjoys. The orange and green colors fit the Halloween theme perfectly.)
- Pretzel sticks (These make great “bones” for the board and add a salty crunch.)
- Orange cheese cubes or slices (Cheddar or Colby Jack work well. Cut them into small squares or use a cookie cutter for pumpkin shapes if you’re feeling fancy.)
- Grapes (Green or red—they look like eyeballs on the board. Just trust me on this one.)
One thing I’ve learned from making this board about a dozen times: don’t overthink the ingredients. The beauty of this recipe is that it’s forgiving. If you don’t have sour cream for the dip, use plain Greek yogurt. If your kids hate pretzels, throw in some goldfish crackers. The mummy hot dogs are the star, and everything else is just supporting cast. I’ve made this board with whatever I had in the fridge, and it’s always worked out.
For the hot dogs, I recommend avoiding the extra-long ones or the jumbo ones—they take too long to cook through and the dough burns before the hot dog is hot. Standard-size hot dogs are the sweet spot. And please, for the love of all things spooky, do not use the low-fat hot dogs. They get rubbery in the oven and the texture is just sad. You deserve better than sad mummies.
Equipment Needed
You don’t need much to pull this off, which is part of the appeal. Here’s what you’ll need:
- Baking sheet (A standard half-sheet pan works perfectly. Line it with parchment paper for easy cleanup—trust me on this, the dough can stick.)
- Parchment paper (Non-negotiable for easy cleanup and preventing sticking. I learned this the hard way after scraping crescent roll residue off a baking sheet for twenty minutes.)
- Sharp knife or pizza cutter (For cutting the crescent roll dough into strips. A pizza cutter makes this job ridiculously easy.)
- Small bowl (For mixing the cream cheese dip.)
- Spatula or butter knife (For spreading and mixing.)
- Large serving board or platter (A wooden cutting board, a large white platter, or even a clean baking sheet works. I use a 12×18 inch wooden board, but anything with a rim works best to contain the dips.)
- Small serving bowls (For the cream cheese dip and ketchup. I use 4-ounce ramekins, but any small bowl works.)
- Toothpicks (Optional, but helpful for securing the mummy wrappings if they try to unravel.)
If you don’t have a pizza cutter, a sharp knife works just fine. If you don’t have a wooden serving board, a large white platter from the dollar store gives you that nice contrast against the orange cheese and green veggies. I’ve made this board on a clean cookie sheet before, and it worked perfectly. Don’t let equipment hold you back—this recipe is about the fun, not the fancy tools.
Preparation Method
Alright, let’s make some mummies. This is where the magic happens, and I promise it’s easier than it looks.
Step 1: Preheat and Prep (5 minutes)
Preheat your oven to 375°F (190°C). Line a baking sheet with parchment paper. This step is not optional—the crescent roll dough will stick to an unlined pan, and you’ll be left with mummies that look like they’ve been through a battle. We want cute mummies, not tragic ones.
Step 2: Prepare the Dough (5 minutes)
Open the can of crescent roll dough. Unroll it and separate it into the 8 pre-cut triangles. Using a sharp knife or pizza cutter, cut each triangle lengthwise into 3 thin strips. You should end up with 24 strips total. The strips don’t need to be perfectly even—in fact, uneven strips give the mummies a more authentic, wrapped-in-a-hurry look. My first attempt at perfect strips resulted in mummies that looked too neat. Real mummies are messy. Embrace the chaos.
Step 3: Wrap the Mummies (10 minutes)
Take one hot dog and start wrapping a strip of dough around it, leaving a small gap near the top for the “face.” The dough should overlap slightly as you wrap, like bandages. Don’t wrap too tightly—the dough will expand as it bakes, and tight wrapping can cause the dough to tear. Leave about 1/2 inch of the hot dog exposed at the top for the face, and tuck the end of the dough strip underneath the hot dog to secure it. Repeat with all 8 hot dogs. You’ll use about 3 strips per mummy, which means you’ll have exactly enough for all 8.
Here’s a tip I learned from my third attempt: if the dough strips are too sticky to handle, dust your fingers lightly with flour. If they’re too dry, they won’t stick to themselves—just press the ends gently to seal. And if a strip tears, don’t panic. Just overlap another strip over the tear. Mummies have bandages over bandages. It’s thematically appropriate.
Step 4: Bake the Mummies (10-12 minutes)
Place the wrapped hot dogs on the prepared baking sheet, leaving about 1 inch of space between each one. Bake at 375°F (190°C) for 10-12 minutes, or until the dough is golden brown and cooked through. The hot dogs should be heated through and slightly plump. If the dough is still pale at the 10-minute mark, give it another 2 minutes. Every oven runs a little differently—mine takes exactly 11 minutes for that perfect golden color.
Step 5: Add the Eyes (2 minutes)
Remove the mummies from the oven and let them cool for 2-3 minutes on the baking sheet. While they’re still warm, use a toothpick or the tip of a knife to dab a tiny amount of mustard onto the exposed hot dog for the eyes. You can make two small dots for classic eyes, or get creative with different expressions. I’ve done one-dot cyclops mummies, three-dot alien mummies, and squiggly-line confused mummies. The kids lose their minds over the different faces.
Step 6: Make the Cream Cheese Dip (3 minutes)
While the mummies are cooling, mix the softened cream cheese, sour cream, garlic powder, and salt in a small bowl until smooth and creamy. Taste it and adjust the salt if needed. This dip is simple, but it’s the perfect savory counterpoint to the salty hot dogs and flaky dough. If you want a little kick, add a pinch of cayenne pepper. If you want it herbier, add a teaspoon of dried dill or chives.
Step 7: Assemble the Board (5 minutes)
Place the small bowl of cream cheese dip and a small bowl of ketchup on your serving board or platter. Arrange the mummy hot dogs around the bowls, grouping them in the center or scattered for a more organic look. Fill in the gaps with the fresh vegetables, pretzel sticks, cheese cubes, and grapes. Drizzle a little extra ketchup around the board for “blood spatters”—just a few small dollops here and there. Don’t go overboard; you want it to look spooky, not like a crime scene.
Step 8: Serve Immediately
This board is best served warm, while the mummy hot dogs are still crispy on the outside and juicy on the inside. The vegetables and dip can sit at room temperature for about an hour, so don’t worry about the cold items getting too warm. Just make sure you have napkins nearby—things are about to get messy in the best possible way.
Cooking Tips & Techniques
I’ve made this recipe about a dozen times now, and I’ve collected a few lessons that will save you from my early mistakes.
Don’t overwork the dough. Crescent roll dough is delicate, and handling it too much makes it tough. When you cut the strips, use a sharp blade and a clean, swift motion. If the dough gets warm and sticky, pop it in the fridge for 5 minutes before wrapping. Cold dough is easier to handle and gives you cleaner strips.
Leave room for the dough to expand. When you wrap the mummies, the dough will puff up as it bakes. If you wrap too tightly, the dough will tear or the mummy will look squished. Think of it like wrapping a gift—you want it snug but not tight. The dough should have a little breathing room.
Watch the oven like a hawk. The difference between perfect golden mummies and burnt ones is about 90 seconds. Start checking at the 9-minute mark. The dough should be golden brown on the edges and slightly lighter in the center. If the edges are browning too fast, you can tent the tray loosely with foil for the last 2 minutes.
Make the eyes after baking. I tried putting the mustard eyes on before baking once, and the mustard just baked into weird brown spots. It looked like my mummies had some kind of skin condition. Not cute. Always add the eyes after the mummies come out of the oven, while they’re still warm enough to make the mustard stick.
Prep the board components in advance. If you’re making this for a Halloween party, you can cut the vegetables, cube the cheese, and mix the dip up to 24 hours ahead. Store everything in separate containers in the fridge, then assemble the board while the mummies are baking. This cuts your active time down to about 15 minutes, which is a game-changer when you’re juggling costumes and face paint.
Double the recipe if you’re feeding a crowd. One batch makes 8 mummy hot dogs, which serves about 4 people as a main dish or 8 as part of a larger spread. For parties, I usually make two batches and stagger the baking so the second batch comes out warm while the first batch is being devoured.
One failure I’ll admit to: I once tried to make these with puff pastry instead of crescent roll dough. The puff pastry was too rich, too buttery, and it didn’t wrap as neatly. The mummies looked like they’d been through a washing machine. Crescent roll dough is the right choice here—it’s light, flaky, and it stays where you put it. Don’t be a hero. Use the canned dough.
Variations & Adaptations
This recipe is incredibly flexible, and I’ve tried several variations over the years. Here are my favorites:
Cheesy Mummy Hot Dogs: Before wrapping the hot dogs, slice them lengthwise almost all the way through (like a hot dog bun) and stuff a thin strip of cheddar or mozzarella cheese inside. Wrap and bake as directed. The cheese melts into the hot dog and creates a gooey surprise. Just be careful—the cheese gets volcano-hot, so let them cool for an extra minute before serving.
Spicy Mummy Hot Dogs: Use spicy andouille sausage or chorizo instead of regular hot dogs. The smoky, spicy flavor pairs beautifully with the flaky dough and the cool cream cheese dip. I made these for a grown-up Halloween party and they disappeared in about 8 minutes.
Vegetarian Mummy “Dogs”: Use your favorite plant-based hot dogs or sausages. I’ve tried this with both field roast and beyond meat options, and they both work well. Just check the cooking time—some plant-based options cook faster than traditional hot dogs, so start checking at 8 minutes.
Gluten-Free Mummies: You can use gluten-free crescent roll dough (I’ve found it at most major grocery stores) or make your own gluten-free dough. The texture will be slightly different—gluten-free dough tends to be more crumbly—but the flavor is still great. Just handle the dough gently and don’t overwork it.
Breakfast Mummies: Swap the hot dogs for breakfast sausage links and use the same crescent roll wrapping technique. Serve with a side of maple syrup for dipping. I made these for a Halloween morning breakfast and my kids declared it “the best day ever.” High praise from a 7-year-old.
Mini Mummy Bites: Use cocktail sausages or lil’ smokies instead of full-size hot dogs, and cut the crescent roll strips into smaller pieces. These bake in about 6-8 minutes and are perfect for appetizers or lunchboxes. I’ve sent these in my daughter’s lunch the week before Halloween and she said her friends were “very jealous.”
Keto-Friendly Mummies: Use cheese wraps or low-carb tortillas cut into strips instead of crescent roll dough. The texture is different—chewier, not flaky—but the flavor is still satisfying. Brush the cheese wraps with a little olive oil before baking to help them brown.
Serving & Storage Suggestions
This board is best served warm, right after the mummies come out of the oven. The contrast between the hot, flaky dough and the cool, creamy dip is where the magic lives. But I know Halloween schedules are chaotic, so here’s how to handle different serving scenarios.
Serving Temperature: The mummy hot dogs are at their peak within the first 15 minutes after baking. If you’re serving them as part of a party spread, keep them on a warm plate or in a low oven (200°F) for up to 30 minutes. The dough will soften slightly but will still be delicious. The cold components—veggies, dip, cheese, grapes—can sit at room temperature for about an hour, so assemble those right before serving.
Presentation Tips: Arrange the mummies so they’re looking at each other or at the dip bowls. It adds a little personality to the board. I like to place the cream cheese dip in the center and arrange the mummies in a circle around it, like they’re having a meeting. The kids find this hilarious. Sprinkle a few pretzel sticks around the board to look like bones, and scatter the grapes randomly for an “eyeball” effect.
Storage: Leftover mummy hot dogs (if you have any—I rarely do) can be stored in an airtight container in the refrigerator for up to 3 days. The dough will soften as it sits, so don’t expect them to be as crispy as when they were fresh. The cream cheese dip keeps for up to 5 days in the fridge. The vegetables and grapes should be stored separately and will last 2-3 days.
Reheating: The best way to reheat leftover mummy hot dogs is in the oven or air fryer. Preheat to 350°F (175°C) and heat for 3-5 minutes, until the dough crisps up again. The microwave works in a pinch, but the dough will be soft and a little sad. If you’re reheating in the microwave, wrap the mummy in a paper towel to absorb excess moisture and heat for 20-30 seconds.
Freezing: You can freeze the unbaked mummy hot dogs for up to 2 months. Arrange them on a baking sheet and freeze until solid (about 2 hours), then transfer to a freezer bag. When you’re ready to bake, add 2-3 minutes to the baking time—no need to thaw first. I’ve done this for Halloween parties, and it’s a lifesaver. Just pull them out of the freezer, pop them in the oven, and you’re done.
Flavor Development: Interestingly, the cream cheese dip actually gets better after a day in the fridge. The garlic flavor mellows and blends with the sour cream, creating a more rounded taste. If you’re making this for a party, I recommend making the dip the day before.
Nutritional Information & Benefits
I’m not going to pretend this is a health food, because it’s not. But I do think there’s value in knowing what you’re working with, especially if you’re feeding kids or managing dietary needs.
Estimated Nutritional Values (per mummy hot dog, without sides):
- Calories: 220-250
- Protein: 8-10g
- Carbohydrates: 18-22g
- Fat: 14-16g
- Sodium: 600-700mg
These numbers will vary depending on the brand of hot dogs and crescent roll dough you use. Beef hot dogs tend to be higher in calories and fat, while turkey or chicken options are lighter. The crescent roll dough is the main source of carbohydrates, so if you’re watching your carb intake, the keto-friendly variation I mentioned earlier is a better option.
Health Benefits: Let’s focus on the board components beyond the hot dogs. The fresh vegetables provide fiber, vitamins, and antioxidants. Carrots are excellent for vitamin A (great for eye health—thematically appropriate for a mummy board). Celery offers hydration and crunch with almost no calories. The cream cheese dip, while not low-fat, provides calcium and protein from the dairy. The grapes add natural sweetness and antioxidants like resveratrol. So while the mummy hot dogs themselves are a treat, the overall board can be balanced if you load up on the veggie sides.
Dietary Considerations: This recipe contains dairy (cream cheese, sour cream, crescent roll dough) and gluten (crescent roll dough). It’s not suitable for vegans or those with celiac disease unless you use the substitutions I mentioned in the variations section. The hot dogs themselves are generally gluten-free, but always check the label—some brands use fillers that contain gluten. For a lower-sodium option, use low-sodium hot dogs and skip the pretzel sticks.
Allergens: Common allergens in this recipe include wheat (crescent roll dough), dairy (cream cheese, sour cream), and potentially soy (some hot dog brands use soy protein). Always check labels if you’re serving someone with allergies. The mummy hot dogs are nut-free and egg-free as written.
My personal perspective? This is a once-a-year treat for most families, and I think that’s perfectly fine. Halloween is about fun, and this board delivers fun in spades. Balance it out with a vegetable-heavy lunch the next day and enjoy the spooky season without guilt. Life is too short to stress about the nutritional profile of a mummy hot dog.
Conclusion
This Easy Mummy Hot Dogs Halloween Dinner Board is proof that Halloween dinner doesn’t have to be stressful or complicated. It’s fun, it’s fast, and it’s the kind of meal that makes everyone smile—even the grumpy teenager who claims they’re too old for Halloween. (Spoiler: they ate three mummies and asked if there were more.)
The beauty of this recipe is how customizable it is. You can keep it simple with just the mummies and a dip, or go all out with a full board that looks like it belongs on a magazine cover. You can make it spicy, cheesy, vegetarian, or gluten-free. You can make it for a party or for a quiet family dinner on October 31st. It works every single time.
I love this recipe because it captures everything I want from Halloween—a little spooky, a lot of fun, and absolutely zero pretension. It’s the dinner that lets you spend less time in the kitchen and more time watching your kids light up at every mummy face. It’s the dinner that makes you feel like a Halloween hero without breaking a sweat.
Now I want to hear from you. Did your kids make funny faces on their mummies? Did you try one of the variations? Drop a comment below and tell me about your Halloween dinner adventures. And if you loved this recipe, share it with a friend who needs a little Halloween inspiration. Let’s make this the year we all stop stressing about Halloween dinner and start having fun with it.
Happy Halloween, friends. Go make some mummies.
Frequently Asked Questions
Can I make these mummy hot dogs ahead of time?
Yes! You can wrap the mummies up to 24 hours in advance and keep them in the refrigerator on the baking sheet, covered with plastic wrap. Bake them just before serving. You can also freeze the unbaked mummies for up to 2 months—just add a few minutes to the baking time.
What can I use instead of crescent roll dough?
You can use puff pastry (though it’s richer and less stable), refrigerated pizza dough cut into thin strips, or even flour tortillas cut into strips. For a low-carb option, try cheese wraps or low-carb tortillas. Each option gives a different texture, so experiment to find your favorite.
How do I keep the dough from unraveling during baking?
Make sure to tuck the end of each dough strip under the hot dog before placing it on the baking sheet. If the dough is still trying to escape, you can secure it with a toothpick—just remember to remove the toothpick before serving. Placing the mummies seam-side down on the baking sheet also helps keep everything in place.
Can I use cocktail sausages instead of full-size hot dogs?
Absolutely! Cocktail sausages or lil’ smokies work great for mini mummy bites. Just cut the crescent roll strips into smaller pieces and reduce the baking time to 6-8 minutes. These are perfect for appetizers or for little hands that might struggle with a full-size hot dog.
What other dips work well with this board?
The cream cheese dip is my favorite, but you can also serve these with ketchup, mustard, ranch dressing, barbecue sauce, or honey mustard. For a spicy kick, try sriracha mayo or chipotle ranch. The mummy hot dogs are versatile enough to pair with almost any dip you have on hand.
Pin This Recipe!
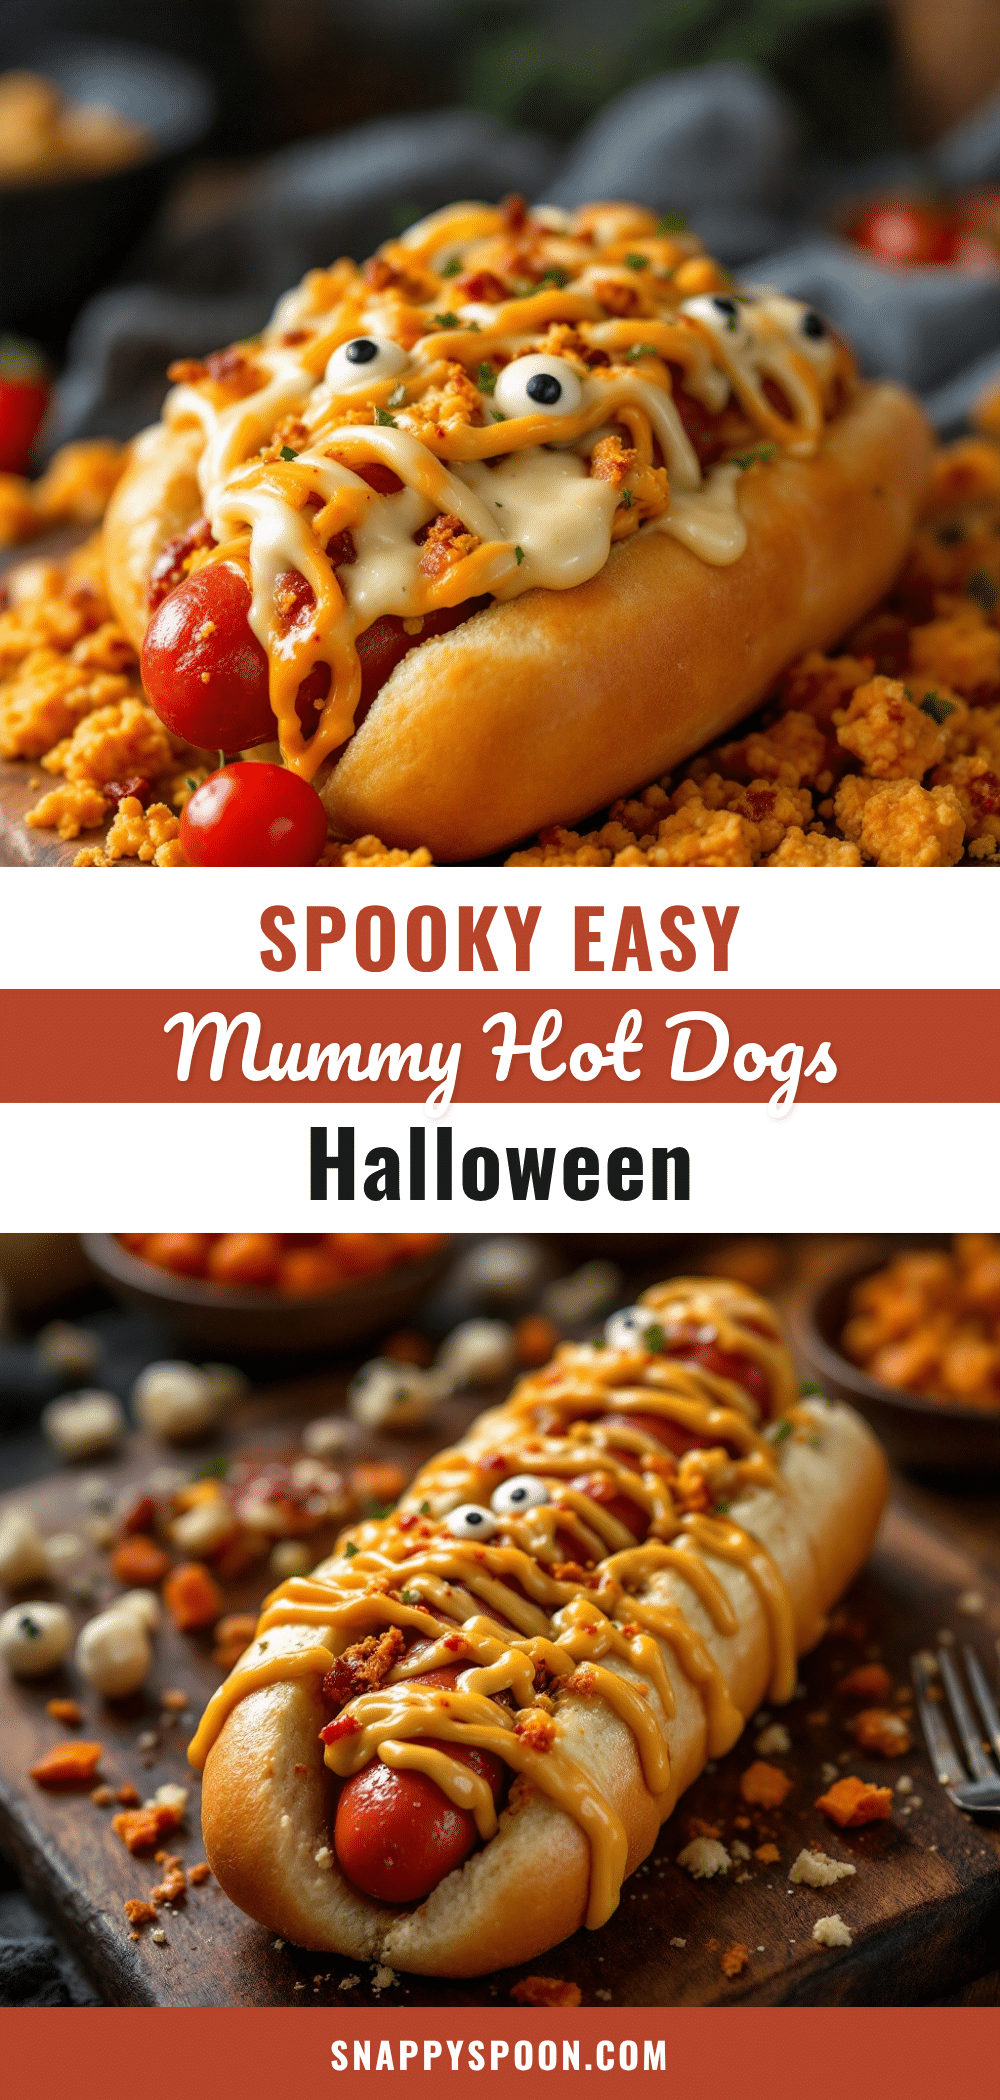
Easy Mummy Hot Dogs Halloween Dinner Board

A fun and easy Halloween dinner board featuring mummy hot dogs wrapped in crescent roll dough with mustard eyes, served with a creamy dip and surrounded by spooky snacks. Ready in under 30 minutes, it’s the perfect crowd-pleaser for Halloween night.
- Prep Time: 15 minutes
- Cook Time: 12 minutes
- Total Time: 27 minutes
- Yield: 4 servings 1x
- Category: Main Course
- Cuisine: American
Ingredients
- 1 package (8-count) hot dogs
- 1 can (8 oz) refrigerated crescent roll dough
- Mustard (yellow, for eyes)
- Ketchup (for dipping and blood spatters)
- 4 oz cream cheese, softened
- 1/2 cup sour cream
- 1/2 teaspoon garlic powder
- 1/4 teaspoon salt
- Fresh vegetables for dipping (carrot sticks, celery, bell pepper strips, cucumber rounds)
- Pretzel sticks
- Orange cheese cubes or slices (cheddar or Colby Jack)
- Grapes (green or red)
Instructions
- Preheat oven to 375°F (190°C). Line a baking sheet with parchment paper.
- Open the can of crescent roll dough. Unroll and separate into 8 triangles. Cut each triangle lengthwise into 3 thin strips (24 strips total).
- Take one hot dog and wrap a strip of dough around it, leaving a small gap near the top for the face. Overlap slightly as you wrap. Leave about 1/2 inch of hot dog exposed at the top. Tuck the end under the hot dog to secure. Repeat with all 8 hot dogs, using about 3 strips per mummy.
- Place wrapped hot dogs on prepared baking sheet, about 1 inch apart. Bake for 10-12 minutes, until dough is golden brown and hot dogs are heated through.
- Remove from oven and let cool 2-3 minutes. Use a toothpick or knife tip to dab small mustard dots onto the exposed hot dog for eyes.
- While mummies cool, mix softened cream cheese, sour cream, garlic powder, and salt in a small bowl until smooth.
- Assemble the board: Place cream cheese dip and ketchup in small bowls on a large serving board. Arrange mummy hot dogs around bowls. Fill gaps with fresh vegetables, pretzel sticks, cheese cubes, and grapes. Drizzle extra ketchup around for blood spatters.
- Serve immediately while warm.
Notes
For best results, use standard-size hot dogs (not jumbo or extra-long). Add mustard eyes after baking to prevent discoloration. The cream cheese dip can be made a day ahead for better flavor. Unbaked mummies can be frozen for up to 2 months.
Nutrition
- Serving Size: 2 mummy hot dogs wit
- Calories: 220250
- Sugar: 46
- Sodium: 600700
- Fat: 1416
- Saturated Fat: 57
- Carbohydrates: 1822
- Fiber: 12
- Protein: 810
Keywords: Halloween, hot dogs, mummy, crescent roll, dinner board, spooky, easy, kid-friendly