Love this? Save it for later!
Share the inspiration with your friends
“I wasn’t expecting a dessert showdown at the neighborhood block party, but there I was, juggling three different flavors of Jello and a mountain of whipped cream,” I laughed to myself last July 4th. It all started when my friend Marcus, who’s usually more about grill mastery than sweets, challenged me to bring something festive but foolproof. I glanced at the clock—only two hours before guests would arrive—and realized I had zero time for complicated recipes. That’s when these Easy Red White Blue Jello Cups were born.
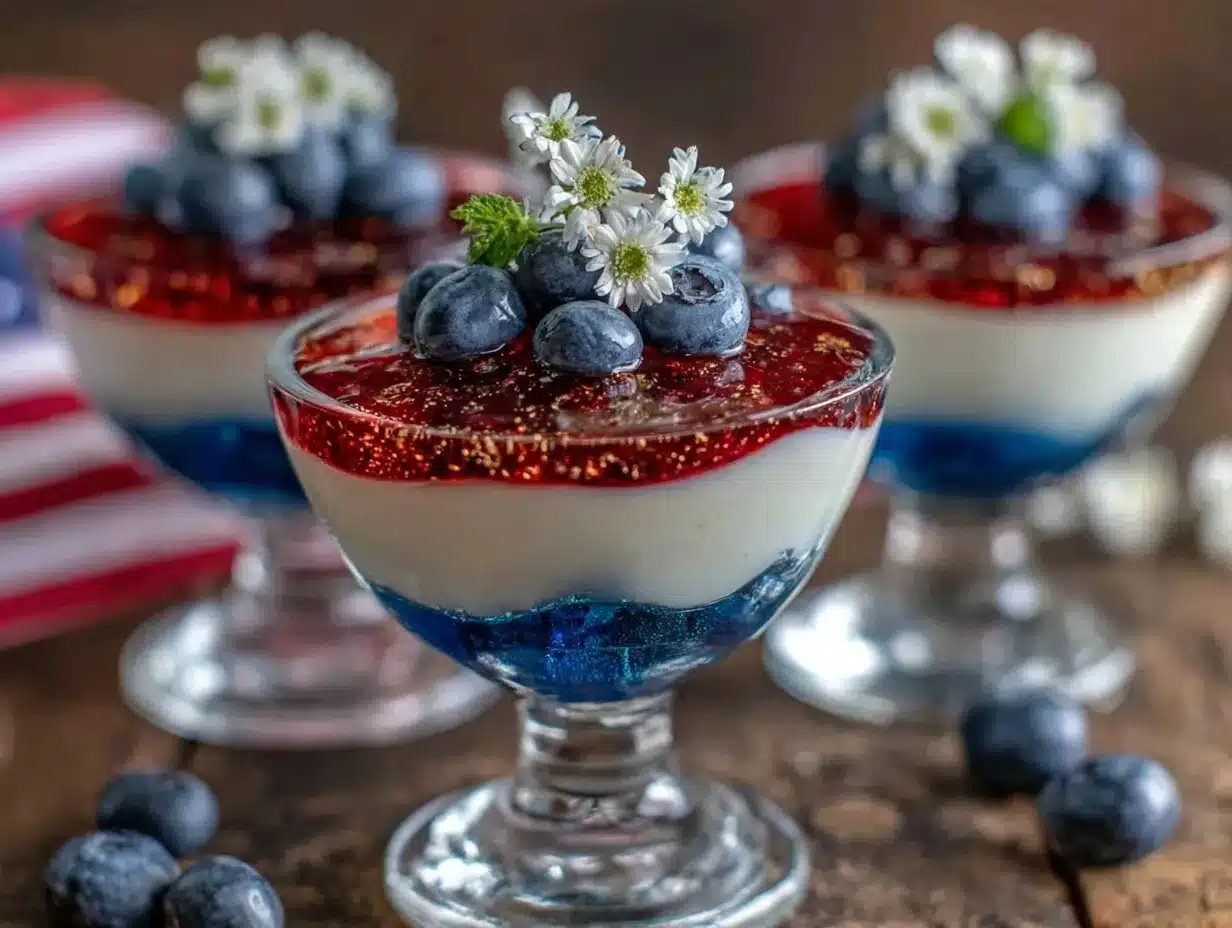
Honestly, it was a last-minute save that turned into a crowd favorite. The cups looked stunning with their vibrant layers of bright red cherry, creamy white whipped topping, and cool blue raspberry—all in a single clear cup. Plus, they were easy enough for even the most kitchen-shy folks to make (trust me, I’ve seen Marcus’s cooking skills firsthand). Maybe you’ve been there too—needing a festive treat that’s quick, colorful, and fun without the fuss.
What really sticks with me about this recipe is how it captures that Fourth of July spirit without any stress. I mean, the way the layers jiggle ever so slightly when you carry them over to the picnic table, the way kids’ eyes light up with each spoonful, and that sweet, nostalgic taste that brings everyone together—it’s pure magic. Let me tell you, this is one of those simple recipes that keeps sneaking back onto my summer menus every year, and I’m betting it’ll do the same for you.
Why You’ll Love This Recipe
After testing more than a dozen patriotic desserts, these Easy Red White Blue Jello Cups are my go-to for holiday gatherings. They’re straightforward yet impressive, and honestly, that’s a win in my book.
- Quick & Easy: Ready in under 30 minutes (plus chilling time), which means you can whip them up even during busy summer days.
- Simple Ingredients: No obscure items here—just classic Jello flavors, whipped topping, and fresh berries if you want to add a little flair.
- Perfect for 4th of July Snacks: These cups bring the festive vibe without the mess, making them ideal for picnics, barbecues, or casual get-togethers.
- Crowd-Pleaser: Kids love the colorful layers, and adults appreciate the nostalgic twist.
- Unbelievably Delicious: The combination of tart cherry, creamy whipped topping, and sweet blue raspberry is a texture and flavor party in every bite.
What sets this recipe apart is the layering technique I’ve honed over time—each layer sets perfectly without mixing into the next, giving you that picture-perfect look. Plus, the whipped topping in the middle adds a creamy balance that makes these cups feel a little more special than your average Jello snack. Honestly, it’s the kind of dessert that makes you pause, smile, and savor the moment—a little patriotic indulgence that’s as pleasing to the eye as it is to the palate.
What Ingredients You Will Need
This recipe uses simple, wholesome ingredients to deliver bold color and flavor without any fuss. Most of these are pantry staples, and you might already have them on hand!
- Cherry Jello mix (3 oz packet): For the vibrant red layer. I recommend Jell-O brand for consistent flavor and brightness.
- Blue Raspberry Jello mix (3 oz packet): Provides the deep blue layer. If you can’t find blue raspberry, use blueberry or grape as a substitute.
- Hot water: To dissolve the Jello powders (boiling, about 1 cup for each flavor).
- Cold water: To mix with the Jello after dissolving (usually 1 cup per packet).
- Whipped topping (8 oz container): For the creamy white layer. I use store-bought whipped topping like Cool Whip, but freshly whipped cream works beautifully too.
- Fresh blueberries and strawberries (optional): For garnish and extra fruity bursts. In summer, fresh berries add a lovely natural touch.
- Clear plastic or glass cups (8 oz size): To layer the dessert attractively.
If you want a dairy-free option, swap the whipped topping with coconut whipped cream—it still sets nicely and tastes fantastic. Also, using small-curd cottage cheese as a creamy layer is a neat alternative if you want a protein boost (though it changes the texture a bit).
Equipment Needed
- Mixing bowls: At least two medium bowls for preparing the red and blue Jello layers separately.
- Measuring cups: For precise water measurements (both boiling and cold).
- Whisk or spoon: For stirring the gelatin mixtures until fully dissolved.
- Clear plastic or glass cups: Eight-ounce size works best for layering and serving individually.
- Refrigerator: Essential for chilling and setting each layer properly.
If you don’t have clear cups, small mason jars or even silicone molds can work, but clear sides really show off those patriotic layers best. Personally, I keep a stack of disposable clear cups handy for outdoor parties—they’re lightweight and save cleanup time. And a tip from experience: have a tray or baking sheet ready to hold the cups while chilling; it makes moving them in and out of the fridge much easier.
Preparation Method
- Prepare the red Jello layer: Boil 1 cup (240 ml) of water and stir in the cherry Jello powder until completely dissolved (about 2 minutes). Add 1 cup cold water (240 ml) and mix well. Pour about ⅓ cup (80 ml) of the red Jello into each clear cup. Place cups on a tray and refrigerate for at least 30 minutes or until firm but not fully set (the surface should be slightly tacky).
- Add the white whipped layer: Spoon about 2 tablespoons (30 ml) of whipped topping over the red layer in each cup. Be gentle to avoid mixing the layers. Spread evenly with the back of a spoon or small spatula. Chill again for 10 minutes to help it firm up slightly.
- Prepare the blue Jello layer: Repeat the boiling water step with the blue raspberry Jello powder—dissolve in 1 cup hot water and stir in 1 cup cold water. Let it cool for 5 minutes (you don’t want it hot; otherwise, it melts the whipped topping).
- Pour the blue layer carefully: Slowly add about ⅓ cup (80 ml) of the blue Jello over the whipped topping layer in each cup. Pour against the spoon or cup side to minimize disturbing the white layer. Return the cups to the fridge and chill for at least 2 hours until fully set.
- Garnish and serve: Just before serving, top with fresh blueberries and sliced strawberries for extra color and texture. You can also add a small dollop of whipped topping if you want that extra creamy bite.
If you notice any bleeding between layers, it usually means the Jello was too warm when poured. Let it cool longer next time or pour even more slowly. Also, don’t skip the refrigeration time—that’s key for those neat, defined layers. I once rushed and ended up with a pinkish purple mess, so trust me on this!
Cooking Tips & Techniques
Layering Jello is all about patience and temperature control. Here are some tips from my own trial and error:
- Cool the Jello before layering: After dissolving the powder in hot water, let the mixture cool to room temperature before pouring over the whipped topping. Hot Jello melts the creamy white layer, and it’s a pain to fix.
- Chill each layer until just set: You want the first layer to be firm enough to hold the next but still slightly tacky so layers stick together. I usually check after 30 minutes by gently pressing with a finger.
- Use a spoon trick for pouring: To avoid splashing, pour the Jello mixture slowly over the back of a spoon held just above the previous layer.
- Don’t rush the chilling: The blue layer needs at least two hours to fully set. If you’re in a hurry, pop the cups in the freezer for 30 minutes but watch carefully to avoid freezing.
- Layer consistency matters: If you want more creamy texture, increase the whipped topping layer slightly. I like to keep it balanced to avoid overwhelming the fruity flavors.
One time, I forgot to chill the red layer before adding white, and the whipped topping sunk right through—lesson learned! Also, timing your steps around other prep tasks helps a lot; I usually start the red Jello layer first, then prep other dishes while it chills.
Variations & Adaptations
This recipe is flexible and perfect for tweaking to your taste or dietary needs.
- Dietary Variation: Use sugar-free Jello mixes and a sugar-free whipped topping for a lower-calorie version that still looks festive.
- Seasonal Twist: Swap in fresh raspberries or blackberries for the red layer during summer instead of Jello powder for a natural fruit flavor.
- Flavor Swap: Try lime Jello for the green layer instead of blue raspberry to make it a red, white, and green treat for Christmas or St. Patrick’s Day.
- Allergen-Free: Use coconut-based whipped topping and check that your Jello is gelatin-free and vegan if needed—agar agar powder can be a substitute for gelatin but requires a different setting method.
- Personal Favorite: Once, I added a thin layer of crushed graham crackers between the white and blue layers for a fun texture surprise. It was a hit with the kids!
Serving & Storage Suggestions
Serve these Easy Red White Blue Jello Cups chilled straight from the fridge for the best texture and refreshing taste. They look fantastic lined up on a tray, perfect for picnics or buffet tables.
Pair them with light summer dishes like grilled chicken skewers or fresh salads to balance the sweetness. For drinks, a cold lemonade or iced tea complements the fruity flavors nicely.
Store leftovers covered with plastic wrap or in an airtight container in the refrigerator for up to 3 days. The layers hold up well, but over time the Jello may weep slightly, so consuming sooner is best.
Reheat? Nope, these are best enjoyed cold. If you want to refresh the whipped topping, add a little extra dollop just before serving.
Flavors actually brighten a bit after a few hours in the fridge, so making them a few hours ahead—or even the day before—will impress your guests with minimal effort.
Nutritional Information & Benefits
Each serving of these Jello cups is roughly 120 calories, depending on the whipped topping brand and any added berries. They’re low in fat and provide a fun way to enjoy a light dessert without overdoing sugar or calories.
The cherry and blue raspberry Jello contribute antioxidants from fruit flavorings, while fresh berries (if added) boost vitamin C and fiber. Whipped topping adds creaminess but also some fat, so choose lighter versions if you prefer.
This recipe is gluten-free and can be easily adapted to be dairy-free or sugar-free, making it suitable for many dietary preferences.
From a wellness perspective, it’s a refreshing treat that won’t weigh you down on hot summer days, plus the portion control in cups helps with mindful eating.
Conclusion
These Easy Red White Blue Jello Cups are the kind of recipe that feels like a little celebration in every bite. They’re simple, colorful, and perfect for bringing some festive cheer to your 4th of July or any patriotic occasion. I love how they take just minutes to prep but get everyone talking—and asking for seconds!
Feel free to tweak the flavors, add your favorite berries, or even sneak in a crunchy layer if you’re feeling adventurous. Honestly, this recipe is a blank canvas for your creativity, and that’s what keeps me coming back each summer.
If you try it, I’d love to hear how your Jello cups turned out or what fun variations you dreamed up. Drop a comment below and share your experience—let’s make this recipe a tradition worth passing around!
FAQs
Can I use different Jello flavors for these cups?
Absolutely! Feel free to swap cherry and blue raspberry with any of your favorite flavors. Just keep the colors festive if you want that patriotic look.
How long do these Jello cups need to chill?
Each layer needs about 30 minutes to set before adding the next one, with the final blue layer chilling for at least 2 hours to be fully firm.
Can I make these ahead of time?
Yes! They actually taste better after chilling overnight. Just cover them with plastic wrap and keep refrigerated until ready to serve.
What can I use instead of whipped topping?
Freshly whipped cream or coconut whipped cream are great alternatives, especially if you want a natural or dairy-free option.
How do I prevent the layers from mixing?
Make sure each layer is cool or slightly set before adding the next. Pour the new layer slowly over a spoon to avoid disturbing the one below.
Pin This Recipe!
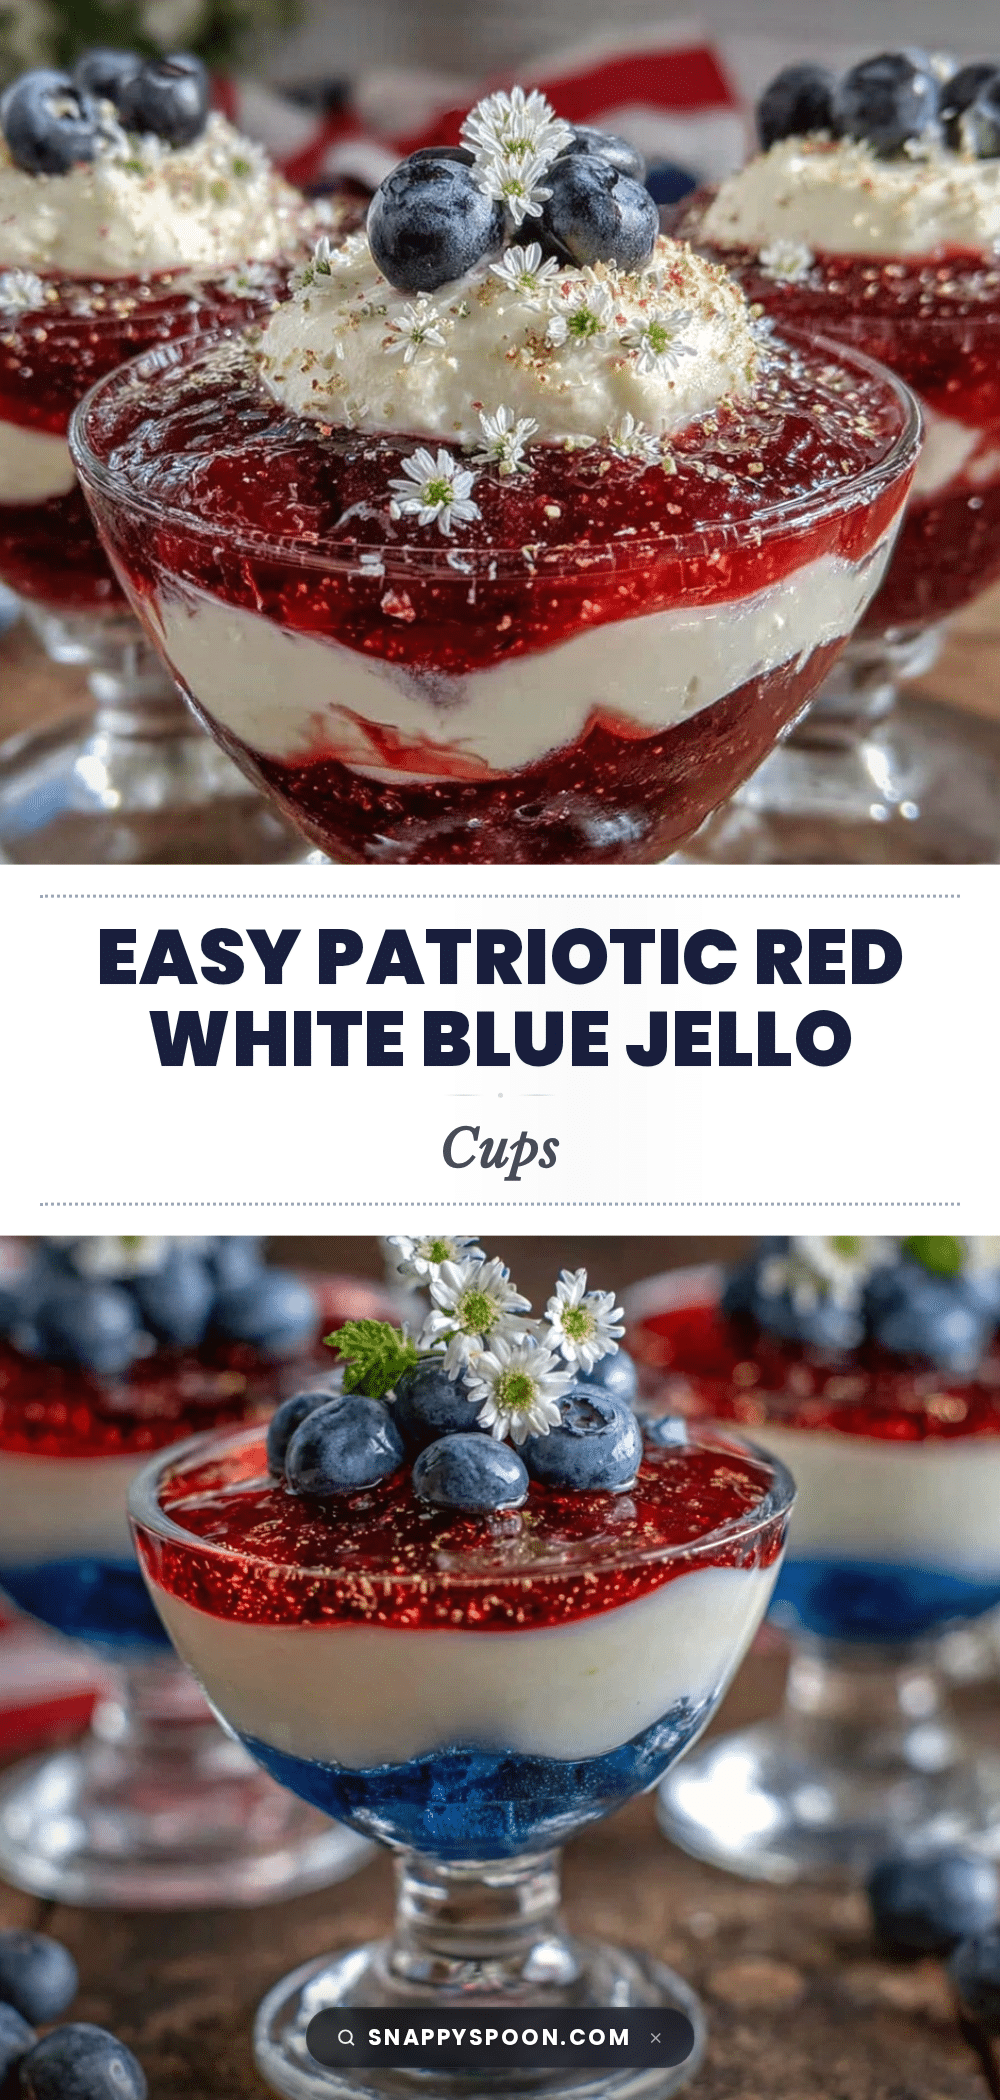
Easy Red White Blue Jello Cups Recipe Perfect for 4th of July Snacks
A quick and festive layered dessert featuring cherry and blue raspberry Jello with a creamy whipped topping, perfect for patriotic celebrations and easy to prepare.
- Prep Time: 15 minutes
- Cook Time: 2 hours 40 minutes
- Total Time: 2 hours 55 minutes
- Yield: 8 servings 1x
- Category: Dessert
- Cuisine: American
Ingredients
- 1 (3 oz) packet Cherry Jello mix
- 1 (3 oz) packet Blue Raspberry Jello mix
- 1 cup boiling water (for cherry Jello)
- 1 cup cold water (for cherry Jello)
- 1 cup boiling water (for blue raspberry Jello)
- 1 cup cold water (for blue raspberry Jello)
- 8 oz whipped topping (store-bought like Cool Whip or freshly whipped cream)
- Fresh blueberries and strawberries (optional, for garnish)
- Clear plastic or glass cups (8 oz size)
Instructions
- Boil 1 cup of water and stir in the cherry Jello powder until completely dissolved (about 2 minutes). Add 1 cup cold water and mix well.
- Pour about 1/3 cup of the red Jello into each clear cup. Place cups on a tray and refrigerate for at least 30 minutes or until firm but slightly tacky.
- Spoon about 2 tablespoons of whipped topping over the red layer in each cup. Spread evenly and chill for 10 minutes to firm up slightly.
- Boil 1 cup of water and stir in the blue raspberry Jello powder until dissolved. Add 1 cup cold water and let cool for 5 minutes.
- Slowly pour about 1/3 cup of the blue Jello over the whipped topping layer in each cup, pouring against a spoon or cup side to avoid disturbing the white layer.
- Refrigerate the cups for at least 2 hours until fully set.
- Just before serving, garnish with fresh blueberries and sliced strawberries. Optionally add a small dollop of whipped topping.
Notes
Cool the Jello mixtures before layering to prevent melting the whipped topping. Chill each layer until just set but slightly tacky to ensure layers stick together. Pour the Jello slowly over the back of a spoon to avoid mixing layers. The final blue layer requires at least 2 hours chilling to fully set. For dairy-free options, use coconut whipped cream. Sugar-free Jello and whipped topping can be used for a lower-calorie version.
Nutrition
- Serving Size: 1 cup (8 oz) serving
- Calories: 120
- Sugar: 18
- Sodium: 90
- Fat: 3
- Saturated Fat: 1.5
- Carbohydrates: 22
- Fiber: 1
- Protein: 1
Keywords: Jello cups, 4th of July dessert, patriotic dessert, layered Jello, easy dessert, summer snacks, red white blue dessert