Love this? Save it for later!
Share the inspiration with your friends
It was 10:47 PM on a random Thursday, and I was supposed to be meal-prepping for the week. Instead, I found myself standing in front of my open fridge, staring at a block of cheddar, a half-empty jar of jalapeños, and a bag of tortilla chips that was definitely two days past its crunch-prime. The craving hit me out of nowhere—not for a simple bowl of nachos, but for something bigger, something that felt like an event. I didn’t have the energy to cook a full meal, but I had a big wooden cutting board, a weirdly specific vision, and the sudden, undeniable urge to build a snack that could feed a crowd without needing a single plate.
I started piling things on that board. Cheese, beans, a sad-looking avocado I managed to mash into guacamole. I pulled out leftover chili from the freezer and some sour cream that was dangerously close to its expiration date. I mean, honestly, it was a mess at first—a glorious, chaotic mess. I forgot to drain the beans and ended up with a little puddle of liquid on the board. I had to stop and wipe it up with a paper towel, muttering to myself about how this was a terrible idea. But then I kept going, and something clicked. The board filled up, and it looked less like a desperate fridge clean-out and more like a masterpiece. That night, I ate nachos standing up in my kitchen, and I knew I had stumbled onto something special.
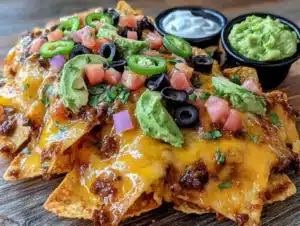
This Ultimate Loaded Nacho Football Charcuterie Board is that exact feeling, turned into a recipe you can actually share. It’s the kind of snack that turns a regular game day into a legendary one, or a quiet Thursday into a party. Maybe you’ve been there—staring at your own fridge, wanting to impress but not wanting to work too hard. This board is your answer. It’s built for sharing, for grazing, for those moments when you want everyone to help themselves and have a great time. Let me tell you, once you make this, you’ll wonder why you ever served nachos any other way.
Why You’ll Love This Ultimate Loaded Nacho Football Charcuterie Board
I’ve tested this board through three football seasons, two Super Bowl parties, and one very memorable (and messy) New Year’s Eve. It’s been approved by picky eaters, hungry teenagers, and my neighbor who claims to be a nacho connoisseur. This isn’t just another snack board—it’s the one that disappears first, every single time.
- Quick & Easy: This board comes together in about 20 minutes of active prep. The oven does most of the work for the nacho base, and the rest is just arranging and opening containers. Perfect for when kickoff is in 30 minutes and you haven’t started anything.
- Simple Ingredients: No fancy grocery trips needed. You likely already have chips, cheese, and a few pantry staples. The beauty is in the layering and the variety, not in exotic ingredients you’ll never use again.
- Perfect for Game Day: This is the ultimate crowd-pleaser for football parties, tailgates, or any gathering where people are standing around talking and snacking. It’s self-serve, which means you get to actually enjoy the game instead of playing host.
- Crowd-Pleaser: I’ve yet to meet someone who doesn’t love a loaded nacho board. The combination of warm, melty cheese, crunchy chips, and cool, creamy toppings is basically irresistible. Kids and adults alike go back for seconds (and thirds).
- Unbelievably Delicious: The real magic is in the temperature contrast—hot, bubbly nachos straight from the oven, paired with cold salsa and sour cream. It’s a textural and flavor experience that a simple bowl of chips and dip just can’t match.
What makes this board different from the rest? It’s the structure. Instead of one sad, soggy pile of nachos, you get a crisp, fully-loaded base that stays crunchy because you bake the chips with cheese and toppings first, then add the cold elements right before serving. It’s a simple technique that changes everything. Plus, the charcuterie-style arrangement means everyone can pick and choose their perfect bite. This isn’t just another version of nachos—it’s the best version, designed for sharing and built to impress.
What Ingredients You Will Need
This Ultimate Loaded Nacho Football Charcuterie Board uses a mix of pantry staples and fresh toppings to create a spread that’s both impressive and approachable. The ingredients are grouped by their role on the board, making it easy to see what goes where.
For the Nacho Base
- 1 large bag (13-16 oz) restaurant-style tortilla chips (I recommend Tostitos Scoops or a similar sturdy chip—they hold up better to the toppings)
- 2 cups shredded Mexican blend cheese (or a mix of cheddar and Monterey Jack for extra flavor)
- 1 cup cooked, seasoned ground beef or shredded chicken (leftover taco meat works perfectly, or use canned chili without beans)
- 1/2 cup canned black beans, drained and rinsed (adds fiber and a nice earthy flavor)
- 1/4 cup pickled jalapeños, sliced (for heat and acidity—adjust to your tolerance)
For the Charcuterie Toppings
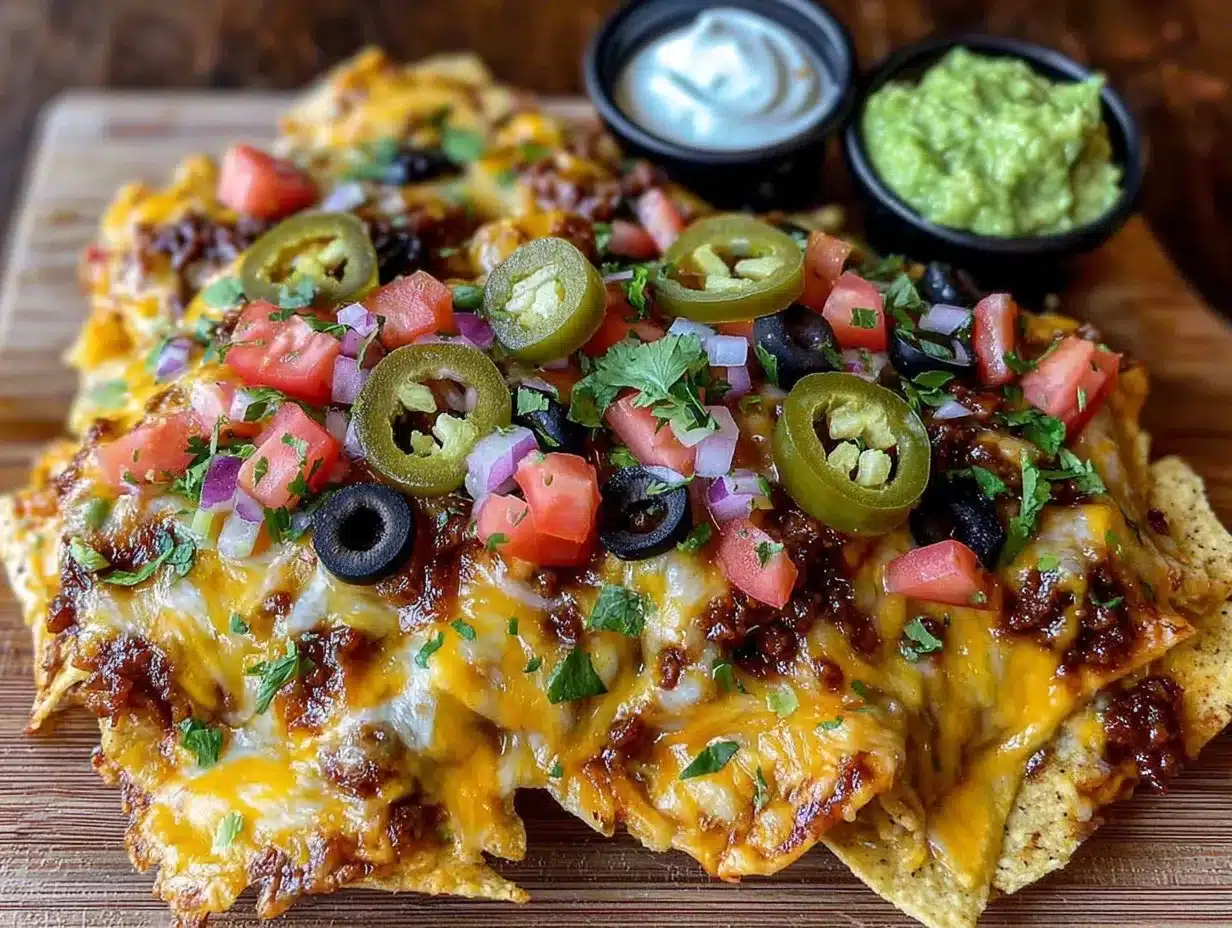
- 1 cup fresh pico de gallo or chunky salsa (drain off excess liquid to keep the chips from getting soggy)
- 1 cup guacamole (store-bought is fine, but homemade is always better—see my tips below)
- 1/2 cup sour cream (full-fat gives the best texture, but Greek yogurt works as a lighter substitute)
- 1/2 cup black olives, sliced (adds a briny, salty pop)
- 1/4 cup fresh cilantro, chopped (for a bright, fresh finish)
- 1 lime, cut into wedges (for squeezing over the top right before serving)
For the Board Add-Ons (Optional but Recommended)
- 1/2 cup roasted corn (adds sweetness and a little char—canned or frozen, thawed, works great)
- 1/4 cup crumbled cotija cheese (for a salty, crumbly finish—feta is a good substitute)
- 1/2 cup diced red onion (for a sharp, crunchy element)
- 1 jalapeño, thinly sliced (fresh) (for those who want extra heat)
When selecting your ingredients, look for a good-quality tortilla chip that won’t break under pressure. I’ve learned the hard way that thin chips turn into a sad, crumbly mess. For the meat, I prefer using leftover chili or taco meat because it’s already seasoned and adds a ton of flavor. If you’re using canned black beans, make sure to drain and rinse them well to remove the excess sodium and that slightly metallic taste. For the guacamole, if you’re making it yourself, use ripe avocados that yield to gentle pressure—they should be slightly soft but not mushy.
Equipment Needed
You don’t need a lot of fancy equipment for this board, which is part of its charm. Here’s what you’ll need:
- A large baking sheet or sheet pan: This is for baking the nacho base. A half-sheet pan (18×13 inches) is perfect. If you don’t have one, a large oven-safe platter or even a cast-iron skillet can work in a pinch.
- A large wooden cutting board or serving platter: This is your charcuterie board. The bigger, the better. I use a 20×14 inch acacia wood board that I found at a home goods store for under $30. A large baking sheet lined with parchment paper also works if you don’t have a wooden board.
- Small bowls or ramekins: You’ll need these for the wet toppings like salsa, guacamole, and sour cream. I have a set of four small ceramic bowls that I use specifically for boards like this. They keep the board organized and prevent the wet ingredients from making everything soggy.
- Serving spoons and tongs: For guests to serve themselves. A small spoon for each bowl and a pair of tongs for the nacho base makes everything easy.
- A sharp knife and cutting board: For prepping any fresh ingredients like cilantro, lime wedges, or red onion.
If you don’t have a large wooden board, don’t stress. I’ve made this on a clean baking sheet covered in parchment paper, and it looked fantastic. The key is to have a large, flat surface where you can arrange everything in a visually appealing way. For the small bowls, any ramekin or even small mason jars will do the job.
Preparation Method
Follow these steps to build your Ultimate Loaded Nacho Football Charcuterie Board. The key is to bake the nacho base first, then arrange the cold toppings around it.
- Preheat your oven to 375°F (190°C). This gives it time to come to temperature while you prep the other ingredients. Line a large baking sheet with parchment paper for easy cleanup.
- Prepare your meat (if using). If you’re using leftover taco meat or chili, warm it up in a skillet over medium heat or in the microwave. If you’re starting from scratch, cook 1/2 pound of ground beef with 1 tablespoon of taco seasoning and 1/4 cup of water until the liquid is absorbed. This takes about 5-7 minutes. Set it aside.
- Layer the chips on the baking sheet. Spread the tortilla chips in a single, even layer on the prepared baking sheet. Don’t pile them too high—you want each chip to get some heat and cheese. I usually do one layer, overlapping slightly, but not more than two chips deep.
- Add the first layer of toppings. Sprinkle the warm meat evenly over the chips. Then, scatter the drained black beans and pickled jalapeños over the top. Try to distribute everything so each chip gets a little something.
- Cover with cheese. Sprinkle the shredded Mexican blend cheese generously over the entire chip and topping mixture. Make sure every chip has some cheese on it—this is what holds everything together and creates that gooey, irresistible texture.
- Bake the nacho base. Place the baking sheet in the preheated oven and bake for 8-10 minutes, or until the cheese is fully melted and bubbly. The edges of the chips should start to turn a light golden brown. Keep an eye on it—you don’t want the chips to burn. I usually check at the 8-minute mark.
- While the nachos bake, prep the board. Take your large wooden board or serving platter and arrange your small bowls. Place them in a way that leaves a large central space for the nacho base. I like to put the bowls at the corners or along the edges, creating a frame for the nachos.
- Fill the bowls. Spoon the pico de gallo or salsa into one bowl, the guacamole into another, and the sour cream into a third. If you’re using additional toppings like roasted corn, diced red onion, or fresh jalapeño slices, place them in separate small bowls or pile them directly on the board.
- Transfer the nacho base. Once the nachos are out of the oven, use a large spatula to carefully transfer the entire sheet of baked nachos to the center of your board. Be gentle—you want to keep the chips intact as much as possible. If some break, just tuck them into the pile.
- Add the finishing touches. Sprinkle the sliced black olives and chopped fresh cilantro over the hot nachos. Arrange the lime wedges around the edges of the board. Add any extra toppings you have, like crumbled cotija cheese or sliced fresh jalapeño, in small piles around the board.
- Serve immediately. Place serving spoons in each bowl and a pair of tongs near the nacho pile. Let your guests dig in! The nachos are best enjoyed while the cheese is still warm and gooey.
Troubleshooting tip: If your nacho base feels a little dry after baking, it might be because you didn’t use enough cheese or meat. Next time, be a little more generous with those layers. Also, if you’re making a larger batch, consider baking two separate sheets of nachos instead of piling everything onto one. Overcrowding leads to uneven melting and soggy chips.
Cooking Tips & Techniques
I’ve made this board more times than I can count, and I’ve definitely learned a few things the hard way. Here are my best tips for success:
Don’t skip the parchment paper. I learned this one during a particularly ambitious Super Bowl party. The cheese will stick to the baking sheet, and scrubbing melted cheese off a pan is not how you want to spend your fourth quarter. Parchment paper makes cleanup a breeze.
Use sturdy chips. This is non-negotiable. Thin, delicate chips will break under the weight of the toppings and turn into a sad pile of crumbs. I always go for restaurant-style or scoop-shaped chips. They’re designed to hold up to heavy dips and toppings.
Layer strategically. The order matters. Meat and beans go directly on the chips, then cheese goes on top. This way, the cheese melts and acts like a glue, holding everything together. If you put the cheese on the bottom, it will just melt onto the pan and leave your toppings dry.
Bake right before serving. These nachos are best fresh out of the oven. If you bake them too early, the chips will start to soften and lose their crunch. I usually pop them in the oven right as guests are arriving, so they’re hot and ready to go when everyone is ready to eat.
Keep wet toppings separate. This is the golden rule of any nacho board. Salsa, guacamole, and sour cream should always be in separate bowls. If you pour them directly over the hot nachos, the chips will turn into a soggy mess within minutes. Let your guests add their own wet toppings so they can control the sogginess factor.
Use room temperature sour cream. Cold sour cream straight from the fridge can be a little stiff and hard to scoop. Let it sit out for 10-15 minutes before serving. It will be much easier to spread and have a better texture.
Variations & Adaptations
This board is incredibly versatile, and you can easily adapt it to fit different tastes, dietary needs, or occasions. Here are some of my favorite variations:
Vegetarian Version
Skip the meat and double up on the beans. I like to use a mix of black beans and pinto beans for different textures. You can also add roasted sweet potatoes or butternut squash for a heartier, fall-inspired version. Just cube the squash, toss it with a little oil and chili powder, and roast at 400°F (200°C) for 20 minutes before adding it to the chips.
Spicy Fiesta Board
For those who like it hot, add a layer of sliced fresh jalapeños and serrano peppers to the nachos before baking. Use a spicy pepper jack cheese instead of the Mexican blend. For the toppings, include a bowl of hot salsa and a drizzle of chipotle crema (mix 1/4 cup sour cream with 1 teaspoon adobo sauce from a can of chipotle peppers).
Breakfast Nacho Board
This is a fun twist for a brunch gathering. Replace the ground beef with crumbled breakfast sausage or bacon. Add a layer of scrambled eggs over the chips before baking. Top with a drizzle of queso or a creamy white sauce. Serve with bowls of fresh salsa, sliced avocado, and a dollop of Greek yogurt.
Smoked Brisket Nacho Board
If you have leftover smoked brisket (from a recent BBQ, perhaps?), this is a fantastic way to use it. Swap the ground beef for shredded brisket. Add a layer of pickled red onions for acidity and a bowl of smoky BBQ sauce for dipping. The combination of smoky meat, tangy onions, and creamy cheese is next-level.
I once tried a “Mediterranean” version with feta cheese, kalamata olives, and a drizzle of tzatziki sauce. It was a bit of a disaster, honestly—the flavors just didn’t mesh with the tortilla chips. Stick to the core Tex-Mex flavor profile, and you’ll be much happier with the result.
Serving & Storage Suggestions
This board is best served immediately, while the nachos are still warm and the cheese is gooey. Here’s how to make the most of it:
Serving Temperature: The nacho base should be hot from the oven, and the toppings should be at room temperature or slightly chilled. This contrast is what makes every bite exciting. I recommend setting the board out on a counter or table where everyone can gather around.
Presentation Tips: Arrange the small bowls first, then place the hot nacho base in the center. Use the lime wedges and fresh cilantro to add pops of green color. If you have extra space on the board, you can add a few whole jalapeños or a small pile of extra chips for dipping.
Complementary Dishes: This board is a meal in itself, but if you’re serving a bigger spread, it pairs beautifully with a simple side salad, a bowl of Mexican street corn salad, or a pitcher of margaritas. For a non-alcoholic option, try a big pitcher of horchata or aguas frescas.
Storage Instructions: Nachos are really best eaten fresh, but if you have leftovers, you can store them in an airtight container in the refrigerator for up to 2 days. Unfortunately, the chips will soften significantly. To reheat, spread the leftover nachos on a baking sheet and bake at 350°F (175°C) for 5-7 minutes. They won’t be as crunchy as the first time, but they’ll still be tasty. Store any leftover wet toppings separately in their own containers.
How Flavors Develop: The flavors of the meat and beans actually meld together a bit overnight, so leftover nachos (even if the chips are soft) can be surprisingly delicious. I’ve been known to eat cold leftover nacho toppings straight from the fridge as a kind of dip. No judgment here.
Nutritional Information & Benefits
This is an indulgent snack, but it does have some redeeming qualities. Here’s a rough estimate per serving (assuming 8 servings):
- Calories: Approximately 450-550 per serving
- Protein: 18-22g (from the meat, cheese, and beans)
- Fiber: 6-8g (from the beans, chips, and vegetables)
- Fat: 25-30g (from the cheese, sour cream, and avocado)
- Carbohydrates: 45-55g
Health Benefits: The black beans are a great source of plant-based protein and fiber, which helps keep you full. The avocado in the guacamole provides healthy monounsaturated fats, which are good for heart health. The tomatoes in the pico de gallo are rich in lycopene, an antioxidant. And the jalapeños contain capsaicin, which can help boost metabolism.
Dietary Considerations: This recipe can be made gluten-free by using certified gluten-free tortilla chips. It can be made vegetarian by omitting the meat and doubling the beans. For a lower-carb option, you can serve the toppings over a bed of lettuce or use cheese crisps instead of chips. Potential allergens include dairy (cheese, sour cream) and corn (tortilla chips).
Personal Note: I don’t make this board every week, but when I do, I try to balance it out with lighter meals the rest of the day. It’s all about moderation, right? Plus, the joy of sharing food with friends is good for the soul, and that counts for something.
Conclusion
This Ultimate Loaded Nacho Football Charcuterie Board is more than just a snack—it’s an experience. It’s the kind of dish that brings people together, encourages conversation, and makes any gathering feel a little more special. Whether you’re hosting a Super Bowl party, a casual get-together, or just a movie night with the family, this board is guaranteed to be a hit.
I love this recipe because it’s forgiving. You can swap ingredients, adjust the spice level, and make it your own. It doesn’t have to be perfect—it just has to be shared. So go ahead, pile on your favorite toppings, and don’t be afraid to get a little messy. That’s what game day is all about.
I’d love to hear how your board turns out! Leave a comment below and let me know what toppings you used. Did you add something unexpected? Did your guests love it? Share your photos and tag me on social media—I can’t wait to see your creations. Happy snacking!
Frequently Asked Questions
Can I make this board ahead of time?
You can prep all the components ahead of time, but I recommend baking the nacho base and assembling the board right before serving. The chips are best when they’re fresh and crunchy. You can chop the vegetables, make the guacamole, and cook the meat a day in advance. Store everything separately in the refrigerator, then assemble and bake when you’re ready.
What if I don’t have a large wooden board?
No problem! You can use a large baking sheet lined with parchment paper, a clean cutting board, or even a big serving platter. The key is to have a flat surface where you can arrange everything. If you’re using a baking sheet, you can bake the nachos directly on it and then serve from the same sheet—just add the bowls of toppings around the edges.
How do I keep the nachos from getting soggy?
The number one rule is to keep wet toppings separate. Serve salsa, guacamole, and sour cream in small bowls so guests can add them to their own portions. Also, make sure to drain any excess liquid from the pico de gallo or salsa before putting it in the bowl. And don’t overload the chips with too many heavy toppings before baking—a single layer is best.
Can I use different types of cheese?
Absolutely! A Mexican blend is classic, but you can experiment. Pepper jack adds a nice kick, sharp cheddar gives a bold flavor, or you can use a mix of Monterey Jack and Colby. For a creamier texture, you can even drizzle some queso over the top after baking. Just avoid using pre-shredded cheese that contains anti-caking agents—it doesn’t melt as smoothly.
What are the best chips to use for this board?
I highly recommend using thick, sturdy chips like Tostitos Scoops or any restaurant-style chip. They are designed to hold up to heavy toppings and dips. Avoid thin, delicate chips like Santitas or generic store brands—they will break under the weight of the meat and cheese. If you want to get fancy, you can even use homemade tortilla chips for an extra-special touch.
Pin This Recipe!
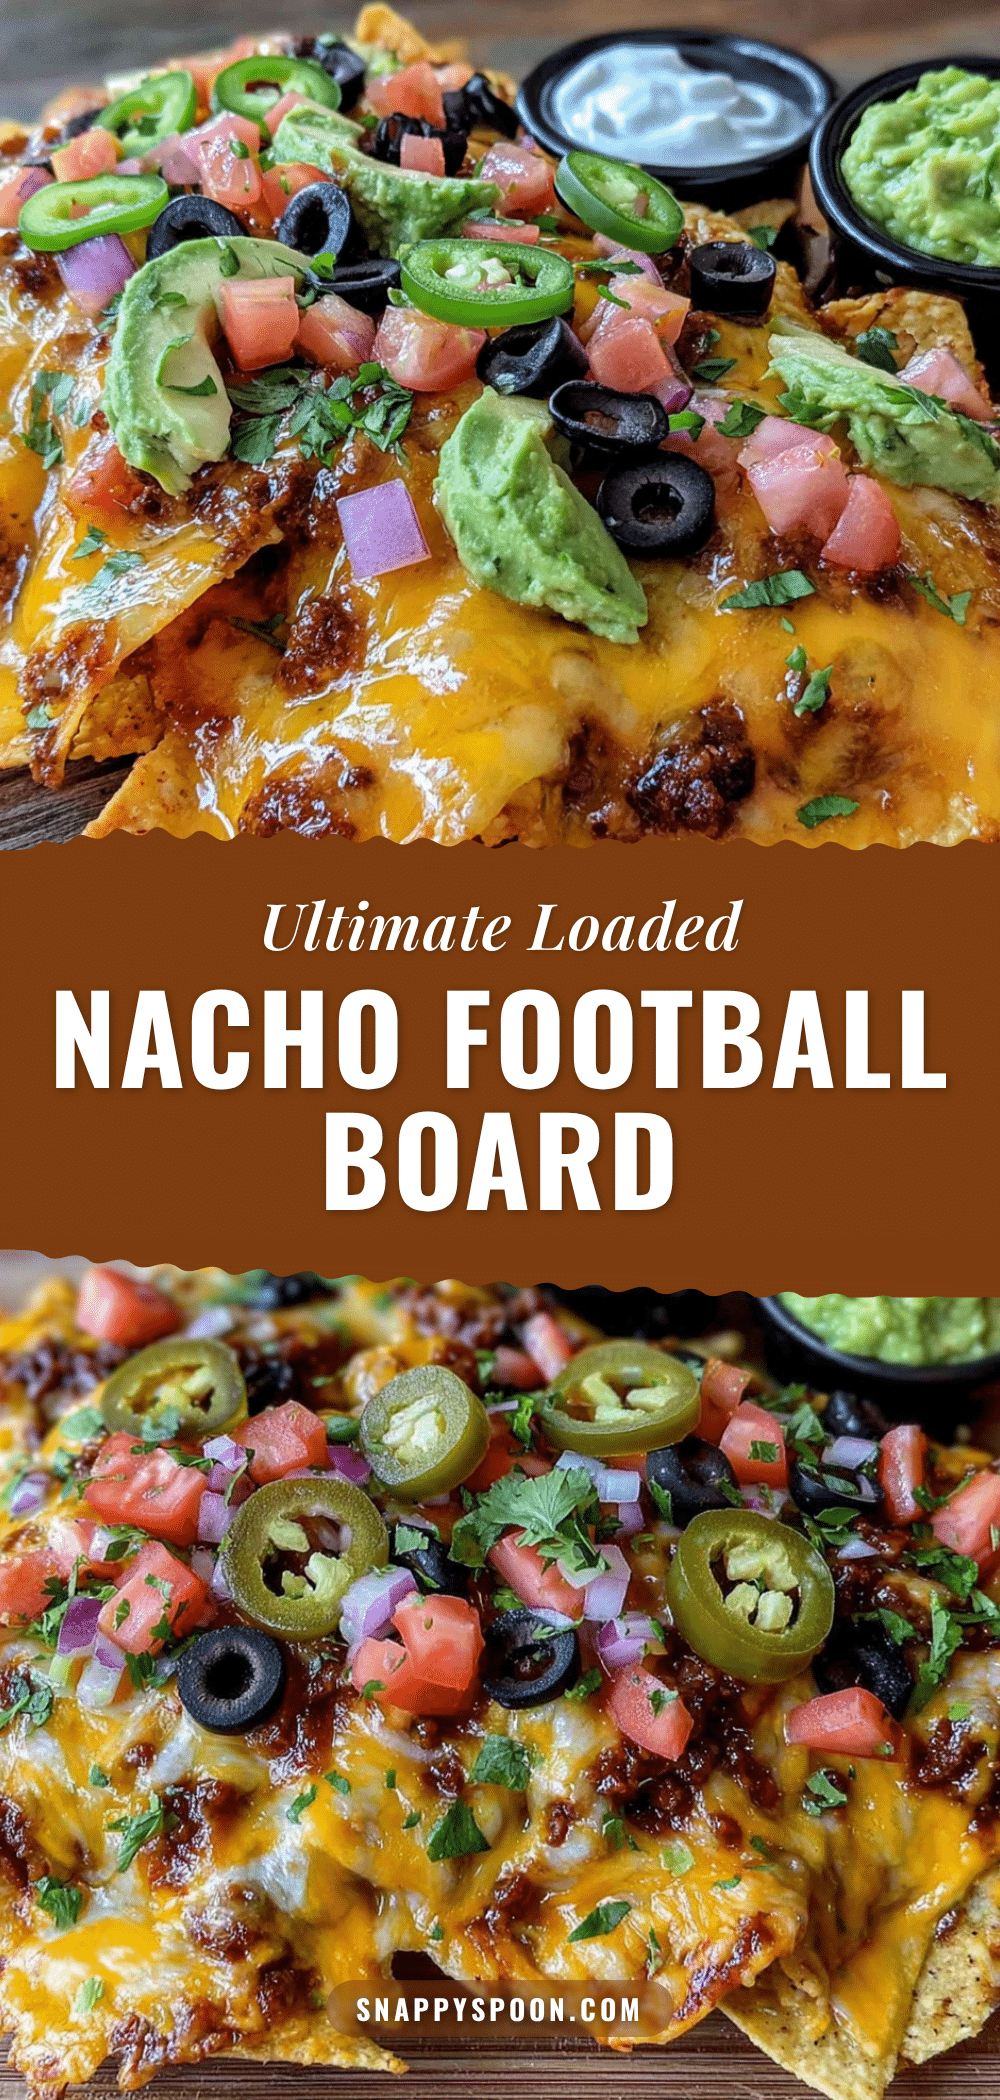
Ultimate Loaded Nacho Football Charcuterie Board
This Ultimate Loaded Nacho Football Charcuterie Board is the perfect game day snack, featuring a crispy, fully-loaded nacho base baked with cheese, meat, and beans, surrounded by bowls of fresh toppings like salsa, guacamole, and sour cream. It’s a crowd-pleasing, self-serve board that turns any gathering into a legendary event.
- Prep Time: 20 minutes
- Cook Time: 10 minutes
- Total Time: 30 minutes
- Yield: 8 servings 1x
- Category: Appetizer
- Cuisine: Tex-Mex
Ingredients
- 1 large bag (13–16 oz) restaurant-style tortilla chips (e.g., Tostitos Scoops)
- 2 cups shredded Mexican blend cheese (or a mix of cheddar and Monterey Jack)
- 1 cup cooked, seasoned ground beef or shredded chicken (or canned chili without beans)
- 1/2 cup canned black beans, drained and rinsed
- 1/4 cup pickled jalapeños, sliced
- 1 cup fresh pico de gallo or chunky salsa (drained)
- 1 cup guacamole
- 1/2 cup sour cream
- 1/2 cup black olives, sliced
- 1/4 cup fresh cilantro, chopped
- 1 lime, cut into wedges
- 1/2 cup roasted corn (optional)
- 1/4 cup crumbled cotija cheese (optional)
- 1/2 cup diced red onion (optional)
- 1 jalapeño, thinly sliced (optional)
Instructions
- Preheat your oven to 375°F (190°C). Line a large baking sheet with parchment paper.
- If using leftover taco meat or chili, warm it up in a skillet over medium heat or in the microwave. If starting from scratch, cook 1/2 pound of ground beef with 1 tablespoon of taco seasoning and 1/4 cup of water until the liquid is absorbed (about 5-7 minutes). Set aside.
- Spread the tortilla chips in a single, even layer on the prepared baking sheet, overlapping slightly but not more than two chips deep.
- Sprinkle the warm meat evenly over the chips. Then, scatter the drained black beans and pickled jalapeños over the top.
- Sprinkle the shredded Mexican blend cheese generously over the entire chip and topping mixture, ensuring every chip has some cheese.
- Bake the nacho base for 8-10 minutes, or until the cheese is fully melted and bubbly, and the edges of the chips start to turn light golden brown.
- While the nachos bake, arrange small bowls on a large wooden board or serving platter, leaving a large central space for the nacho base.
- Fill the bowls with pico de gallo or salsa, guacamole, and sour cream. If using additional toppings like roasted corn, diced red onion, or fresh jalapeño slices, place them in separate small bowls or pile them directly on the board.
- Once the nachos are out of the oven, use a large spatula to carefully transfer the entire sheet of baked nachos to the center of the board.
- Sprinkle the sliced black olives and chopped fresh cilantro over the hot nachos. Arrange the lime wedges around the edges of the board. Add any extra toppings like crumbled cotija cheese or sliced fresh jalapeño in small piles around the board.
- Serve immediately with serving spoons in each bowl and a pair of tongs near the nacho pile.
Notes
For best results, use sturdy chips like Tostitos Scoops to prevent breakage. Keep wet toppings (salsa, guacamole, sour cream) in separate bowls to avoid soggy chips. Bake the nacho base right before serving for maximum crunch. If making ahead, prep all components separately and assemble just before serving.
Nutrition
- Serving Size: 1 serving (approxima
- Calories: 500
- Sugar: 5
- Sodium: 800
- Fat: 28
- Saturated Fat: 10
- Carbohydrates: 50
- Fiber: 7
- Protein: 20
Keywords: nachos, charcuterie board, game day snack, football party, loaded nachos, easy appetizer, crowd-pleaser