Love this? Save it for later!
Share the inspiration with your friends
Introduction
“You won’t believe how simple it is to make this at home,” my friend Jenna said, sliding a bowl of banana pudding across the counter during one of our late-night catch-ups. It was a chilly Friday evening, and the soft hum of kitchen appliances mixed with the comforting aroma of vanilla and bananas. I wasn’t expecting much — I mean, banana pudding sounded basic, right? But, honestly, that first spoonful was like a little miracle: creamy, smooth, with just the right balance of sweetness and that nostalgic Southern charm you only find in a perfect Magnolia Bakery dessert.
The recipe wasn’t pulled from some fancy cookbook or a high-tech cooking show. It came from Jenna’s weekend baking experiment after spotting a “Magnolia Bakery Banana Pudding” sign on a New York food tour years ago. She’d tried dozens of versions online, tweaking this and that until she landed on this dreamy copycat version that’s easy enough for busy folks but tastes like a treat you’d order in a cozy bakery shop.
I remember the tiny mishap when she forgot to drain the pudding properly, and the whole thing turned a bit runny. Instead of tossing it out, she stirred in a little extra whipped cream, and boom — it was even better. Maybe you’ve been there, trying to salvage a “failed” dessert and ending up with a new favorite? That’s exactly why this recipe stuck with me. It’s forgiving, satisfying, and rich without being overwhelming. If you’re craving a homemade dessert that’s creamy, comforting, and downright irresistible, this Creamy Magnolia Bakery Copycat Banana Pudding recipe is one you’ll want to keep in your back pocket.
Why You’ll Love This Recipe
After testing this recipe many times (and yes, sneaking spoonfuls during each round), I can confidently say it’s got everything you want in a banana pudding dessert. Here’s why this recipe stands out:
- Quick & Easy: Ready in about 30 minutes, no lengthy chilling required, making it perfect for last-minute dessert cravings.
- Simple Ingredients: Uses pantry staples and fresh bananas — no need for fancy or hard-to-find items.
- Perfect for Gatherings: Whether it’s a picnic, potluck, or cozy family dinner, this pudding always gets rave reviews.
- Crowd-Pleaser: Kids adore it, adults can’t stop talking about it, and honestly, it’s one of those desserts that disappears fast!
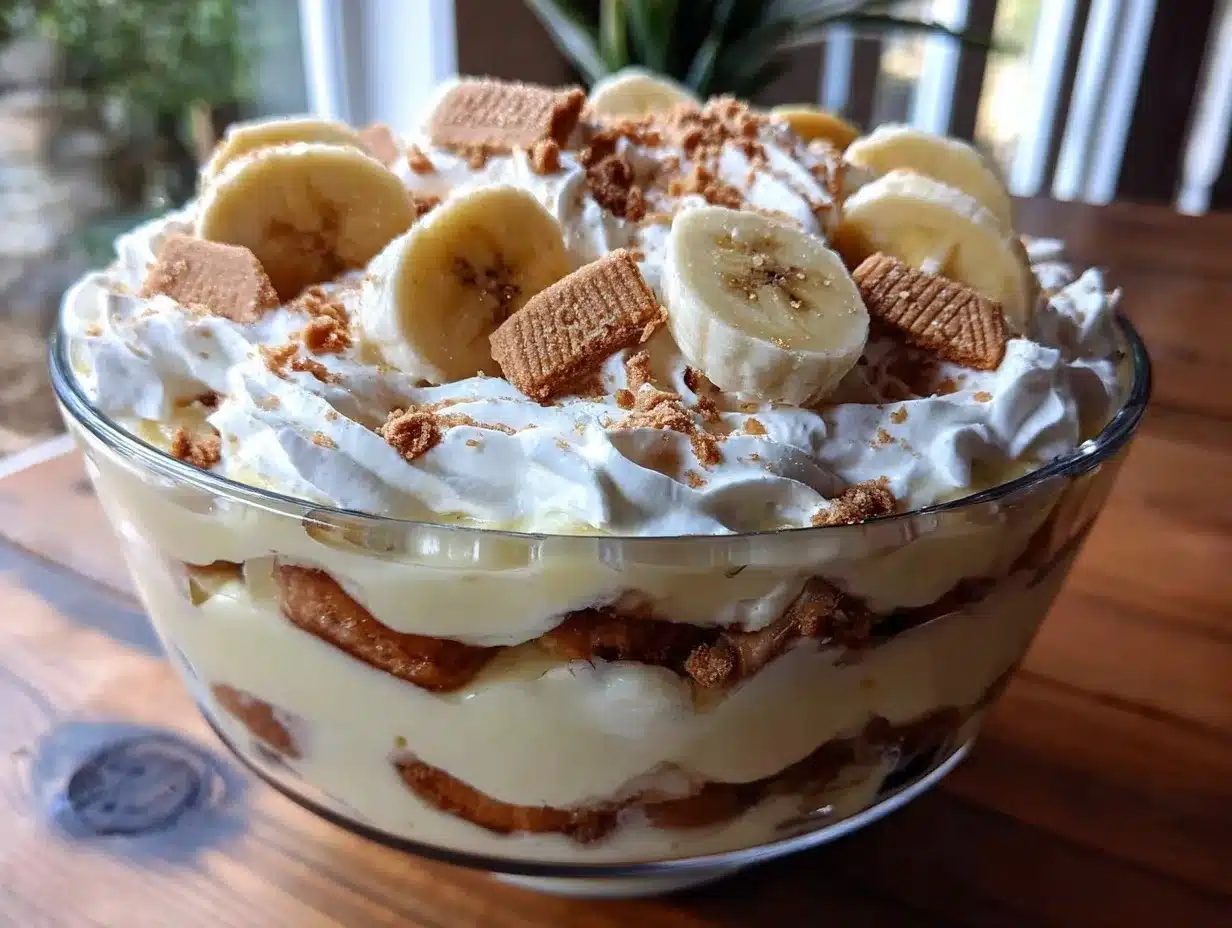
- Unbelievably Delicious: The silky custard paired with fresh banana slices and crunchy vanilla wafers creates that iconic texture combo that Magnolia Bakery fans swoon over.
This isn’t just another banana pudding recipe floating around. It’s the kind where you blend the pudding until ultra-smooth, fold in just the right amount of whipped cream for that fluffy finish, and layer with crisp wafers for a perfect bite every time. And the secret? Using whole milk and a touch of real vanilla extract to give it that deep, comforting flavor that makes you close your eyes after the first bite. I love how this recipe brings a little bakery magic right into your kitchen, without fuss or fancy tools.
What Ingredients You Will Need
This recipe relies on straightforward ingredients you probably already have, making it a no-brainer to whip up. The magic happens when these simple components come together to create creamy, dreamy banana pudding without the fuss.
- For the Pudding Base:
- 2 cups whole milk (for rich, creamy texture; you can swap for 2% but whole milk is best)
- 3/4 cup granulated sugar (balances sweetness)
- 1/3 cup all-purpose flour (helps thicken the custard)
- 1/4 teaspoon salt (enhances flavors)
- 4 large egg yolks, room temperature (adds silkiness and richness)
- 2 teaspoons pure vanilla extract (use Nielsen-Massey if you want that special touch)
- 2 tablespoons unsalted butter, softened (adds depth and smooth finish)
- For the Assembly:
- 4 to 5 ripe bananas, sliced (choose firm bananas, not overly ripe for best texture)
- 1 box (about 11 ounces) vanilla wafers (Nilla Wafers are the classic choice)
- For the Topping:
- 1 1/2 cups heavy whipping cream, chilled (to whip for light, fluffy topping)
- 2 tablespoons powdered sugar (to sweeten the whipped cream)
- 1 teaspoon vanilla extract (for flavor in the whipped cream)
Feel free to swap the all-purpose flour for cornstarch if you prefer a gluten-free thickening agent, just use about 1/4 cup cornstarch instead. For a dairy-free version, almond or oat milk works okay but the pudding won’t be quite as rich. And if you want a little extra zing, a pinch of cinnamon in the pudding base adds a subtle warmth that’s surprisingly delightful.
Equipment Needed
- Medium saucepan – for cooking the pudding base evenly without burning
- Whisk – essential for smooth custard and folding ingredients without lumps
- Mixing bowls – at least two; one for pudding and one for whipping cream
- Electric mixer or hand whisk – for whipping heavy cream to soft peaks (a stand mixer makes it easier but a strong arm works too!)
- 9×13-inch glass or ceramic baking dish – perfect for layering your pudding and wafers
- Rubber spatula – to fold whipped cream gently into the pudding
If you don’t have a whisk, a fork can suffice but expect a bit more elbow grease. Also, using a heavy-bottomed saucepan helps prevent scorching the pudding. I learned this the hard way when my first batch developed a few burnt bits on the bottom — not the end of the world, but definitely not ideal! For whipping cream, chilled bowls make a noticeable difference in how quickly it whips up, so pop your bowl in the fridge for 15 minutes before starting.
Preparation Method
- Mix Dry Ingredients: In a medium saucepan, whisk together the sugar, flour, and salt until evenly combined. This step ensures the flour doesn’t clump when you add milk. (2 minutes)
- Add Milk Gradually: Slowly pour in the whole milk while whisking constantly to keep the mixture smooth. Place the saucepan over medium heat. (3 minutes)
- Cook Until Thickened: Continue whisking as the mixture heats. After about 8-10 minutes, the custard will start to thicken and bubble gently. Don’t rush this — patience is key to avoid lumps. (8-10 minutes)
- Temper the Egg Yolks: In a separate bowl, lightly beat the egg yolks. To avoid scrambling, slowly add about 1/2 cup of the hot milk mixture into the yolks while whisking constantly. Then pour the yolk mixture back into the saucepan. (3 minutes)
- Cook Again: Return the pan to medium heat and cook for another 2 minutes, stirring constantly until the pudding thickens further and coats the back of a spoon. (2 minutes)
- Remove from Heat and Add Butter & Vanilla: Stir in the softened butter and vanilla extract until fully melted and incorporated. This step adds richness and that signature warm flavor. (1 minute)
- Cool Slightly: Transfer the pudding to a bowl and cover with plastic wrap directly on the surface to prevent a skin from forming. Let it cool to room temperature. (at least 20 minutes)
- Whip the Cream: While the pudding cools, beat the heavy cream with powdered sugar and vanilla until soft peaks form. Be careful not to overwhip or you’ll get butter! (5 minutes)
- Fold Whipped Cream into Pudding: Gently fold about half of the whipped cream into the cooled pudding for a lighter texture, saving the rest for topping. (2 minutes)
- Layer the Banana Pudding: In your baking dish, arrange a layer of vanilla wafers, then a layer of banana slices, followed by a layer of pudding mixture. Repeat until all ingredients are used, finishing with pudding on top. (5 minutes)
- Top with Whipped Cream & Wafers: Spread remaining whipped cream evenly over the top and sprinkle with a few extra vanilla wafers for crunch. (3 minutes)
- Chill Before Serving: Refrigerate for at least 2 hours to allow flavors to meld and wafers to soften slightly. Some folks like it after overnight chill for best texture. (2+ hours)
Pro tip: If your pudding seems too thick after cooling, you can stir in a splash of milk to loosen it up. Also, don’t skip the plastic wrap on the pudding surface — it really helps keep it silky smooth. I remember the first time I skipped this step, and the skin formed felt like an unwelcome surprise at serving time.
Cooking Tips & Techniques
Mastering this creamy banana pudding is all about attention to detail, especially when cooking the custard base. Here are some tips I’ve picked up:
- Constant Whisking: Stirring continuously while heating prevents lumps and scorching. I know it’s tempting to check your phone, but your pudding will thank you.
- Tempering Eggs: Slowly adding hot liquid to eggs avoids curdling. Rushing this step is a common beginner mistake and leads to scrambled eggs in your pudding (yikes!).
- Use Room Temperature Eggs: Helps them combine more smoothly with the hot mixture.
- Don’t Overwhip Cream: Stop whipping as soon as you see soft peaks. Overwhipping can turn your cream grainy and buttery.
- Layering Matters: Place wafers and bananas in even layers to get a consistent pudding experience with each bite — no one wants soggy bananas or dry wafers.
- Patience with Chilling: The pudding tastes better after some rest time. Rushing this step results in less melded flavors and a less creamy texture.
- Multitasking Tip: Whip your cream while pudding cools to save time and keep it fresh.
One time, I accidentally added all the whipped cream at once and the pudding became too loose — lesson learned! Folding it in gently and in portions keeps that perfect balance between creamy and fluffy.
Variations & Adaptations
This Creamy Magnolia Bakery Copycat Banana Pudding is versatile and easy to tweak for different preferences or dietary needs:
- Gluten-Free: Swap vanilla wafers for gluten-free cookies or crushed graham crackers.
- Dairy-Free: Use coconut milk instead of whole milk and coconut cream in place of heavy cream. The flavor profile shifts but still delicious.
- Chocolate Banana Pudding: Add a layer of mini chocolate chips or drizzle melted chocolate between the layers for a decadent twist.
- Seasonal Fruit Swap: In spring or summer, try fresh strawberries or peaches instead of bananas for a fresh take.
- Extra Crunch: Add chopped toasted pecans or walnuts on top for texture contrast.
I personally love the chocolate variation on lazy Sundays when I want something indulgent but familiar. Just a handful of chocolate chips tucked inside the layers amps up the flavor without overpowering the classic banana goodness.
Serving & Storage Suggestions
Serve this banana pudding chilled, straight from the fridge, for the creamiest texture and freshest flavor. The pudding is perfect on its own or paired with a cup of strong coffee or iced tea for a balanced dessert experience.
Leftovers can be stored in an airtight container in the refrigerator for up to 3 days. The wafers will continue to soften, making the pudding even creamier but less crunchy over time. If you like some crunch, add fresh vanilla wafers right before serving leftovers.
To reheat, gently warm small portions in the microwave for 15-20 seconds — but honestly, this pudding is best cold or at room temperature.
Flavors meld beautifully overnight, making it a great make-ahead dessert for parties or family dinners. You might find the pudding tastes even better the next day when the bananas have soaked in all that custard goodness.
Nutritional Information & Benefits
Per serving (about 1/2 cup): approximately 250 calories, 8g fat, 38g carbohydrates, 3g protein.
This dessert offers potassium and dietary fiber from bananas, which are great for heart health and digestion. Using whole milk and heavy cream adds calcium and vitamin D but also increases fat content, so it’s a treat to enjoy in moderation.
For those watching carbs, you can reduce sugar slightly or use sugar substitutes, though that may alter texture. This pudding is naturally gluten-free if you choose gluten-free cookies. Be mindful of egg allergies, as eggs are a key custard component.
From my wellness perspective, this banana pudding is a delightful way to enjoy dessert with familiar, mostly wholesome ingredients — a comforting treat that feels like a warm hug after a long day.
Conclusion
This Creamy Magnolia Bakery Copycat Banana Pudding recipe is a keeper for anyone who loves classic, comforting desserts made from scratch. It’s simple enough for a weekday treat but special enough to bring out for guests or celebrations.
Feel free to adjust sweetness, swap ingredients, or add your personal twist — cooking is all about making recipes your own. I love how this pudding brings back sweet memories of good times with friends and always sparks joy at the table.
If you decide to make it, I’d love to hear how it turns out or any fun variations you try. Don’t hesitate to share your thoughts or questions in the comments below — let’s keep the pudding conversation going!
Remember, sometimes the simplest desserts are the ones that make the biggest impact. Happy pudding making!
FAQs
What makes this banana pudding similar to Magnolia Bakery’s version?
It’s all about the creamy custard base made with whole milk and egg yolks, the folding in of whipped cream for fluffiness, and layering with vanilla wafers and fresh bananas to capture that signature texture and flavor.
Can I make this banana pudding ahead of time?
Yes! In fact, chilling it for at least 2 hours or overnight helps the flavors meld and the wafers soften perfectly. Just add extra wafers on top before serving if you want some crunch.
How do I prevent the pudding from forming a skin on top?
Pressing plastic wrap directly onto the surface of the pudding while it cools prevents a skin from forming. This little trick keeps the custard silky smooth.
Can I use instant vanilla pudding mix instead of making custard from scratch?
While it’s quicker, the homemade custard in this recipe delivers a richer, smoother texture and more authentic flavor that closely matches Magnolia Bakery’s classic banana pudding.
What can I substitute for vanilla wafers?
Gluten-free cookies, graham crackers, or even ladyfingers work well as alternatives depending on your dietary needs or personal taste.
Pin This Recipe!
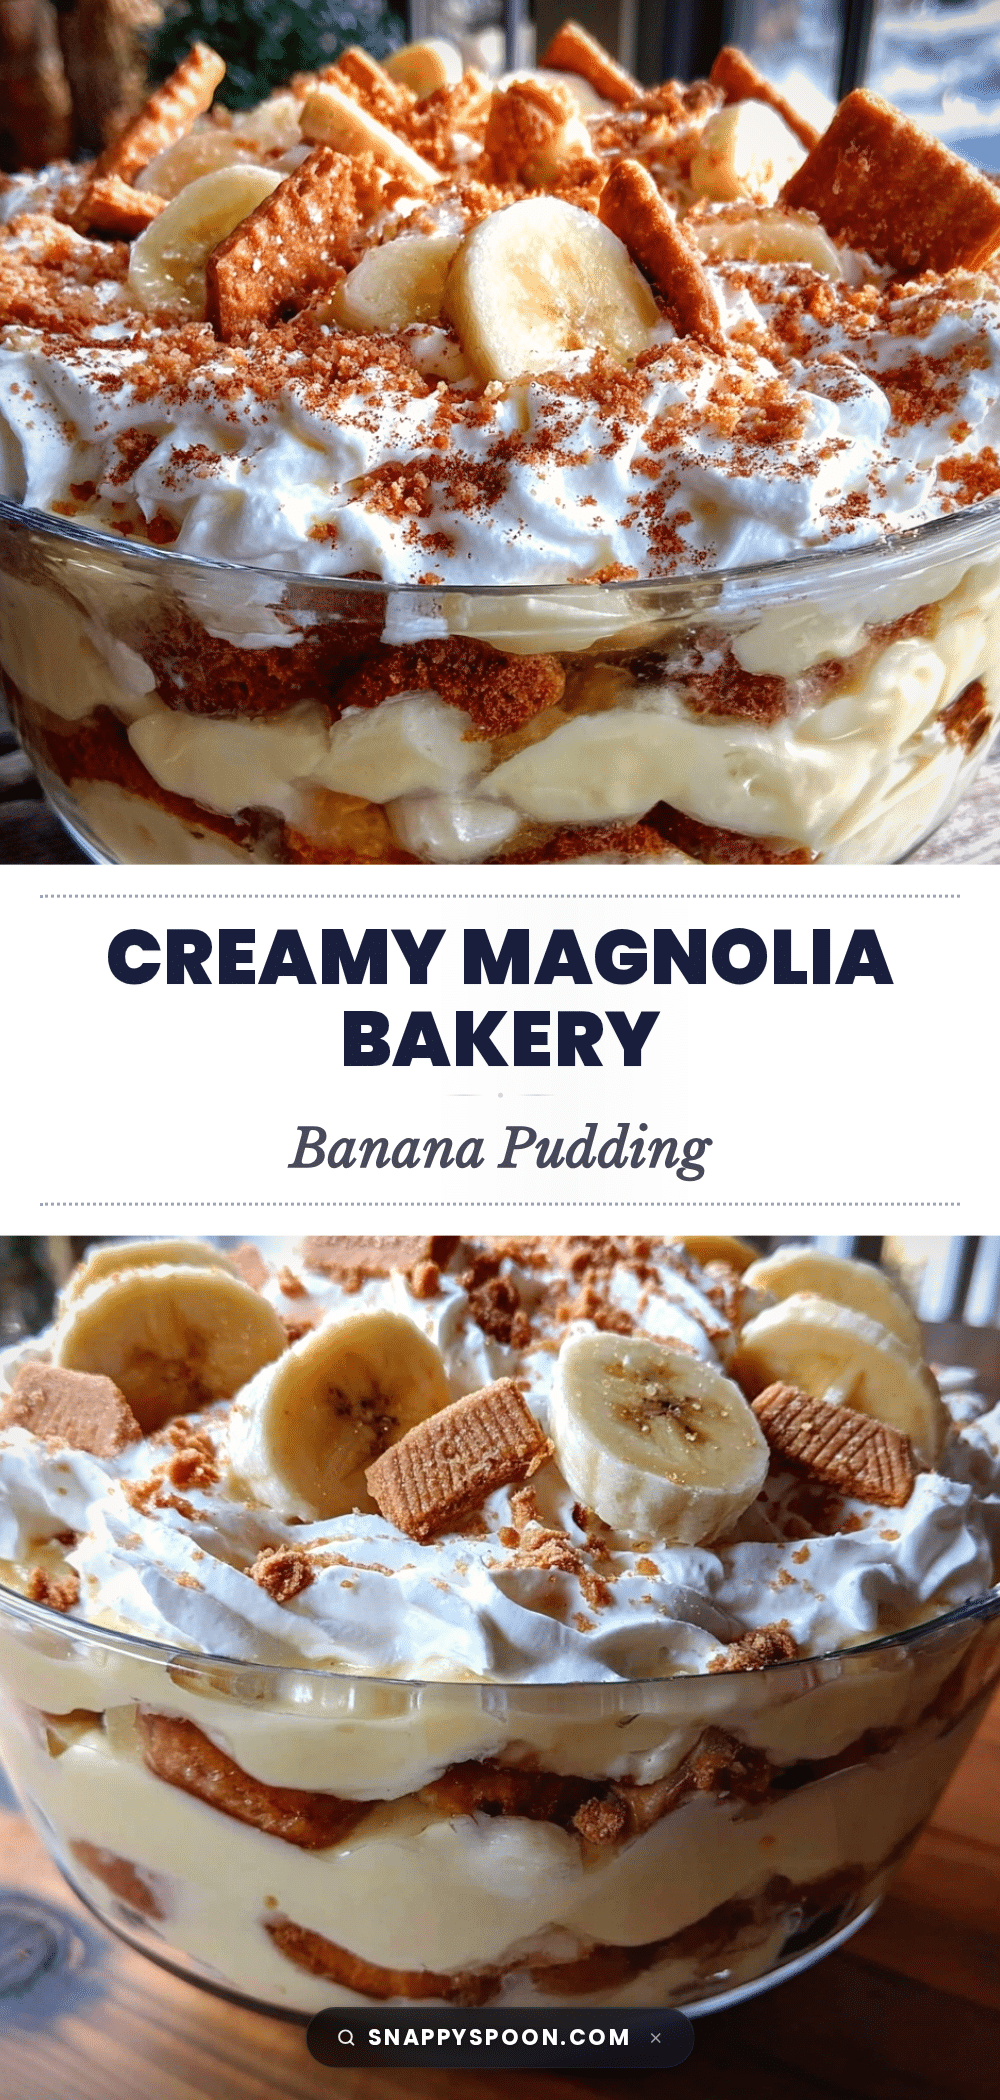
Creamy Magnolia Bakery Copycat Banana Pudding Recipe Easy Homemade Dessert
A creamy, smooth banana pudding recipe inspired by Magnolia Bakery, featuring a rich custard base, whipped cream folding, and layers of vanilla wafers and fresh bananas. Easy to make and perfect for gatherings or a comforting homemade dessert.
- Prep Time: 15 minutes
- Cook Time: 15 minutes
- Total Time: 2 hours 30 minutes
- Yield: 8 servings 1x
- Category: Dessert
- Cuisine: American
Ingredients
- 2 cups whole milk
- 3/4 cup granulated sugar
- 1/3 cup all-purpose flour
- 1/4 teaspoon salt
- 4 large egg yolks, room temperature
- 2 teaspoons pure vanilla extract
- 2 tablespoons unsalted butter, softened
- 4 to 5 ripe bananas, sliced
- 1 box (about 11 ounces) vanilla wafers
- 1 1/2 cups heavy whipping cream, chilled
- 2 tablespoons powdered sugar
- 1 teaspoon vanilla extract
Instructions
- In a medium saucepan, whisk together sugar, flour, and salt until evenly combined.
- Slowly pour in whole milk while whisking constantly to keep mixture smooth. Place saucepan over medium heat.
- Continue whisking as mixture heats until custard thickens and bubbles gently, about 8-10 minutes.
- In a separate bowl, lightly beat egg yolks. Slowly add about 1/2 cup of hot milk mixture into yolks while whisking constantly, then pour yolk mixture back into saucepan.
- Return pan to medium heat and cook for another 2 minutes, stirring constantly until pudding thickens further and coats the back of a spoon.
- Remove from heat and stir in softened butter and vanilla extract until fully melted and incorporated.
- Transfer pudding to a bowl and cover with plastic wrap directly on the surface to prevent skin from forming. Let cool to room temperature (at least 20 minutes).
- While pudding cools, beat heavy cream with powdered sugar and vanilla until soft peaks form.
- Gently fold about half of the whipped cream into the cooled pudding for lighter texture, saving the rest for topping.
- In a 9×13-inch baking dish, layer vanilla wafers, banana slices, and pudding mixture. Repeat layers, finishing with pudding on top.
- Spread remaining whipped cream evenly over the top and sprinkle with a few extra vanilla wafers.
- Refrigerate for at least 2 hours to allow flavors to meld and wafers to soften. Overnight chilling is recommended for best texture.
Notes
Use plastic wrap pressed directly on pudding surface to prevent skin formation. Whole milk is preferred for richness. You can substitute cornstarch for flour for gluten-free option. For dairy-free, use coconut milk and coconut cream. Chill pudding at least 2 hours or overnight for best flavor and texture. Fold whipped cream gently to maintain fluffiness.
Nutrition
- Serving Size: About 1/2 cup
- Calories: 250
- Sugar: 25
- Sodium: 150
- Fat: 8
- Saturated Fat: 5
- Carbohydrates: 38
- Fiber: 2
- Protein: 3
Keywords: banana pudding, Magnolia Bakery copycat, creamy dessert, homemade banana pudding, easy dessert, vanilla wafers, whipped cream, custard