Love this? Save it for later!
Share the inspiration with your friends
It was 10:47 PM on a Wednesday, and I was staring into the fridge like it held the secrets to the universe. The truth is, I was just tired. The kind of tired where even ordering takeout feels like too many decisions. I had leftover salami, a block of cheddar, and a box of crackers that were one day away from going stale. And then it hit me—not a groundbreaking thought, just a simple one. Why was I buying those overpriced plastic trays for my kid’s lunch when I could just make them myself? Honestly, I think the late hour loosened my usual rules about what counted as “real food.” I wasn’t trying to be a hero. I was just trying to get through the week without another trip to the grocery store.
I grabbed a cutting board and started slicing. The salami curled a little as it hit the knife, and the cheese broke in a few places because I was rushing. It wasn’t perfect. But as I stacked the little piles into a bento box, I realized something. This was better than the store-bought version. It had more cheese, better salami, and no weird plastic dividers. Plus, I could make three of them in the time it takes to argue with a kid about which brand to buy. Maybe you’ve been there—staring at a lunchbox and wondering how something so small costs so much. Let me tell you, this recipe changed everything for me.
I kept making them. First for the kids, then for myself on busy days when a sad desk salad wasn’t going to cut it. These Easy Mini Homemade Lunchables with Salami and Cheese became a weekly staple. They’re not fancy, and they don’t pretend to be. But they are exactly what you need when you want something quick, satisfying, and a little bit nostalgic. And honestly, that’s the kind of recipe worth keeping around.
Why You’ll Love This Recipe
Let’s be real for a second. Store-bought lunchables are convenient, but they’re also tiny, expensive, and usually leave you hungry twenty minutes later. These homemade versions solve all of that. I’ve tested this recipe more times than I can count—with different cheeses, crackers, and even meats—and it always delivers. Here’s why this version stands out:
- Quick & Easy: You can put these together in under 10 minutes. No cooking, no heating, no stress. Just slice, stack, and pack.
- Simple Ingredients: You probably already have everything in your fridge. No fancy grocery trips needed. I mean, how often does that happen?
- Perfect for Busy Days: Great for school lunches, work breaks, road trips, or even a lazy afternoon snack. They travel like a dream.
- Crowd-Pleaser: Kids love them, adults love them, and honestly, I’ve never met anyone who turned down a plate of salami and cheese crackers.
- Unbelievably Customizable: You control the portions, the quality, and the ingredients. Want extra cheese? Go for it. Prefer turkey instead of salami? Done.
What makes these different from the store-bought version is the freedom. You’re not stuck with three sad little crackers and a square of processed cheese. You get real cheese, good salami, and as many crackers as you want. Plus, the texture is way better—crunchy crackers, silky salami, and creamy cheese. It’s comfort food in its simplest form, and it never disappoints.
I’ve made these for playdates, picnics, and even as a quick dinner when I just couldn’t. Every single time, someone asks for the recipe. And the best part? There’s no real recipe to follow. It’s more of a formula, and you can tweak it however you like. That’s the kind of cooking I love—flexible, forgiving, and always delicious.
What Ingredients You Will Need
This recipe uses simple, straightforward ingredients that you can find at any grocery store. The beauty of these homemade lunchables is that you can mix and match based on what you have on hand. Here’s what I typically use:
- Salami: 8 ounces, thinly sliced. I prefer Genoa salami for its rich flavor and soft texture, but any hard salami works. Look for pre-sliced rounds to save time, or ask the deli counter for thick slices you can cut into bite-sized pieces.
- Cheddar Cheese: 6 ounces, cut into small cubes or thin slices. Sharp cheddar adds a nice tang, but mild cheddar or Colby jack are also great. I like to buy a block and cut it myself—it tastes better than pre-shredded or pre-sliced.
- Crackers: About 40-50 small crackers. Ritz, Club crackers, or any buttery round cracker works perfectly. You can also use whole wheat or gluten-free crackers if needed.
- Optional Add-ins: A handful of grapes, cherry tomatoes, pickles, or baby carrots. These add color and a fresh crunch to balance the rich salami and cheese.
For a slightly different flavor, you can swap the salami for pepperoni, turkey slices, or even ham. I’ve tried all three, and honestly, they’re all good. The key is to use thinly sliced meat that’s easy to stack on a cracker without falling apart. If you’re using a stronger cheese like aged gouda or smoked provolone, it pairs beautifully with the salty salami.
One thing I’ve learned through trial and error: don’t skip the crackers. I know that sounds obvious, but I once tried this with pita chips, and it just wasn’t the same. The buttery, slightly salty cracker is what makes the whole thing work. It’s the foundation. If you’re gluten-free, there are plenty of good cracker alternatives out there—just look for ones that are sturdy enough to hold the toppings without breaking.
Equipment Needed
You don’t need much for this recipe, which is part of why I love it. Here’s what I use:
- Cutting Board: Any size works. I prefer a wooden board because it’s gentle on knives, but plastic is fine too.
- Chef’s Knife: A sharp knife makes slicing cheese and salami much easier. If your knife is dull, you’ll end up with ragged edges and frustrated fingers.
- Bento Box or Lunch Container: I use a simple divided container with compartments. You can also use a small mason jar, a snack box, or even a plate if you’re eating at home.
- Small Cookie Cutters (optional): If you want to make the cheese into fun shapes for kids, small star or heart cutters work great. It adds a little whimsy without much effort.
I’ve made these with just a butter knife and a paper plate before, and they still turned out fine. The equipment is flexible. If you don’t have a bento box, just use whatever container you have. The important thing is that the components stay separate so the crackers don’t get soggy.
Preparation Method

Making these homemade lunchables is almost too easy. But I’ll walk you through it step by step, because sometimes the simplest things need a little guidance. Here’s how I do it:
- Prep the Cheese: Start by cutting your cheddar into small cubes or thin slices. I aim for pieces that are about 1/2 inch square—small enough to fit on a cracker but big enough to taste. If you’re using a cheese block, slice it into 1/4-inch thick slabs, then cut those into strips and finally into cubes. This takes about 2 minutes.
- Prep the Salami: If your salami is pre-sliced, you’re golden. Just separate the slices and maybe cut them in half if they’re large. If you bought a whole salami log, slice it into thin rounds—about 1/8 inch thick. You want them thin enough to bend but thick enough to hold their shape. This takes another 2 minutes.
- Arrange the Crackers: Lay out your crackers on a clean surface. I usually do about 10-12 per serving, but you can adjust based on appetite. Make sure they’re not overlapping, so they stay crispy.
- Assemble (Optional): If you’re eating immediately, you can stack the salami and cheese on the crackers right away. Layer a slice of salami, then a cube of cheese, and gently press down. If you’re packing for later, keep everything separate in a divided container to prevent sogginess.
- Pack It Up: Place the crackers in one compartment, the salami in another, and the cheese in a third. Add any optional add-ins like grapes or pickles in the remaining space. Close the lid and refrigerate until ready to eat.
- Serve: When you’re ready to eat, let the lunchable sit at room temperature for about 5 minutes. Cold cheese is fine, but it tastes creamier when it’s slightly warmed up. Then just assemble and enjoy!
A few notes from my kitchen: if you’re packing these for a school lunch, put an ice pack in the lunchbox to keep the cheese cold. And if you’re making a big batch for the week, store the components separately in airtight containers. The crackers will stay fresh for up to 5 days, the salami for about a week, and the cheese for a couple of weeks (depending on the type).
One time, I accidentally left the crackers in the same container as the salami overnight. The crackers absorbed some of the salami’s moisture and got a little soft. They were still edible, but not as crunchy. So trust me on this—keep them separate until you’re ready to eat!
Cooking Tips & Techniques
I’ve made these lunchables dozens of times, and I’ve picked up a few tricks along the way. Here are my best tips for getting it right every time:
- Use Room Temperature Cheese: Cold cheese is harder to cut and doesn’t taste as good. Let your cheese sit out for 10-15 minutes before slicing. It’ll be creamier and more flavorful.
- Slice Against the Grain: When cutting salami or cheese, slice against the grain for a more tender bite. You’ll notice the difference in texture immediately.
- Don’t Overstuff: It’s tempting to pile on the toppings, but too much salami or cheese will make the cracker break. One slice of salami and one cube of cheese per cracker is the sweet spot.
- Add a Crunch Element: I like to include a few baby carrots or celery sticks on the side. The crunch contrasts nicely with the soft cheese and chewy salami.
- Make It a Meal: Add a small fruit cup, a yogurt tube, or a handful of nuts to turn this snack into a full lunch. It’s still quick, but way more satisfying.
I once made the mistake of using pre-shredded cheese. It was dry, clumpy, and didn’t taste as good. Freshly cut cheese from a block is always better. Trust me on this one—it’s worth the extra 30 seconds.
Another tip: if you’re making these for a party or gathering, arrange them on a platter like a charcuterie board. It looks impressive, but it’s just salami, cheese, and crackers. Everyone will think you spent hours on it. You didn’t. But that’s our little secret.
Variations & Adaptations
One of the best things about this recipe is how adaptable it is. Here are some variations I’ve tried and loved:
- Turkey and Swiss: Swap the salami for oven-roasted turkey and the cheddar for Swiss cheese. It’s a lighter option that still feels indulgent. Add a smear of honey mustard for extra flavor.
- Pepperoni and Mozzarella: Use pepperoni slices and fresh mozzarella pearls. It’s like a mini pizza lunchable. Add a side of marinara sauce for dipping.
- Vegetarian Version: Skip the meat and use roasted red peppers, cucumber slices, or marinated artichoke hearts instead. Pair with a creamy cheese like brie or goat cheese.
- Gluten-Free: Use gluten-free crackers or rice cakes. Most salami and cheese are naturally gluten-free, so you just need to swap the base.
- Spicy Kick: Use spicy salami or add a few pickled jalapeños on top. The heat pairs beautifully with the cool, creamy cheese.
I tried a version with prosciutto and fresh figs once, and it was incredible. The sweet and salty combo is chef’s kiss. But honestly, the classic salami and cheddar version is still my favorite. It’s what I reach for on a busy Tuesday when I just need something good without thinking too hard.
Serving & Storage Suggestions
These lunchables are best served cold or at room temperature. I like to eat them straight from the container, but you can also arrange them on a plate for a more polished presentation. If you’re serving them at a party, fan the salami slices and arrange the cheese cubes in a neat row. It looks beautiful with minimal effort.
For storage, keep the components separate in an airtight container in the fridge. The crackers will stay fresh for up to 5 days, the salami for about a week, and the cheese for up to 2 weeks (depending on the type). If you’re packing them for lunch, assemble them just before eating to keep the crackers crunchy.
I’ve also frozen these before. The salami and cheese freeze well, but the crackers don’t. So if you’re meal prepping, freeze the meat and cheese separately, and add fresh crackers on the day you eat them. They’ll thaw in about 20 minutes at room temperature.
One thing I love about this recipe is that the flavors actually get better after a day in the fridge. The salami’s spices mellow out, and the cheese firms up nicely. It’s one of those rare snacks that tastes good fresh and even better the next day.
Nutritional Information & Benefits
Here’s an approximate nutritional breakdown for one serving (about 10 crackers with salami and cheese):
- Calories: 350-400
- Protein: 18-22g
- Fat: 24-28g
- Carbohydrates: 18-22g
- Fiber: 1-2g
- Sugar: 2-4g
The salami provides a good dose of protein and iron, while the cheese adds calcium and healthy fats. The crackers offer quick energy, making this a balanced snack that keeps you full for a few hours. If you’re watching your sodium intake, look for low-sodium salami and crackers. You can also use reduced-fat cheese to cut down on calories.
I’m not a nutritionist, but I’ve learned that this snack works well for me when I need something between meals. It’s satisfying without being heavy, and it doesn’t cause a sugar crash later. Plus, making it yourself means you control the portions and ingredients—no hidden preservatives or artificial flavors.
Conclusion
These Easy Mini Homemade Lunchables with Salami and Cheese are proof that good food doesn’t have to be complicated. They’re quick, customizable, and way better than anything you’ll find in a plastic tray at the store. Whether you’re packing a school lunch, prepping for a busy week, or just need a snack that hits the spot, this recipe delivers every time.
I love that I can make these in under 10 minutes with ingredients I already have. I love that my kids actually eat them without complaining. And I love that I feel good about what I’m feeding them—real food, no shortcuts. So go ahead and give them a try. Swap in your favorite meats and cheeses, add some fruit on the side, and make them your own. And when you do, come back and tell me about it. I’d love to hear how you made them work for your family.
Happy snacking!
Frequently Asked Questions
Can I use any type of salami for this recipe?
Yes, absolutely. Genoa salami is my go-to because of its soft texture and mild flavor, but hard salami, pepperoni, or even summer sausage work great. Just make sure it’s thinly sliced so it stacks easily on a cracker.
How long do these homemade lunchables last in the fridge?
If stored separately in airtight containers, the crackers stay fresh for up to 5 days, the salami for about a week, and the cheese for up to 2 weeks. Assemble them just before eating for the best texture.
Can I make these gluten-free?
Definitely. Just swap the crackers for your favorite gluten-free variety. Most salami and cheese are naturally gluten-free, so you only need to change the base. Rice cakes or gluten-free pretzels also work well.
What if I don’t have a bento box?
No problem at all. You can use any container with a tight-fitting lid. If it doesn’t have compartments, just layer the ingredients with a piece of parchment paper between the crackers and the moist ingredients to keep them from getting soggy.
Can I add other ingredients to these lunchables?
Absolutely. I often add grapes, cherry tomatoes, pickles, or baby carrots for extra crunch and color. You can also include a small treat like a few dark chocolate chips or a handful of nuts for a more complete snack.
Pin This Recipe!
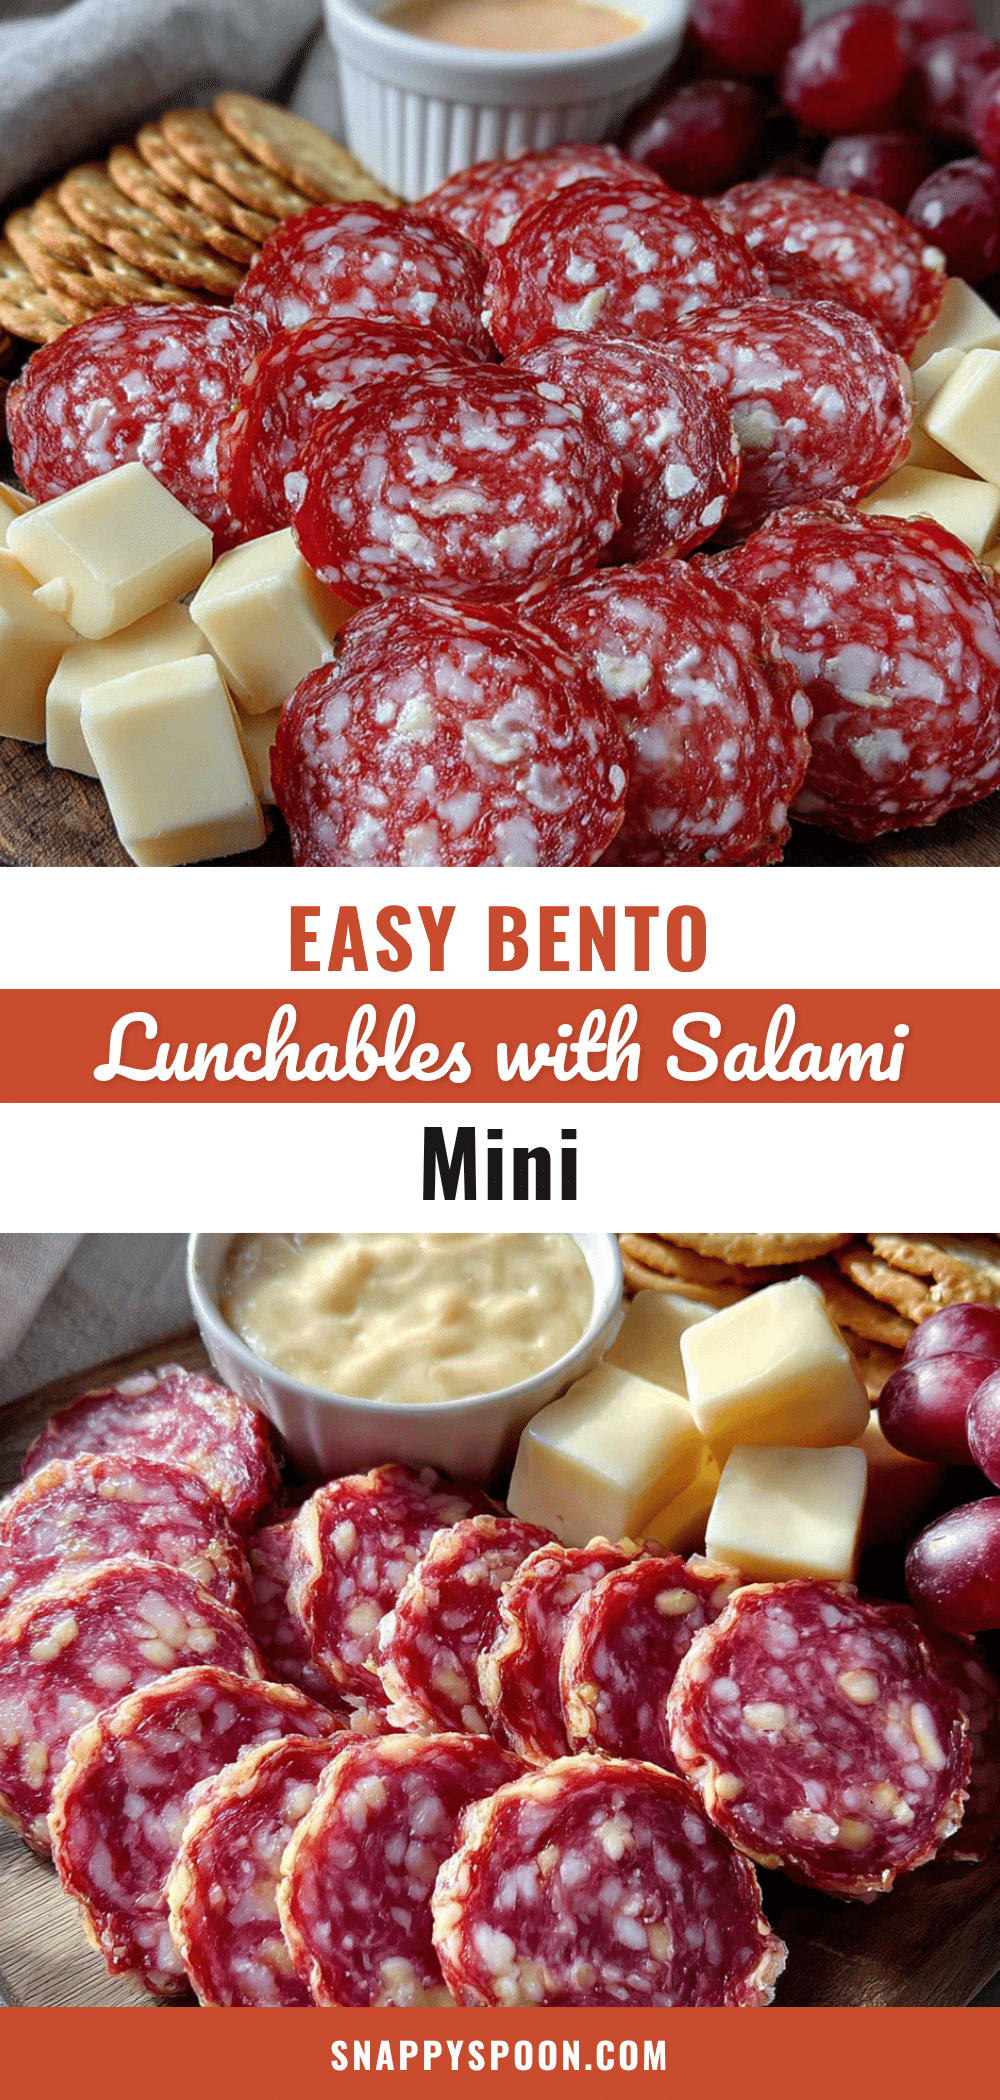
Easy Mini Homemade Lunchables with Salami and Cheese

These quick and customizable homemade lunchables are made with salami, cheddar cheese, and crackers, perfect for busy days, school lunches, or a nostalgic snack.
- Prep Time: 10 minutes
- Cook Time: 0 minutes
- Total Time: 10 minutes
- Yield: 4 servings 1x
- Category: Snack
- Cuisine: American
Ingredients
- 8 ounces salami, thinly sliced (preferably Genoa)
- 6 ounces cheddar cheese, cut into small cubes or thin slices
- 40–50 small crackers (such as Ritz or Club crackers)
- Optional: grapes, cherry tomatoes, pickles, or baby carrots
Instructions
- Prep the cheese: Cut cheddar into small cubes or thin slices, about 1/2 inch square.
- Prep the salami: If pre-sliced, separate slices; if whole, slice into thin rounds about 1/8 inch thick.
- Arrange the crackers on a clean surface, about 10-12 per serving.
- If eating immediately, stack a slice of salami and a cube of cheese on each cracker. For later, keep components separate.
- Pack in a divided container: crackers in one compartment, salami in another, cheese in a third. Add optional add-ins.
- Refrigerate until ready to eat. Let sit at room temperature for 5 minutes before serving for best flavor.
Notes
Keep crackers separate from salami and cheese until ready to eat to prevent sogginess. For school lunches, include an ice pack. For meal prep, store components separately in airtight containers. Crackers stay fresh up to 5 days, salami up to 1 week, cheese up to 2 weeks.
Nutrition
- Serving Size: 1 serving (about 10
- Calories: 375
- Sugar: 3
- Sodium: 800
- Fat: 26
- Saturated Fat: 12
- Carbohydrates: 20
- Fiber: 1.5
- Protein: 20
Keywords: homemade lunchables, salami and cheese, easy snack, school lunch, no-cook recipe, bento box