Love this? Save it for later!
Share the inspiration with your friends
This was supposed to be a quick stir-fry. I had the chicken thawed, the veggies chopped, the wok ready to go. But somewhere between grabbing the tortillas instead of the rice and realizing my teenager had eaten the last of the broccoli, the whole plan fell apart. I stood there, staring at a pile of cooked chicken strips and a stack of flour tortillas, feeling that familiar kitchen panic rise up. You know that feeling when dinner plans go sideways and you’re already running late?
Honestly, I almost just ordered pizza. But then I spotted the bag of spinach, the block of cheddar, and a lonely jar of ranch dressing in the fridge. I mean, I had the makings of a wrap, right? So I threw it all together, rolled it up tight, and called it a win. What came out was nothing like the plan—and better. My kid ate it cold the next day out of a lunchbox and actually asked for it again. That never happens.
So here we are. These high school meal-prep chicken wrap lunchboxes became my secret weapon for chaotic mornings. They take five minutes to assemble, they hold up beautifully in a lunch bag, and they don’t require any reheating. If you’ve got a teenager who won’t eat soggy sandwiches or a busy schedule that leaves zero time for fussing, this recipe might just save your sanity too.
Why You’ll Love This Recipe
Let me tell you why these wraps have earned a permanent spot in my weekly rotation. First off, they’re ridiculously fast. We’re talking five minutes from start to finish. That’s less time than it takes to argue about what’s for lunch.
- Quick & Easy: Comes together in under 5 minutes, perfect for busy school mornings or last-minute lunch packing.
- Simple Ingredients: No fancy grocery trips needed. You likely already have cooked chicken, tortillas, and a few veggies in your kitchen.
- Perfect for School Lunches: These wraps hold up for hours without getting soggy, and they taste great cold or at room temperature.
- Crowd-Pleaser: Even picky eaters love them. My neighbor’s kid traded his lunch for one of these three days in a row.
- Unbelievably Delicious: The combo of creamy ranch, crisp veggies, and tender chicken is next-level comfort food wrapped in a tortilla.
What makes this recipe different from the rest? It’s the layering technique I figured out after making about a dozen soggy wraps. I spread the dressing all the way to the edges and place the lettuce as a barrier between the wet ingredients and the tortilla. No more sad, wet wraps at lunchtime. This isn’t just another version—it’s my best version, tested by a real teenager with a critical palate.
This recipe isn’t just good—it’s the kind that makes you close your eyes after the first bite. It’s comfort food reimagined for real life: faster, simpler, but with the same soul-soothing satisfaction. Perfect for impressing your kid’s friends without stress, or turning a chaotic morning into something manageable.
What Ingredients You Will Need
This recipe uses simple, wholesome ingredients to deliver bold flavor and satisfying texture without the fuss. Most of these are pantry staples, but I’ve included notes on substitutions in case you need to swap things around.
- Cooked chicken breast: About 2 cups, shredded or diced. Rotisserie chicken works great here. I usually use leftover grilled chicken from dinner the night before.
- Large flour tortillas: 4 tortillas, burrito-sized (10 inches). I prefer Mission brand for their flexibility—they don’t crack when you roll them.
- Ranch dressing: ¼ cup. Use your favorite brand. I like Hidden Valley for that classic flavor, but homemade works too.
- Shredded cheddar cheese: ½ cup. Sharp cheddar adds more punch, but mild works fine for sensitive palates.
- Romaine lettuce: 1 cup, chopped. The key is to dry it really well after washing—wet lettuce makes wraps soggy.
- Cherry tomatoes: ½ cup, halved or quartered. You can leave these out if your kid hates tomatoes.
- Bacon bits: ¼ cup, cooked and crumbled. Real bacon bits from a bag are fine, but fresh-cooked bacon takes these over the top.
- Salt and black pepper: To taste. A pinch goes a long way.
For ingredient selection tips, look for chicken that’s moist but not watery. Dry chicken makes for a sad wrap. If you’re using rotisserie chicken, remove the skin and shred it while it’s still warm—it holds together better. For the tortillas, avoid the thin, cheap ones. They tear easily when you’re packing a lunchbox. Spend an extra dollar on good-quality tortillas; it makes a difference.
Substitution guidance: Use turkey or ham instead of chicken. Swap ranch for Caesar dressing or honey mustard if that’s what your family prefers. For a dairy-free version, use vegan cheese and a dairy-free ranch like Primal Kitchen. No lettuce? Use spinach or mixed greens. You get the idea—this recipe is forgiving.
Equipment Needed
You don’t need much for this recipe, which is part of the beauty. Here’s what I use:
- Cutting board: Any size works. I prefer a large wooden board because it doesn’t slide around.
- Chef’s knife: A sharp 8-inch knife makes quick work of chopping chicken and veggies. A dull knife is dangerous—keep it sharp.
- Mixing bowl: Medium-sized, for combining the filling ingredients. I use a glass bowl because it doesn’t stain.
- Spatula or spoon: For mixing. A rubber spatula helps scrape every bit of dressing out of the bowl.
- Plastic wrap or parchment paper: For wrapping the assembled wraps tightly before storing. Plastic wrap works best for keeping them fresh.
- Lunchbox or airtight container: To store the wraps. I use bento-style lunchboxes with compartments for keeping things separate.
If you don’t have a chef’s knife, a serrated knife works for tomatoes and lettuce. No cutting board? Use a clean plate. Honestly, I’ve made these on a paper towel in a pinch. The equipment list is short because the recipe is simple. A tip from experience: invest in a good pair of kitchen shears for cutting the wraps in half. They make cleaner cuts than a knife.
Preparation Method
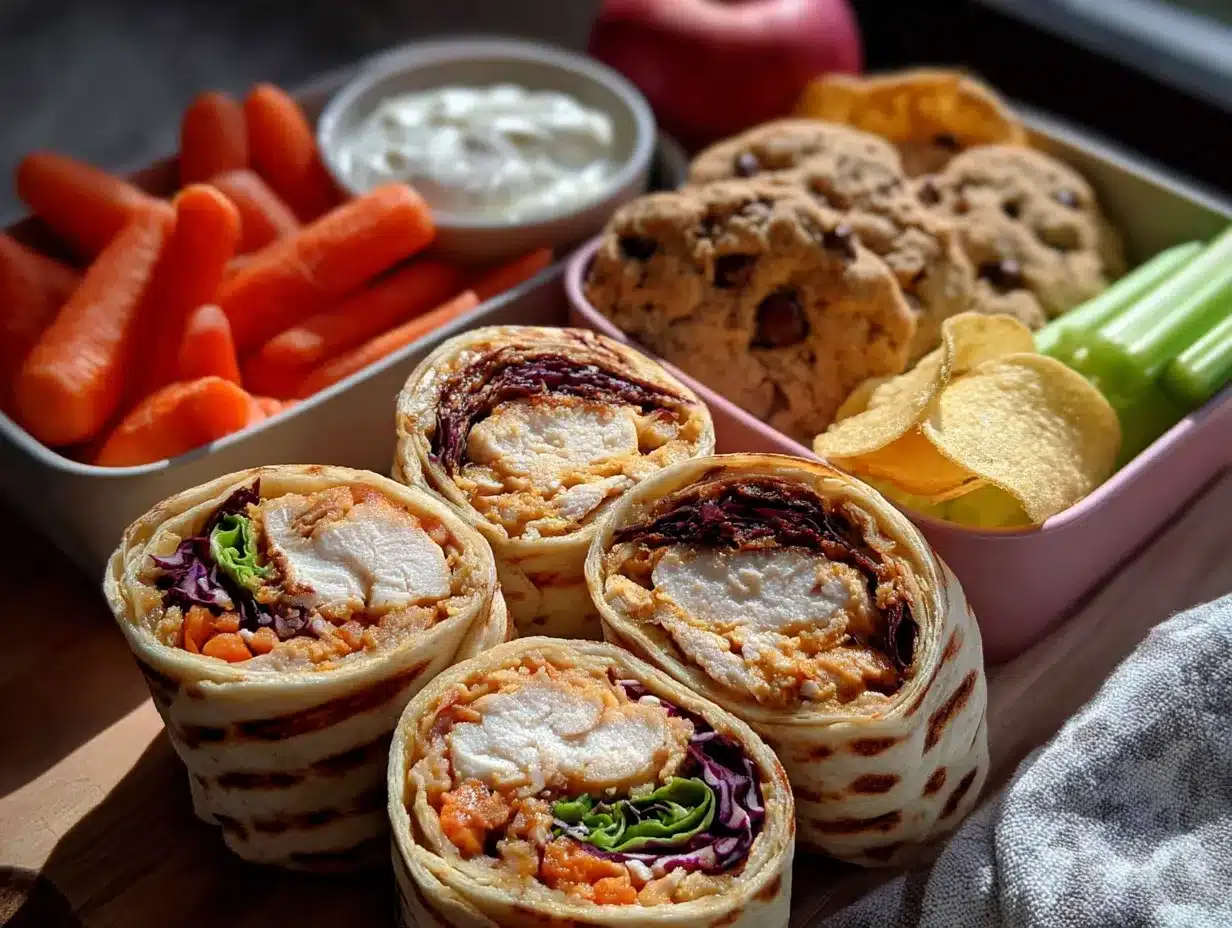
Let’s get to the good part—making these wraps. Follow these steps, and you’ll have four lunchbox-ready wraps in under five minutes.
- Prepare the chicken: If using leftover chicken, shred or dice it into bite-sized pieces. You want about 2 cups total. If using rotisserie chicken, remove the skin and shred the meat with two forks. Season lightly with salt and pepper. (Time: 1 minute)
- Mix the filling: In a medium bowl, combine the shredded chicken, ¼ cup ranch dressing, ½ cup shredded cheddar, ¼ cup bacon bits, and ½ cup halved cherry tomatoes. Stir until everything is evenly coated. Taste and adjust seasoning—add more salt or pepper if needed. (Time: 1 minute)
- Prepare the tortillas: Lay four large tortillas flat on your work surface. If they’re stiff, microwave them for 10 seconds to make them more pliable. This prevents cracking when you roll them. (Time: 15 seconds)
- Layer the lettuce: Divide 1 cup of chopped romaine lettuce evenly among the tortillas. Place the lettuce in the center, leaving about 2 inches of space at the edges. This lettuce barrier is crucial—it keeps the tortilla from getting soggy from the dressing mixture. (Time: 30 seconds)
- Add the filling: Spoon the chicken mixture on top of the lettuce. Spread it evenly, but don’t overstuff. You want about ½ cup of filling per wrap. Too much filling makes rolling difficult and messy. (Time: 30 seconds)
- Roll the wraps: Fold the sides of the tortilla inward over the filling. Then, starting from the bottom, roll the tortilla tightly away from you. Keep it snug but not so tight that the filling squishes out the ends. Place the wrap seam-side down. (Time: 1 minute per wrap)
- Wrap and store: Tightly wrap each assembled wrap in plastic wrap or parchment paper. This keeps them from drying out and helps them hold their shape. Store in the refrigerator for up to 3 days. For lunchboxes, pack them whole or slice them in half diagonally. (Time: 1 minute)
A sensory cue here: when you roll the tortilla, you should feel gentle resistance but not struggle. If the tortilla resists, you’ve overstuffed it. Unroll, remove a little filling, and try again. The finished wrap should feel firm and compact, not bulging.
Troubleshooting tip: If your wraps are coming out soggy, you’re either using too much dressing or not drying your lettuce well enough. Pat the lettuce dry with paper towels before layering. Also, don’t let the assembled wraps sit too long before wrapping them in plastic—the moisture from the filling will start seeping into the tortilla.
Cooking Tips & Techniques
Over the years, I’ve made every mistake in the book with wraps. Here’s what I’ve learned so you don’t have to repeat my failures.
Don’t overdress the filling: I once added extra ranch because I thought it would make the wrap more flavorful. Wrong. It turned the tortilla into a wet mess by lunchtime. Stick to ¼ cup of dressing for 2 cups of chicken. If you want more flavor, add extra seasoning instead.
Dry your veggies thoroughly: This is the number one cause of soggy wraps. After washing lettuce, spin it in a salad spinner or pat it dry with paper towels. Same goes for tomatoes—remove the seeds and jelly-like interior if you have time. Every bit of moisture you remove is a win for texture.
Warm the tortillas slightly: Cold tortillas straight from the fridge crack and tear. Microwave them for 10-15 seconds on a plate covered with a damp paper towel. They become flexible and easy to roll without breaking. This little step changed my wrap game completely.
Use the right rolling technique: Fold the sides in first, then roll from the bottom. Keep the roll tight but gentle. Think of it like rolling a sleeping bag—firm but not crushing. If you roll too loosely, the filling falls out when you cut the wrap.
Let the wraps rest after rolling: After wrapping in plastic, let them sit in the fridge for at least 15 minutes before slicing. This gives the tortilla time to relax and hold its shape. Slicing immediately leads to unraveling. I learned this the hard way when I tried to cut a wrap right after rolling it and ended up with a pile of ingredients on the counter.
Multitasking strategy: Make the filling while the tortillas warm. That way, everything is ready at the same time. You can also prep the filling the night before and assemble the wraps in the morning. Assembly takes less than two minutes once the filling is ready.
Variations & Adaptations
One of the best things about this recipe is how easy it is to change up. Here are some variations I’ve tried and loved.
Buffalo chicken wraps: Replace the ranch dressing with buffalo sauce and add a little blue cheese crumbles. My teenager went through a buffalo phase, and these were a hit for about three weeks straight. Use shredded rotisserie chicken and toss it in ¼ cup of buffalo sauce before assembling.
Greek-style wraps: Swap the ranch for tzatziki sauce, use feta instead of cheddar, and add cucumber slices and kalamata olives. This version feels fresher and lighter—perfect for spring lunches. I add a sprinkle of dried oregano for extra flavor.
Veggie-packed version: Add shredded carrots, sliced bell peppers, and avocado to the filling. The avocado adds creaminess without extra dressing. This is my go-to when I have random veggies in the fridge that need using up. It’s also a good way to sneak extra vegetables into lunchboxes.
Low-carb option: Use large lettuce leaves or low-carb tortillas instead of flour tortillas. The filling stays the same, but the wrap becomes much lighter. I’ve made these with butter lettuce leaves, and they hold up surprisingly well for a few hours.
Allergen substitutions: For dairy-free, use vegan cheese and dairy-free ranch. For gluten-free, choose corn tortillas or gluten-free wraps. For nut-free, this recipe is already safe—just check your ranch dressing label for any nut-based ingredients.
My personal favorite variation is the buffalo chicken version. I add a little extra bacon and a drizzle of blue cheese dressing. It’s messy but worth it. My neighbor tried it and now makes a batch every Sunday for her son’s lunches.
Serving & Storage Suggestions
These wraps are designed to be served cold or at room temperature, which makes them perfect for lunchboxes. Here’s how to get the best results.
Serving temperature: Serve cold straight from the fridge, or let them sit at room temperature for 10-15 minutes before eating. Don’t microwave them—the tortilla gets rubbery and the lettuce wilts. Trust me, I tried it once. It was not good.
Presentation ideas: Slice the wraps in half diagonally and arrange them cut-side up in a lunchbox. Add a small container of extra ranch for dipping, some baby carrots, and a piece of fruit for a complete meal. My kid loves when I pack them with a side of apple slices and a few pretzels.
Storage instructions: Keep assembled wraps tightly wrapped in plastic wrap or parchment paper in the refrigerator for up to 3 days. Do not freeze them—the lettuce and tomatoes become watery and unappetizing after thawing.
Reheating tips: Don’t reheat these. They’re meant to be eaten cold. If you want a warm wrap, assemble them fresh and heat them in a skillet for 2 minutes per side until golden. But for lunchbox purposes, cold is the way to go.
How flavors develop over time: The wraps actually taste better after a few hours in the fridge. The flavors meld together, and the dressing soaks into the chicken without making the tortilla soggy (if you used the lettuce barrier). I’ve eaten them the next day, and they were just as good as fresh. Sometimes better, honestly.
Nutritional Information & Benefits
Here’s a rough estimate per wrap (based on one wrap using the ingredients listed above):
- Calories: Approximately 380-420
- Protein: 28-32 grams
- Carbohydrates: 30-35 grams
- Fat: 16-20 grams
- Fiber: 3-4 grams
- Sugar: 3-5 grams
These numbers vary depending on the specific brands and ingredients you use. The bacon bits and ranch dressing add most of the fat, so you can reduce that by using turkey bacon and light ranch if you’re watching calories.
Health benefits: Chicken provides lean protein for sustained energy throughout the school day. Romaine lettuce offers vitamin A and K, plus hydration. Tomatoes add lycopene, an antioxidant that supports heart health. The cheese contributes calcium for growing bones. It’s a balanced meal that covers multiple food groups without being complicated.
Dietary considerations: This recipe can be made gluten-free, dairy-free, or low-carb with simple substitutions. It’s naturally nut-free, which is important for school lunch policies. I always check labels on ranch dressing and tortillas for any hidden allergens.
From a wellness perspective, I love that this recipe doesn’t require any cooking in the morning. It reduces stress and gives me a few extra minutes to drink my coffee. That mental health benefit is just as important as the nutritional one.
Conclusion
If you’re tired of the morning lunch-packing scramble, these high school meal-prep chicken wrap lunchboxes are your answer. They take five minutes, use ingredients you probably already have, and taste better than anything you’d buy pre-made. I’ve been making them for months now, and I still look forward to packing lunch—which is saying something.
Don’t be afraid to customize these wraps based on what your family likes. Swap the chicken for turkey, add different veggies, or change up the dressing. The formula is flexible, and that’s the beauty of it. You can’t really mess it up, and even if you do, it’ll probably still be edible.
I’d love to hear how these turn out for you. Drop a comment below and tell me what variations you tried—or if your teenager actually admitted they liked something you made. That’s a win worth celebrating. Happy wrapping!
Frequently Asked Questions
Can I make these wraps the night before?
Yes, absolutely. In fact, they taste better the next day. Assemble them, wrap them tightly in plastic, and store them in the fridge overnight. Just make sure the lettuce is very dry to prevent sogginess.
How long do these wraps stay fresh in the fridge?
They stay fresh for up to 3 days when wrapped properly. After that, the tortilla starts to get soft and the filling loses its texture. I recommend making only what you’ll eat within that time frame.
Can I use canned chicken instead of fresh?
You can, but I don’t recommend it. Canned chicken has a softer, mushier texture that doesn’t hold up well in wraps. Fresh or rotisserie chicken gives much better results. If you’re in a pinch, drain the canned chicken well and pat it dry before using.
What’s the best way to keep the wraps from getting soggy?
The lettuce barrier is key. Place the lettuce directly on the tortilla before adding the dressing-coated chicken. The lettuce acts as a shield, preventing moisture from reaching the tortilla. Also, dry your lettuce and tomatoes thoroughly before assembling.
Can I freeze these wraps for later?
I don’t recommend freezing them. The lettuce and tomatoes become watery and limp after thawing, and the tortilla gets gummy. If you want to meal prep for longer, freeze the chicken filling separately and assemble fresh wraps when needed.
Pin This Recipe!
High School Meal-Prep Chicken Wrap Lunchboxes

These high school meal-prep chicken wrap lunchboxes are a quick and easy 5-minute recipe perfect for busy mornings. They hold up beautifully in a lunch bag, don’t require reheating, and are a crowd-pleaser even for picky eaters.
- Prep Time: 5 minutes
- Cook Time: 0 minutes
- Total Time: 5 minutes
- Yield: 4 servings 1x
- Category: Main Course
- Cuisine: American
Ingredients
- 2 cups cooked chicken breast, shredded or diced
- 4 large flour tortillas (10-inch, burrito-sized)
- 1/4 cup ranch dressing
- 1/2 cup shredded cheddar cheese
- 1 cup romaine lettuce, chopped
- 1/2 cup cherry tomatoes, halved or quartered
- 1/4 cup bacon bits, cooked and crumbled
- Salt and black pepper to taste
Instructions
- Prepare the chicken: If using leftover chicken, shred or dice it into bite-sized pieces. You want about 2 cups total. If using rotisserie chicken, remove the skin and shred the meat with two forks. Season lightly with salt and pepper.
- Mix the filling: In a medium bowl, combine the shredded chicken, 1/4 cup ranch dressing, 1/2 cup shredded cheddar, 1/4 cup bacon bits, and 1/2 cup halved cherry tomatoes. Stir until everything is evenly coated. Taste and adjust seasoning.
- Prepare the tortillas: Lay four large tortillas flat on your work surface. If they’re stiff, microwave them for 10 seconds to make them more pliable.
- Layer the lettuce: Divide 1 cup of chopped romaine lettuce evenly among the tortillas. Place the lettuce in the center, leaving about 2 inches of space at the edges.
- Add the filling: Spoon the chicken mixture on top of the lettuce. Spread it evenly, using about 1/2 cup of filling per wrap.
- Roll the wraps: Fold the sides of the tortilla inward over the filling. Then, starting from the bottom, roll the tortilla tightly away from you. Place the wrap seam-side down.
- Wrap and store: Tightly wrap each assembled wrap in plastic wrap or parchment paper. Store in the refrigerator for up to 3 days. For lunchboxes, pack them whole or slice them in half diagonally.
Notes
The lettuce barrier is crucial to prevent sogginess. Dry lettuce and tomatoes thoroughly before assembling. Wraps taste better after a few hours in the fridge as flavors meld. Do not microwave or freeze. For best results, let wraps rest for 15 minutes after rolling before slicing.
Nutrition
- Serving Size: 1 wrap
- Calories: 400
- Sugar: 4
- Sodium: 650
- Fat: 18
- Saturated Fat: 6
- Carbohydrates: 33
- Fiber: 3.5
- Protein: 30
Keywords: chicken wraps, meal prep, lunchbox, easy recipe, 5-minute recipe, school lunch, high school lunch, chicken wrap lunchboxes