Love this? Save it for later!
Share the inspiration with your friends
The afternoon sun was blazing through my kitchen window last Tuesday when I realized my mistake. I’d promised to bring snacks for my son’s entire soccer team — that’s twelve hungry, muddy kids — and practice started in forty-five minutes. I’d completely forgotten. Everyone else would be showing up with store-bought protein bars and those little cheese cracker packs. I had a half-empty jar of peanut butter, some sad-looking oats, and a bag of chocolate chips that was mostly dust at the bottom. Honestly, I almost just grabbed my keys to run to the store. But then I remembered this recipe for easy no-bake protein balls that my friend Jenna had scribbled on a napkin months ago. I figured, what’s the worst that could happen?
I mixed everything in one bowl — which, let me tell you, is not my usual style. I’m the person who uses every dish in the kitchen for a simple sandwich. But with the clock ticking, I just threw it all together, rolled it into little balls, and tossed them in the fridge while I found my shoes. I walked into that practice feeling a little sheepish, holding a Tupperware container of what looked like toddler playdough balls. The kids devoured them in about four minutes flat. One of the dads asked for the recipe. Another mom said her picky eater never finishes snacks. She finished two. And I just stood there, covered in oat dust, thinking… maybe I’m onto something.
That’s the thing about these easy no-bake protein balls — they save you when you least expect it. They’re the recipe you pull out when you have no time, no energy, and a pantry that looks like it’s given up. Maybe you’ve been there, staring into your fridge, wondering how you’re going to feed the tiny humans (or yourself) without a full production. These little bites are the answer. I’ve been making them every week since that soccer practice, and they’ve never let me down.
Why You’ll Love This Recipe
Let me tell you why these easy no-bake protein balls have become my absolute go-to. I’ve tested a lot of snack recipes over the years — some that required soaking dates overnight, others that called for expensive protein powders you can only find online. This one is different. It’s the kind of recipe that makes you wonder why you ever bought packaged snacks in the first place.
- Quick & Easy: These come together in under 5 minutes. I’m not exaggerating. From pulling out the ingredients to having them in the fridge, you’re looking at less time than it takes to decide what to order for delivery.
- Simple Ingredients: You probably have everything in your kitchen right now. Oats, peanut butter, chocolate chips, honey — that’s it. No fancy superfood powders or trips to the specialty grocery store.
- Perfect for Busy Days: These are ideal for post-workout refueling, afternoon slumps, lunchbox surprises, or road trip snacks. They travel beautifully and don’t require refrigeration for a few hours.
- Crowd-Pleaser: I’ve served these to kids, adults, picky eaters, and health-conscious friends. Everyone loves them. They disappear faster than cookies at a bake sale.
- Unbelievably Delicious: The texture is this perfect balance of chewy oats, creamy peanut butter, and little bursts of melted chocolate. It’s comfort food that happens to be good for you.
What makes this version different from all the other protein ball recipes out there? It’s the ratio. I spent weeks tweaking the measurements to get that perfect consistency — not too dry, not too sticky, with just the right amount of sweetness. These easy no-bake protein balls hold their shape without crumbling, but they’re still soft and satisfying to bite into. No chalky texture, no weird aftertaste. Just pure, simple goodness that tastes like a treat.
This recipe isn’t just good — it’s the kind that makes you close your eyes after the first bite. It’s comfort food reimagined: healthier, faster, but with the same soul-soothing satisfaction. Perfect for impressing guests without stress, or turning a simple afternoon into something a little more special.
What Ingredients You Will Need
This recipe uses simple, wholesome ingredients to deliver bold flavor and satisfying texture without the fuss. Most of these are pantry staples, which is exactly why I love this recipe so much.
- Rolled Oats – 1 cup (90g) – Use old-fashioned rolled oats for the best texture. Quick oats work in a pinch, but they’ll make the balls a bit mushier. I prefer Quaker Old-Fashioned Oats for consistent results.
- Creamy Peanut Butter – ½ cup (130g) – Natural peanut butter works great, but make sure it’s well-stirred. If you use the kind with oil on top, your balls might be too greasy. I like Skippy Natural for the perfect balance.
- Honey – ⅓ cup (110g) – This binds everything together and adds natural sweetness. Maple syrup works as a substitute, but the balls will be slightly softer.
- Chocolate Chips – ½ cup (90g) – Semi-sweet or dark chocolate chips are my go-to. Milk chocolate makes them sweeter, which some people prefer. I use Ghirardelli 60% Cacao chips for that rich flavor.
- Ground Flaxseed – 2 tablespoons (14g) – This is optional but adds extra fiber and omega-3s. It also helps with binding. You can skip it or substitute with chia seeds.
- Vanilla Extract – 1 teaspoon – Pure vanilla extract makes a difference. The imitation stuff works, but the flavor won’t be as warm and rich.
- Pinch of Salt – ¼ teaspoon – This balances the sweetness and enhances all the flavors. Don’t skip it — it’s the secret to making these taste bakery-quality.
Substitution Notes: For a nut-free version, use sunflower seed butter instead of peanut butter. For gluten-free, make sure your oats are certified gluten-free. For vegan, swap the honey for maple syrup or agave nectar. I’ve tried all these variations, and they all work beautifully — just expect slight differences in texture.
Equipment Needed
The beauty of these easy no-bake protein balls is that you don’t need fancy equipment. Here’s what you’ll need:
- Large Mixing Bowl – Any medium-to-large bowl works. I use my grandmother’s old ceramic mixing bowl because it has the perfect depth for stirring without making a mess.
- Measuring Cups and Spoons – For accuracy. I’ve eyeballed these before, and trust me, the texture suffers. Use proper measurements for the best results.
- Rubber Spatula or Wooden Spoon – For mixing. A rubber spatula is great for scraping the sides and getting every last bit of peanut butter incorporated.
- Baking Sheet or Plate – To hold the balls while they chill. A small baking sheet lined with parchment paper works perfectly.
- Parchment Paper or Wax Paper – Optional but helpful for easy cleanup and preventing sticking.
- Cookie Scoop or Tablespoon – For uniform balls. A 1-tablespoon cookie scoop is my favorite tool here — it makes perfectly sized balls every time.
That’s it. No food processor, no stand mixer, no complicated gadgets. If you have hands and a bowl, you can make these. I’ve made them in a hotel room with a plastic cup and a fork before. It works.
Preparation Method
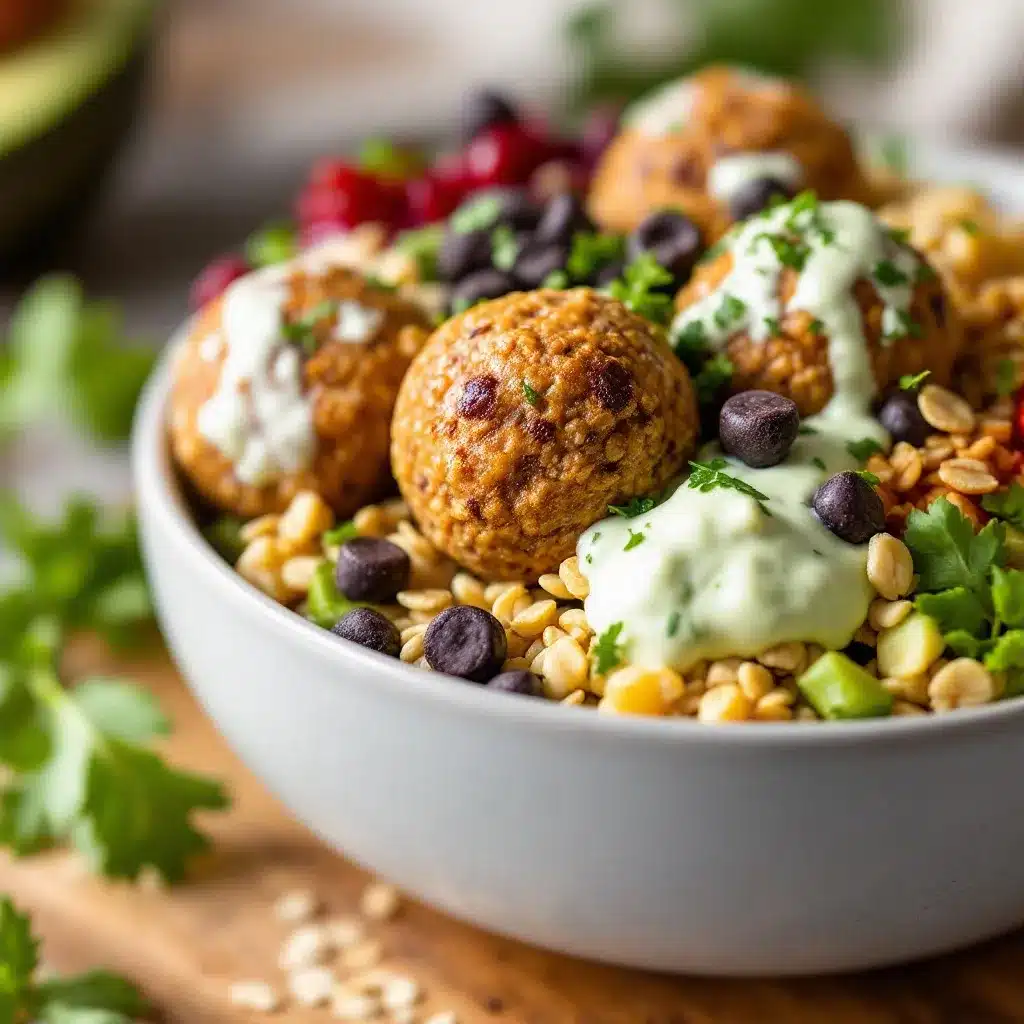
- Combine the dry ingredients. In your large mixing bowl, add 1 cup of rolled oats, 2 tablespoons of ground flaxseed (if using), and ¼ teaspoon of salt. Give it a quick stir with your spatula to distribute everything evenly. You want the flaxseed to be mixed in so you don’t get clumps later.
- Add the wet ingredients. Spoon in ½ cup of creamy peanut butter, ⅓ cup of honey, and 1 teaspoon of vanilla extract. Don’t worry if the peanut butter is a little stiff — it’ll soften as you mix. If your peanut butter has been in the fridge, let it sit out for 10 minutes first. I learned this the hard way when my first batch had cold, stubborn peanut butter that refused to incorporate.
- Mix everything together. Start stirring with your spatula, pressing the peanut butter into the oats. At first, it’ll look like a dry, crumbly mess. Keep going. Seriously, don’t give up here. After about 30 seconds of vigorous mixing, the mixture will start coming together. The oats will absorb the moisture, and the peanut butter will coat everything. You’re looking for a texture that holds together when you squeeze a bit in your hand — like slightly damp sand. If it’s too dry, add a teaspoon of honey. If it’s too sticky, add a tablespoon of oats.
- Fold in the chocolate chips. Once the base mixture is well-combined, add ½ cup of chocolate chips. Fold them in gently, making sure they’re distributed throughout. I like to save a few chips to press onto the tops of the balls for a prettier presentation — totally optional, but it makes them look like you tried harder than you did.
- Chill the mixture (optional but recommended). Pop the bowl in the fridge for 10-15 minutes. This makes the mixture easier to handle and less sticky. If you’re in a rush, you can skip this step — just expect slightly messier hands. I usually do this step because it makes rolling so much easier, and I’m a little particular about having clean hands.
- Roll into balls. Using your hands or a cookie scoop, portion out about 1 tablespoon of the mixture. Roll it between your palms to form a smooth ball. Place each ball on your parchment-lined baking sheet. You should get about 16-18 balls, depending on how generous you are with your portions. I always end up with exactly 16 because I sneak a little taste of the mixture along the way.
- Chill to set. Place the baking sheet in the refrigerator for at least 30 minutes. This allows the balls to firm up and hold their shape. If you can wait an hour, they’ll be even better. The texture really develops as they chill — the oats soften slightly, and the chocolate chips become perfectly firm.
- Enjoy! Once they’re set, these easy no-bake protein balls are ready to eat. They should be firm but still soft enough to bite into easily. If they’re too hard after chilling, let them sit at room temperature for 5 minutes before eating.
Cooking Tips & Techniques
After making these easy no-bake protein balls probably fifty times (I’ve lost count), I’ve picked up a few tricks that make a real difference. Let me share the ones that matter most.
The texture test. Before you roll all your balls, test one first. Squeeze a small amount of mixture in your hand. If it holds together without crumbling, you’re good. If it falls apart, add a little more honey or peanut butter. If it’s too sticky to handle, add more oats. This simple test has saved me from batches that would have fallen apart in the container.
Wet your hands. This is the biggest game-changer. Lightly dampen your hands before rolling each ball. The mixture won’t stick to your palms, and you’ll get smoother, more uniform balls. I keep a small bowl of water nearby and dip my fingers between each ball. It sounds fussy, but it makes the process so much more pleasant.
Don’t overmix. Once the ingredients are combined, stop mixing. Overworking the mixture can make the balls dense and tough. You want them to be tender and slightly crumbly, not like little hockey pucks. Mix just until everything comes together, then stop.
Temperature matters. If your kitchen is warm (like mine in July), the peanut butter will be softer, and the mixture will be stickier. In that case, definitely chill the mixture before rolling. In cooler weather, you can skip the chilling step entirely. I’ve learned to read the room — literally.
The chocolate chip trick. If you want those beautiful, visible chocolate chips on the outside of your balls, press a few extra chips onto the surface after rolling. This is purely aesthetic, but it makes them look so much more appetizing. I do this when I’m making them for guests or for my kid’s lunchbox.
My biggest failure. The first time I made these, I used crunchy peanut butter. Don’t do it. The nut pieces made the balls crumbly and weirdly textured. Stick with creamy. Trust me on this one — I learned the hard way while picking peanut chunks out of my teeth.
Variations & Adaptations
One of the best things about this recipe is how easy it is to change up. Here are some of my favorite variations:
Chocolate Peanut Butter Dream: Add 2 tablespoons of cocoa powder to the dry ingredients for a double-chocolate version. Reduce the oats by 2 tablespoons to keep the texture right. This is my husband’s favorite — he says they taste like brownie batter, which is basically the highest compliment he can give.
Tropical Twist: Swap the chocolate chips for ¼ cup of dried pineapple and ¼ cup of shredded coconut. Use almond butter instead of peanut butter for a different flavor profile. These are amazing in the summer when you want something lighter and fruitier.
Spiced Pumpkin: Add 2 tablespoons of pumpkin puree, ½ teaspoon of pumpkin pie spice, and reduce the honey by 1 tablespoon. Use white chocolate chips instead of dark. These are perfect for fall and taste like a healthier version of pumpkin pie.
Vegan Version: Replace honey with maple syrup or agave nectar. Make sure your chocolate chips are dairy-free (most dark chocolate chips are). The texture will be slightly softer, so you might need to chill them longer. I’ve made these for my vegan friend Sarah, and she said they’re better than the ones from her favorite cafe.
Nut-Free Option: Use sunflower seed butter instead of peanut butter. The color will be a little different (sunflower butter turns greenish when combined with baking soda, but since we’re not baking, it stays a nice tan color). These are perfect for school lunchboxes where nuts aren’t allowed.
Serving & Storage Suggestions
These easy no-bake protein balls are incredibly versatile when it comes to serving and storing. Here’s what I’ve learned:
Serving Temperature: They’re best served cold or at room temperature. Straight from the fridge, they have a firm, satisfying texture. If you leave them out for 10-15 minutes, they soften slightly and become almost fudge-like. Both are delicious — it just depends on your preference.
Presentation Ideas: For parties, arrange them on a platter with fresh berries and a drizzle of melted chocolate on top. For lunchboxes, pop a couple in a small container with an ice pack. For post-workout snacks, I like to eat them with a handful of almonds and an apple. They’re also great crumbled over yogurt or oatmeal for a quick breakfast upgrade.
Storage Instructions: Store in an airtight container in the refrigerator for up to 2 weeks. I use a glass container with a tight-fitting lid, and they stay fresh perfectly. You can also layer them between sheets of parchment paper if you’re stacking them.
Freezer Instructions: These freeze beautifully. Place the balls on a baking sheet and freeze until solid (about 1 hour), then transfer to a freezer-safe bag or container. They’ll keep for up to 3 months. To thaw, just leave them in the fridge overnight or at room temperature for 30 minutes. I always keep a batch in the freezer for emergencies — like when I forget about a school event or when I need a quick snack before a workout.
How Flavors Develop: Honestly, these get better after a day or two in the fridge. The oats absorb the moisture from the peanut butter and honey, becoming softer and more cohesive. The flavors meld together, and the chocolate chips firm up perfectly. If you can wait 24 hours before eating them, you’ll be rewarded with a much better texture. I know, waiting is hard — I struggle with it too.
Nutritional Information & Benefits
Let me break down what you’re getting in each of these little powerhouses. These values are approximate and based on making 16 balls with the standard recipe:
| Nutrient | Per Ball |
|---|---|
| Calories | 145 |
| Protein | 5g |
| Carbohydrates | 18g |
| Fiber | 3g |
| Sugar | 10g |
| Fat | 7g |
| Iron | 4% DV |
Health Benefits: The rolled oats provide slow-release energy and plenty of fiber to keep you full. Peanut butter adds healthy fats and plant-based protein — about 5 grams per ball. The flaxseed brings omega-3 fatty acids and extra fiber for digestive health. And the dark chocolate? It’s rich in antioxidants. I like to think of these as a treat that actually does something good for your body.
Dietary Considerations: This recipe is naturally vegetarian. With the substitutions I mentioned earlier, it can be made vegan, gluten-free, and nut-free. It’s also free from refined sugar if you use a natural sweetener like honey or maple syrup. Just be aware that the chocolate chips do contain some sugar — you can use sugar-free chocolate chips if that’s a concern.
Potential Allergens: Contains peanuts and oats. May contain traces of dairy, soy, and other tree nuts depending on your chocolate chip brand. Always check labels if you’re serving someone with allergies.
Conclusion
These easy no-bake protein balls have genuinely changed how I approach snacks in my house. They’ve saved me from countless hangry moments, last-minute commitments, and expensive trips to the store for packaged snacks. They’re proof that you don’t need complicated techniques or exotic ingredients to make something truly satisfying.
What I love most is how adaptable they are. You can tweak them to match your cravings, your dietary needs, or whatever you have in your pantry. They’re forgiving, reliable, and always delicious. That soccer team snack disaster turned into one of my most-used recipes, and I hope it becomes one of yours too.
I’d love to hear how yours turn out! Did you try any fun variations? Did your kids devour them like mine did? Drop a comment below and let me know. And if you have a friend who’s always scrambling for healthy snacks, share this recipe with them — they’ll thank you later. Happy rolling, friends!
Frequently Asked Questions
Can I use quick oats instead of rolled oats?
Yes, you can use quick oats, but the texture will be different. Quick oats are more finely processed, so they absorb moisture faster and create a softer, almost mushy texture. Rolled oats give you that nice chewy bite. If you only have quick oats, reduce the honey slightly since they’ll absorb less liquid.
How long do these protein balls last at room temperature?
These are best kept refrigerated, but they can sit at room temperature for up to 4-6 hours without any issues. If you’re taking them to a picnic or packing them in a lunchbox, they’ll be fine for the day. Just don’t leave them out overnight — the peanut butter can go rancid, and the texture will suffer.
Why are my protein balls too dry and crumbly?
This usually happens when the peanut butter is too thick or when you’ve added too many oats. Try adding a little more honey or peanut butter — start with 1 tablespoon and mix well. If that doesn’t help, add a teaspoon of water or milk. Also, make sure your peanut butter is well-stirred and at room temperature before starting.
Can I make these without chocolate chips?
Absolutely! You can swap the chocolate chips for dried fruit like raisins, cranberries, or chopped apricots. You can also use chopped nuts, seeds, or even shredded coconut. Just keep the total amount the same — about ½ cup — to maintain the right texture.
Are these suitable for kids to help make?
Yes, this is a perfect recipe for kids! There’s no baking or sharp knives involved. Little hands can help measure ingredients, stir the mixture, and roll the balls. Just make sure they wash their hands first and don’t eat too much of the mixture before it’s chilled (trust me, it’s tempting). My son has been helping me make these since he was three, and it’s one of our favorite kitchen activities together.
Pin This Recipe!
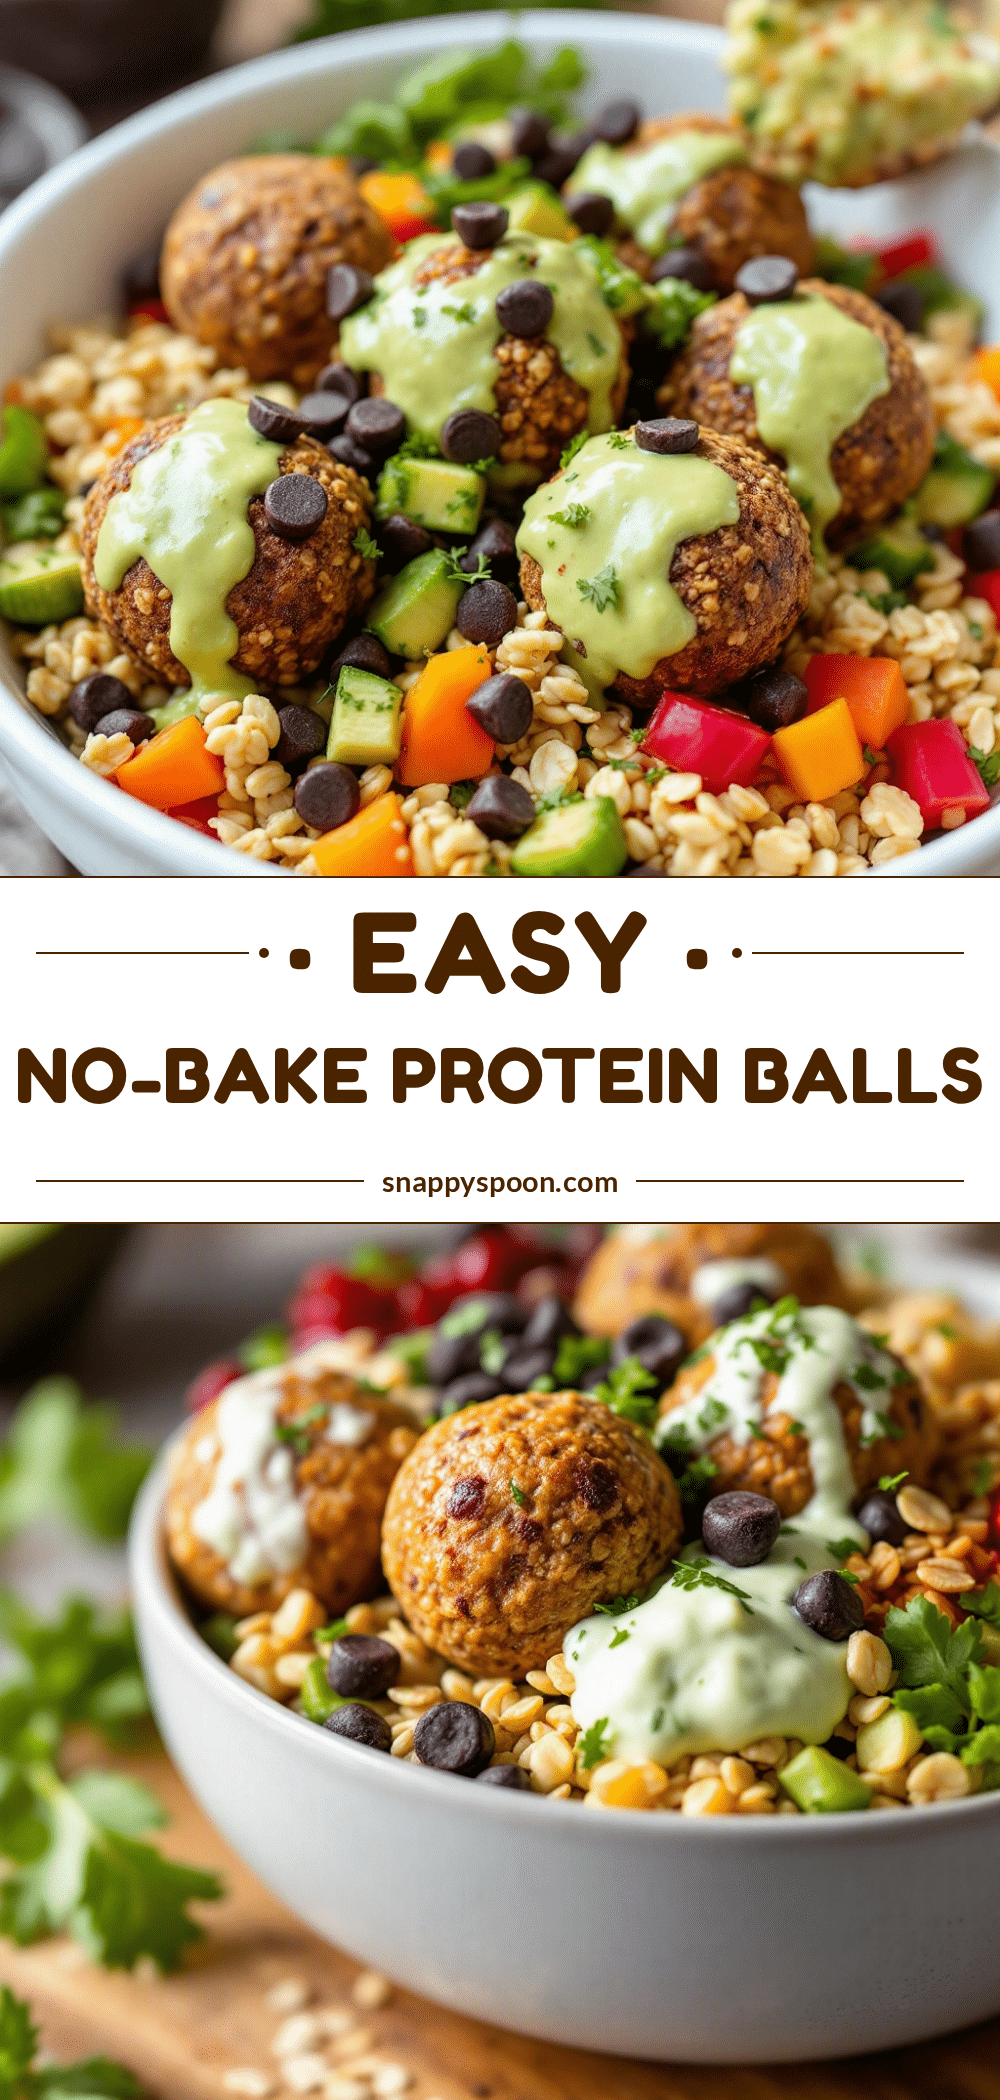
Easy No-Bake Protein Balls: Best 5-Minute Chocolate Oat Snack
These easy no-bake protein balls come together in under 5 minutes with simple pantry ingredients. Perfect for busy days, post-workout refueling, or a healthy snack that tastes like a treat.
- Prep Time: 5 minutes
- Cook Time: 0 minutes
- Total Time: 35 minutes (includes chilling)
- Yield: 16-18 balls 1x
- Category: Snack
- Cuisine: American
Ingredients
- 1 cup (90g) rolled oats
- ½ cup (130g) creamy peanut butter
- ⅓ cup (110g) honey
- ½ cup (90g) chocolate chips (semi-sweet or dark)
- 2 tablespoons (14g) ground flaxseed (optional)
- 1 teaspoon vanilla extract
- ¼ teaspoon salt
Instructions
- Combine the dry ingredients: In a large mixing bowl, add 1 cup of rolled oats, 2 tablespoons of ground flaxseed (if using), and ¼ teaspoon of salt. Stir to distribute evenly.
- Add the wet ingredients: Spoon in ½ cup of creamy peanut butter, ⅓ cup of honey, and 1 teaspoon of vanilla extract. If peanut butter is cold, let it sit out for 10 minutes first.
- Mix everything together: Stir with a spatula, pressing the peanut butter into the oats. Continue mixing for about 30 seconds until the mixture holds together when squeezed. If too dry, add a teaspoon of honey; if too sticky, add a tablespoon of oats.
- Fold in the chocolate chips: Add ½ cup of chocolate chips and fold gently until evenly distributed. Optionally, reserve a few chips to press onto the tops of the balls.
- Chill the mixture (optional but recommended): Refrigerate the bowl for 10-15 minutes to make rolling easier and less sticky.
- Roll into balls: Using your hands or a cookie scoop, portion out about 1 tablespoon of mixture and roll into smooth balls. Place on a parchment-lined baking sheet. Makes about 16-18 balls.
- Chill to set: Refrigerate the baking sheet for at least 30 minutes (or up to 1 hour) to firm up.
- Enjoy! Once set, the balls are ready to eat. If too hard after chilling, let sit at room temperature for 5 minutes before eating.
Notes
For a nut-free version, use sunflower seed butter instead of peanut butter. For gluten-free, use certified gluten-free oats. For vegan, swap honey for maple syrup or agave nectar. The texture improves after a day in the fridge. Wet your hands lightly before rolling to prevent sticking.
Nutrition
- Serving Size: 1 ball
- Calories: 145
- Sugar: 10
- Sodium: 60
- Fat: 7
- Saturated Fat: 2
- Carbohydrates: 18
- Fiber: 3
- Protein: 5
Keywords: no-bake protein balls, healthy snack, easy protein balls, chocolate oat snack, 5-minute recipe, peanut butter balls, energy balls