Love this? Save it for later!
Share the inspiration with your friends
The Pear Preserve Quest That Started with a Closed Bakery
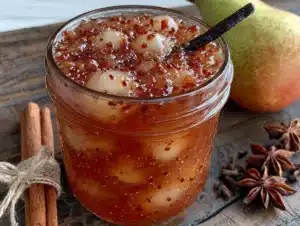
There used to be this tiny bakery in an old Victorian house on Maple Street—the kind of place where the floorboards creaked and the air always smelled like butter and sugar. They made these incredible pear preserves that I would buy by the jar and hoard in my pantry like a squirrel preparing for an endless winter. When the bakery closed its doors three years ago, I actually stood on the sidewalk feeling genuinely panicked. I mean, what was I supposed to do without their spiced vanilla pear preserves? Toast would never be the same. After twelve tries—and one particularly disastrous batch that turned into what I can only describe as pear-flavored cement—I finally cracked the code. This recipe is the result of that obsession, and honestly, it tastes even better than the original.
The first time I nailed it, I actually texted my friend Maria at 10 PM with a photo and the words “WE’RE BACK IN BUSINESS.” She thought I’d lost my mind. Maybe I had, a little. But when you spend months chasing a specific flavor memory, that first perfect spoonful feels like coming home. The pears are tender but not mushy, the vanilla is warm without being overpowering, and those spices—cinnamon, clove, and a whisper of cardamom—wrap around each other like an old married couple who still finish each other’s sentences.
I still think about that bakery sometimes. But now I don’t have to mourn their preserves anymore. I make my own, and I think the baker who used to work that creaky floor would approve. Maybe you’ve been there too—chasing a recipe from a place that no longer exists. This one’s worth the chase, I promise.
Why You’ll Love This Recipe
Let me tell you why this homemade spiced vanilla pear preserves recipe has become my most-requested canning project. I’ve tested it more times than I care to admit, and every single batch has taught me something new about getting that perfect balance of sweet, spiced, and silky.
- Simple Ingredients, Stunning Results: You don’t need a specialty grocery store for this one. Pears, sugar, a vanilla bean, and a few pantry spices are all it takes to create something that tastes like it came from a fancy farmhouse kitchen.
- Beginner-Friendly Canning: If you have never canned before, this is a forgiving recipe to start with. Pears have natural pectin, so you don’t need to mess with store-bought pectin or worry about whether your jam will set.
- Perfect for Gifting: I have lost count of how many jars I have given away as hostess gifts, holiday presents, or just because. People lose their minds over a jar of homemade preserves tied with a bit of twine.
- Incredibly Versatile: Spoon it over yogurt, spread it on buttery toast, swirl it into oatmeal, or serve it alongside a cheese board. This preserve does not discriminate—it works with everything.
- That Spiced Vanilla Magic: The combination of real vanilla bean and warm spices creates a depth of flavor that no store-bought jam can touch. It’s the kind of preserve that makes you close your eyes after the first bite.
What makes this version different from every other pear preserve recipe out there? It’s the method. I cook the pears in two stages—first with just sugar to draw out their natural juices, then with the spices and vanilla. This technique keeps the pears from turning into mush while still giving you that thick, spreadable texture. It’s not just another recipe; it’s the one I keep coming back to, and I think you will too.
What Ingredients You Will Need
This recipe uses simple, honest ingredients to create preserves that taste like autumn in a jar. Most of these are pantry staples, which makes this an easy project to tackle on a Sunday afternoon when you spot a good deal on pears at the market.
For the Preserves
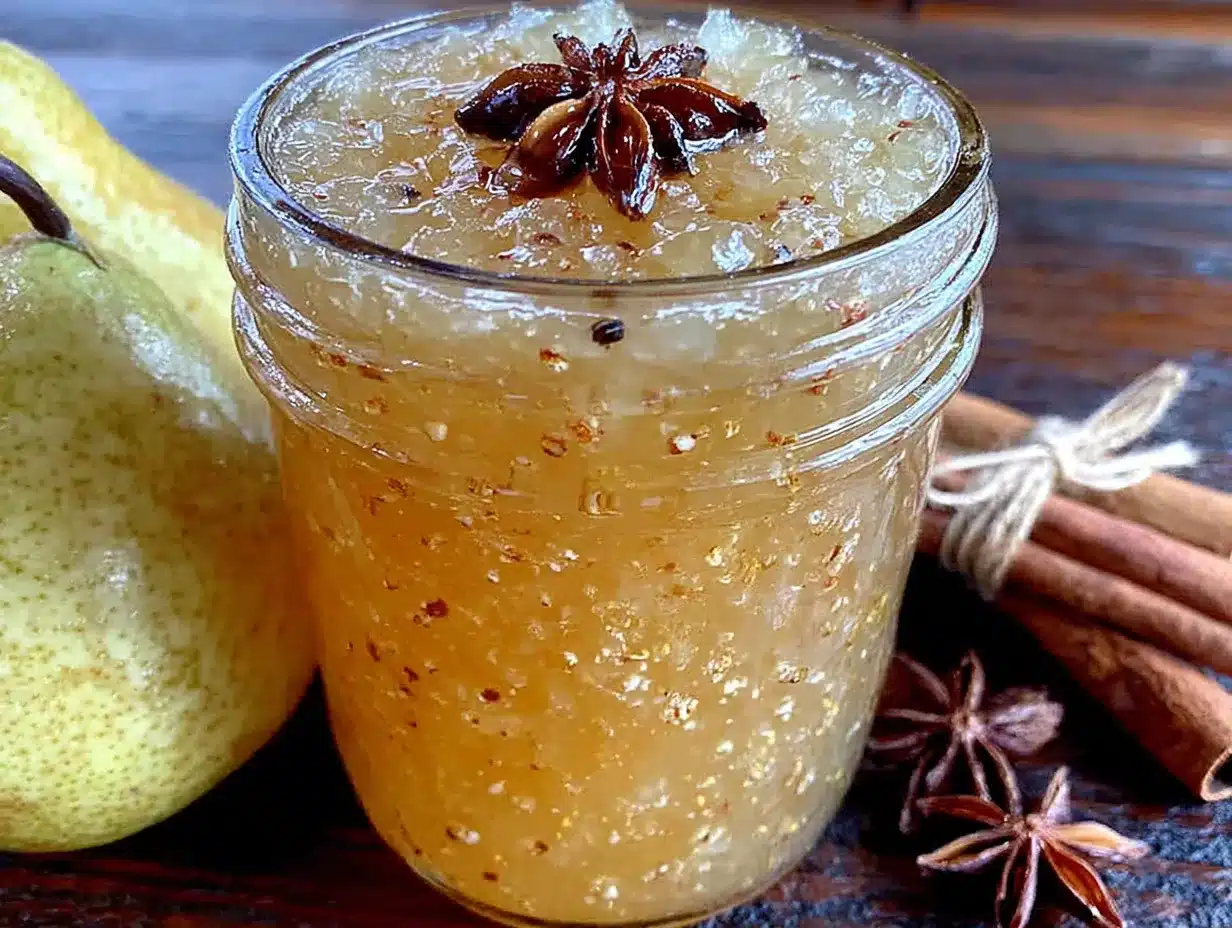
- 4 pounds ripe but firm Bartlett or Bosc pears (about 8-10 medium pears) — peeled, cored, and cut into ½-inch chunks. I prefer Bosc pears for their honeyed sweetness and firm texture that holds up well during cooking.
- 3 cups granulated sugar — this is not the time to reduce sugar, as it acts as both sweetener and preservative
- 1 vanilla bean — split lengthwise and seeds scraped out. Please don’t use vanilla extract here if you can help it; the specks of real vanilla bean make this preserve look and taste spectacular
- 2 tablespoons fresh lemon juice — this brightens the flavor and helps with the set
- 1 cinnamon stick — I recommend Ceylon cinnamon if you can find it; it’s milder and more floral than the cassia variety
- ½ teaspoon ground ginger — adds a gentle warmth without stealing the show
- ¼ teaspoon ground cardamom — trust me on this one, it’s the secret ingredient that makes people ask what’s in it
- ¼ teaspoon ground cloves — go easy here, cloves are potent and can overwhelm the delicate pear flavor
- Pinch of salt — just a tiny pinch to balance the sweetness
For Canning (if preserving)
- 4 half-pint (8 oz) canning jars with new lids and bands
- Water bath canner or large stockpot with a rack
- Canning tongs and a jar lifter — your fingers will thank you
When selecting pears for preserves, look for fruit that is ripe but still firm. If your pears are too soft, they will break down completely and you will end up with pear butter rather than preserves. If they are too hard, they won’t soften enough during cooking. The sweet spot is when the pear yields slightly to gentle pressure near the stem, like the firmness of a ripe avocado.
I usually buy my vanilla beans from a bulk spice store online—they are so much more affordable than the little jars at the grocery store, and the quality is consistently better. One bean goes a long way in this recipe, and you can rinse and dry the scraped pod to add to a jar of sugar for vanilla sugar later. Waste not, want not!
Equipment Needed
You do not need a fancy kitchen to make these preserves, but having the right tools makes the process smoother and more enjoyable. Here is what I use every time I make this recipe:
- Large heavy-bottomed pot or Dutch oven — a 6-quart pot is ideal. I use my enameled cast iron Dutch oven because it distributes heat evenly and prevents scorching
- Sharp chef’s knife and cutting board — you will be peeling and chopping a lot of pears, so a good knife makes all the difference
- Vegetable peeler — a Y-shaped peeler is my go-to for pears; it glides around the curves beautifully
- Wooden spoon or silicone spatula for stirring
- Canning funnel — not strictly necessary but saves so much mess when filling jars
- Small plate kept in the freezer — for testing the set of your preserves without wasting a spoonful
- Clean kitchen towels — for wiping jar rims and catching drips
If you do not have a water bath canner, a deep stockpot with a rack in the bottom works perfectly. I used a regular spaghetti pot with a folded kitchen towel in the bottom for years before I invested in an actual canner. The key is just keeping the jars off the direct heat of the pot bottom so they don’t crack.
Preparation Method
Making homemade spiced vanilla pear preserves is a labor of love, but the active time is shorter than you might think. Set aside about two hours from start to finish, and put on some music or a podcast—this is a kitchen project that rewards patience and attention.
- Prepare your pears (20 minutes): Wash, peel, and core all the pears. Cut them into ½-inch chunks and place them in your large pot. As you work, toss the pear pieces with the lemon juice to prevent browning. I like to work in batches, keeping the cut pears in a bowl of water with a splash of lemon juice while I finish chopping.
- Macerate the pears (30 minutes): Add the sugar to the pot with the pears and stir gently to coat every piece. Let this sit at room temperature for 30 minutes. During this time, the sugar will draw out the natural juices from the pears, creating a syrupy liquid that will help the preserves cook evenly. You will see the pears start to look glossy and the sugar will dissolve into a light syrup. This is a good time to wash your jars and get your canning station set up.
- Start cooking (15 minutes): Place the pot over medium heat and add the split vanilla bean (both the pod and the scraped seeds), the cinnamon stick, ground ginger, cardamom, cloves, and salt. Stir everything together and bring the mixture to a gentle boil. You want a steady simmer, not a furious boil—if it’s bubbling too aggressively, turn the heat down a notch.
- Simmer and stir (25-30 minutes): Continue cooking the preserves at a gentle simmer, stirring occasionally. At first, the mixture will look very liquidy, but as the pears cook and release their natural pectin, it will begin to thicken. Stir more frequently toward the end of cooking to prevent sticking on the bottom. You will notice the color deepening to a warm golden amber, and the kitchen will smell absolutely incredible—like autumn and comfort and everything good.
- Test for doneness (2 minutes): Place a small spoonful of the preserves on your frozen plate and let it sit for 30 seconds. Run your finger through the middle—if the preserves wrinkle and hold their shape without flooding back together, they are ready. If they are still runny, continue cooking for another 5 minutes and test again. I have definitely over-cooked a batch before, and let me tell you, slightly underdone is better than overdone. You can always cook it a bit more, but you cannot uncook it.
- Remove the whole spices (1 minute): Fish out the cinnamon stick and the vanilla bean pod. Give the vanilla pod a quick rinse and set it aside to dry—you can add it to a jar of sugar for vanilla-infused sugar later. Don’t throw it away!
- Fill the jars (10 minutes): If you are canning, ladle the hot preserves into your sterilized jars, leaving ¼ inch of headspace. Wipe the rims with a clean, damp towel to remove any sticky residue. Place the lids on and screw the bands until fingertip-tight—not too tight, or air bubbles cannot escape during processing.
- Process in water bath (10 minutes): Lower the filled jars into your boiling water bath canner. Make sure the water covers the jars by at least 1 inch. Process for 10 minutes (adjust for altitude if needed—add 5 minutes for every 1,000 feet above sea level). When the time is up, turn off the heat and let the jars sit in the water for 5 minutes before removing them to a towel-lined counter.
- Cool and check seals (12-24 hours): Let the jars cool completely, undisturbed, for 12 to 24 hours. You will hear the satisfying “pop” as each jar seals. After they have cooled, press the center of each lid—if it does not flex up and down, the jar is sealed. Any unsealed jars should be stored in the refrigerator and used within a few weeks.
Cooking Tips & Techniques
After making this recipe more times than I can count, I have collected a few hard-won lessons that will save you from my early mistakes. The first time I made pear preserves, I walked away from the pot to answer the phone and came back to a sticky, scorched mess that took me an hour to clean. Learn from my distraction!
Watch your heat carefully. Pears are high in natural sugar, which means they can go from perfectly thickened to burnt in about thirty seconds if you are not paying attention. I keep my burner at medium-low once the mixture reaches a boil, and I stir more frequently in the last ten minutes of cooking. If you see dark specks forming on the bottom of the pot, you have scorched it—lower the heat immediately and stir gently, scraping the bottom without disturbing the scorched bits too much.
Do not skip the maceration step. I know it feels like extra waiting time, but letting the pears sit with the sugar before cooking is non-negotiable. This step draws out the fruit’s natural juices, which means you do not need to add water. Less water means a more concentrated flavor and a better set. Plus, the gentle osmotic action helps the pears retain their shape during cooking instead of turning into mush.
Trust the frozen plate test over your timer. Every batch of fruit behaves differently depending on ripeness and variety. I have had batches that looked thick and ready at 20 minutes and others that took a full 40 minutes to reach the right consistency. The frozen plate test never lies. Keep that plate in the freezer before you even start cooking, and test every 5 minutes once the preserves start looking thick.
One mistake I made early on was using too much clove. I thought, “More spice must be better, right?” Wrong. Clove is incredibly assertive, and it completely masked the delicate flavor of the pears and the vanilla. I ended up with preserves that tasted like holiday potpourri rather than fruit. The amounts listed in this recipe are carefully balanced—trust the measurements before you go rogue with the spice jar.
Variations & Adaptations
One of the best things about this homemade spiced vanilla pear preserves recipe is how easily it adapts to different tastes and dietary needs. Here are some variations I have tried and loved:
Vanilla Bean Citrus Pear Preserves: Add the zest of one orange and one lemon along with the spices in step 3. The citrus brightens the flavor beautifully and cuts through the sweetness. I made this version last winter when I had an abundance of citrus, and it was incredible swirled into Greek yogurt.
Low-Sugar Pear Preserves: You can reduce the sugar to 2 cups if you prefer a less sweet preserve. Keep in mind that sugar acts as a preservative, so low-sugar preserves will not keep as long at room temperature. I recommend freezing these instead of water bath canning, or simply storing them in the refrigerator and using within a month.
Spiced Pear and Ginger Preserves: Add 2 tablespoons of finely minced fresh ginger along with the ground ginger. The fresh ginger adds a pleasant heat and a slightly chewy texture that I really enjoy. This version is fantastic on warm scones with clotted cream.
Alcohol-Infused Variation: Stir in 2 tablespoons of brandy or bourbon after removing the preserves from heat. The alcohol adds warmth and complexity, and it cooks off enough that you are left with just the flavor. I made a bourbon-pear batch for a holiday party and it disappeared faster than anything else on the table.
For those watching their sugar intake, you can substitute up to half the granulated sugar with a sugar substitute like allulose or monk fruit sweetener. Just note that the texture will be slightly different, and the preserves will not keep as long without traditional sugar. I have made this swap for my aunt who is diabetic, and she said it was the best low-sugar jam she had ever tasted.
Serving & Storage Suggestions
These spiced vanilla pear preserves are incredibly versatile, and I love finding new ways to enjoy them. Here are my favorite serving ideas:
On Toast or Biscuits: This is the classic application, and for good reason. Spread a generous layer on warm buttered toast, flaky biscuits, or English muffins. The preserves soften slightly from the heat of the bread, releasing all those vanilla and spice aromas.
With Cheese: Pear preserves and cheese are a match made in heaven. Serve them alongside aged cheddar, creamy brie, or tangy goat cheese. I put out a small bowl of these preserves at every cheese board I assemble, and it is always the first thing to run out.
Over Yogurt or Oatmeal: Swirl a spoonful into plain Greek yogurt or warm oatmeal for an instant upgrade to breakfast. The sweetness of the preserves means you can skip additional sweetener in your oatmeal entirely.
As a Glaze for Meat: Warm a few tablespoons of preserves with a splash of balsamic vinegar and brush it over roasted pork loin or chicken thighs during the last 10 minutes of cooking. The sweet-spiced glaze caramelizes beautifully and adds incredible flavor.
Storage Instructions: Sealed jars of properly canned preserves will keep in a cool, dark pantry for up to 18 months. Once opened, store the jar in the refrigerator and use within 3 weeks. If you prefer not to can, you can store the preserves in the refrigerator for up to 3 months or freeze them in freezer-safe containers for up to a year. I actually prefer the texture of thawed preserves—they seem to become even more luscious after freezing.
The flavors in these preserves continue to develop over the first week after cooking. I have noticed that the vanilla becomes more pronounced and the spices meld together more harmoniously after a few days of resting. If you can resist the temptation, let your jars sit for at least a week before opening them.
Nutritional Information & Benefits
While preserves are certainly a treat, pears themselves offer some lovely nutritional benefits. A 2-tablespoon serving of these spiced vanilla pear preserves contains approximately 60 calories, 15 grams of carbohydrates (mostly from natural fruit sugars), and no fat or protein.
Health Highlights:
- Pears are rich in fiber, particularly when you include the skins (though we peel them here for texture). One medium pear provides about 6 grams of fiber, which supports digestive health.
- Vanilla contains small amounts of antioxidants and has been traditionally used for its calming properties. I cannot promise that these preserves will reduce your stress, but the act of making them certainly does for me.
- Cinnamon and ginger both have anti-inflammatory properties and may help with blood sugar regulation. The amounts used in preserves are small, but every little bit helps.
- This recipe is naturally gluten-free, dairy-free, and vegan, making it accessible for many dietary needs.
I like to think of these preserves as a way to preserve the best of pear season and enjoy it throughout the year. Yes, there is sugar involved, but a tablespoon of something this special on your morning toast feels like a small act of self-care rather than an indulgence.
Frequently Asked Questions
Can I use canned pears instead of fresh?
I would not recommend it. Canned pears are already cooked and packed in syrup, which throws off the sugar-to-fruit ratio and results in a watery, poorly set preserve. Fresh pears give you control over the texture and sweetness, and they have more natural pectin for a better set.
Why did my preserves turn out too runny?
This usually happens when the pears were not cooked long enough to release their pectin, or when the fruit was too ripe and broke down too quickly. Next time, cook the preserves a bit longer and use the frozen plate test before you decide they are done. You can also add a tablespoon of lemon juice to help activate the pectin.
Do I really need a vanilla bean, or can I use extract?
You can use 1 tablespoon of vanilla extract added at the very end of cooking, but the flavor will not be as deep or complex. The vanilla bean adds those beautiful black specks that make the preserves look gorgeous, and the flavor is noticeably more aromatic. Save your extract for baking and splurge on a bean for this recipe.
How do I know if my jars are properly sealed?
After the jars have cooled completely, press down on the center of each lid. If it does not pop up and down, the jar is sealed. You can also remove the band and gently lift the jar by the lid—if the lid holds firm, you have a good seal. Any jars that did not seal should be stored in the refrigerator and used within a few weeks.
Can I double this recipe?
Absolutely, but do not use a pot that is too small. The preserves need room to bubble without boiling over, and a larger volume takes longer to cook. I would not recommend tripling or quadrupling the recipe unless you have a very large pot and a lot of patience. Stick with doubling for your first large batch.
Conclusion
These homemade spiced vanilla pear preserves have become a staple in my kitchen, and I hope they find a permanent spot in yours too. There is something deeply satisfying about opening a jar in the middle of winter and tasting the sweetness of autumn pears, warm vanilla, and gentle spices. It is like capturing a perfect fall afternoon in a jar and saving it for when you need it most.
I love that this recipe is forgiving enough for beginners but rewarding enough for experienced canners. Whether you are making it for the first time or the fiftieth, there is always that moment when you taste the finished preserves and think, “Yes, that is exactly right.” That moment never gets old for me.
I would love to hear how your batch turns out! Did you try any variations? Did you give jars as gifts? Drop a comment below and let me know—I read every single one, and your stories and questions help me keep creating recipes that work for real people in real kitchens. Happy preserving, friends!
Pin This Recipe!
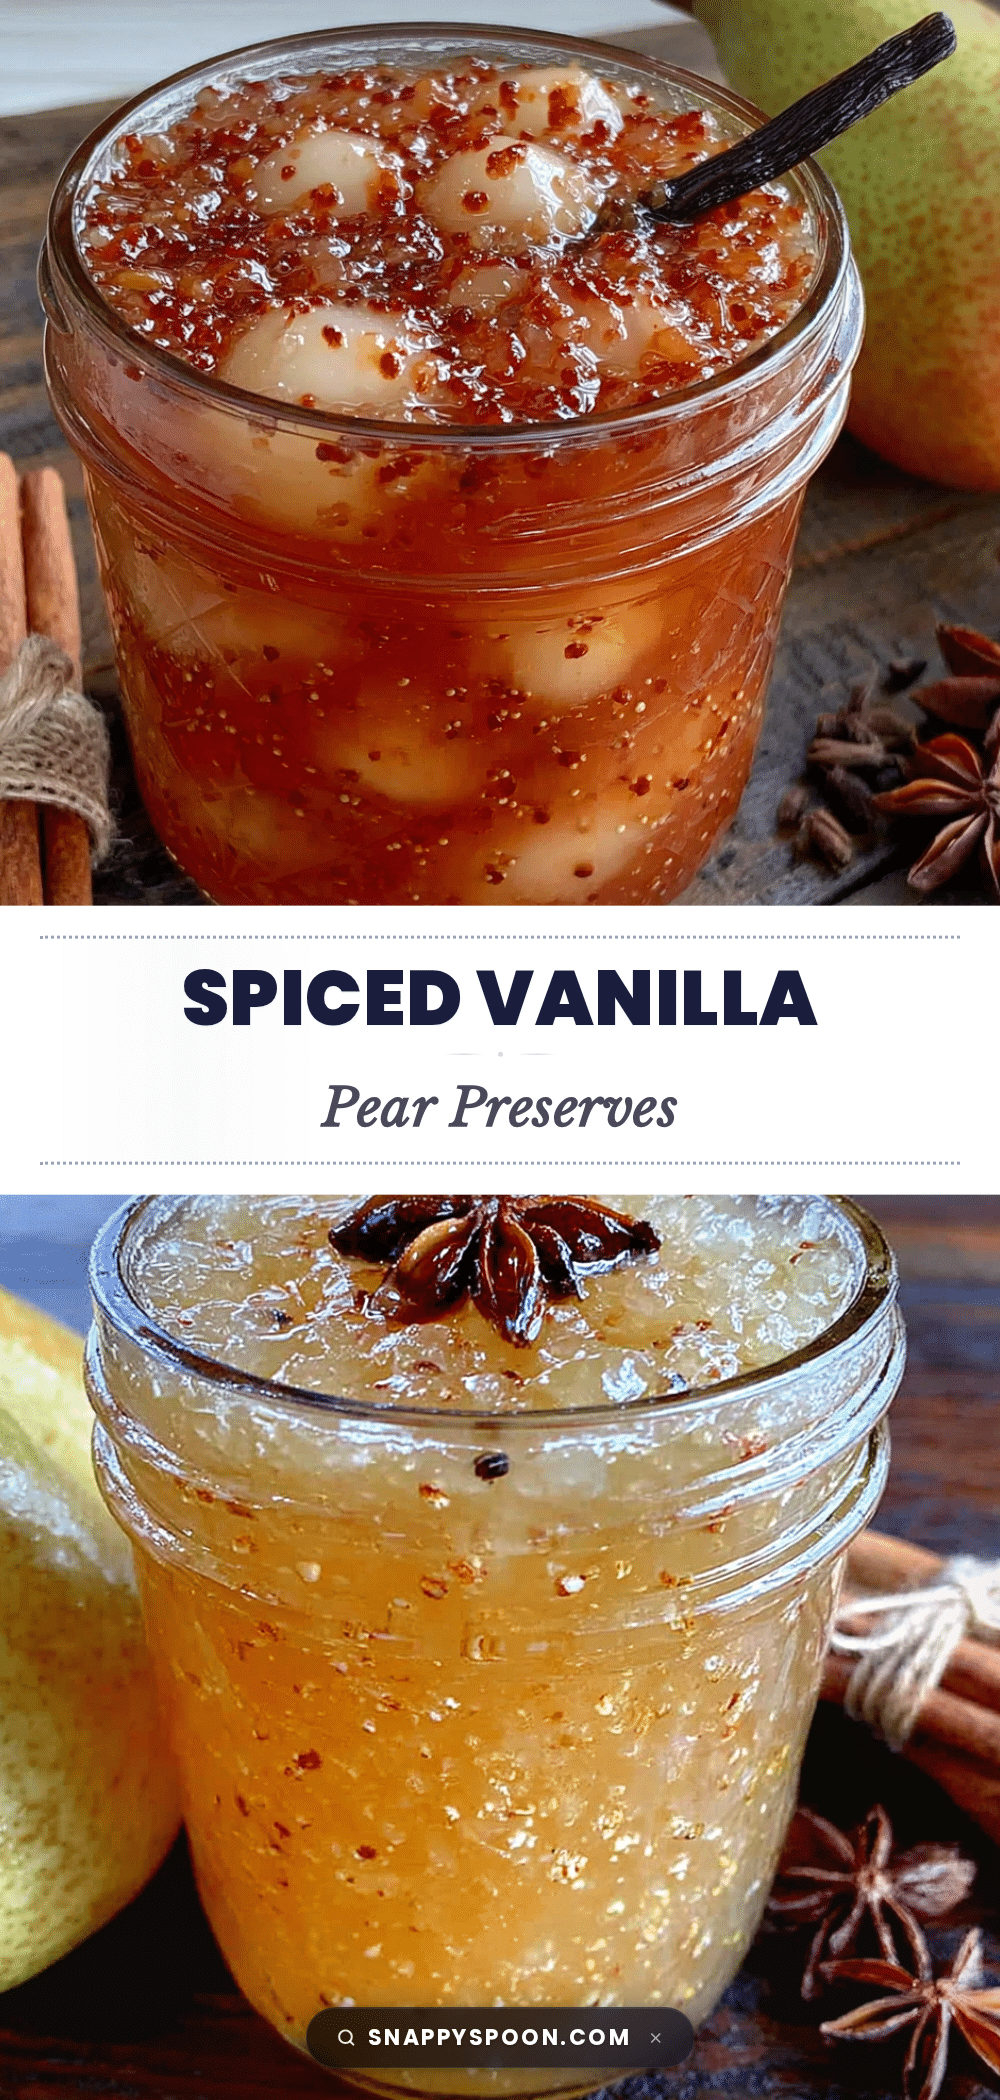
Homemade Spiced Vanilla Pear Preserves – Easy Canning Recipe
These homemade spiced vanilla pear preserves are a perfect balance of sweet, spiced, and silky, made with simple ingredients and beginner-friendly canning techniques. They’re incredibly versatile for gifting, spreading on toast, or serving with cheese.
- Prep Time: 20 minutes
- Cook Time: 30 minutes
- Total Time: 2 hours
- Yield: 4 half-pint jars (about 4 cups) 1x
- Category: Preserves
- Cuisine: American
Ingredients
- 4 pounds ripe but firm Bartlett or Bosc pears (about 8–10 medium pears), peeled, cored, and cut into ½-inch chunks
- 3 cups granulated sugar
- 1 vanilla bean, split lengthwise and seeds scraped out
- 2 tablespoons fresh lemon juice
- 1 cinnamon stick (preferably Ceylon cinnamon)
- ½ teaspoon ground ginger
- ¼ teaspoon ground cardamom
- ¼ teaspoon ground cloves
- Pinch of salt
- 4 half-pint (8 oz) canning jars with new lids and bands (for canning)
- Water bath canner or large stockpot with a rack (for canning)
- Canning tongs and a jar lifter (for canning)
Instructions
- Prepare your pears (20 minutes): Wash, peel, and core all the pears. Cut them into ½-inch chunks and place them in your large pot. As you work, toss the pear pieces with the lemon juice to prevent browning. Work in batches, keeping the cut pears in a bowl of water with a splash of lemon juice while you finish chopping.
- Macerate the pears (30 minutes): Add the sugar to the pot with the pears and stir gently to coat every piece. Let this sit at room temperature for 30 minutes. During this time, the sugar will draw out the natural juices from the pears, creating a syrupy liquid. Wash your jars and set up your canning station during this time.
- Start cooking (15 minutes): Place the pot over medium heat and add the split vanilla bean (both the pod and the scraped seeds), the cinnamon stick, ground ginger, cardamom, cloves, and salt. Stir everything together and bring the mixture to a gentle boil. Maintain a steady simmer, not a furious boil.
- Simmer and stir (25-30 minutes): Continue cooking the preserves at a gentle simmer, stirring occasionally. At first, the mixture will look very liquidy, but as the pears cook and release their natural pectin, it will begin to thicken. Stir more frequently toward the end of cooking to prevent sticking. The color will deepen to a warm golden amber.
- Test for doneness (2 minutes): Place a small spoonful of the preserves on a frozen plate and let it sit for 30 seconds. Run your finger through the middle—if the preserves wrinkle and hold their shape without flooding back together, they are ready. If still runny, continue cooking for another 5 minutes and test again.
- Remove the whole spices (1 minute): Fish out the cinnamon stick and the vanilla bean pod. Rinse the vanilla pod and set it aside to dry for making vanilla sugar later.
- Fill the jars (10 minutes): If canning, ladle the hot preserves into your sterilized jars, leaving ¼ inch of headspace. Wipe the rims with a clean, damp towel. Place the lids on and screw the bands until fingertip-tight.
- Process in water bath (10 minutes): Lower the filled jars into your boiling water bath canner. Ensure water covers the jars by at least 1 inch. Process for 10 minutes (adjust for altitude if needed—add 5 minutes for every 1,000 feet above sea level). Turn off heat and let jars sit in water for 5 minutes before removing to a towel-lined counter.
- Cool and check seals (12-24 hours): Let the jars cool completely, undisturbed, for 12 to 24 hours. You will hear the satisfying ‘pop’ as each jar seals. After cooling, press the center of each lid—if it does not flex up and down, the jar is sealed. Store any unsealed jars in the refrigerator and use within a few weeks.
Notes
Do not skip the maceration step; it draws out natural juices for better flavor and set. Watch heat carefully to avoid scorching. Trust the frozen plate test over your timer. Use a vanilla bean for best flavor and appearance. Let jars rest for at least a week before opening for best flavor development.
Nutrition
- Serving Size: 2 tablespoons
- Calories: 60
- Sugar: 14
- Carbohydrates: 15
Keywords: pear preserves, spiced vanilla pear preserves, homemade preserves, canning recipe, pear jam, vanilla bean preserves, easy canning, fall preserves