Love this? Save it for later!
Share the inspiration with your friends
There used to be a tiny bakery tucked between a vintage bookstore and a laundromat in my old neighborhood that made the most incredible pumpkin cinnamon rolls. When they closed their doors three years ago—just a handwritten sign taped to the window saying “Thank you for the sweet years”—I honestly felt a little lost. I mean, those rolls were my autumn ritual. After 12 attempts—some burnt, some doughy, one that my husband politely called “aggressively dense”—I finally got it.
The secret wasn’t just pumpkin. It was the way the dough felt like velvet after the right amount of kneading, the way the cinnamon filling melted into every crevice, and that maple glaze that pooled in the center like liquid gold. I stood in my kitchen on a rainy Tuesday, flour on my glasses, and took a bite of the final version. You know that feeling when something tastes exactly like a memory? That was it. Maybe you’ve been there—chasing a flavor from a place that no longer exists. This one’s for you.
Why You’ll Love This Recipe
These aren’t just cinnamon rolls. They’re the kind of baked good that makes people linger at the kitchen counter, reaching for “just one more.” Let me break down why this recipe works so well:
- Quick & Easy: Despite how impressive they look, these come together in about 2 hours total. The dough rises fast thanks to the yeast and warm pumpkin puree.
- Simple Ingredients: No weird additives or hard-to-find items. Pumpkin puree, butter, cinnamon, flour—you probably have most of this already.
- Perfect for Fall Mornings: These scream cozy weekends, Thanksgiving brunch, or that first crisp day when you need something warm in your hands.
- Crowd-Pleaser: I’ve brought these to three different gatherings and watched them disappear within minutes. Kids love them. Adults pretend to share.
- Unbelievably Delicious: The texture is pillowy with a slight density from the pumpkin, and the maple glaze adds that sweet finish without being cloying.
What makes this version different from every other pumpkin cinnamon roll recipe out there is the dough technique. I spent weeks testing different hydration levels, and the sweet spot involves a tangzhong-style starter that keeps these rolls soft for days. Not dry. Not gummy. Just perfectly tender.
Honestly, this recipe is the one that makes you close your eyes after the first bite. It’s comfort food reimagined—familiar but better, with that homemade warmth that no bakery can quite replicate.
What Ingredients You Will Need
This recipe uses simple, wholesome ingredients to deliver bold flavor and satisfying texture without the fuss. Most of these are pantry staples, especially if you’re a fall baker like me.
For the Dough
- 3 ½ cups all-purpose flour (plus extra for dusting) — I prefer King Arthur Flour for consistent results
- 1 cup pumpkin puree (not pumpkin pie filling) — Libby’s works great, or homemade if you’re ambitious
- ½ cup whole milk, warm (about 110°F) — you can use 2% but whole milk gives richer dough
- ¼ cup granulated sugar
- ¼ cup unsalted butter, melted and slightly cooled
- 1 large egg, room temperature
- 2 ¼ teaspoons active dry yeast (one packet) — I’ve used Red Star for years
- 1 teaspoon salt
- 1 teaspoon pumpkin pie spice — or make your own with cinnamon, nutmeg, ginger, and cloves
For the Filling
- ½ cup unsalted butter, very soft but not melted
- ¾ cup packed brown sugar — light or dark, dark gives deeper flavor
- 2 tablespoons ground cinnamon — don’t skimp here, this is the star
- 1 teaspoon pumpkin pie spice
- Pinch of salt
For the Maple Glaze
- 1 ½ cups powdered sugar, sifted
- 3 tablespoons pure maple syrup — please don’t use pancake syrup, it’s not the same
- 2 tablespoons heavy cream — or milk if that’s what you have
- ½ teaspoon vanilla extract
- Pinch of salt — it balances the sweetness
For the pumpkin puree, make sure you’re getting pure pumpkin and not pumpkin pie filling. The filling has added sugar and spices that will throw off the dough. If you’re using homemade puree, drain it a bit in a cheesecloth to remove excess moisture—wet dough is a nightmare to work with, trust me on this one.
Equipment Needed
You don’t need a professional bakery setup for these rolls, but a few key tools make the process smoother:
- Stand mixer with dough hook — this is my preferred method because the dough is slightly sticky and hand-kneading can get messy. A KitchenAid or similar works beautifully.
- 9×13-inch baking dish — glass or ceramic works best for even heat distribution
- Rolling pin — a standard one, nothing fancy
- Sharp knife or bench scraper — for clean cuts through the rolled dough
- Large mixing bowls — at least two
- Clean kitchen towel — for covering the dough while it rises
- Parchment paper — optional but makes cleanup so much easier
- Cooling rack — for letting the rolls cool before glazing
If you don’t have a stand mixer, you can absolutely knead by hand. It’ll take about 10 minutes of solid work, and your arms will feel it, but the dough will be just as good. I actually prefer hand-kneading sometimes—it’s meditative, you know?
Preparation Method
Alright, let’s get into the good stuff. Take your time with these steps, and don’t rush the rising process. Good things, and all that.
- Activate the yeast. In a small bowl, combine the warm milk (about 110°F—warm but not hot) with 1 tablespoon of the sugar and the yeast. Let it sit for 5-7 minutes until it becomes foamy. If it doesn’t foam, your yeast might be dead. Start over with fresh yeast. I learned this the hard way after an hour of waiting for nothing.
- Mix the dough. In the bowl of your stand mixer, combine the flour, remaining sugar, salt, and pumpkin pie spice. Add the pumpkin puree, melted butter, egg, and the yeast mixture. Mix on low speed with the dough hook until a shaggy dough forms, about 2 minutes.
- Knead the dough. Increase speed to medium-low and knead for 6-8 minutes. The dough should be smooth, slightly tacky but not sticky. If it’s too sticky, add flour 1 tablespoon at a time. Too dry? Add milk 1 teaspoon at a time. You’re looking for that “earlobe” texture—soft and pliable.
- First rise. Shape the dough into a ball and place it in a lightly greased bowl. Cover with a clean kitchen towel and let it rise in a warm, draft-free place for 1 to 1.5 hours, or until doubled in size. I usually put it in my oven with the light on—perfect temperature every time.
- Make the filling. While the dough rises, mix the softened butter, brown sugar, cinnamon, pumpkin pie spice, and salt in a small bowl. It should be spreadable like a paste. Set aside at room temperature.
- Roll out the dough. Once risen, punch the dough down gently and turn it onto a lightly floured surface. Roll it into a 12×18-inch rectangle. Don’t stress about perfect edges—rustic is fine. The dough should be about ¼-inch thick.
- Spread the filling. Using an offset spatula or the back of a spoon, spread the cinnamon filling evenly over the dough, leaving a ½-inch border on one long edge. This bare edge will help seal the roll.
- Roll it up. Starting from the long edge opposite the bare border, roll the dough tightly into a log. Use gentle, even pressure. The seam should be on the bottom. Pinch the seam to seal it.
- Cut the rolls. Using a sharp knife or bench scraper, cut the log into 12 equal pieces, about 1.5 inches each. I like to mark my cuts first with a small notch, then slice through cleanly. Don’t saw back and forth—it squishes the dough.
- Second rise. Place the rolls in a greased 9×13-inch baking dish, cut side up. They should be touching but not crammed. Cover and let rise for another 30-45 minutes, until puffy and nearly doubled.
- Bake. Preheat your oven to 350°F. Bake the rolls for 22-27 minutes, until golden brown on top. The internal temperature should reach 190°F if you want to be precise. Mine usually take exactly 24 minutes, but ovens vary.
- Make the glaze. While the rolls bake, whisk together the powdered sugar, maple syrup, heavy cream, vanilla, and salt. It should be thick but pourable. Add more cream if needed, 1 teaspoon at a time.
- Glaze and serve. Let the rolls cool for 5-10 minutes in the pan, then drizzle the glaze over the top. The heat will help it melt into all the crevices. Serve warm for the best experience.
Cooking Tips & Techniques
I’ve made these rolls more times than I care to count, and I’ve learned a few things along the way. Here’s what I wish someone had told me sooner:
Temperature matters more than you think. Your milk should be warm, not hot—110°F is the sweet spot. Too hot and you’ll kill the yeast. Too cold and it won’t activate. I use a thermometer because I’ve guessed wrong too many times.
Don’t over-flour your surface. The dough should be tacky but not sticky. If you dump too much flour on your board, the rolls turn out dense. Use just enough to prevent sticking, and use a bench scraper to lift the dough if needed.
Cut with confidence. When slicing the rolls, use a sharp knife and one clean motion. If you saw back and forth, you’ll smash the spiral and the rolls won’t look as pretty. A piece of unflavored dental floss works surprisingly well too—slide it under the log, cross the ends over the top, and pull.
The tangzhong trick. If you want even softer rolls that stay fresh for days, make a tangzhong starter. Cook 3 tablespoons of flour with ½ cup of water until it forms a paste, then add it to your dough. It sounds weird, but it works. I use this method when I’m making rolls for a crowd the next day.
Watch the bake time. Ovens run differently. Start checking at 22 minutes. The rolls should be golden brown, and the center should feel set but not hard. Undercooked rolls are doughy in the middle, and overcooked ones are dry. That 5-minute window is critical.
One time I forgot to set a timer and the rolls came out dark brown on top. I scraped off the burnt parts and glazed them anyway. Honestly? They were still delicious. So don’t stress too much.
Variations & Adaptations
This recipe is flexible, and I love playing around with different versions depending on the season or who I’m feeding:
- Dairy-Free Version: Substitute the butter with vegan butter (I like Miyoko’s), use oat milk instead of whole milk, and swap the heavy cream in the glaze for coconut cream. The texture is slightly different but still amazing.
- Gluten-Free Option: Use a 1:1 gluten-free flour blend that contains xanthan gum. The dough will be more delicate, so handle it gently. Reduce the kneading time to 3-4 minutes, and let the dough rise a bit longer—gluten-free dough needs more time.
- Spiced-Up Filling: Add ¼ teaspoon of cardamom and a pinch of cloves to the filling for a more complex flavor. I did this for a holiday brunch and everyone asked for the recipe.
- Nutty Twist: Sprinkle ½ cup of chopped pecans or walnuts over the filling before rolling. The nuts toast slightly during baking and add a wonderful crunch.
- Cream Cheese Glaze: For a tangier topping, mix 4 ounces of softened cream cheese with 1 cup powdered sugar, 2 tablespoons maple syrup, and a splash of milk. It’s richer and pairs beautifully with the pumpkin.
- Make-Ahead Option: Assemble the rolls, place them in the baking dish, cover tightly with plastic wrap, and refrigerate overnight. In the morning, let them sit at room temperature for 30 minutes while the oven preheats, then bake as directed. This is my go-to for Thanksgiving morning.
I tried a version with chocolate chips once—don’t do it. The chocolate overwhelmed the pumpkin and cinnamon. Some combinations are classic for a reason.
Serving & Storage Suggestions
These rolls are best served warm, fresh from the oven, with the glaze still slightly melty. I like to put the whole baking dish in the center of the table and let everyone grab their own. It feels communal and cozy.
For drinks, these pair beautifully with black coffee, chai latte, or a simple glass of cold milk. If you’re serving them for brunch, add a side of scrambled eggs or fresh fruit to balance the sweetness.
Storage: Leftover rolls (if you have any) can be stored in an airtight container at room temperature for up to 2 days. After that, refrigerate them for up to 4 days. The glaze will soften and soak into the rolls slightly, which some people actually prefer.
Reheating: The microwave works in a pinch—15-20 seconds per roll—but the oven is better. Place rolls on a baking sheet and warm at 300°F for 5-7 minutes. The edges get slightly crisp again, and the center stays soft.
Freezing: You can freeze unbaked rolls. Assemble them in the dish, cover tightly with plastic wrap and foil, and freeze for up to 3 months. To bake, thaw in the refrigerator overnight, then let rise at room temperature for 30 minutes before baking. Baked rolls can also be frozen without glaze for up to 2 months. Just thaw, reheat, and glaze fresh.
Honestly, these rolls get better after a day. The flavors meld together, and the texture becomes even more tender. If you can resist eating them all immediately, you’ll be rewarded.
Nutritional Information & Benefits
Let’s be real—these are a treat, not a health food. But that doesn’t mean they’re without redeeming qualities. Here’s a rough estimate per roll (with glaze):
- Calories: ~380
- Fat: 16g
- Carbohydrates: 55g
- Protein: 6g
- Fiber: 2g
- Sugar: 32g
The pumpkin puree adds vitamin A and fiber, which is more than most cinnamon rolls can claim. Cinnamon has anti-inflammatory properties, and maple syrup contains antioxidants. Does that make this a health food? No. But it makes me feel slightly better about having two.
For dietary considerations: This recipe contains gluten, dairy, and eggs. It can be adapted for dairy-free and gluten-free diets using the substitutions listed above. The rolls are vegetarian as written.
I believe in balance. These rolls are for the days when you want something indulgent and soul-warming. They’re for sharing with people you love. That has its own kind of nutritional value, if you ask me.
Conclusion
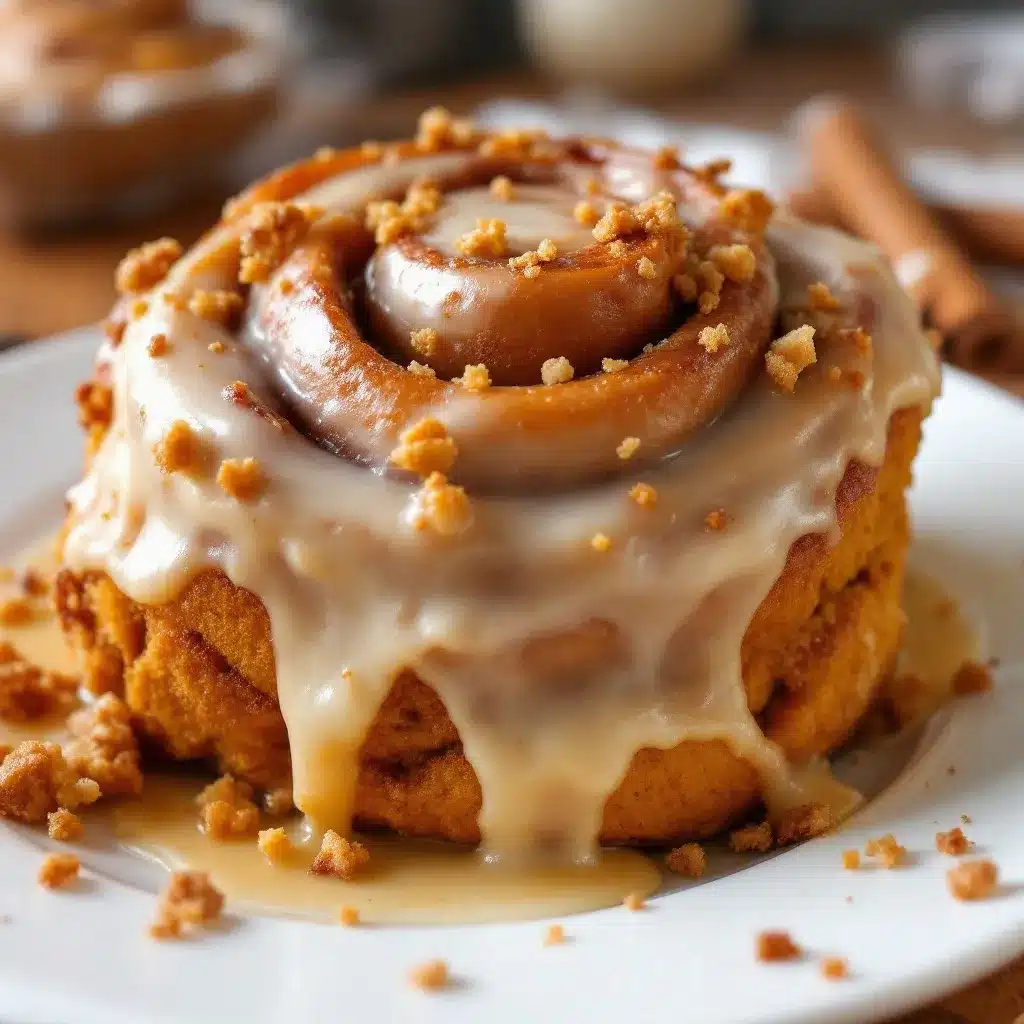
These ultimate baked pumpkin cinnamon rolls with maple glaze are everything I wanted them to be—soft, spiced, sweet, and deeply satisfying. They’re the recipe I reach for when I want to fill my kitchen with that unmistakable autumn aroma, the one that makes people wander in and ask, “What are you baking?”
I hope you make these your own. Add more cinnamon if that’s your thing. Double the glaze—I won’t judge. Swap in your favorite fall spices. The beauty of a good recipe is that it’s a starting point, not a rulebook.
I’d love to hear how yours turn out. Drop a comment below and let me know if you tried any variations, or if these became a new tradition in your home. Share a photo if you’re feeling proud—I always love seeing your creations. Until next time, happy baking, and may your kitchen always smell like cinnamon and warmth.
Frequently Asked Questions
Can I use canned pumpkin pie filling instead of pure pumpkin?
No, please don’t. Pumpkin pie filling has added sugar, spices, and thickeners that will throw off the dough’s hydration and sweetness. Stick with 100% pure pumpkin puree for the best results.
Why didn’t my dough rise?
Most likely the yeast was dead or the milk was too hot. Check the expiration date on your yeast, and make sure your milk is around 110°F—warm but not hot. If your kitchen is cold, let the dough rise in the oven with just the light on.
Can I make these without a stand mixer?
Absolutely. Mix the dough with a wooden spoon until it comes together, then knead on a floured surface for about 10 minutes. Your arms will get a workout, but the dough will be just as good.
How do I keep the rolls from getting soggy?
Make sure you’re not over-proofing them during the second rise. They should be puffy but not overly soft. Also, let them cool for 5-10 minutes before glazing so the glaze doesn’t just melt into a puddle.
Can I skip the maple glaze?
You can, but why would you? The maple glaze is what makes these rolls special. If you really want to skip it, try a simple cream cheese frosting or just a dusting of powdered sugar. But honestly, the maple glaze is worth every calorie.
Pin This Recipe!
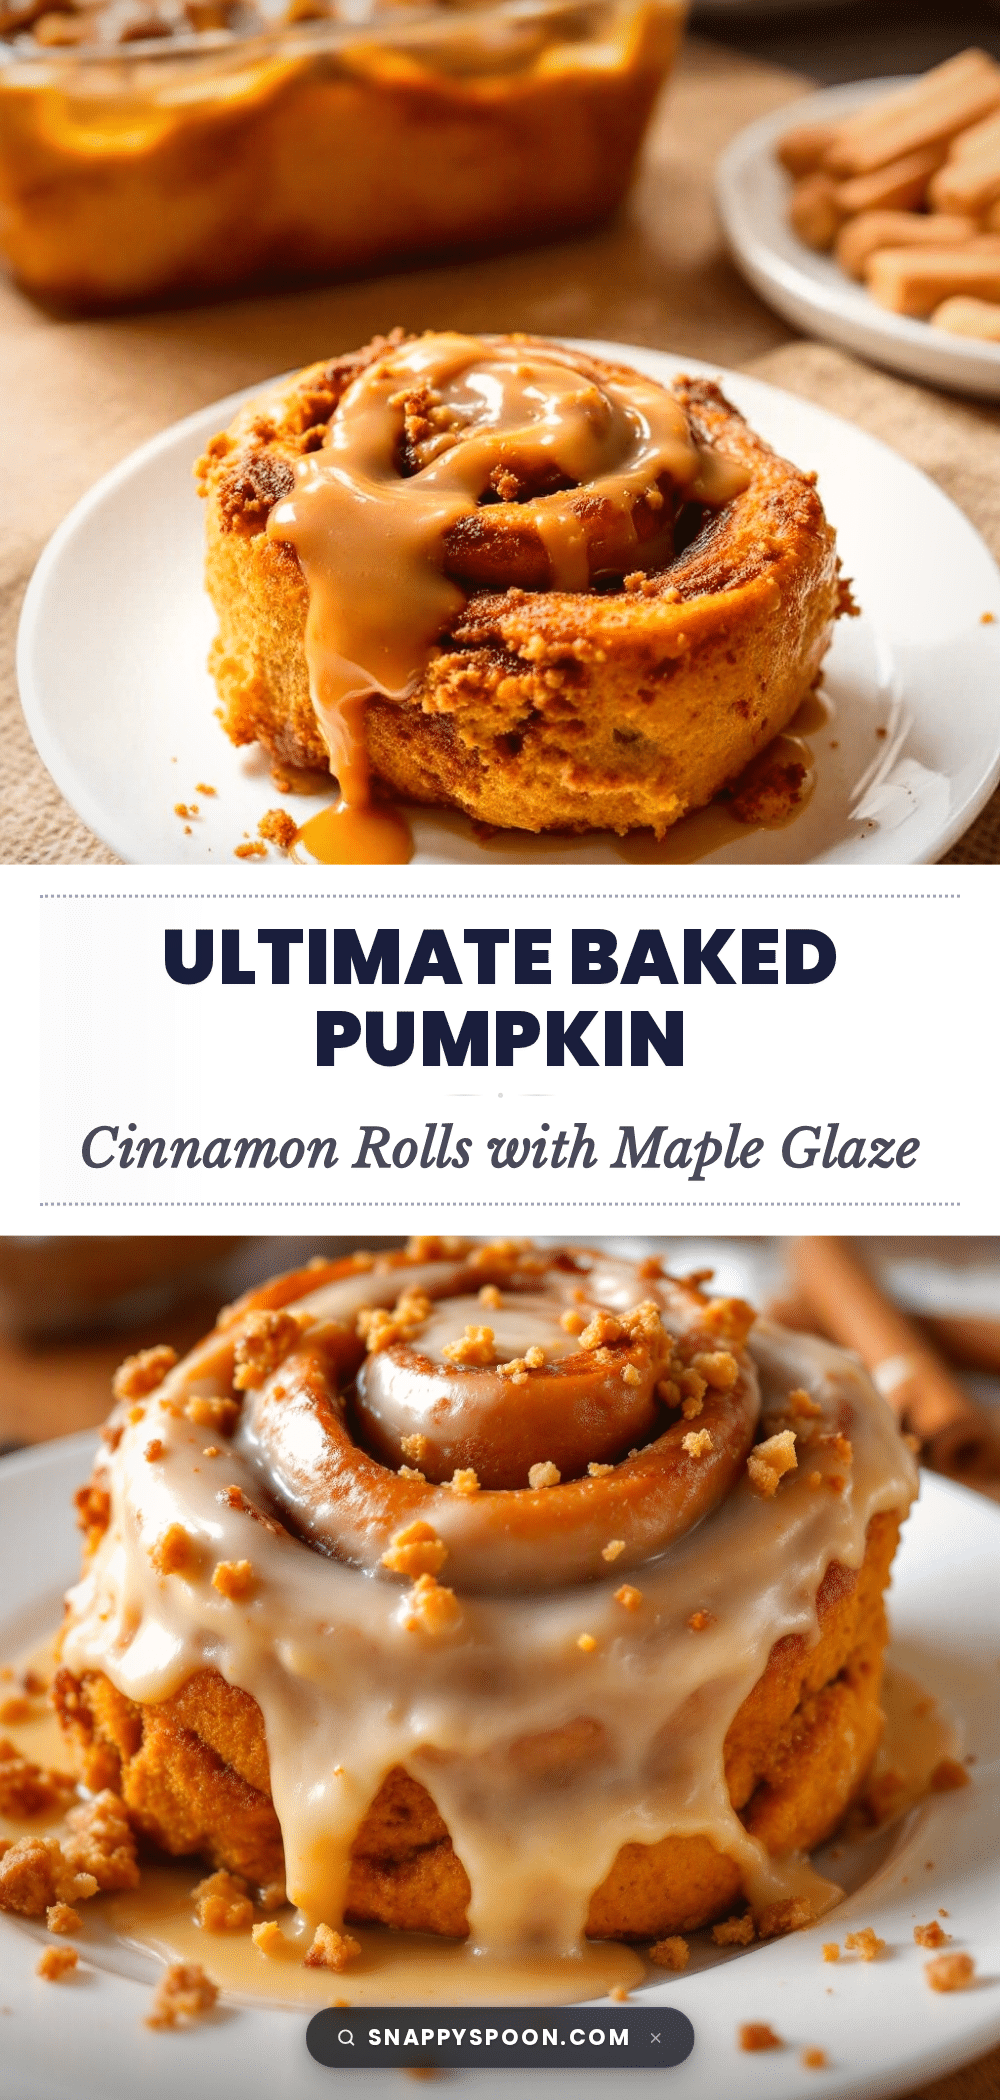
Ultimate Baked Pumpkin Cinnamon Rolls With Maple Glaze
Soft, spiced pumpkin cinnamon rolls with a rich maple glaze that tastes like autumn in every bite. Perfect for cozy weekends and holiday brunches.
- Prep Time: 20 minutes
- Cook Time: 25 minutes
- Total Time: 2 hours
- Yield: 12 servings 1x
- Category: Dessert
- Cuisine: American
Ingredients
- 3 ½ cups all-purpose flour (plus extra for dusting)
- 1 cup pumpkin puree (not pumpkin pie filling)
- ½ cup whole milk, warm (about 110°F)
- ¼ cup granulated sugar
- ¼ cup unsalted butter, melted and slightly cooled
- 1 large egg, room temperature
- 2 ¼ teaspoons active dry yeast (one packet)
- 1 teaspoon salt
- 1 teaspoon pumpkin pie spice
- ½ cup unsalted butter, very soft but not melted
- ¾ cup packed brown sugar (light or dark)
- 2 tablespoons ground cinnamon
- 1 teaspoon pumpkin pie spice
- Pinch of salt
- 1 ½ cups powdered sugar, sifted
- 3 tablespoons pure maple syrup
- 2 tablespoons heavy cream (or milk)
- ½ teaspoon vanilla extract
- Pinch of salt
Instructions
- Activate the yeast: In a small bowl, combine warm milk (about 110°F) with 1 tablespoon of the sugar and the yeast. Let sit for 5-7 minutes until foamy.
- Mix the dough: In the bowl of a stand mixer, combine flour, remaining sugar, salt, and pumpkin pie spice. Add pumpkin puree, melted butter, egg, and yeast mixture. Mix on low speed with dough hook until a shaggy dough forms, about 2 minutes.
- Knead the dough: Increase speed to medium-low and knead for 6-8 minutes until smooth, slightly tacky but not sticky. Add flour 1 tablespoon at a time if too sticky, or milk 1 teaspoon at a time if too dry.
- First rise: Shape dough into a ball and place in a lightly greased bowl. Cover with a clean kitchen towel and let rise in a warm, draft-free place for 1 to 1.5 hours, or until doubled in size.
- Make the filling: While dough rises, mix softened butter, brown sugar, cinnamon, pumpkin pie spice, and salt in a small bowl until spreadable.
- Roll out the dough: Punch down dough and turn onto a lightly floured surface. Roll into a 12×18-inch rectangle, about ¼-inch thick.
- Spread the filling: Using an offset spatula or spoon, spread cinnamon filling evenly over dough, leaving a ½-inch border on one long edge.
- Roll it up: Starting from the long edge opposite the bare border, roll dough tightly into a log. Place seam side down and pinch to seal.
- Cut the rolls: Using a sharp knife or bench scraper, cut log into 12 equal pieces, about 1.5 inches each.
- Second rise: Place rolls in a greased 9×13-inch baking dish, cut side up. Cover and let rise for 30-45 minutes until puffy and nearly doubled.
- Bake: Preheat oven to 350°F. Bake rolls for 22-27 minutes until golden brown on top and internal temperature reaches 190°F.
- Make the glaze: While rolls bake, whisk together powdered sugar, maple syrup, heavy cream, vanilla, and salt until thick but pourable. Add more cream if needed.
- Glaze and serve: Let rolls cool for 5-10 minutes in the pan, then drizzle glaze over the top. Serve warm.
Notes
For even softer rolls, make a tangzhong starter by cooking 3 tablespoons flour with ½ cup water until it forms a paste, then add to dough. Rolls can be assembled the night before and refrigerated; let sit at room temperature for 30 minutes before baking. Use a thermometer to ensure milk is at 110°F for yeast activation.
Nutrition
- Serving Size: 1 roll
- Calories: 380
- Sugar: 32
- Sodium: 280
- Fat: 16
- Saturated Fat: 9
- Carbohydrates: 55
- Fiber: 2
- Protein: 6
Keywords: pumpkin cinnamon rolls, maple glaze, fall baking, pumpkin rolls, cinnamon rolls