Love this? Save it for later!
Share the inspiration with your friends
I was hunched over my laptop last Tuesday, trying to type up a grocery list, when the smell of roasting chiles drifted through my open kitchen window. My neighbor, Mrs. Gable, was charring a batch on her gas grill — something she does every September without fail. And just like that, I was twelve years old again, standing in my aunt’s tiny Albuquerque kitchen, watching her peel the blackened skin off Hatch chiles with her bare fingers like some kind of kitchen wizard.
She’d hand me a warm tortilla with a strip of roasted chile and a sprinkle of salt, and I’d burn my tongue every single time. Honestly, I didn’t care. That smoky, slightly spicy flavor was pure magic. My aunt passed away a few years ago, and I haven’t been back to New Mexico since. But every time Hatch season rolls around, I get this ache to recreate that feeling — not just the flavor, but the warmth of being in her cramped, messy kitchen with the radio playing oldies.
These Creamy Hatch Green Chili Chicken Enchiladas are my attempt to bottle that memory. They’re not traditional by any means — my aunt would probably raise an eyebrow at the cream cheese and sour cream situation. But they’re what I reach for when I need a hug in casserole form. The first time I made them, I accidentally used way too much garlic powder and had to start over. But the second batch? That was the one. Maybe you’ve been there — chasing a taste you can’t quite describe, hoping it’ll bring back a moment you thought you’d lost. That’s what this recipe does for me. That’s why I keep making it.
Why You’ll Love This Recipe
Let me tell you, I’ve tested a lot of enchilada recipes over the years. Some were too dry, some were too soupy, and some just lacked that something special. These Creamy Hatch Green Chili Chicken Enchiladas hit that sweet spot perfectly. They’re the kind of dish that makes you close your eyes after the first bite — I’m not kidding.
- Quick & Easy: This comes together in about 30 minutes, making it perfect for those busy weeknights when you want something satisfying without spending hours in the kitchen. It’s also great for last-minute dinner guests.
- Simple Ingredients: You won’t need to hunt down anything fancy. Most of these ingredients are probably already in your fridge or pantry — chicken, tortillas, cheese, and a few pantry staples.
- Perfect for Fall: When Hatch chile season hits, this is my go-to. It’s warm, comforting, and tastes like the Southwest in a baking dish. It’s also fantastic for potlucks or holiday gatherings.
- Crowd-Pleaser: I’ve served these at family dinners, game-day parties, and casual get-togethers. Kids love the creamy texture, and adults appreciate the subtle heat. They always disappear fast.
- Unbelievably Delicious: The combination of tender chicken, smoky Hatch chiles, and a rich, creamy sauce is next-level comfort food. The cream cheese adds this velvety texture that regular enchiladas just don’t have.
What makes this recipe different from the rest is the balance. I’ve played around with the ratios for months — too much cream cheese makes it heavy, not enough makes it thin. This version is just right. Plus, using roasted Hatch chiles (fresh or jarred) gives it that authentic, slightly smoky flavor that you can’t get from canned green chiles. It’s not just another enchilada recipe; it’s my best version.
This recipe isn’t just good — it’s the kind that makes you text your friends about it the next day. It’s comfort food reimagined: quicker, creamier, and with the same soul-soothing satisfaction. Perfect for impressing guests without stress, or turning a simple Tuesday dinner into something memorable.
What Ingredients You Will Need
This recipe uses simple, wholesome ingredients to deliver bold flavor and satisfying texture without the fuss. Most of these are pantry staples, but the star of the show is definitely the Hatch chiles. Here’s what you’ll need:
For the Filling
- Cooked chicken, shredded (about 3 cups) — Rotisserie chicken works great here. I usually grab one from the store to save time.
- Hatch green chiles, roasted and chopped (1 cup) — Fresh roasted are best if you can find them, but jarred Hatch chiles work perfectly too. I prefer the medium heat level for a nice kick without overwhelming the dish.
- Cream cheese, softened (4 ounces) — This gives the filling that luscious, creamy texture. Let it sit out for 20 minutes so it blends smoothly.
- Sour cream (½ cup) — Adds tanginess and helps thin the filling just enough.
- Shredded Monterey Jack cheese (1 cup) — Melts beautifully and has a mild flavor that doesn’t compete with the chiles.
- Garlic powder (1 teaspoon) — I prefer powder over fresh here because it distributes evenly without burning.
- Cumin (½ teaspoon) — A little goes a long way. It adds that warm, earthy note that ties everything together.
- Salt and black pepper (to taste)
For the Sauce
- Butter (2 tablespoons) — I use unsalted to control the sodium.
- All-purpose flour (2 tablespoons) — This thickens the sauce. For a gluten-free option, you can use cornstarch mixed with a little cold water.
- Chicken broth (1½ cups) — Low-sodium is best so you can adjust the salt later.
- Sour cream (½ cup) — Stirred in at the end for creaminess.
- Hatch green chiles, chopped (¼ cup) — Extra chiles in the sauce reinforce that signature flavor.
- Salt (¼ teaspoon)
For Assembly
- Flour tortillas (8-10, 8-inch) — Corn tortillas work too, but they can crack if not warmed first. I like flour for their flexibility and mild flavor.
- Shredded Monterey Jack cheese (1½ cups) — For topping. You can also use a Mexican blend if you prefer.
- Fresh cilantro, chopped (for garnish, optional)
- Diced red onion (for garnish, optional)
Ingredient Tips: When buying Hatch chiles, look for ones that are firm and have a bit of give — they should smell slightly smoky even when raw. If you’re using jarred, I recommend the 505 Southwestern brand; it’s widely available and has a consistent roast. For the chicken, I’ve tested this with both white and dark meat, and honestly, a mix is best. The dark meat keeps it moist, while the white meat adds structure. If you’re in a pinch, canned chicken works, but the texture won’t be as good.
Equipment Needed
You don’t need a lot of fancy gear for this recipe, which is part of why I love it. Here’s what you’ll need:
- 9×13-inch baking dish — Any casserole dish works, but this size gives you enough room for 8-10 enchiladas without overcrowding.
- Large skillet or saucepan — For making the sauce. A non-stick surface makes cleanup easier.
- Mixing bowls — One large for the filling, one small for the sauce (if you’re mixing dry ingredients).
- Whisk — Essential for a smooth sauce without lumps.
- Spatula or wooden spoon — For stirring the filling and sauce.
- Chef’s knife and cutting board — For chopping chiles and garnishes.
- Measuring cups and spoons — Accuracy matters, especially with the flour and broth.
Alternatives: If you don’t have a 9×13 dish, you can use two smaller dishes or even a cast-iron skillet (just adjust the baking time slightly). No whisk? A fork works in a pinch, but you’ll need to whisk vigorously. I once used a plastic spatula to make the sauce, and it worked fine — just took a little more elbow grease.
Personal Note: I bought my baking dish at a thrift store for three dollars, and it’s still going strong five years later. You don’t need expensive equipment to make great food. Just make sure whatever dish you use is oven-safe and deep enough to hold the sauce without spilling over.
Preparation Method
Let’s get cooking. This recipe moves fast, so I like to have everything prepped and ready before I start. Trust me, it makes the process much smoother.
- Preheat your oven to 375°F (190°C). While it’s heating, lightly grease your 9×13 baking dish with butter or non-stick spray. Set it aside.
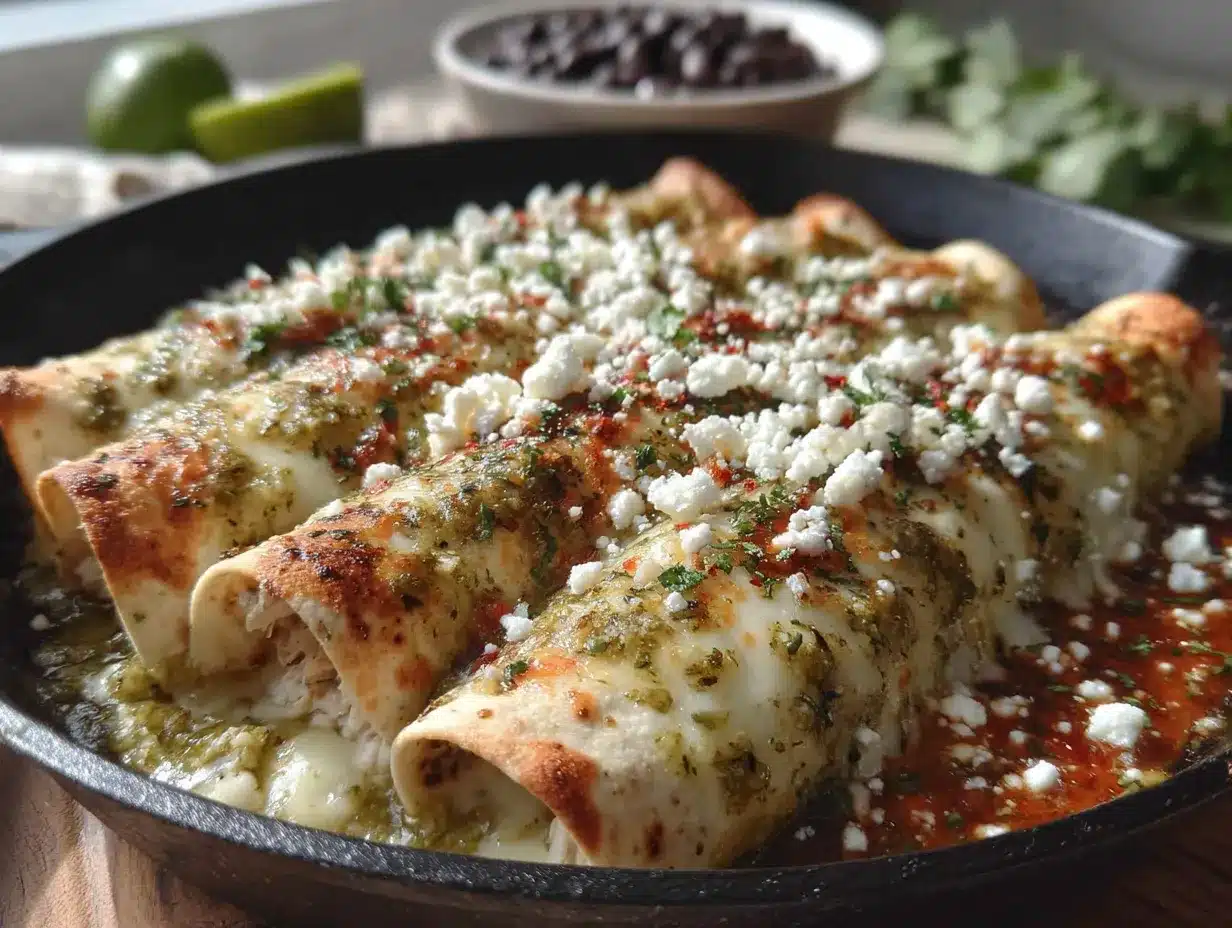
- Make the filling: In a large mixing bowl, combine the shredded chicken, 1 cup of chopped Hatch chiles, softened cream cheese, ½ cup sour cream, 1 cup shredded Monterey Jack cheese, garlic powder, cumin, salt, and pepper. Mix everything together with a spatula until it’s well combined. The mixture should be thick and creamy — if it seems too dry, add a tablespoon of sour cream. Taste it and adjust the seasoning. It should be slightly salty and have a nice warmth from the chiles.
- Warm the tortillas: This step is crucial. Cold tortillas crack when you roll them. Wrap 8-10 tortillas in a damp paper towel and microwave them for 30-45 seconds, or until they’re pliable. Alternatively, you can warm them one by one in a dry skillet for about 15 seconds per side. Keep them covered so they stay soft.
- Assemble the enchiladas: Spoon about ⅓ cup of the chicken filling down the center of each tortilla. Don’t overfill — about 3 tablespoons is perfect. Roll the tortilla up tightly and place it seam-side down in the prepared baking dish. Repeat with the remaining tortillas, arranging them snugly in a single layer. If you have extra filling, just spoon it over the top.
- Make the sauce: In a medium saucepan over medium heat, melt the butter. Once it’s foaming, whisk in the flour and cook for 1 minute, stirring constantly. This gets rid of the raw flour taste. Slowly pour in the chicken broth while whisking continuously to prevent lumps. Bring the mixture to a simmer — it should thicken after about 2-3 minutes. Reduce the heat to low and stir in the remaining ¼ cup of Hatch chiles and ½ cup of sour cream. Whisk until smooth. Season with ¼ teaspoon salt. The sauce should be thick enough to coat the back of a spoon but still pourable.
- Pour the sauce over the enchiladas: Evenly pour the sauce over the rolled tortillas, making sure to cover the ends so they don’t dry out. Use a spatula to spread it if needed. Sprinkle the remaining 1½ cups of Monterey Jack cheese over the top, covering every inch.
- Bake: Place the dish in the preheated oven and bake for 20-25 minutes, or until the cheese is melted and bubbly and the edges are slightly golden. If you want a browner top, switch the oven to broil for the last 2 minutes — but watch it closely so it doesn’t burn.
- Rest and garnish: Let the enchiladas rest for 5 minutes before serving. This helps the sauce set so it doesn’t run everywhere when you cut into it. Sprinkle with fresh cilantro and diced red onion if you like.
Visual Cue: The sauce should be bubbling around the edges when it’s done. The cheese should be fully melted and starting to brown in spots. If you insert a knife into the center, it should come out hot.
Common Issue: If your sauce seems too thin after baking, don’t panic. It will thicken as it cools. If it’s still watery, you might have added too much broth. Next time, let the sauce simmer a minute longer before pouring it over.
Cooking Tips & Techniques
I’ve made this recipe probably a dozen times, and I’ve learned a few things along the way. Here are my best tips to help you nail it on the first try.
Don’t skip warming the tortillas. I know it seems like an extra step, but cold tortillas crack and tear when you roll them. I learned this the hard way when I ended up with a pile of torn tortillas and filling all over the counter. Warm them properly, and you’ll get beautiful, tight rolls every time.
Toast your spices. Before adding the flour to the sauce, try toasting the cumin and garlic powder in the butter for about 30 seconds. It wakes up their flavors and makes the sauce taste more complex. Just be careful not to burn them — they go bitter fast.
Use room temperature cream cheese. Cold cream cheese creates lumps in the filling that won’t smooth out. Let it sit on the counter for 20-30 minutes before you start. If you forget, you can microwave it in 10-second bursts until it’s soft but not melted.
Layer the sauce carefully. Pouring the sauce over the enchiladas can be tricky. I like to drizzle it in a zigzag pattern, then gently shake the dish to help it settle. Don’t pour it all in one spot or you’ll wash the filling out of the ends.
Make it ahead. You can assemble the enchiladas up to 24 hours in advance. Just cover the dish with foil and refrigerate. When you’re ready to bake, add about 10 minutes to the cooking time since everything will be cold. This is a lifesaver for parties or busy weeknights.
My biggest failure: The first time I made this, I used low-fat cream cheese and non-fat sour cream. The filling was watery, the sauce was grainy, and the whole thing tasted… sad. Use full-fat dairy here. It’s not the time to diet — trust me on this one.
Variations & Adaptations
One of the best things about this recipe is how flexible it is. Here are some ways to make it your own.
Vegetarian Version: Swap the chicken for 2 cups of black beans (rinsed and drained) and 1 cup of corn kernels. You can also use roasted sweet potatoes or butternut squash for a heartier filling. The creaminess of the sauce pairs beautifully with the sweetness of the squash.
Spicy Upgrade: If you like heat, use hot Hatch chiles instead of medium. You can also add a diced jalapeño to the filling or a pinch of cayenne pepper to the sauce. For extra fire, top the finished enchiladas with sliced pickled jalapeños before serving.
Cheese Swap: Monterey Jack is mild and creamy, but you can use pepper jack for a spicy kick, or a mix of cheddar and Monterey for more sharpness. Smoked gouda would also be amazing — it adds a smoky depth that complements the Hatch chiles.
Gluten-Free Option: Use corn tortillas instead of flour, and substitute the all-purpose flour in the sauce with a gluten-free blend or cornstarch. If using cornstarch, mix 1 tablespoon with 2 tablespoons of cold water to make a slurry, then stir it into the sauce after adding the broth. Let it simmer for a minute to thicken.
Add Some Greens: Stir a handful of fresh spinach into the filling before rolling. It wilts down and adds color and nutrients without changing the flavor much. You can also add sautéed mushrooms or zucchini for extra texture.
Personal Variation: I once made these with leftover Thanksgiving turkey instead of chicken, and it was incredible. The smoky chiles and creamy sauce turned dry turkey into something amazing. I’ve also added a layer of refried beans on the bottom of the dish before placing the enchiladas — it adds a nice earthy base.
Serving & Storage Suggestions
These enchiladas are best served warm, right out of the oven. Let them rest for 5 minutes so the sauce sets, then serve them with a generous spoonful of the extra sauce from the dish. I like to top mine with a dollop of sour cream, a sprinkle of fresh cilantro, and some diced red onion for crunch.
What to serve with them: These are rich and creamy, so I like to balance them with something fresh and light. A simple side salad with lime vinaigrette works beautifully. Mexican rice or cilantro-lime rice is also a classic choice. If you’re feeding a crowd, serve them with refried beans and a side of tortilla chips with salsa or guacamole.
Storage: Leftover enchiladas keep well in the refrigerator for up to 4 days. Store them in an airtight container, or cover the baking dish tightly with foil. The flavors actually meld together overnight, so they might taste even better the next day.
Freezing: You can freeze the assembled but unbaked enchiladas for up to 3 months. Wrap the dish tightly in plastic wrap, then a layer of foil. When you’re ready to bake, thaw it in the refrigerator overnight, then bake as directed, adding 10-15 minutes since it starts cold. You can also freeze baked leftovers — just portion them out and reheat individually.
Reheating: The best way to reheat these is in the oven at 350°F for about 15 minutes, or until heated through. The microwave works in a pinch, but the tortillas can get a bit soggy. If using the microwave, cover the plate with a damp paper towel to retain moisture.
Flavor Development: Honestly, these enchiladas are even better on day two. The sauce soaks into the tortillas, and the flavors become more cohesive. I often make a double batch just so I can have leftovers for lunch.
Nutritional Information & Benefits
Here’s an approximate nutritional breakdown per serving (based on 8 servings):
| Nutrient | Amount |
|---|---|
| Calories | 420 |
| Protein | 28g |
| Fat | 24g |
| Saturated Fat | 13g |
| Carbohydrates | 28g |
| Fiber | 2g |
| Sugar | 4g |
| Sodium | 680mg |
Health Benefits: Hatch green chiles are packed with vitamin C and capsaicin, which can boost metabolism and reduce inflammation. Chicken provides lean protein for muscle repair, and the calcium from the cheese supports bone health. The cream cheese and sour cream add richness, but they also provide calcium and vitamin A. This isn’t a light meal, but it’s a balanced one — protein, carbs, and fat in one satisfying dish.
Dietary Considerations: This recipe is not gluten-free as written (due to the flour tortillas and all-purpose flour), but it can easily be adapted. It’s also not low-fat, but the full-fat dairy is what gives it that luxurious texture. If you’re watching sodium, use low-sodium broth and go easy on the added salt.
Allergens: Contains dairy (cream cheese, sour cream, cheese, butter) and gluten (flour tortillas, all-purpose flour). For dairy-free, use vegan cream cheese, sour cream, and cheese alternatives — but the texture will be different. I haven’t tested it with dairy-free options, so let me know if you try it!
Conclusion
These Creamy Hatch Green Chili Chicken Enchiladas are more than just a recipe — they’re a little piece of New Mexico comfort that I get to share with you. They’re quick enough for a weeknight, special enough for company, and forgiving enough for a beginner. The creamy sauce, the smoky chiles, the tender chicken, and the melty cheese all come together in a way that feels both indulgent and familiar.
I hope you’ll give them a try, and I hope they bring you the same warmth they’ve brought me. Feel free to customize them based on what you have on hand — that’s the beauty of a good recipe. Add more chiles if you like heat, swap the protein, or load up on veggies. Make them your own.
If you make these, I’d love to hear about it! Drop a comment below and let me know how they turned out. Did you make any substitutions? Did your family love them? Share your photos and tag me on social media — I can’t wait to see your creations. Until next time, happy cooking, and remember: the best meals are the ones made with a little bit of heart and a whole lot of cheese.
Frequently Asked Questions
Can I use canned green chiles instead of Hatch?
You can, but the flavor won’t be the same. Canned green chiles are usually milder and lack that distinct smoky, roasted flavor that Hatch chiles have. If you can’t find Hatch, look for fire-roasted green chiles in a jar — they’re the closest substitute.
How do I make this recipe less spicy?
Use mild Hatch chiles instead of medium or hot. You can also reduce the amount of chiles in the filling and sauce, or remove the seeds and membranes before chopping — that’s where most of the heat lives.
Can I make this recipe ahead of time?
Absolutely! Assemble the enchiladas up to 24 hours in advance, cover them with foil, and refrigerate. When you’re ready to bake, add about 10 minutes to the cooking time since everything will be cold. You can also freeze the unbaked dish for up to 3 months.
Why are my tortillas cracking when I roll them?
This usually happens when the tortillas are too cold. Make sure you warm them properly — microwave them wrapped in a damp paper towel for 30-45 seconds, or heat them one by one in a dry skillet. Corn tortillas are more prone to cracking than flour, so handle them gently.
Can I use Greek yogurt instead of sour cream?
Yes, but the sauce will be tangier and slightly thinner. Full-fat Greek yogurt works best because it has a similar consistency to sour cream. Just don’t use non-fat yogurt — it can curdle when heated and make the sauce grainy.
Pin This Recipe!
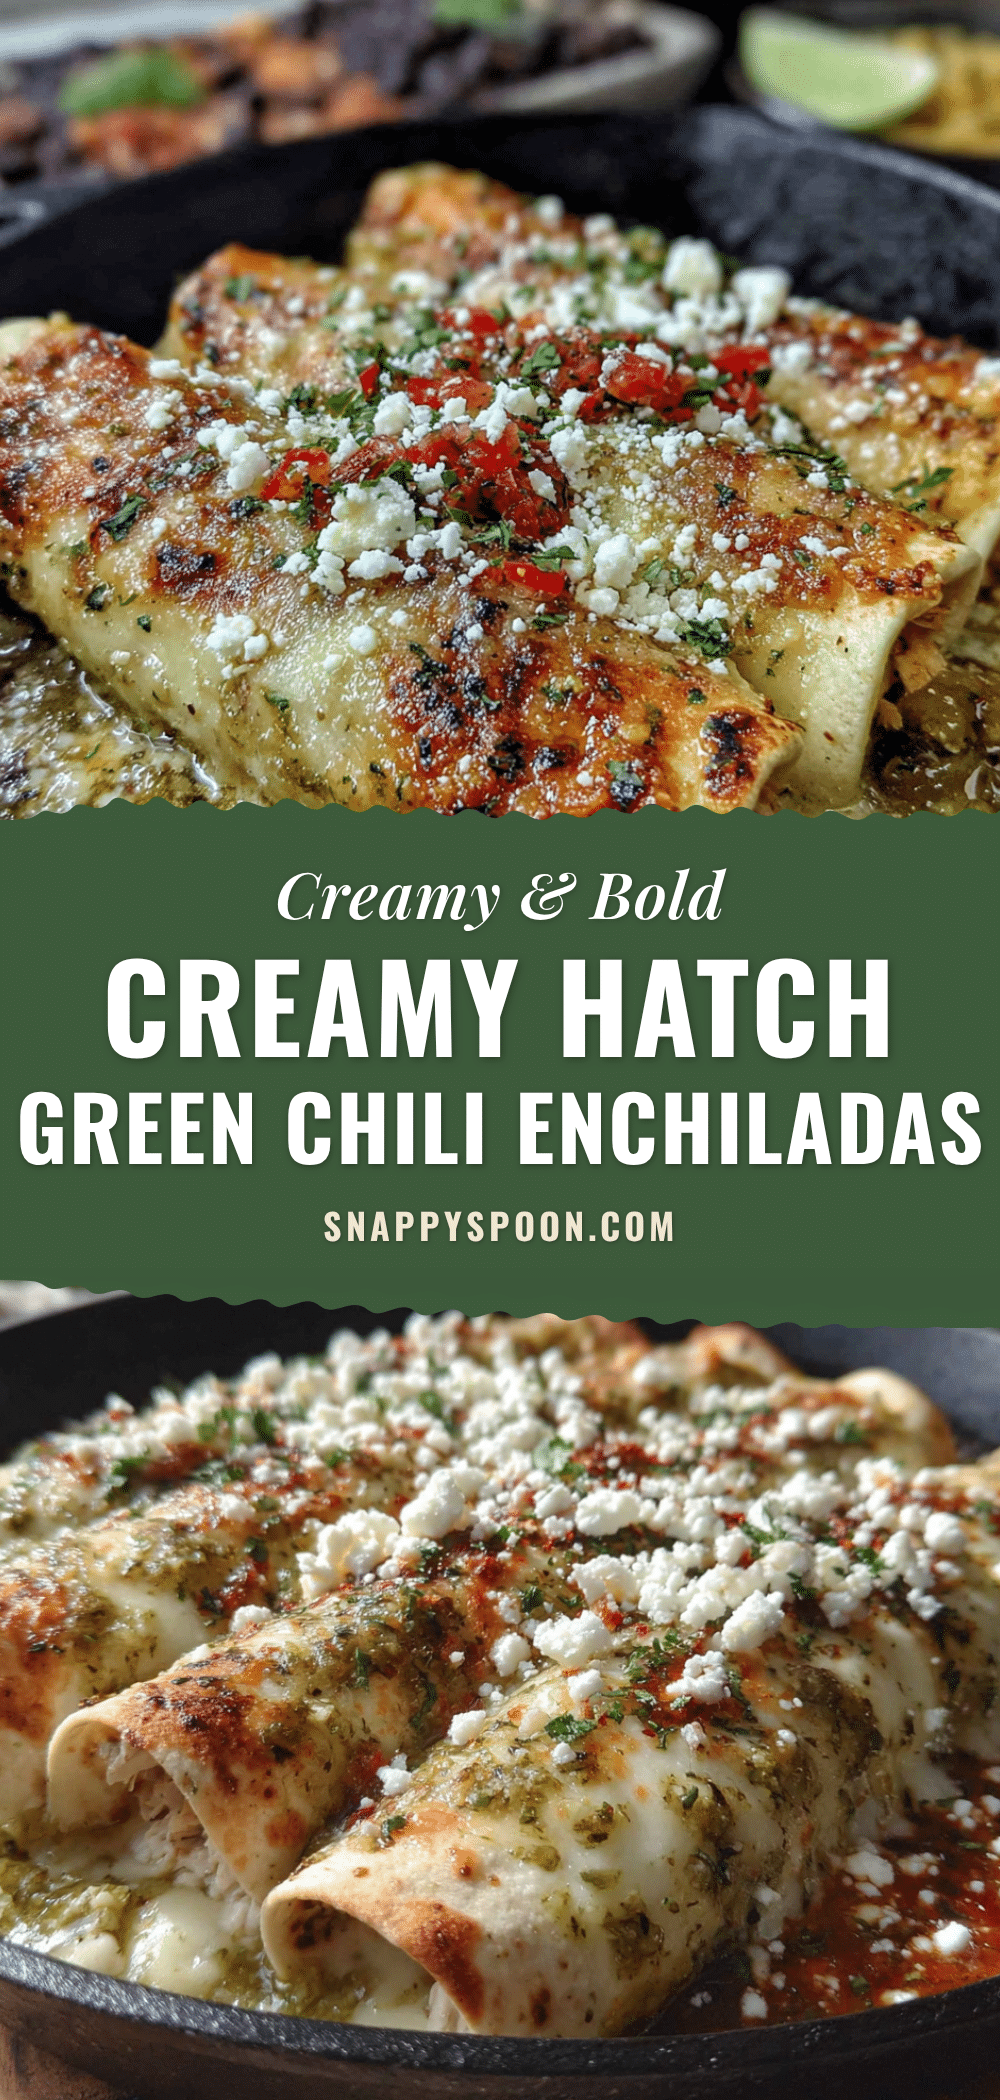
Creamy Hatch Green Chili Chicken Enchiladas (Easy, 30-Minute Meal)
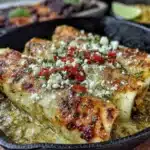
These Creamy Hatch Green Chili Chicken Enchiladas are a quick and easy 30-minute meal featuring tender chicken, smoky Hatch chiles, and a rich, creamy sauce. Perfect for busy weeknights, this comforting dish brings the flavors of the Southwest to your table.
- Prep Time: 10 minutes
- Cook Time: 25 minutes
- Total Time: 35 minutes
- Yield: 8 servings 1x
- Category: Main Course
- Cuisine: Mexican
Ingredients
- 3 cups cooked chicken, shredded
- 1 cup Hatch green chiles, roasted and chopped
- 4 ounces cream cheese, softened
- 1 cup sour cream (divided: ½ cup for filling, ½ cup for sauce)
- 1 cup shredded Monterey Jack cheese (for filling)
- 1 teaspoon garlic powder
- ½ teaspoon cumin
- Salt and black pepper to taste
- 2 tablespoons unsalted butter
- 2 tablespoons all-purpose flour
- 1½ cups low-sodium chicken broth
- ¼ cup Hatch green chiles, chopped (for sauce)
- ¼ teaspoon salt (for sauce)
- 8–10 flour tortillas (8-inch)
- 1½ cups shredded Monterey Jack cheese (for topping)
- Fresh cilantro, chopped (optional garnish)
- Diced red onion (optional garnish)
Instructions
- Preheat your oven to 375°F (190°C). Lightly grease a 9×13-inch baking dish with butter or non-stick spray.
- Make the filling: In a large mixing bowl, combine shredded chicken, 1 cup chopped Hatch chiles, softened cream cheese, ½ cup sour cream, 1 cup shredded Monterey Jack cheese, garlic powder, cumin, salt, and pepper. Mix until well combined. Adjust seasoning to taste.
- Warm the tortillas: Wrap 8-10 tortillas in a damp paper towel and microwave for 30-45 seconds until pliable. Alternatively, warm them one by one in a dry skillet for about 15 seconds per side. Keep covered.
- Assemble the enchiladas: Spoon about ⅓ cup (3 tablespoons) of the chicken filling down the center of each tortilla. Roll tightly and place seam-side down in the prepared baking dish. Arrange snugly in a single layer.
- Make the sauce: In a medium saucepan over medium heat, melt the butter. Whisk in the flour and cook for 1 minute, stirring constantly. Slowly pour in the chicken broth while whisking continuously. Bring to a simmer and cook for 2-3 minutes until thickened. Reduce heat to low and stir in the remaining ¼ cup Hatch chiles and ½ cup sour cream. Whisk until smooth. Season with ¼ teaspoon salt.
- Pour the sauce evenly over the enchiladas, covering the ends. Sprinkle the remaining 1½ cups Monterey Jack cheese over the top.
- Bake for 20-25 minutes, until the cheese is melted and bubbly and the edges are slightly golden. For a browner top, broil for the last 2 minutes, watching closely.
- Let the enchiladas rest for 5 minutes before serving. Garnish with fresh cilantro and diced red onion if desired.
Notes
Warm tortillas to prevent cracking. Use room temperature cream cheese for a smooth filling. For a gluten-free version, use corn tortillas and substitute flour with cornstarch (1 tablespoon cornstarch mixed with 2 tablespoons cold water). Full-fat dairy is recommended for best texture. Leftovers keep for up to 4 days in the refrigerator or freeze for up to 3 months.
Nutrition
- Serving Size: 1 enchilada
- Calories: 420
- Sugar: 4
- Sodium: 680
- Fat: 24
- Saturated Fat: 13
- Carbohydrates: 28
- Fiber: 2
- Protein: 28
Keywords: Hatch green chili, chicken enchiladas, creamy enchiladas, 30-minute meal, easy dinner, New Mexico recipe, comfort food