Love this? Save it for later!
Share the inspiration with your friends
“You won’t believe what happened when I tried making ice cream at 2 AM,” my friend Lisa confessed over coffee last summer. Honestly, I was more intrigued by the idea of someone craving ice cream in the middle of the night than the ice cream itself. But then she explained how her trusty ice cream maker turned a midnight craving into a creamy, dreamy treat that felt way better than anything store-bought. That’s how I first got hooked on creamy homemade ice cream maker recipes for irresistible treats.
The thing is, I never thought homemade ice cream could be that simple or so satisfying. I mean, who has time to fuss over complicated recipes or hunt down rare ingredients? But Lisa’s quick and easy method stuck with me—five simple steps, no fancy gadgets besides the ice cream maker, and delicious results that made me want to keep experimenting.
Maybe you’ve been there too: craving a scoop of something rich and smooth but wanting to avoid the additives and mystery ingredients in commercial brands. Or maybe you just want to impress your friends with a cool, homemade dessert that feels indulgent but is actually straightforward to make. Either way, this collection of creamy homemade ice cream maker recipes is built to fit right into your kitchen rhythm. Because honestly, once you taste that first batch, you’ll understand why this recipe stays on repeat in my house.
Why You’ll Love This Recipe
After plenty of kitchen trials (and a few sticky spills), I found that these creamy homemade ice cream maker recipes are more than just tasty—they’re genuinely approachable and dependable. Here’s why this recipe has earned a permanent spot in my dessert lineup:
- Quick & Easy: Comes together in under 30 minutes, perfect for busy weeknights or last-minute sweet tooth moments.
- Simple Ingredients: No need for fancy or hard-to-find items; most are pantry staples or easy to grab at any grocery store.
- Perfect for All Occasions: Whether it’s a family dinner, casual hangout, or holiday celebration, this recipe fits the bill.
- Crowd-Pleaser: Kids and adults alike rave about the creamy texture and balanced sweetness every time.
- Unbelievably Delicious: The magic of the ice cream maker combined with balanced flavors means you’re biting into real homemade joy.
What sets this apart from other ice cream recipes? The technique of slowly chilling the base before churning and the option to blend in mix-ins right before the final churn creates an ultra-smooth texture that feels indulgent without being overly rich. Plus, I’ve tested these recipes with everything from classic vanilla bean to adventurous salted caramel swirl, and every batch hits the mark. Honestly, it’s the kind of dessert that makes you close your eyes after the first bite and smile, knowing you made it yourself.
What Ingredients You Will Need
This recipe uses simple, wholesome ingredients to deliver bold flavor and satisfying texture without the fuss. Most are pantry staples, and you can easily swap a few depending on your preferences or dietary needs.
- For the Ice Cream Base:
- 2 cups heavy cream (I prefer organic heavy cream for the best richness)
- 1 cup whole milk (or use almond milk for a lighter, dairy-free option)
- 3/4 cup granulated sugar (feel free to reduce slightly for less sweetness)
- 1 tablespoon pure vanilla extract (look for Madagascar vanilla for a deeper flavor)
- Pinch of salt (to balance the sweetness)
- Optional Mix-Ins:
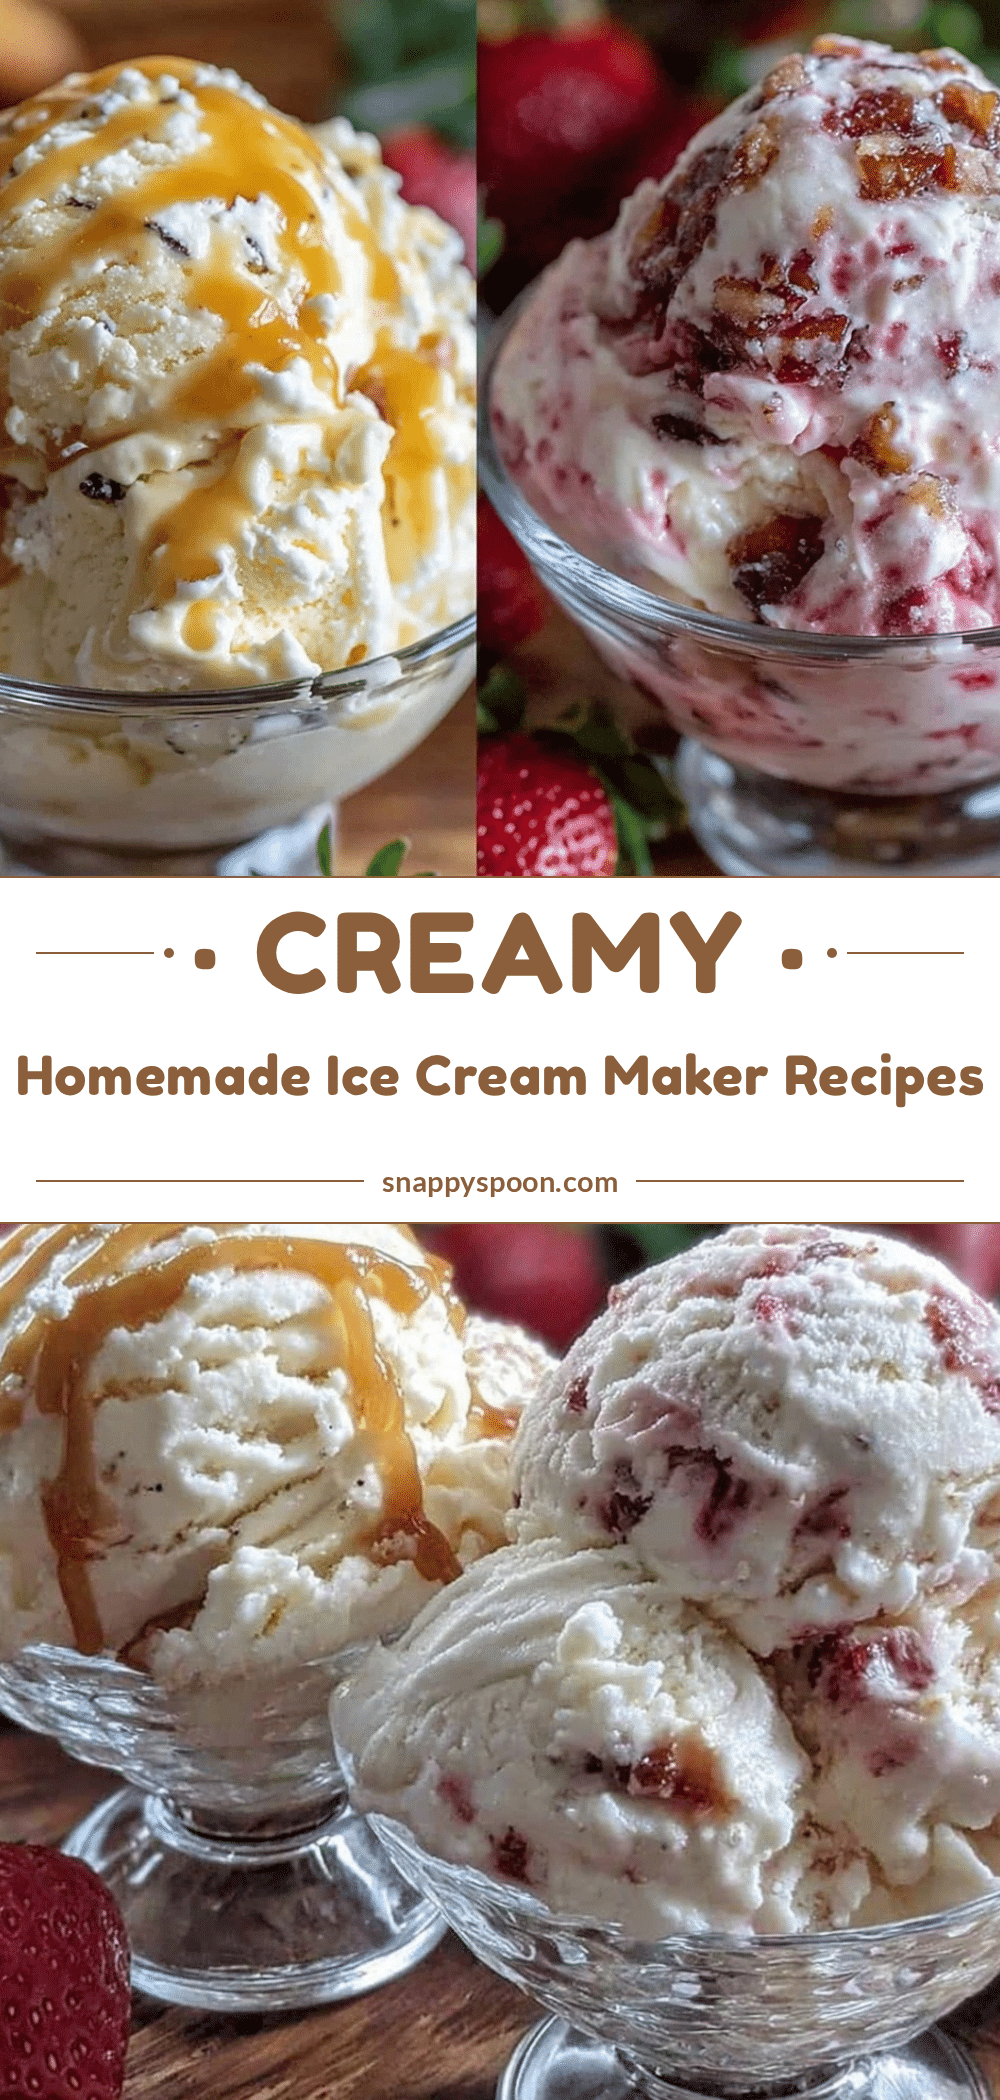
- Chocolate chips, crushed cookies, fresh berries, chopped nuts, or caramel sauce
- For a seasonal twist, fresh peaches or mango chunks work beautifully in summer
- Substitution Tips:
- Use coconut cream instead of heavy cream for a dairy-free treat
- Swap regular sugar with coconut sugar for a subtle caramel note
Equipment Needed
- Ice cream maker: I use a mid-range electric model with a built-in freezer bowl—budget-friendly and reliable.
- Mixing bowls: For combining ingredients and chilling the base.
- Whisk or hand mixer: To dissolve sugar evenly and incorporate air.
- Measuring cups and spoons: Precise measurements help get the texture just right.
- Spatula: For scraping down the sides and folding in mix-ins.
If you don’t have an ice cream maker, a no-churn version can work, but honestly, the texture won’t be quite as creamy. For cleaning, I keep my ice cream maker’s bowl in the freezer all day before starting, which helps churn faster and reduces graininess.
Preparation Method
- Mix the Base (10 minutes): In a large bowl, whisk together 2 cups heavy cream, 1 cup whole milk, 3/4 cup sugar, 1 tablespoon vanilla extract, and a pinch of salt until the sugar dissolves completely. It should feel smooth and slightly thickened. If you want a richer flavor, use a hand mixer on low speed for 1-2 minutes to incorporate a bit of air.
- Chill the Mixture (at least 2 hours or overnight): Cover the bowl with plastic wrap and refrigerate. This step is key—it lets the flavors meld and the base thicken, which prevents icy textures when churning. Trust me, skipping this is a rookie mistake I learned the hard way.
- Prepare Your Ice Cream Maker: Make sure the freezer bowl has been in the freezer for at least 12 hours (check your machine’s instructions). This keeps the churning bowl cold enough to freeze the mixture properly.
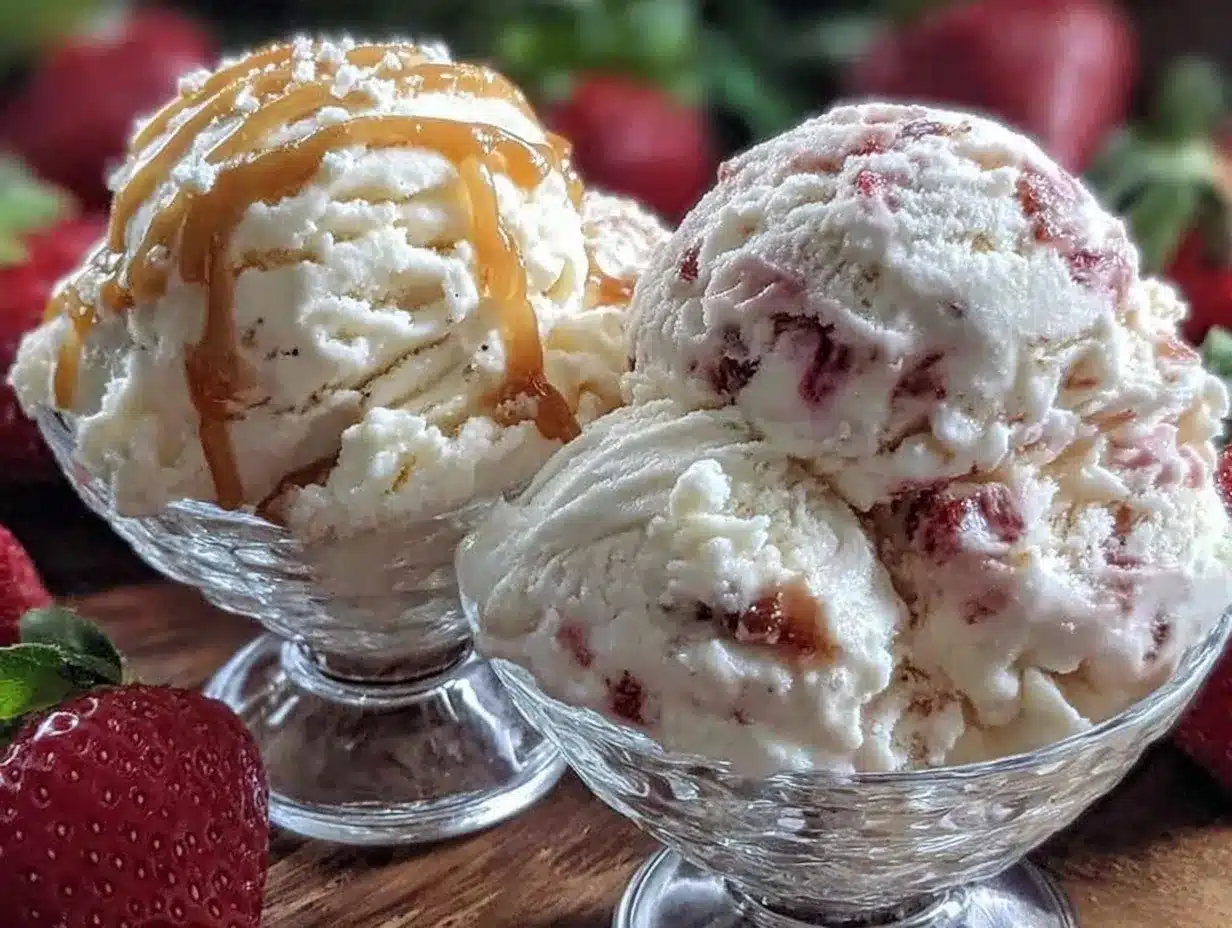
- Churn the Ice Cream (20-25 minutes): Pour the chilled base into the ice cream maker. Turn it on and let it churn until it reaches a soft-serve consistency. This usually takes about 20-25 minutes but varies by machine. You’ll notice the texture thicken and the volume increase slightly.
- Add Mix-Ins & Freeze (optional, 2-4 hours): If you want to add chocolate chips, fruit, or nuts, fold them in gently once the ice cream is almost done churning. Transfer the ice cream to a freezer-safe container and freeze for a couple of hours to firm up before serving.
Pro tip: Don’t rush the freezing step after churning. The ice cream can be soft right out of the machine, but it firms up nicely and develops a richer flavor as it chills.
Cooking Tips & Techniques
Getting that perfect creamy texture can feel tricky, but a few tricks make all the difference:
- Slow and steady chilling: The base needs to be cold before churning. I usually make mine the night before and chill it overnight.
- Don’t overfill your ice cream maker: Leave room for the ice cream to expand while churning. Overfilling can lead to uneven freezing.
- Use quality ingredients: Good vanilla and fresh cream make a world of difference. I once grabbed cheap vanilla and regretted it immediately.
- Mix-ins timing: Add them in the last 5 minutes of churning or fold in after churning to keep their texture intact.
- Patience is key: The ice cream might look ready right out of the machine, but it needs a few hours in the freezer to get that scoopable firmness.
One time, I forgot to freeze the churn bowl ahead of time and ended up with a slushy mess. Lesson learned! Also, if your ice cream comes out icy, it usually means the base wasn’t cold enough or it churned too fast.
Variations & Adaptations
Feel free to customize these creamy homemade ice cream maker recipes to suit your taste and dietary needs:
- Vegan Version: Swap heavy cream and milk with coconut cream and almond milk. Use maple syrup instead of sugar for natural sweetness.
- Fruit-Infused: Puree fresh strawberries or mango and swirl into the base before churning for a fruity burst.
- Chocolate Lover’s: Add cocoa powder to the base for a rich chocolate ice cream, then fold in chocolate chunks for extra indulgence.
- Low-Sugar Option: Use a sugar substitute like erythritol or monk fruit sweetener, adjusting to taste.
- Personal Twist: I once added a splash of coffee liqueur to the base for an adult-friendly dessert—it was a hit at my book club!
Serving & Storage Suggestions
Serve your homemade ice cream straight from the freezer, letting it sit at room temperature for 5 minutes if it’s too firm to scoop easily. Presentation-wise, a simple waffle cone or a bowl with fresh berries and a drizzle of chocolate sauce makes all the difference.
Store leftover ice cream in an airtight container in the freezer. Press a piece of parchment paper directly on the surface to prevent ice crystals. Homemade ice cream is best enjoyed within a week for peak freshness and creamy texture.
When reheating, technically you don’t reheat ice cream, but if it’s too hard, just let it soften at room temperature for 10 minutes before scooping. Flavors also mellow and blend better after a day or two in the freezer, so feel free to make it ahead for gatherings.
Nutritional Information & Benefits
Each serving (about 1/2 cup or 125 ml) of this creamy homemade ice cream contains roughly 200 calories, 15 grams of fat, and 18 grams of sugar, depending on your ingredient choices. Using whole milk and heavy cream delivers satisfying richness and fat-soluble vitamins like A and D.
Choosing natural vanilla extract and fresh ingredients means no artificial additives or preservatives, which is always a win. For those watching sugar intake, the recipe adapts well to reduced or alternative sweeteners without sacrificing creaminess.
From a wellness perspective, making ice cream at home lets you control exactly what goes in, which can be a treat with fewer surprises than store-bought brands. Plus, it’s a fun way to enjoy dessert mindfully, savoring every homemade spoonful.
Conclusion
Honestly, creamy homemade ice cream maker recipes have changed the way I think about dessert. They’re simple enough for a spontaneous treat but impressive enough to serve at any gathering. Whether you stick to classic vanilla or experiment with mix-ins and flavor twists, the joy of making your own ice cream is unbeatable.
Give yourself permission to play around with the recipe and make it your own. Maybe you’ll discover a new favorite, or like me, find that perfect scoop that feels like a little moment of happiness on a hot day. When you do, I’d love to hear how it turned out—drop a comment or share your own variations!
Now, grab your ice cream maker and start chilling that base—you’re about to make some seriously irresistible treats.
FAQs
What’s the best type of ice cream maker to use at home?
Electric ice cream makers with a built-in freezer bowl are the most convenient for home use. They’re budget-friendly and produce consistent results. Just remember to freeze the bowl at least 12 hours before churning.
Can I make this recipe without an ice cream maker?
Yes, you can try a no-churn method by freezing the base in a shallow container and stirring every 30 minutes to break up ice crystals. It won’t be as creamy but still tasty.
How long should I chill the ice cream base before churning?
At least 2 hours in the refrigerator is ideal, but overnight chilling works best to develop flavor and texture.
Can I add chunks like cookies or nuts during churning?
Yes! Add them in the last 5 minutes of churning or fold them in gently after the ice cream is done for best texture.
How do I store homemade ice cream to keep it fresh?
Keep it in an airtight container with a piece of parchment or plastic wrap pressed on the surface to prevent ice crystals. Store in the freezer and consume within a week for best flavor and texture.
Pin This Recipe!
Creamy Homemade Ice Cream Maker Recipes Easy 5-Step Treats
This recipe offers a quick and easy method to make creamy homemade ice cream using an ice cream maker, with simple ingredients and customizable mix-ins for a delicious treat.
- Prep Time: 10 minutes
- Cook Time: 20-25 minutes
- Total Time: 2 hours 35 minutes to overnight (including chilling time)
- Yield: Approximately 4 servings 1x
- Category: Dessert
- Cuisine: American
Ingredients
- 2 cups heavy cream (organic preferred)
- 1 cup whole milk (or almond milk for dairy-free option)
- 3/4 cup granulated sugar (can reduce for less sweetness)
- 1 tablespoon pure vanilla extract (Madagascar vanilla recommended)
- Pinch of salt
- Optional mix-ins: chocolate chips, crushed cookies, fresh berries, chopped nuts, caramel sauce, fresh peaches or mango chunks
Instructions
- Mix the Base (10 minutes): In a large bowl, whisk together 2 cups heavy cream, 1 cup whole milk, 3/4 cup sugar, 1 tablespoon vanilla extract, and a pinch of salt until the sugar dissolves completely. Optionally, use a hand mixer on low speed for 1-2 minutes to incorporate air.
- Chill the Mixture (at least 2 hours or overnight): Cover the bowl with plastic wrap and refrigerate to let flavors meld and base thicken.
- Prepare Your Ice Cream Maker: Ensure the freezer bowl has been in the freezer for at least 12 hours.
- Churn the Ice Cream (20-25 minutes): Pour the chilled base into the ice cream maker and churn until soft-serve consistency is reached.
- Add Mix-Ins & Freeze (optional, 2-4 hours): Fold in desired mix-ins near the end of churning or after, then transfer to a freezer-safe container and freeze to firm up before serving.
Notes
Chill the ice cream base overnight for best texture. Freeze the ice cream maker bowl at least 12 hours before use. Add mix-ins in the last 5 minutes of churning or fold in after churning. Let ice cream soften at room temperature for 5 minutes before scooping. Store in airtight container with parchment paper on surface to prevent ice crystals. Consume within one week for best freshness.
Nutrition
- Serving Size: 1/2 cup (125 ml)
- Calories: 200
- Sugar: 18
- Sodium: 50
- Fat: 15
- Saturated Fat: 9
- Carbohydrates: 22
- Protein: 3
Keywords: homemade ice cream, ice cream maker recipe, creamy ice cream, easy dessert, vanilla ice cream, no additives, simple ingredients