Love this? Save it for later!
Share the inspiration with your friends
It was 10:47 PM on a rainy Tuesday in late October, and I was hit with the most specific craving I’ve ever had. I wanted pumpkin pie cheesecake, but I did not want to turn on my oven, wait for a water bath, or even wash more than one bowl. The problem? I had exactly zero cream cheese in the fridge. But I did have a can of pumpkin puree, a box of graham crackers, and a jar of marshmallow fluff that had been staring at me from the back of the pantry for months. And then, the idea arrived: what if I skipped the cheesecake base entirely and used the marshmallow fluff to create a creamy, no-bake texture? Honestly, it felt like a crazy idea, the kind you only have when your brain is half-asleep and your tastebuds are wide awake. I started mixing, tasting, and adding a pinch of this and a dash of that, and by 11:30 PM, I had a pan of the most ridiculously creamy no-bake pumpkin pie cheesecake bars sitting in my freezer. I mean, I licked the spatula clean, and that’s when I knew I had stumbled onto something special. Maybe you’ve been there—a late-night kitchen experiment that turns into your new favorite dessert. This recipe is that moment, and it’s been a staple ever since.
These creamy no-bake pumpkin pie cheesecake bars are everything you want in a fall dessert. They’re rich, silky, and packed with that classic pumpkin pie spice flavor, but they require zero oven time. The texture is almost mousse-like, thanks to a clever combination of marshmallow fluff and whipped topping, and the buttery graham cracker crust adds the perfect crunch. What makes these bars truly special is how simple they are—just six main ingredients, a few minutes of prep, and a few hours in the fridge. They’re the kind of dessert that makes you look like a hero with almost no effort. Whether you’re hosting Thanksgiving, bringing a dish to a potluck, or just satisfying a late-night craving, these bars deliver every single time. Trust me on this one.
Why You’ll Love This Recipe
I have tested this recipe more times than I care to admit, and I can confidently say it’s foolproof. The first time I made it, I used too much pumpkin puree and the bars were a little too soft. The second time, I nailed it. The third time, I added a pinch of black pepper to the spice mix, and my neighbor, Sarah, said it was the best pumpkin dessert she’d ever had. So, I’ve done the trial and error for you.
- Quick & Easy: This recipe comes together in about 15 minutes of active prep time. No oven, no water bath, no complicated techniques. It’s perfect for busy weeknights or last-minute holiday entertaining.
- Simple Ingredients: You only need six main ingredients, and most of them are pantry staples. No fancy grocery trips or hard-to-find items required.
- Perfect for Fall Gatherings: These bars are a hit at Thanksgiving, Halloween parties, Friendsgiving dinners, and cozy autumn get-togethers. They travel well and slice beautifully.
- Crowd-Pleaser: I’ve served these to kids, adults, and even a few self-proclaimed pumpkin-haters, and they’ve all gone back for seconds. The creamy texture and spiced flavor are universally loved.
- Unbelievably Delicious: The texture is what sets these bars apart. It’s not quite cheesecake, not quite mousse, but something perfectly in between. It’s light, airy, and melts in your mouth.
What makes this recipe different from the rest is the marshmallow fluff. Most no-bake pumpkin cheesecake recipes use cream cheese as the base, which can sometimes make the filling a bit dense or grainy. By swapping in marshmallow fluff, you get a silky-smooth texture that’s almost cloud-like. It’s a game-changer, honestly. This isn’t just another pumpkin dessert—it’s my best version, perfected through late-night experiments and plenty of taste tests.
This recipe is the kind that makes you close your eyes after the first bite. It’s comfort food reimagined—healthier (no baking!), faster, but with the same soul-soothing satisfaction. Perfect for impressing guests without stress, or turning a simple Tuesday into something memorable.
What Ingredients You Will Need
This recipe uses simple, wholesome ingredients to deliver bold flavor and satisfying texture without the fuss. Most of these are pantry staples, and I’ve included substitution guidance for dietary needs.
- Graham Cracker Crumbs (2 cups): I recommend using store-bought crumbs for convenience, but you can also crush your own. For a gluten-free option, use gluten-free graham crackers or crushed gluten-free cookies.
- Unsalted Butter (½ cup, melted): Salted butter works in a pinch, just reduce any added salt in the recipe. I prefer using unsalted to control the salt level.
- Granulated Sugar (¼ cup, for the crust): Adds a touch of sweetness to the base. You can use coconut sugar for a less refined option.
- Marshmallow Fluff (1 jar, about 7 ounces): This is the secret ingredient that makes the filling incredibly creamy. I’ve tried this with homemade marshmallow fluff, and it works beautifully. Do not substitute with melted marshmallows—the texture will be different.
- Canned Pumpkin Puree (1 cup): Make sure you’re using 100% pure pumpkin puree, not pumpkin pie filling. Libby’s is my go-to brand for consistent texture and flavor.
- Whipped Topping (1 ½ cups, thawed): I recommend Cool Whip for stability, but you can also use homemade stabilized whipped cream. Just make sure it’s thawed and not too runny.
- Pumpkin Pie Spice (1 ½ teaspoons): You can use store-bought or make your own with cinnamon, nutmeg, ginger, and cloves. I prefer making my own so I can control the intensity.
- Vanilla Extract (1 teaspoon): Pure vanilla extract adds warmth and depth. Imitation vanilla works in a pinch.
- Optional Toppings: Whipped cream, a sprinkle of cinnamon, caramel drizzle, or crushed pecans for crunch.
Equipment Needed
You don’t need a lot of fancy equipment for this recipe, which is part of its charm. Here’s what you’ll need:
- 9×9-inch Baking Pan: This is the perfect size for these bars. You can also use an 8×8-inch pan for slightly thicker bars, just increase the cooling time. I’ve used a glass baking dish and a metal one, and both work well.
- Mixing Bowls: You’ll need a medium bowl for the crust and a large bowl for the filling. I prefer using glass or stainless steel bowls.
- Electric Mixer or Whisk: An electric hand mixer makes the filling come together quickly, but you can also whisk by hand if you have a strong arm. I’ve done both, and the results are the same.
- Spatula: A rubber spatula is essential for scraping down the sides of the bowl and smoothing the top of the bars.
- Plastic Wrap or Parchment Paper: Lining the pan makes it easy to lift the bars out for clean slicing. I use parchment paper with a slight overhang on two sides.
- Measuring Cups and Spoons: Accurate measurements are key for the crust and filling. I recommend using dry measuring cups for the graham cracker crumbs.
Preparation Method
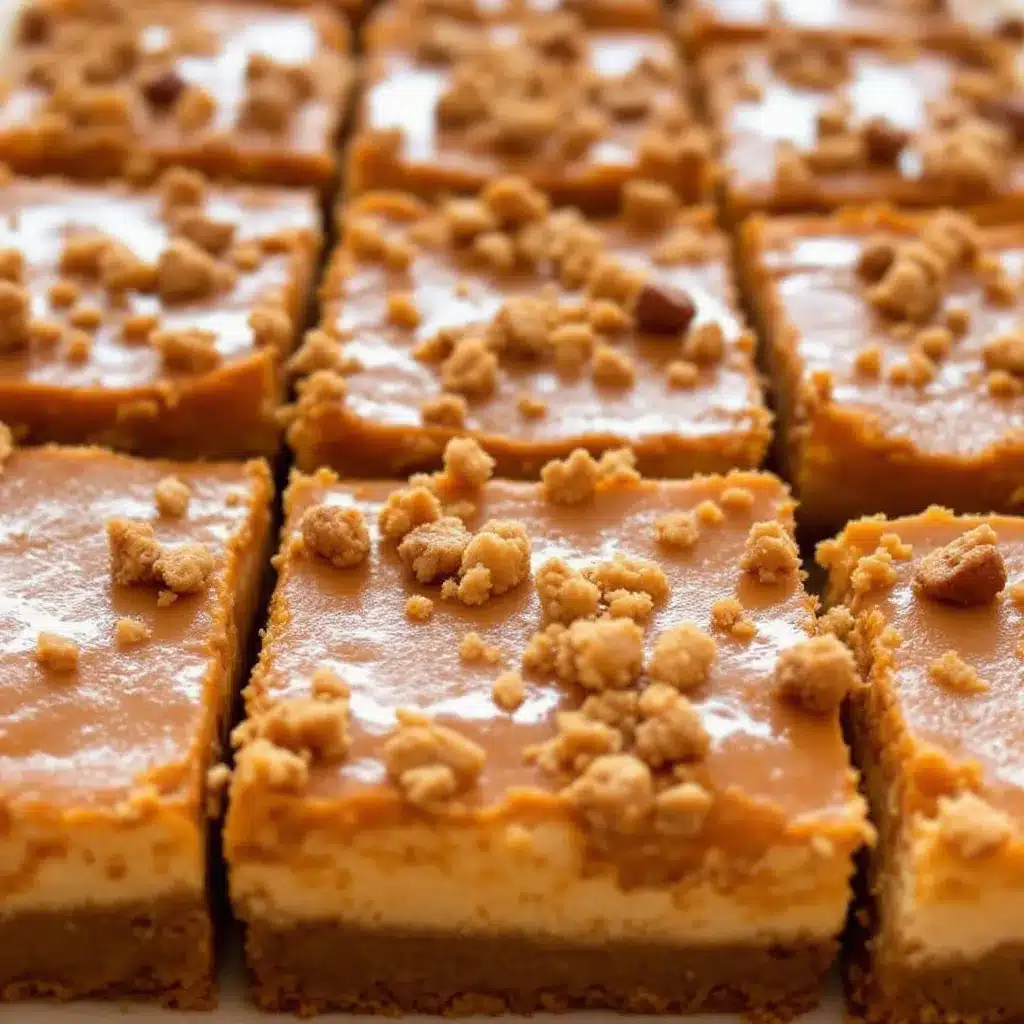
Follow these steps carefully, and you’ll have perfect bars every time. I’ve included sensory cues and troubleshooting tips to guide you through.
- Prepare the Pan: Line a 9×9-inch baking pan with parchment paper, leaving a 2-inch overhang on two opposite sides. This will act as handles to lift the bars out later. Lightly spray the parchment with non-stick cooking spray for extra insurance.
- Make the Crust: In a medium bowl, combine 2 cups of graham cracker crumbs, ¼ cup of granulated sugar, and ½ cup of melted unsalted butter. Stir with a fork until the mixture resembles wet sand and holds together when pressed. The texture should be like damp sand—if it’s too dry, add a tablespoon more melted butter.
- Press the Crust: Transfer the crust mixture to the prepared pan. Press it firmly and evenly into the bottom using the bottom of a measuring cup or a flat glass. Make sure it’s compact, or the bars will fall apart. Pop the pan in the fridge while you make the filling.
- Mix the Filling Base: In a large mixing bowl, add the entire jar of marshmallow fluff (about 7 ounces). Using an electric mixer on low speed, beat the fluff for about 30 seconds to loosen it up. It should be smooth and slightly airy.
- Add Pumpkin and Spices: Add 1 cup of canned pumpkin puree, 1 ½ teaspoons of pumpkin pie spice, and 1 teaspoon of vanilla extract to the bowl. Beat on medium speed until everything is well combined and smooth. The mixture should be a uniform orange color and smell like fall. Scrape down the sides of the bowl with a spatula.
- Fold in Whipped Topping: Gently fold in 1 ½ cups of thawed whipped topping using a rubber spatula. Use a gentle, sweeping motion from the bottom up to incorporate the whipped topping without deflating it. You want the mixture to be light and airy, not dense. It should look like a thick mousse.
- Assemble the Bars: Pour the filling over the chilled crust and spread it into an even layer using an offset spatula or the back of a spoon. Tap the pan gently on the counter to release any air bubbles. The top should be smooth and level.
- Chill: Cover the pan with plastic wrap and refrigerate for at least 6 hours, but overnight is best. The bars need time to set and become firm enough to slice. If you’re in a hurry, you can freeze them for 3-4 hours, but the texture will be slightly icier.
- Slice and Serve: Once fully set, lift the bars out of the pan using the parchment overhang. Place on a cutting board and use a sharp knife to slice into squares. For clean slices, wipe the knife with a damp paper towel between cuts. Serve cold with a dollop of whipped cream and a sprinkle of cinnamon.
Cooking Tips & Techniques
I’ve made this recipe more times than I can count, and I’ve learned a few things along the way. Here are my best tips for success:
- Don’t Overmix the Filling: Once you add the whipped topping, fold gently. Overmixing can deflate the air and make the bars dense. You want them light and mousse-like.
- Chill Time is Non-Negotiable: I know it’s tempting to rush this, but 6 hours is the minimum. I once tried to slice them after 4 hours, and they were a goopy mess. Overnight chilling gives you the cleanest slices and the best texture.
- Use Room Temperature Ingredients: Let your marshmallow fluff and pumpkin puree sit out for about 15 minutes before mixing. This helps everything combine smoothly without lumps.
- Line Your Pan Properly: The parchment overhang is your best friend. Without it, you’ll be digging the bars out with a fork. Trust me, I learned this the hard way.
- Make Your Own Pumpkin Pie Spice: If you don’t have a blend on hand, mix 1 teaspoon of cinnamon, ¼ teaspoon of nutmeg, ¼ teaspoon of ginger, and ⅛ teaspoon of cloves. It’s fresher and more flavorful than most store-bought blends.
- Clean Slices Every Time: Run your knife under hot water and wipe it dry before each cut. This prevents the filling from sticking and gives you those beautiful, bakery-style edges.
Variations & Adaptations
One of the best things about this recipe is how versatile it is. I’ve tried several variations, and they’re all delicious in their own way.
- Gluten-Free Version: Simply swap the graham crackers for gluten-free graham crackers or crushed gluten-free vanilla cookies. The rest of the ingredients are naturally gluten-free.
- Vegan Adaptation: Use a vegan marshmallow fluff (like Dandies), a plant-based butter substitute, and a coconut-based whipped topping. I’ve tested this with a vegan friend, and it worked beautifully.
- Chocolate Pumpkin Swirl: Melt ¼ cup of semi-sweet chocolate chips and drizzle it over the filling before chilling. Use a knife to create a swirl pattern. The chocolate adds a rich contrast to the spiced pumpkin.
- Boozy Pumpkin Bars: Add 1 tablespoon of bourbon or dark rum to the filling along with the vanilla extract. It adds a warm, grown-up flavor that’s perfect for holiday parties.
- Extra Crunchy Crust: Mix ½ cup of finely chopped pecans or walnuts into the graham cracker crust. Toast the nuts first for even more flavor.
- Pumpkin Chai Spice: Replace the pumpkin pie spice with 1 ½ teaspoons of chai spice blend. It adds cardamom and black pepper notes that are surprisingly good with the marshmallow fluff.
Serving & Storage Suggestions
These bars are best served cold, straight from the fridge. The texture is firm but creamy, and the flavors are more pronounced when they’re chilled. I like to serve them on a pretty platter with a dollop of whipped cream and a light dusting of cinnamon or nutmeg. For a more decadent presentation, drizzle with caramel sauce and sprinkle with toasted pecans.
These bars pair beautifully with a hot cup of coffee, spiced chai latte, or a glass of cold milk. They’re also a great addition to a dessert board alongside other fall treats like apple cider donuts or pumpkin spice cookies.
Storage Instructions: Store any leftover bars in an airtight container in the refrigerator for up to 5 days. The crust may soften slightly over time, but the flavor remains delicious. You can also freeze the bars for up to 3 months. Wrap individual squares in plastic wrap and place them in a freezer-safe bag. Thaw in the refrigerator overnight before serving. I’ve done this for a last-minute Thanksgiving dessert, and no one could tell they were frozen.
The flavors actually deepen after a day or two in the fridge. The pumpkin and spice meld together beautifully, making these bars even better on day two. Just keep them covered so they don’t absorb any fridge odors.
Nutritional Information & Benefits
While these bars are definitely a treat, they do offer some nutritional benefits thanks to the pumpkin. Pumpkin is rich in vitamin A, fiber, and antioxidants, which support eye health and immunity. The marshmallow fluff and whipped topping add sugar, so enjoy these in moderation.
Here are the estimated nutritional values per bar (based on 9 servings):
| Nutrient | Amount per Serving |
|---|---|
| Calories | 285 |
| Total Fat | 14g |
| Saturated Fat | 8g |
| Cholesterol | 20mg |
| Sodium | 210mg |
| Total Carbohydrates | 38g |
| Dietary Fiber | 2g |
| Sugars | 24g |
| Protein | 2g |
These bars are vegetarian and can be made gluten-free and vegan with simple substitutions. They contain dairy and wheat (from graham crackers), so keep that in mind for guests with allergies. I personally love that I can make a dessert that feels indulgent but still has a little bit of nutritional value from the pumpkin. It’s all about balance, right?
Conclusion
These creamy no-bake pumpkin pie cheesecake bars are the kind of recipe that makes you feel like a kitchen genius with almost no effort. They’re quick, easy, and unbelievably delicious. The marshmallow fluff trick gives them a texture you won’t find in any other pumpkin dessert, and the six-ingredient list means you can whip them up anytime a craving strikes. I honestly love these bars because they remind me of that rainy Tuesday night when I decided to experiment instead of giving up. They’re proof that the best recipes often come from the most unexpected moments.
I’d love to hear how these turn out for you! Try swapping in your favorite spices or adding a chocolate swirl, and let me know what you think. Leave a comment below or tag me in your photos—I can’t wait to see your creations. Go ahead, make a batch tonight. Your future self will thank you.
Frequently Asked Questions
Can I use homemade whipped cream instead of Cool Whip?
Yes, you can! Just make sure your homemade whipped cream is stabilized. Whip 1 ½ cups of heavy cream with 2 tablespoons of powdered sugar until stiff peaks form. It will work, but the bars may be slightly less firm than with Cool Whip. I recommend chilling them for the full 8 hours if you go this route.
Can I make these bars dairy-free?
Absolutely. Use a dairy-free butter substitute (like Earth Balance) for the crust, and a coconut-based whipped topping (like CocoWhip). Most marshmallow fluff brands are dairy-free, but double-check the label. I’ve made a dairy-free version for a friend, and it was just as creamy and delicious.
How long do these bars need to set in the fridge?
At least 6 hours, but overnight is best. The filling needs time to firm up so you can slice them cleanly. If you’re in a real hurry, you can freeze them for 3-4 hours, but the texture will be slightly icier. Patience is key here!
Can I use pumpkin pie filling instead of pumpkin puree?
I wouldn’t recommend it. Pumpkin pie filling is already sweetened and spiced, so it will throw off the balance of the recipe. Stick with 100% pure pumpkin puree for the best results. If you only have pumpkin pie filling, reduce the sugar and spices in the recipe by half, but the texture may still be different.
Why are my bars too soft?
This usually happens for one of three reasons: not enough chilling time, overmixing the filling, or using too much pumpkin puree. Make sure you measure your pumpkin accurately and chill the bars for the full 6-8 hours. If they’re still soft, pop them in the freezer for an hour before slicing. I’ve saved many a batch this way!
Pin This Recipe!
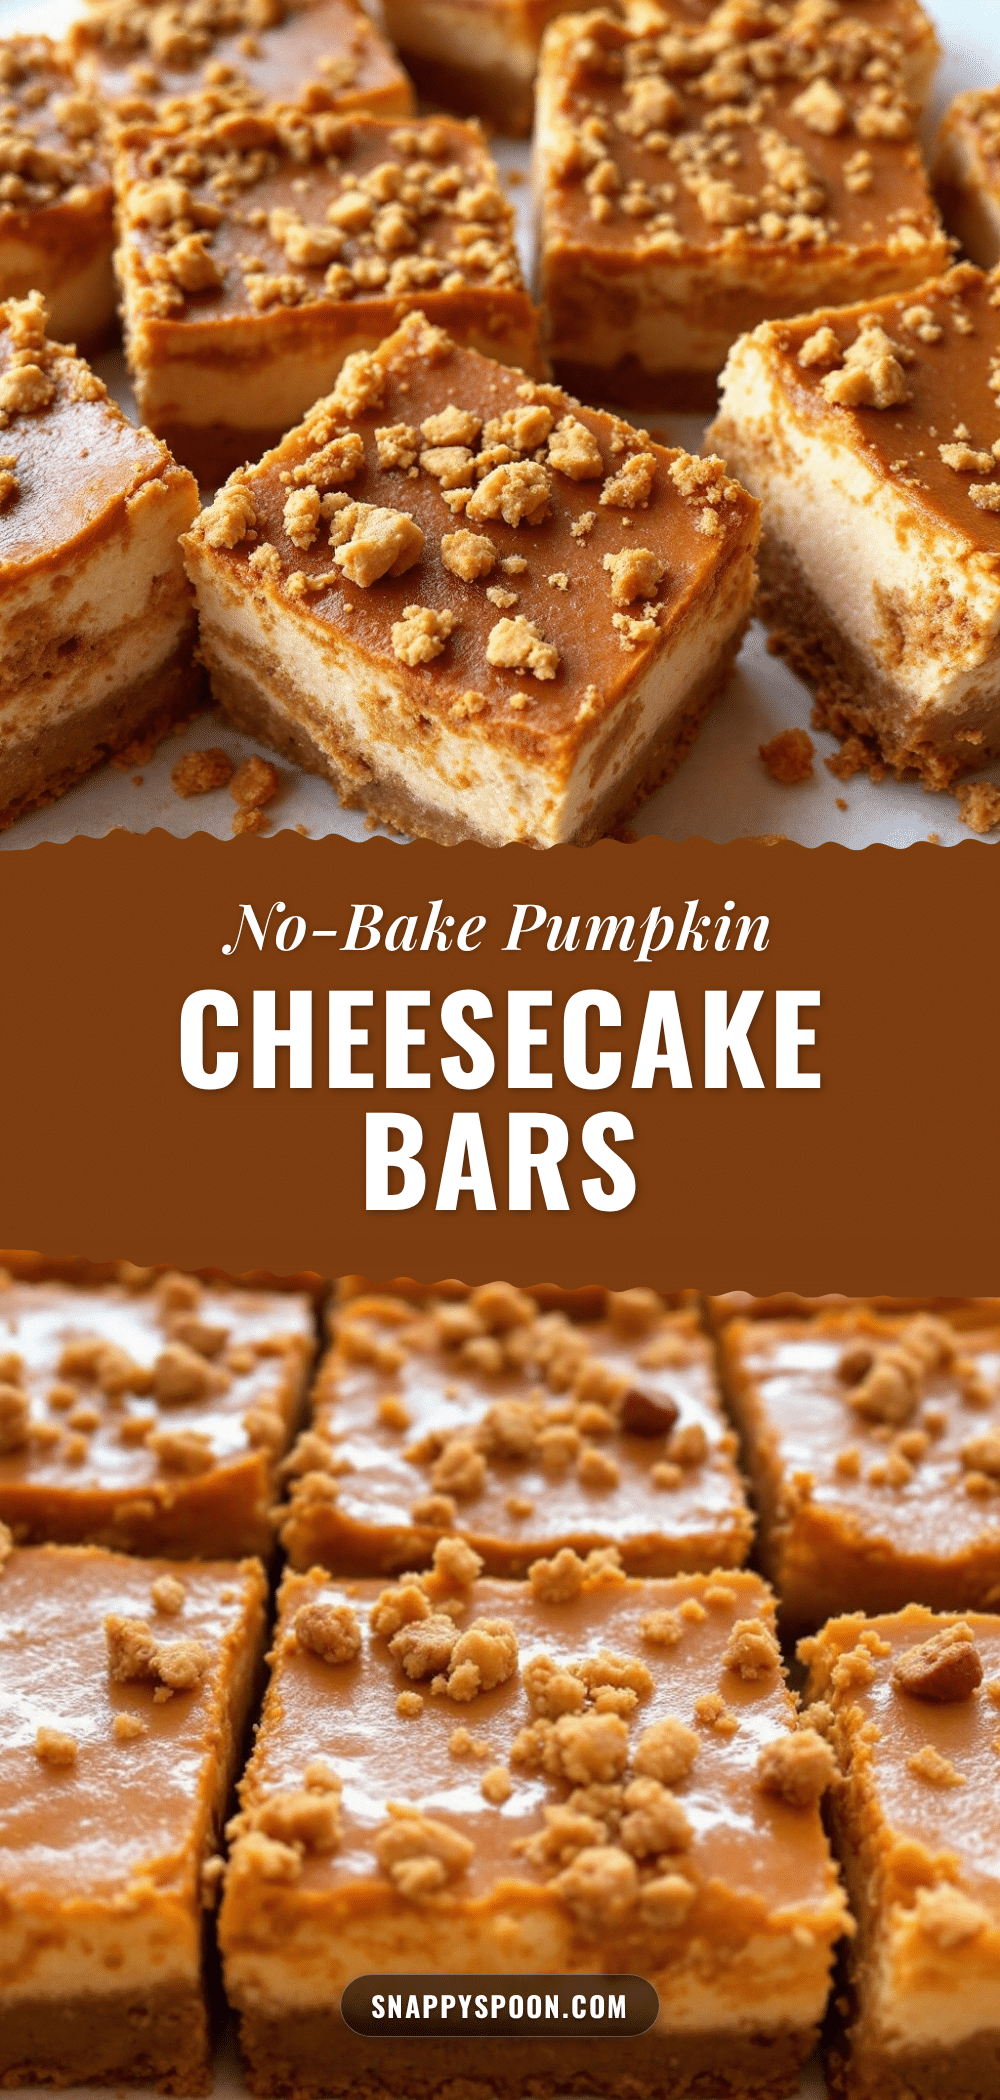
Creamy No-Bake Pumpkin Pie Cheesecake Bars
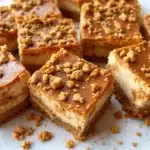
These creamy no-bake pumpkin pie cheesecake bars are rich, silky, and packed with classic pumpkin pie spice flavor, requiring zero oven time. Made with just six main ingredients, they’re the perfect easy fall dessert for any gathering or late-night craving.
- Prep Time: 15 minutes
- Cook Time: 0 minutes
- Total Time: 6 hours 15 minutes (includes chilling time)
- Yield: 9 servings 1x
- Category: Dessert
- Cuisine: American
Ingredients
- 2 cups graham cracker crumbs
- ½ cup unsalted butter, melted
- ¼ cup granulated sugar
- 1 jar (7 ounces) marshmallow fluff
- 1 cup canned pumpkin puree (100% pure, not pumpkin pie filling)
- 1 ½ cups whipped topping (thawed, like Cool Whip)
- 1 ½ teaspoons pumpkin pie spice
- 1 teaspoon vanilla extract
- Optional toppings: whipped cream, cinnamon, caramel drizzle, crushed pecans
Instructions
- Line a 9×9-inch baking pan with parchment paper, leaving a 2-inch overhang on two opposite sides. Lightly spray with non-stick cooking spray.
- In a medium bowl, combine graham cracker crumbs, granulated sugar, and melted unsalted butter. Stir until the mixture resembles wet sand and holds together when pressed.
- Press the crust mixture firmly and evenly into the bottom of the prepared pan using the bottom of a measuring cup or flat glass. Refrigerate while making the filling.
- In a large mixing bowl, add the marshmallow fluff. Beat with an electric mixer on low speed for about 30 seconds until smooth and slightly airy.
- Add pumpkin puree, pumpkin pie spice, and vanilla extract. Beat on medium speed until well combined and smooth. Scrape down the sides of the bowl.
- Gently fold in the thawed whipped topping using a rubber spatula, using a gentle sweeping motion from the bottom up until the mixture is light and airy like a thick mousse.
- Pour the filling over the chilled crust and spread into an even layer. Tap the pan gently on the counter to release air bubbles.
- Cover with plastic wrap and refrigerate for at least 6 hours, preferably overnight, until firm enough to slice.
- Lift the bars out using the parchment overhang, place on a cutting board, and slice into squares with a sharp knife. Wipe the knife with a damp paper towel between cuts for clean slices.
- Serve cold with optional toppings like whipped cream, cinnamon, caramel drizzle, or crushed pecans.
Notes
Chill time is non-negotiable—at least 6 hours, but overnight is best for clean slices. Do not overmix the filling after adding whipped topping to keep it light. Use room temperature ingredients for smoother mixing. For gluten-free, use gluten-free graham crackers. For vegan, use vegan marshmallow fluff, plant-based butter, and coconut-based whipped topping. The bars can be frozen for up to 3 months.
Nutrition
- Serving Size: 1 bar
- Calories: 285
- Sugar: 24
- Sodium: 210
- Fat: 14
- Saturated Fat: 8
- Carbohydrates: 38
- Fiber: 2
- Protein: 2
Keywords: no-bake pumpkin cheesecake bars, easy pumpkin dessert, 6-ingredient dessert, fall dessert, pumpkin pie bars, no-bake dessert