Love this? Save it for later!
Share the inspiration with your friends
This was supposed to be a simple batch of cold-fighting tea. I had the ginger, the turmeric, the honey—all the usual suspects lined up on my counter. But somewhere between answering my phone and trying to chop things one-handed, I grabbed the wrong jar. Instead of apple cider vinegar, I reached for raw, unfiltered apple cider vinegar with the mother, thinking it was just another bottle of something mild. I poured a generous glug into my simmering pot before I even realized what I’d done. And honestly? My first reaction was panic. I stood there staring at the pot, convinced I’d just ruined a perfectly good batch of immune-boosting tea.
I almost dumped the whole thing. But I didn’t. I let it simmer for a few more minutes, added a bit more honey to balance things out, and took a cautious sip. The warmth hit first, then the tang, then this incredible, spreading heat that settled right in my chest. It wasn’t tea anymore. It was something fiercer, something more alive. I ended up bottling that happy accident, and it became the base for what I now call my Wholesome Fire Cider Shots with Ginger and Turmeric. I mean, who knew a distracted moment could lead to something so good? Maybe you’ve had one of those kitchen disasters that turned out to be a secret blessing.
The thing is, this recipe stayed with me because it worked. Every time I felt that familiar tickle in my throat or just needed a little morning kick, I’d reach for a shot of this stuff. It’s become a staple in my kitchen, a little ritual that makes me feel like I’m doing something good for myself. And honestly, it’s so much better than anything you can buy at the store.
Why You’ll Love This Recipe
Let me tell you why these Wholesome Fire Cider Shots with Ginger and Turmeric have earned a permanent spot in my fridge. After countless batches and a few tweaks along the way, I can confidently say this is the version you’ll want to make again and again.
- Quick & Easy: This comes together in about 15 minutes of active prep time. The hardest part is waiting for it to steep! Perfect for a weekend afternoon when you want to feel productive without a huge kitchen mess.
- Simple Ingredients: You probably have most of these in your pantry or produce drawer right now. No weird, hard-to-find items that require a special trip to the health food store.
- Perfect for Cold Season: This is my go-to when I feel something coming on. A little shot each morning helps me feel like I’m fighting back, you know?
- Crowd-Pleaser: I’ve brought jars of this to friends and family, and everyone asks for the recipe. It’s got that perfect balance of spicy, tangy, and sweet that just works.
- Unbelievably Delicious: Okay, I’ll be honest—it’s not for the faint of heart. But the way the ginger and turmeric blend with the apple cider vinegar and honey? It’s a flavor experience that wakes you up from the inside out.
What makes this recipe different from all the other fire cider recipes out there? It’s the ratio. I spent a good amount of time testing different proportions of ginger to turmeric to vinegar to honey. Too much vinegar and it’s undrinkable. Too much honey and you lose the medicinal punch. This version hits that sweet spot where it’s potent enough to do its job but pleasant enough that you actually look forward to taking it. Plus, I add a touch of black pepper to help your body absorb the turmeric better—a little science tip I picked up from a nutritionist friend.
This isn’t just another wellness trend. It’s the kind of recipe that makes you feel like you’re taking care of yourself in a real, tangible way. It’s comfort in a shot glass, with a kick.
What Ingredients You Will Need
This recipe uses simple, whole ingredients that each play a specific role in creating that signature fiery yet soothing flavor. Most of these are pantry staples or easily found at any grocery store.
- Fresh Ginger Root: 1/2 cup, thinly sliced (no need to peel if it’s organic—just scrub it well). The ginger brings that signature heat and helps settle the stomach. I prefer organic ginger when I can find it; it just seems to have more punch.
- Fresh Turmeric Root: 1/4 cup, thinly sliced. This is the golden goodness that gives the shots their beautiful color and anti-inflammatory properties. Fresh turmeric stains everything it touches, so be careful with your cutting board and clothes!
- Raw Apple Cider Vinegar: 2 cups, with the mother. I use Bragg’s or a local brand from the farmer’s market. The mother is that cloudy stuff floating around—it’s full of good bacteria and enzymes.
- Raw Honey: 1/4 cup, or more to taste. Local honey is ideal if you can get it, but any raw, unfiltered honey works. The honey balances the acidity and adds a touch of sweetness.
- Fresh Lemon Juice: 1/4 cup, from about 2 lemons. Fresh is non-negotiable here—bottled lemon juice just doesn’t have the same brightness.
- Garlic Cloves: 4-5 cloves, smashed. Garlic is a classic immune booster, and it adds a subtle savory depth. Don’t skip it—you won’t even taste it in the final product.
- Small Onion: 1/2 an onion, roughly chopped. This might sound weird, but trust me. The onion adds a layer of complexity and its own immune-supporting properties.
- Fresh Jalapeño or Habanero: 1 small pepper, sliced (optional, for extra heat). I usually add half a jalapeño for a gentle warmth. If you want a serious kick, go for a habanero.
- Black Peppercorns: 1 teaspoon, whole or cracked. This is crucial for turmeric absorption. The piperine in black pepper helps your body make the most of the curcumin in turmeric.
- Optional Add-ins: A sprig of fresh rosemary, a few slices of horseradish, or a cinnamon stick. These are fun to experiment with but not essential.
When selecting your ginger and turmeric, look for firm roots without any soft spots or wrinkling. The fresher they are, the more flavorful your fire cider will be. For the honey, I recommend a mild-flavored variety like clover or orange blossom so it doesn’t overpower the other ingredients.
Equipment Needed
You don’t need a fancy kitchen setup for this recipe. Here’s what you’ll need:
- Cutting Board and Sharp Knife: A good chef’s knife makes slicing ginger and turmeric much easier. I learned the hard way that a dull knife + turmeric = a recipe for disaster (and stained fingers).
- Glass Jar with Tight-Fitting Lid: A 32-ounce (1 quart) mason jar works perfectly. Make sure it’s completely clean and dry before you start. I use wide-mouth jars because they’re easier to fill and clean.
- Measuring Cups and Spoons: For precise measurements, though this recipe is pretty forgiving.
- Small Saucepan: Only if you want to gently warm the vinegar to speed up the infusion process. This is optional—I usually skip it and just let time do the work.
- Fine-Mesh Strainer or Cheesecloth: For straining the finished fire cider. A nut milk bag works great too.
- Funnel: Makes bottling much less messy. I have a small stainless steel one that I use for everything.
- Dark Glass Bottles for Storage: Amber or cobalt blue bottles protect the mixture from light and keep it potent longer. You can find these online or reuse a clean store-bought bottle.
If you don’t have a funnel, you can carefully pour through a makeshift paper cone. And if you don’t have dark glass bottles, a regular mason jar in the fridge works just fine—just use it within a month or so.
Preparation Method

Making your own Wholesome Fire Cider Shots with Ginger and Turmeric is surprisingly simple. Here’s how I do it, step by step.
- Prep your produce. Wash and scrub the ginger and turmeric roots thoroughly. No need to peel them unless the skin looks tough or dirty. Slice them into thin rounds—about 1/8 inch thick. Smash the garlic cloves with the flat side of your knife to release their oils. Roughly chop the onion. Slice the jalapeño if you’re using it. This whole step takes about 10 minutes.
- Layer everything in the jar. Start with the ginger and turmeric slices, then add the garlic, onion, and pepper. Drop in the black peppercorns. I like to pack everything in fairly tightly so the vinegar has lots of surface area to work with.
- Add the liquids. Pour the raw apple cider vinegar over the solids, making sure everything is completely submerged. You might need to press down on the ingredients with a spoon to release any air bubbles. Leave about an inch of headspace at the top of the jar.
- Seal and shake. Put the lid on tightly and give the jar a good shake. You’ll see the vinegar immediately start to take on color from the turmeric. That’s a good sign!
- Steep and wait. Store the jar in a cool, dark place (like a kitchen cabinet) for 2 to 4 weeks. Shake it gently every day or two to redistribute the flavors. I usually let mine go for a full 3 weeks—the longer it steeps, the more potent it gets. You can taste it after 2 weeks and decide if it’s strong enough for you.
- Strain and bottle. After the steeping period, strain the liquid through a fine-mesh strainer or cheesecloth into a clean bowl or large measuring cup. Press down on the solids to extract every last drop of that good stuff. Discard the solids (compost them if you can!).
- Add honey and lemon. Stir in the raw honey and fresh lemon juice while the vinegar mixture is still at room temperature. Taste and adjust—if you want it sweeter, add more honey. If you want it tangier, add a splash more lemon.
- Bottle and refrigerate. Use a funnel to pour the finished fire cider into your dark glass bottles or a clean jar. Store it in the refrigerator. It will keep for up to 6 months, but honestly, you’ll probably use it up long before then.
Pro tip: Label your bottles with the date you made them. I learned this after finding an unlabeled mystery bottle in my fridge that I was too scared to drink.
Cooking Tips & Techniques
After making this recipe more times than I can count, I’ve picked up a few tricks that make a real difference.
Don’t skip the black pepper. I know it seems like a small detail, but it’s actually the key to making the turmeric work in your body. Turmeric’s active compound, curcumin, is poorly absorbed on its own. Black pepper contains piperine, which can increase absorption by up to 2,000%. That’s not a typo. So please, don’t leave it out.
Use the freshest roots you can find. I once made a batch with ginger and turmeric that had been sitting in my fridge for a few weeks. The flavor was noticeably weaker, and the color wasn’t as vibrant. Fresh roots are firmer, more aromatic, and give you a much better end product.
Be patient with the steeping. I know it’s tempting to rush this step, especially when you’re excited to try it. But the flavors really do develop and deepen over time. I’ve tasted it at 1 week, 2 weeks, and 3 weeks, and the difference is significant. The longer steep gives you a more complex, well-rounded flavor with a pleasant warmth rather than a harsh bite.
Watch out for turmeric stains. Seriously. Turmeric will stain your cutting board, your countertops, your clothes, and your fingernails. I learned this the hard way when I wore a white shirt while making a batch. Now I always wear an apron and use a dedicated cutting board. If you do get stains on your hands, a little lemon juice and baking soda paste can help remove them.
Adjust the heat to your liking. The beauty of making your own fire cider is that you control the spice level. If you’re sensitive to heat, skip the jalapeño entirely. If you want a serious kick, add a habanero or even a ghost pepper. I like mine with a gentle warmth, so I use half a jalapeño with the seeds removed.
Variations & Adaptations
One of the best things about this recipe is how adaptable it is. Here are some variations I’ve tried and loved.
Milder Version for Sensitive Stomachs: If you find the vinegar too harsh, use half apple cider vinegar and half water. You can also reduce the ginger and garlic by half. My mom prefers this version—she says it’s gentle enough to take on an empty stomach.
Sweet and Spicy Version: Add a cinnamon stick and a star anise to the jar during steeping. The warm spices complement the ginger and turmeric beautifully. I made this for a holiday batch last year and it was a huge hit.
Herbal Infusion: Add a few sprigs of fresh rosemary, thyme, or oregano to the mix. These herbs have their own immune-supporting properties and add a lovely earthy note. I like to do a rosemary version in the winter.
Extra Immunity Boost: Add 1 tablespoon of echinacea root or elderberries to the jar during steeping. Both are well-known immune boosters that pair nicely with the other ingredients. Just strain them out along with everything else.
Low-Sugar Option: Replace the honey with stevia or monk fruit sweetener to taste. Keep in mind that honey has its own beneficial properties, so you’ll be losing some of that immune support. But if you’re watching your sugar intake, this is a great alternative.
Kid-Friendly Version: Use a 50/50 mix of apple cider vinegar and apple juice, and reduce the ginger and garlic by half. Add extra honey to taste. My nephew actually asks for this one—he calls it his “special juice.”
Serving & Storage Suggestions
These Wholesome Fire Cider Shots with Ginger and Turmeric are best served cold or at room temperature. I like to take mine first thing in the morning, about 15-20 minutes before breakfast. It wakes up my digestion and gives me a little energy boost.
How to take it: Shake the bottle well before each use (the honey can settle at the bottom). Pour a shot—about 1 to 2 tablespoons—and drink it straight. You can also dilute it in a small glass of water or warm tea if the straight shot feels too intense. Some people like to add it to salad dressings or marinades, and honestly, it’s amazing in a vinaigrette.
Storage: Keep your fire cider in the refrigerator at all times. It will stay good for up to 6 months, though the flavor is best within the first 3 months. I’ve kept batches longer than that and they were still fine, but the color starts to fade and the flavor becomes less vibrant.
Freezing: You can freeze fire cider in ice cube trays for individual servings. Pop out a cube whenever you need a quick immune boost. This is great if you’re traveling or want to have some on hand for emergencies.
Flavor development: The flavors will continue to mellow and blend over the first few weeks in the fridge. I actually think it tastes better after about a week of refrigeration. The initial harshness of the vinegar softens, and the honey and lemon really come through.
Nutritional Information & Benefits
Here’s a rough estimate for a 1-tablespoon serving of these Wholesome Fire Cider Shots with Ginger and Turmeric:
- Calories: 15-20
- Carbohydrates: 4g
- Sugars: 3g (from honey)
- Vitamin C: 2% DV
- Iron: 1% DV
The real value here isn’t in the numbers—it’s in the powerful compounds these ingredients contain. Ginger contains gingerol, a potent anti-inflammatory compound that can help reduce muscle pain and soreness. Turmeric is famous for curcumin, which supports joint health and overall inflammation response. The raw apple cider vinegar provides beneficial bacteria and enzymes that support gut health. And the raw honey offers antimicrobial properties and a quick source of natural energy.
This recipe is naturally gluten-free, dairy-free, and vegan (if you use maple syrup instead of honey). It’s also low in calories and sugar compared to commercial wellness shots. The main allergen to be aware of is honey, which some people avoid for dietary or ethical reasons.
I personally love that this recipe lets me take a proactive approach to my health without relying on expensive supplements or processed products. It feels good to know exactly what’s going into my body.
Conclusion
Making your own Wholesome Fire Cider Shots with Ginger and Turmeric is one of those small kitchen projects that pays off in a big way. It’s simple, affordable, and gives you a powerful tool for supporting your immune system all year round. Whether you’re fighting off a cold, looking for a morning pick-me-up, or just want to feel like you’re doing something good for yourself, this recipe delivers.
I love that this recipe is so forgiving. You can tweak it to match your taste, add your favorite herbs, or adjust the heat level. It’s your fire cider now—make it your own. And if you end up with a happy accident like I did, don’t panic. It might just be the best mistake you ever made.
I’d love to hear how your batch turns out! Drop a comment below and let me know what variations you tried. Did you add something unexpected? Did you make it extra spicy? Share your fire cider story—I read every single comment and I love hearing about your kitchen adventures. And if you found this helpful, please share it with someone who could use a little immune boost. Happy brewing!
Frequently Asked Questions
Can I use dried ginger and turmeric instead of fresh?
You can, but the flavor won’t be as bright or potent. Fresh roots give a much more vibrant and complex taste. If you’re in a pinch, use about half the amount of dried spices—they’re more concentrated.
How long does homemade fire cider last?
Stored in the refrigerator in a sealed bottle, it will keep for up to 6 months. The flavor is best within the first 3 months. If you see any mold or off smells, discard it immediately.
Can I drink this every day?
Yes, many people take a small shot (1-2 tablespoons) daily as a preventive measure. Start with a smaller amount to see how your body reacts, especially if you have a sensitive stomach or are on medication.
Is this safe during pregnancy or while breastfeeding?
It’s best to consult with your healthcare provider before consuming large amounts of medicinal herbs and vinegar during pregnancy or breastfeeding. The amounts in this recipe are generally considered safe, but everyone’s situation is different.
Can I make this without the onion and garlic?
Absolutely. The onion and garlic add depth and immune support, but you can leave them out if you prefer a milder flavor. The ginger and turmeric will still shine through beautifully.
Pin This Recipe!
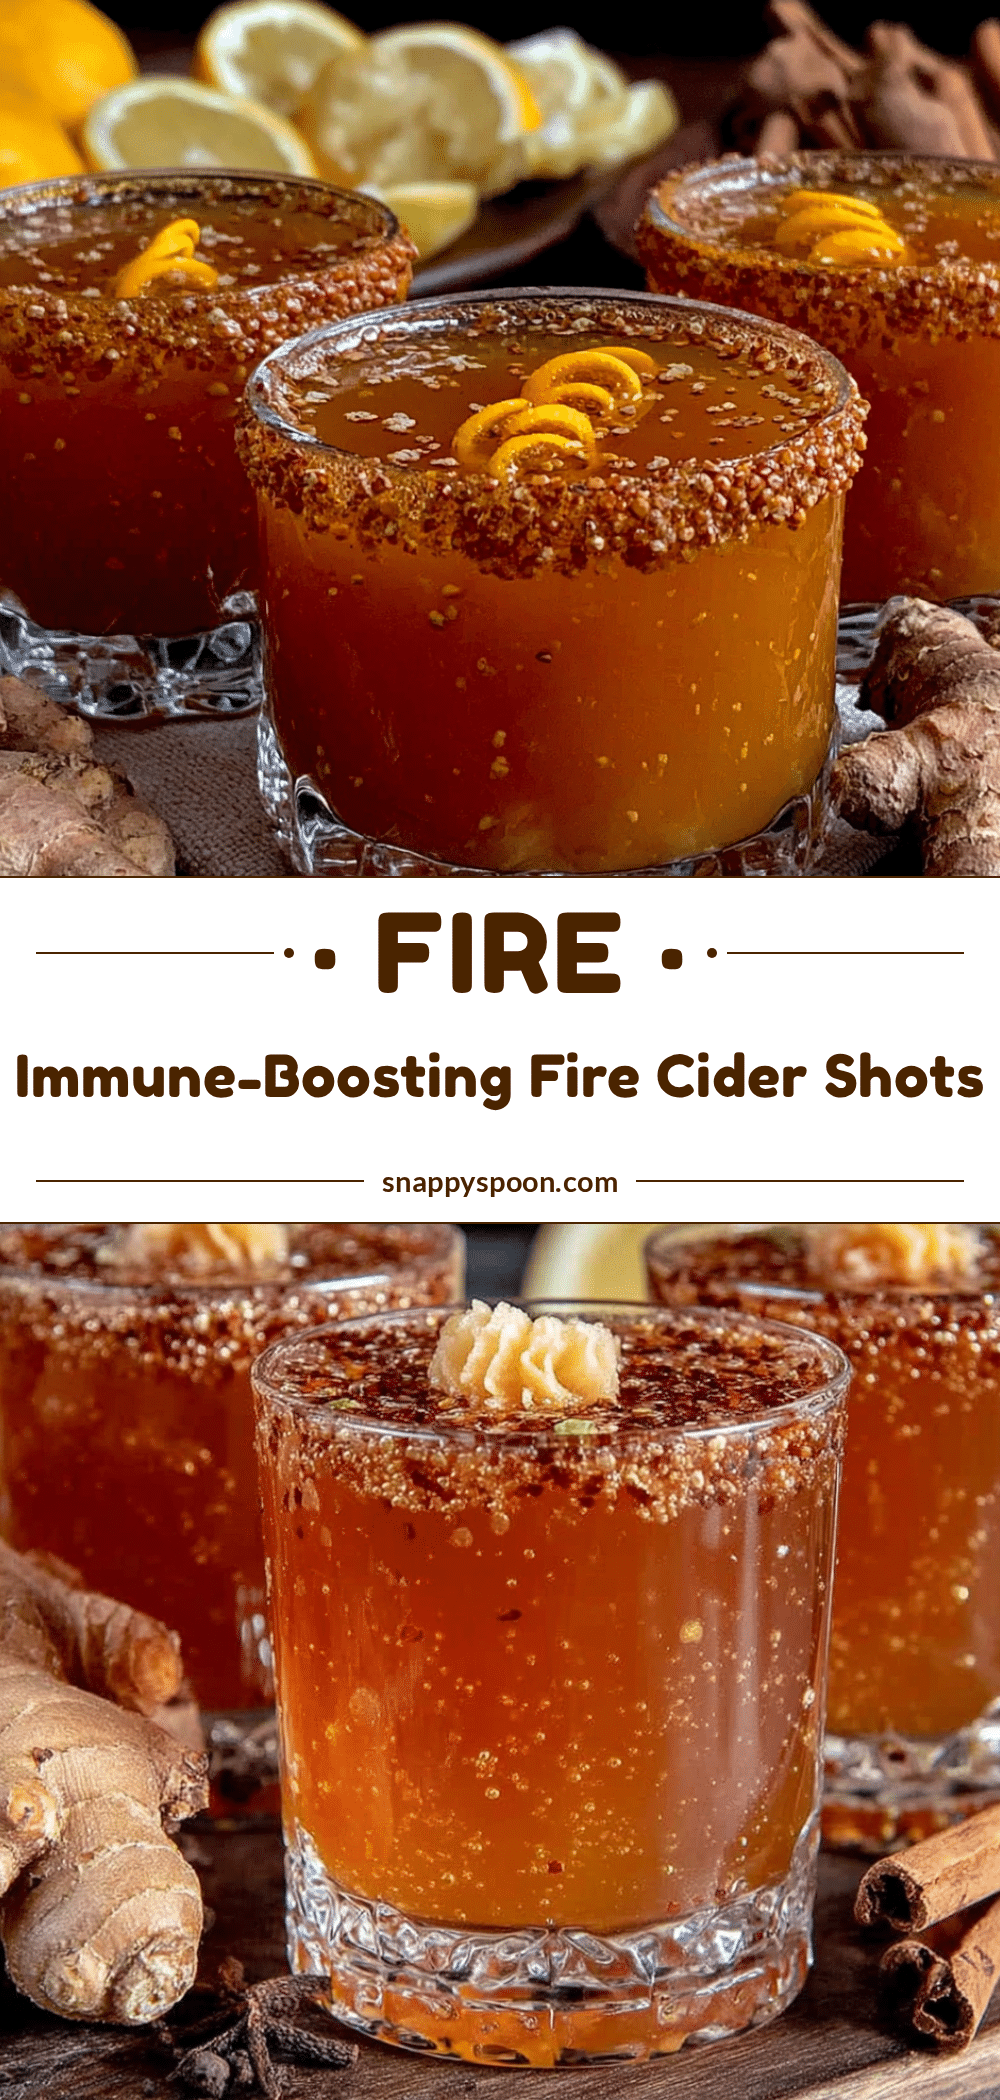
Wholesome Fire Cider Shots with Ginger and Turmeric

A potent and flavorful immune-boosting shot made with fresh ginger, turmeric, apple cider vinegar, and honey. This easy recipe is perfect for cold season and can be customized to your preferred spice level.
- Prep Time: 15 minutes
- Cook Time: 0 minutes
- Total Time: 15 minutes (plus 2-4 weeks steeping)
- Yield: About 2 cups (32 servings of 1 tablespoon each) 1x
- Category: Beverage
- Cuisine: American
Ingredients
- 1/2 cup fresh ginger root, thinly sliced
- 1/4 cup fresh turmeric root, thinly sliced
- 2 cups raw apple cider vinegar (with the mother)
- 1/4 cup raw honey (or more to taste)
- 1/4 cup fresh lemon juice (from about 2 lemons)
- 4–5 garlic cloves, smashed
- 1/2 small onion, roughly chopped
- 1 small jalapeño or habanero pepper, sliced (optional)
- 1 teaspoon black peppercorns, whole or cracked
- Optional: fresh rosemary sprig, horseradish slices, or cinnamon stick
Instructions
- Wash and scrub the ginger and turmeric roots thoroughly. Slice them into thin rounds (about 1/8 inch thick). Smash the garlic cloves with the flat side of a knife. Roughly chop the onion. Slice the jalapeño if using.
- Layer the ginger, turmeric, garlic, onion, pepper, and black peppercorns in a clean 32-ounce glass jar. Pack them in tightly.
- Pour the raw apple cider vinegar over the solids, ensuring everything is completely submerged. Press down with a spoon to release air bubbles. Leave about 1 inch of headspace.
- Seal the jar tightly and shake well. Store in a cool, dark place (like a kitchen cabinet) for 2 to 4 weeks. Shake gently every day or two.
- After steeping, strain the liquid through a fine-mesh strainer or cheesecloth into a clean bowl. Press down on the solids to extract all liquid. Discard the solids.
- Stir in the raw honey and fresh lemon juice while the mixture is at room temperature. Taste and adjust sweetness or tanginess as desired.
- Use a funnel to pour the finished fire cider into dark glass bottles or a clean jar. Store in the refrigerator for up to 6 months.
Notes
Don’t skip the black pepper—it increases turmeric absorption by up to 2,000%. Use fresh roots for best flavor. Turmeric stains surfaces, so wear an apron and use a dedicated cutting board. The longer the steeping time (up to 4 weeks), the more potent the flavor. Shake the bottle before each use as honey may settle.
Nutrition
- Serving Size: 1 tablespoon
- Calories: 1520
- Sugar: 3
- Carbohydrates: 4
Keywords: fire cider, immune booster, ginger, turmeric, apple cider vinegar, wellness shots, cold remedy, homemade