Love this? Save it for later!
Share the inspiration with your friends
My sister-in-law, Jen, wasn’t trying to impress anyone. I’d stopped by to drop off a casserole dish I’d borrowed, and the sight of her kids eating lunch hit me before I even got past the doorway. There they were, two little boys, happily munching on a bento-style box filled with salami, cheese, and crackers. It wasn’t fancy. It wasn’t a big deal to her. She just shrugged and said, “They love it, and it keeps them quiet for five minutes.” I stood there, genuinely curious, watching them pick and choose their bites. That casual, no-fuss moment stuck with me. It made me realize that sometimes the best recipes aren’t complex meals; they’re the simple, clever ideas that make life easier. Honestly, that’s how this easy copycat Lunchable snack box with salami and crackers was born in my own kitchen. I mean, maybe you’ve been there, staring at the overpriced, plastic-wrapped lunch kits at the store and thinking, “I can make this better.” Well, you can. This version is fresher, more customizable, and honestly, it tastes way better. Let me tell you, once you start making your own, you won’t go back.
Why You’ll Love This Recipe
This isn’t just another snack idea; it’s a game-changer for your lunch routine. After testing this with my own kids and a few picky adult friends, I can confidently say this recipe delivers on every level. Here’s why you’ll absolutely love it:
- Quick & Easy: This snack box comes together in under 10 minutes. Seriously, it’s faster than waiting in line at the grocery store deli counter, making it perfect for busy mornings or last-minute lunch packing.
- Simple Ingredients: You only need a few basic items—salami, cheese, crackers, and a few fun add-ins. No fancy grocery trips needed; you likely already have everything in your kitchen.
- Perfect for Lunchboxes: Great for school lunches, work snacks, picnics, or even a light dinner. It’s a crowd-pleaser that works for any occasion.
- Crowd-Pleaser: Kids love the interactive element of building their own bites, and adults appreciate the balanced, satisfying flavors. It always gets rave reviews.
- Unbelievably Delicious: The combination of salty salami, creamy cheese, and crunchy crackers is next-level comfort food. It’s the perfect mix of textures and tastes.
What makes this recipe different from the store-bought version is the quality. You control the ingredients, so you can choose better salami, your favorite cheese, and crackers you actually love. It’s not just another copycat—it’s your best version. This recipe isn’t just good; it’s the kind that makes you close your eyes after the first bite. It’s comfort food reimagined—healthier, faster, and with the same soul-soothing satisfaction. Perfect for impressing your kids without stress, or turning a simple snack into something memorable.
What Ingredients You Will Need
This recipe uses simple, wholesome ingredients to deliver bold flavor and satisfying texture without the fuss. Most of these are pantry staples, but I’ve included some tips to make your snack box even better.
- Salami: Use 4 to 6 ounces of your favorite salami. I recommend Genoa salami for its classic flavor, but hard salami or even pepperoni works great. Look for pre-sliced for convenience, or slice it yourself from a log for a thicker, meatier bite.
- Cheese: Pick 3 to 4 ounces of cheese. Cheddar, provolone, or mozzarella string cheese are excellent choices. I personally love using sharp cheddar for its bold flavor. Cut it into cubes or slices that are easy to grab.
- Crackers: About 1 cup of crackers. Ritz, saltines, or whole-wheat crackers are all perfect. For a gluten-free option, use rice crackers or almond flour crackers. I often use a mix of shapes for fun.
- Fruit (optional): A small handful of grapes, apple slices, or berries adds a sweet, fresh contrast to the salty ingredients. It’s a great way to round out the snack box.
- Vegetable (optional): Some baby carrots, cucumber rounds, or cherry tomatoes add crunch and color. This is perfect for sneaking in extra veggies.
- Dipping Sauce (optional): A tablespoon of mustard, honey, or ranch dressing can take the flavor up a notch. Honey mustard is a personal favorite of mine.
When selecting salami, I prefer the brand Columbus for its consistent quality and rich taste. For cheese, Kerrygold cheddar is a splurge but worth every penny. If you’re using fruit, opt for seedless grapes for easy eating. You can also swap the salami for turkey slices or roast beef for a different protein. The beauty of this snack box is its flexibility—use what you have on hand!
Equipment Needed
You don’t need much to put this snack box together, which is part of its charm. Here’s what you’ll need:
- Bento Box or Lunch Container: A divided container is ideal for keeping ingredients separate. I use a PlanetBox for my kids, but any small container with compartments works. A simple plate works for at-home snacking.
- Cutting Board: A medium-sized cutting board is essential for slicing salami and cheese. I prefer a wooden board because it’s gentle on knives.
- Sharp Knife: A good chef’s knife or paring knife makes slicing cheese and fruit a breeze. No need for anything fancy—just a sharp blade.
- Small Bowls (optional): If you’re adding dips, small ramekins or silicone cups are perfect for holding mustard or ranch without making a mess.
- Cookie Cutters (optional): For fun shapes! I sometimes use star or heart-shaped cutters to cut cheese and salami for a special treat. It’s a hit with kids.
I’ve used everything from a cheap plastic container to a high-end stainless steel bento box, and honestly, they all work. The key is having separate sections. If you don’t have a divided container, just use silicone cupcake liners in a regular lunch box to keep things organized. One tip: avoid using paper towels to line the container, as they can stick to the cheese. Instead, use a small piece of parchment paper if you need to separate items.
Preparation Method

Making this easy copycat Lunchable snack box with salami and crackers is incredibly straightforward. Follow these steps, and you’ll have a delicious, Instagram-worthy snack in minutes.
- Prep Your Ingredients: Start by taking your salami and cheese out of the refrigerator. If you’re using a block of cheese, slice it into thin, bite-sized cubes or rectangles. Aim for pieces about 1/2 inch thick. For the salami, if it’s not pre-sliced, cut it into thin rounds. If you’re using a log, you can also quarter the slices for easier handling. This should take about 2 minutes.
- Wash and Cut Produce: If you’re adding fruit or vegetables, wash them thoroughly. Slice grapes in half lengthwise to prevent choking hazards for small children. Cut apple slices into thin wedges, and if you’re using baby carrots, leave them whole. This step takes about 3 minutes.
- Assemble the Crackers: Count out your crackers. I usually use about 10 to 12 crackers per box. If you want to get creative, you can sandwich a small piece of cheese between two crackers for a mini sandwich. Place them in one compartment of your bento box.
- Arrange the Salami: Fold or roll the salami slices for a more appealing presentation. You can fold them in half, then in half again to create a small triangle, or simply roll them into little cylinders. Place them in a separate compartment. This takes about 1 minute.
- Add the Cheese: Place the cheese cubes or slices in another compartment. If you’re using string cheese, you can pull it apart into strips for a fun texture. This is also a good time to add any cookie-cutter shapes if you’re using them.
- Fill Remaining Spaces: Use the fruit and vegetables to fill any empty compartments. This not only adds color and nutrition but also helps keep the other ingredients from shifting around. If you’re including a dip, pour a small amount into a ramekin and nestle it into the box.
- Final Check and Seal: Give your snack box a final look. Make sure everything is secure and the lid fits properly. If you’re packing this for later, seal the container and refrigerate until ready to serve. The total preparation time is about 8 to 10 minutes.
One thing I learned the hard way: don’t overfill the container. If you cram too much in, the crackers can break, and the cheese can get squished. Leave a little breathing room. Also, if you’re using a dip, make sure the container is leak-proof. I once had a honey mustard disaster that ruined a whole batch of crackers. Trust me, a good seal is worth it.
Cooking Tips & Techniques
Over the years, I’ve made this snack box dozens of times, and I’ve picked up a few tricks that make a big difference. Here are my best tips for success:
- Keep It Cold: Salami and cheese are best when they’re cold. If you’re packing this for lunch, use an ice pack to keep everything fresh. The crackers can stay at room temperature, so don’t worry about them.
- Prevent Soggy Crackers: The enemy of a good snack box is a soggy cracker. Keep crackers completely separate from any moist ingredients like fruit or dips. If you must include a dip, use a sealed container or a silicone cup with a lid.
- Vary the Textures: The magic of this snack box is the contrast. Pair the soft, fatty salami with a sharp, firm cheese. Add a crunchy cracker and a juicy grape. Each bite should be a different experience.
- Make It Fun: Use small cookie cutters to shape cheese and salami into stars, animals, or hearts. This is a game-changer for picky eaters. I once made a batch of star-shaped cheese for my nephew, and he ate every single piece.
- Prep Ahead: You can slice the cheese and salami the night before and store them in separate airtight containers in the fridge. In the morning, just assemble the box. It saves you precious minutes during the morning rush.
I once made the mistake of using a very soft cheese, like brie, in a snack box. It was a mess. The cheese squished out everywhere, and the crackers turned into a sticky disaster. Stick to firmer cheeses like cheddar, gouda, or provolone. They hold their shape better and are easier to eat with your fingers.
Variations & Adaptations
One of the best things about this easy copycat Lunchable snack box with salami and crackers is how customizable it is. Here are some of my favorite variations:
- Vegetarian Version: Skip the salami and double up on the cheese and vegetables. Add some hummus or a hard-boiled egg for protein. I love using roasted red pepper strips and marinated artichoke hearts for extra flavor.
- Low-Carb/Keto Option: Replace the crackers with cheese crisps or cucumber rounds. Use a high-fat cheese like cheddar and add some nuts or olives. This version is incredibly satisfying and keeps you full for hours.
- Sweet and Savory Twist: Add a few dark chocolate chips or a small square of dark chocolate to the box. The combination of salty salami and sweet chocolate is surprisingly amazing. My kids think this is a special treat.
- Global Flavors: Swap the salami for prosciutto or soppressata. Use a soft cheese like mozzarella and add some sun-dried tomatoes and basil. It becomes an Italian-inspired antipasto box that’s perfect for a grown-up lunch.
- Breakfast Box: Use the same concept but with breakfast ingredients. Replace salami with cooked bacon or sausage, use cheddar cheese, and add some mini pancakes or waffle pieces. It’s a fun, portable breakfast.
I personally love the low-carb version. I use pepperoni slices instead of salami, add some cubed pepper jack cheese, and use pork rinds instead of crackers. It’s a crunchy, spicy, and satisfying snack that fits perfectly into my meal plan. Don’t be afraid to experiment—the possibilities are endless.
Serving & Storage Suggestions
This snack box is best served cold or at room temperature. If you’re packing it for a lunchbox, take it straight from the fridge and add an ice pack to keep it cool. For a picnic or snack at home, you can leave it out for up to two hours safely.
For presentation, I like to arrange the ingredients in a visually appealing way. Place the crackers in a neat row, fan out the salami slices, and group the cheese cubes together. Adding a small sprig of fresh herbs, like rosemary or mint, can make it look restaurant-worthy. If you’re serving this for a party, use a large wooden board and arrange everything in small piles. It’s a beautiful, no-cook appetizer.
When it comes to storage, this snack box is best assembled fresh. However, you can prep the components ahead of time. Store the sliced salami and cheese in separate airtight containers in the refrigerator for up to 3 days. Crackers should be kept in a cool, dry place. Do not assemble the box more than a few hours before serving, or the crackers will lose their crunch.
For reheating, you don’t need to heat anything. Just let the cheese and salami sit at room temperature for about 10 minutes before serving to take the chill off. This allows the flavors to come through more clearly. The flavors of the salami and cheese actually develop a bit over time, so if you make the components a day ahead, the taste is even better.
Nutritional Information & Benefits
Here is an estimated nutritional breakdown for one serving of this snack box (based on 2 ounces salami, 1 ounce cheese, and 10 crackers):
| Nutrient | Amount |
|---|---|
| Calories | 350-400 kcal |
| Protein | 15-20 g |
| Fat | 25-30 g |
| Carbohydrates | 20-25 g |
| Fiber | 1-2 g |
| Sodium | 800-1000 mg |
This snack box is a good source of protein and calcium from the cheese, which supports muscle health and strong bones. Salami provides iron and B vitamins, which are essential for energy production. The optional fruit and vegetables add fiber, vitamins, and antioxidants. If you’re watching your sodium intake, opt for low-sodium salami and cheese. This recipe can be easily adapted for gluten-free, low-carb, or vegetarian diets. It is not suitable for vegans in its current form, but you can use plant-based cheese and meat alternatives.
From a wellness perspective, I love that this snack box offers portion control. It’s a satisfying, balanced snack that doesn’t leave you feeling heavy. It’s perfect for a mid-afternoon energy boost or a light lunch when you’re on the go.
Conclusion
This easy copycat Lunchable snack box with salami and crackers is more than just a recipe; it’s a solution to the daily lunch dilemma. It’s quick, customizable, and infinitely more delicious than anything you can buy in a plastic tray. I love that it brings a little bit of joy to an ordinary day—whether it’s for my kids, my own work lunch, or a simple snack. I encourage you to make this your own. Swap in your favorite ingredients, get creative with the shapes, and don’t be afraid to try new combinations. The best part is watching someone open their lunchbox and smile.
I’d love to hear how you customize your snack box! Leave a comment below and share your favorite ingredient combinations. Don’t forget to pin this recipe for later and share it with a friend who needs a lunchbox win. Happy snacking!
Frequently Asked Questions
Can I use different types of meat?
Absolutely! You can swap the salami for turkey, ham, roast beef, or even chicken slices. Just make sure the meat is fully cooked and sliced thin for easy eating.
How long will this snack box last in the fridge?
If assembled, it’s best eaten within 24 hours. The crackers will start to soften. If you store the components separately, the salami and cheese will last 3-4 days, and crackers will stay fresh for weeks.
Can I make this nut-free?
Yes, this recipe is naturally nut-free if you choose nut-free crackers and cheese. Just double-check the labels on your salami and any dips to ensure they are processed in a nut-free facility.
Is this recipe suitable for a school lunch?
Yes, it’s perfect for school lunches. Just make sure to check your school’s policy on allergens like nuts or dairy. You can easily adapt it to meet those requirements.
Can I use a different type of cheese?
Definitely! Cheddar, provolone, mozzarella, gouda, or even a spreadable cheese like brie work well. Just remember that softer cheeses may squish more easily, so pack them carefully.
Pin This Recipe!
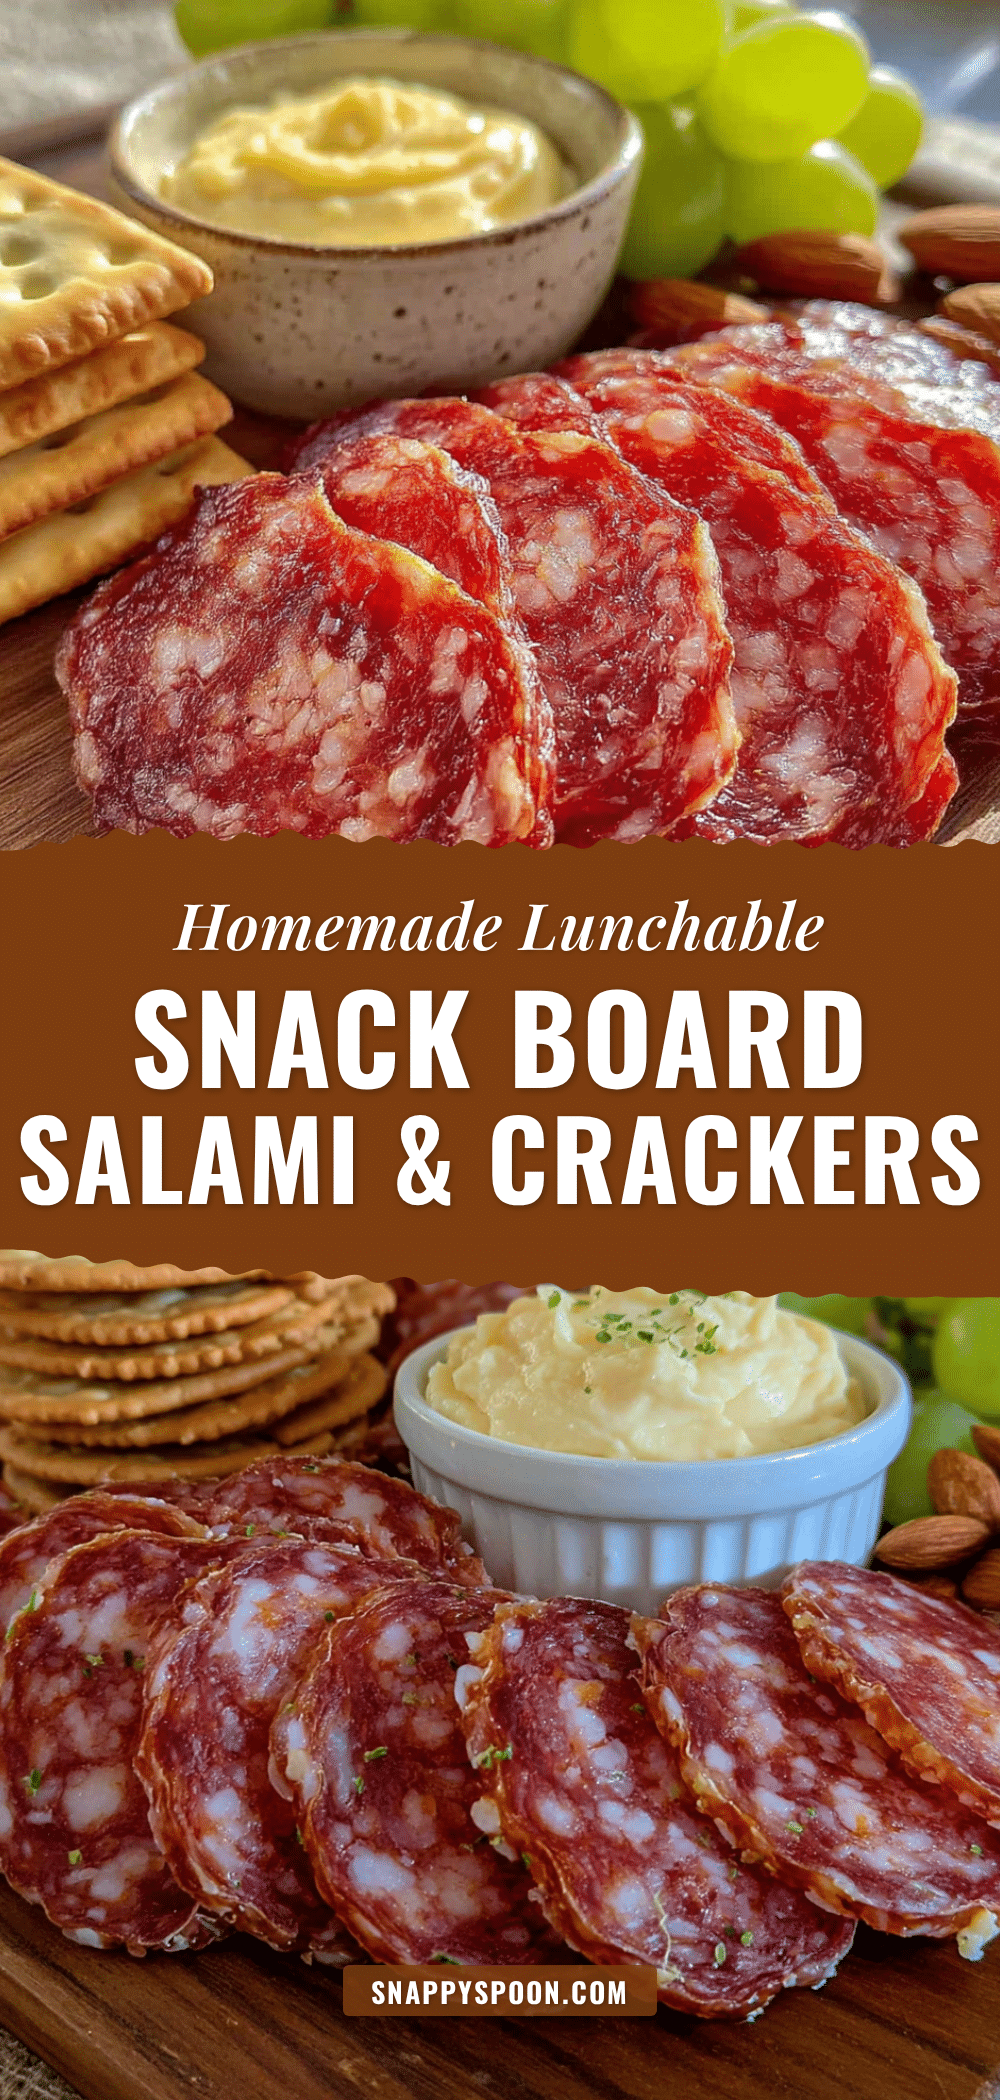
Easy Copycat Lunchable Snack Box: Best Salami & Cracker Recipe

This easy copycat Lunchable snack box with salami and crackers is a quick, customizable, and delicious alternative to store-bought lunch kits. Perfect for school lunches, work snacks, or picnics, it comes together in under 10 minutes with simple ingredients.
- Prep Time: 10 minutes
- Cook Time: 0 minutes
- Total Time: 10 minutes
- Yield: 1 serving 1x
- Category: Snack
- Cuisine: American
Ingredients
- 4 to 6 ounces salami (Genoa, hard salami, or pepperoni)
- 3 to 4 ounces cheese (cheddar, provolone, or mozzarella string cheese)
- 1 cup crackers (Ritz, saltines, whole-wheat, or gluten-free)
- Small handful grapes, apple slices, or berries (optional)
- Baby carrots, cucumber rounds, or cherry tomatoes (optional)
- 1 tablespoon mustard, honey, or ranch dressing (optional)
Instructions
- Prep your ingredients: Take salami and cheese out of the refrigerator. Slice cheese into bite-sized cubes or rectangles about 1/2 inch thick. If salami is not pre-sliced, cut into thin rounds or quarter slices.
- Wash and cut produce: Wash fruit and vegetables thoroughly. Slice grapes in half lengthwise, cut apple slices into thin wedges, leave baby carrots whole.
- Assemble the crackers: Count out 10 to 12 crackers per box. Optionally, sandwich a small piece of cheese between two crackers. Place in one compartment of bento box.
- Arrange the salami: Fold or roll salami slices into triangles or cylinders. Place in a separate compartment.
- Add the cheese: Place cheese cubes or slices in another compartment. If using string cheese, pull apart into strips. Optionally, use cookie cutters for fun shapes.
- Fill remaining spaces: Use fruit and vegetables to fill empty compartments. If including dip, pour into a ramekin and nestle into the box.
- Final check and seal: Ensure everything is secure and lid fits properly. Refrigerate until ready to serve.
Notes
Keep crackers separate from moist ingredients to prevent sogginess. Use an ice pack for packed lunches. For best results, use firm cheeses like cheddar or gouda. Prep components ahead of time and assemble just before serving.
Nutrition
- Serving Size: 1 snack box
- Calories: 375
- Sugar: 3
- Sodium: 900
- Fat: 27.5
- Saturated Fat: 10
- Carbohydrates: 22.5
- Fiber: 1.5
- Protein: 17.5
Keywords: copycat lunchable, salami and crackers, snack box, bento box lunch, easy lunch idea, kid-friendly snack, no-cook recipe