Love this? Save it for later!
Share the inspiration with your friends
Hand me that sticky jar of peanut butter, I muttered to myself last Tuesday morning, staring into the abyss of my pantry. It was one of those days—you know the kind—where the school bus honks in ten minutes, someone can’t find their left shoe, and the lunchboxes are still sitting empty on the counter. I was this close to tossing in a granola bar and calling it a win. But then I spotted the sad, spotty banana on the counter, and a little lightbulb flickered. Honestly, I’d been meaning to try making energy bites for weeks, but life kept getting in the way.
I grabbed the banana, mashed it with a fork in a bowl that had a tiny chip on the rim (it’s my favorite, don’t judge), and just started mixing things together. Oats went in. Then the peanut butter. A drizzle of honey. I forgot to add the chocolate chips at first and had to stir them in after everything else was already sticky—classic move. The whole thing took maybe eight minutes, and I had a batch of little bites that actually looked edible. I packed a few in each lunchbox with a note that said “try these first.”
That afternoon, my kid came home and said, “Mom, can you make those again? Everyone wanted one.” And that’s how a frantic Tuesday morning turned into a recipe I now make on autopilot. Maybe you’ve been there—staring at a hungry kid, a ticking clock, and a kitchen that feels bare. These peanut butter banana energy bites are my little secret weapon, and honestly, they’ve saved my sanity more times than I can count.
Why You’ll Love This Recipe
Let’s be real for a second. Finding a snack that’s healthy, easy, and actually gets eaten by kids feels like winning the lottery. These energy bites check every box, and I’ve tested them on picky eaters, hungry teenagers, and even my own skeptical self. Here’s why they work:
- Quick & Easy: You can have these done in under 10 minutes. No oven, no stove, no fancy equipment. Just a bowl and a spoon.
- Simple Ingredients: You probably have everything in your kitchen right now. Oats, peanut butter, a banana, honey, and a few mix-ins. No weird stuff.
- Perfect for Lunchboxes: They hold up well, don’t get soggy, and kids love pulling them out at snack time. Plus, they’re nut-free if you use a seed butter.
- Crowd-Pleaser: I brought a batch to a playdate and watched four kids demolish them in minutes. Parents asked for the recipe.
- Unbelievably Delicious: The texture is soft and chewy, with just the right amount of sweetness. The banana keeps them moist, and the peanut butter makes them taste like a treat.
What makes these different from every other energy bite recipe out there? It’s the banana. Most recipes use dates or honey as the main binder, but the banana adds a natural creaminess that makes these bites almost pudding-like in texture. I’ve tried dozens of versions, and this one wins every time. It’s not just another recipe—it’s the one I come back to week after week.
Honestly, this is comfort food reimagined. It’s healthier than a cookie, faster than a smoothie, and it gives you that same soul-soothing satisfaction without the sugar crash. Perfect for hectic mornings, after-school hangry moments, or just a little something sweet when you need it.
What Ingredients You Will Need
This recipe uses simple, wholesome ingredients to deliver that perfect balance of sweetness, texture, and staying power. Most of these are pantry staples, so you won’t need to make a special trip to the store. Let’s break them down:
For the Base
- 1 cup rolled oats (not quick oats—they get too mushy. Old-fashioned oats give the best chewy texture)
- 1/2 cup creamy peanut butter (I use natural peanut butter with just peanuts and salt. Skippy or Jif works too, but the oilier brands can make the bites a little greasy)
- 1 large ripe banana, mashed (the riper, the better. Brown spots are perfect—they add natural sweetness and moisture)
- 2 tablespoons honey (or maple syrup if you want it vegan. Agave works too, but it’s thinner)
- 1/4 teaspoon vanilla extract (adds warmth and depth. Don’t skip it—it makes a difference)
For the Mix-Ins
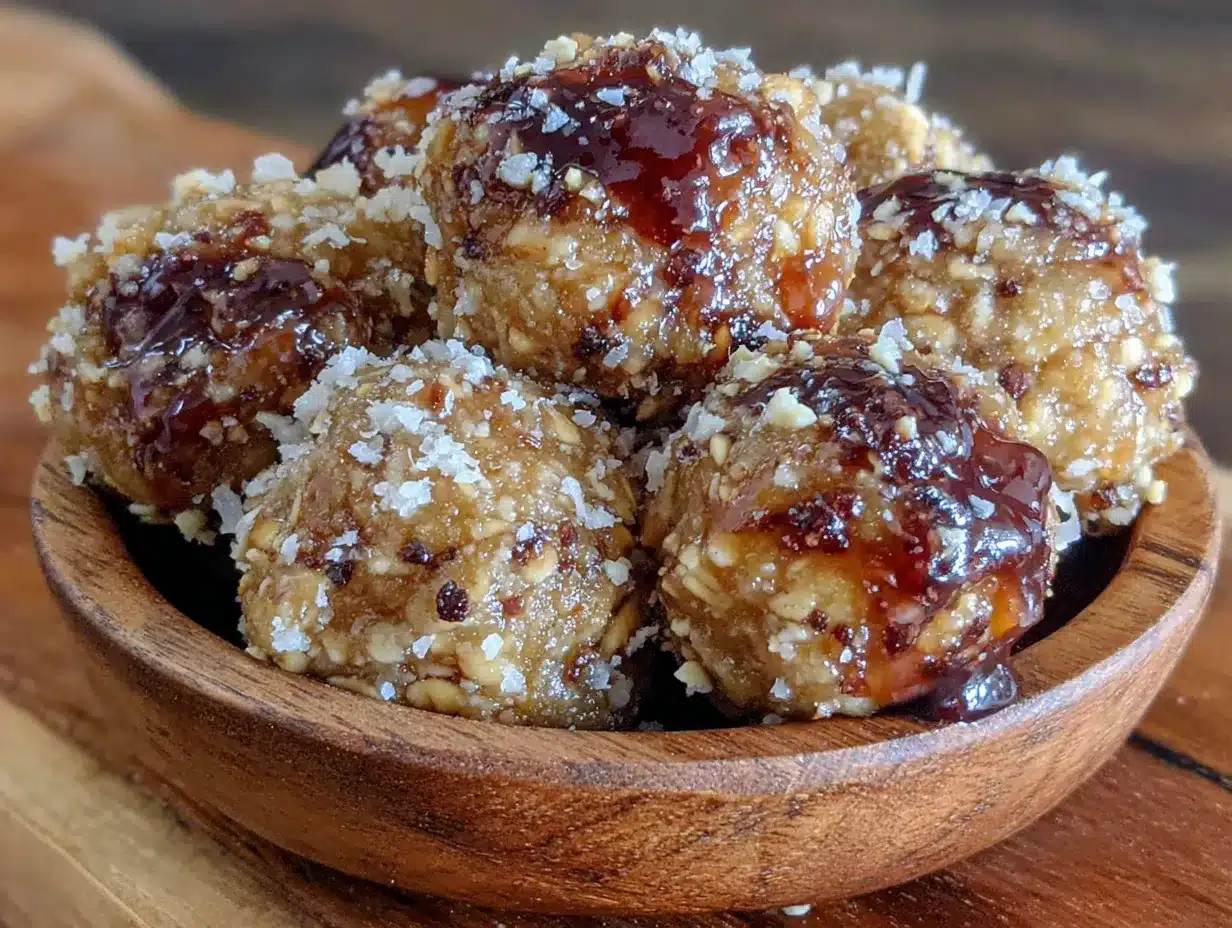
- 1/4 cup mini chocolate chips (regular chips work, but mini ones distribute more evenly. I like Enjoy Life for a dairy-free option)
- 2 tablespoons ground flaxseed (optional, but I add it for extra fiber and omega-3s. You won’t taste it)
- Pinch of salt (only if your peanut butter is unsalted. If it’s salted, skip this)
A quick note on ingredient selection: when I’m buying peanut butter for this recipe, I look for one that’s stirred and not separated. If the oil is sitting on top, I stir it really well before measuring. And for the banana—don’t use a green one. It won’t mash smoothly, and the bites will be dry. Let it sit on the counter until it’s soft and spotty. Trust me on this.
If you need substitutions, here are my go-tos: use almond butter or sunflower seed butter instead of peanut butter. For a gluten-free version, make sure your oats are certified gluten-free. And if you’re out of honey, maple syrup works beautifully—it just makes the mixture a tiny bit looser, so you might need an extra tablespoon of oats.
Equipment Needed
You don’t need much for this recipe, which is honestly my favorite part. Here’s what I use:
- Large mixing bowl (any size works, but I prefer a medium bowl so things don’t get lost)
- Fork or potato masher (for mashing the banana. A fork works fine, but a masher is faster)
- Spatula or wooden spoon (for mixing everything together. I use a silicone spatula because it scrapes the sides well)
- Measuring cups and spoons (I’ve learned the hard way that eyeballing peanut butter leads to sticky disasters)
- Small cookie scoop or tablespoon (for portioning. A cookie scoop makes them uniform and is less messy than using your hands)
- Parchment-lined baking sheet or plate (for chilling the bites. A plate works if you’re short on space)
- Air-tight container (for storage. I use a glass container with a tight lid)
If you don’t have a cookie scoop, just use a tablespoon and roll the mixture into balls with your hands. It’s a little stickier, but it works. And if you don’t have parchment paper, wax paper is fine—just avoid using foil, because the mixture can stick.
Preparation Method
Let’s get to the fun part. These energy bites come together in about 10 minutes, and the only real work is rolling them into balls. Here’s how I do it:
- Mash the banana. Peel your ripe banana and put it in a large mixing bowl. Use a fork to mash it until it’s smooth with no big chunks. You want it to be almost liquid—like baby food consistency. This takes about 30 seconds. If your banana is a little under-ripe, pop it in the microwave for 15 seconds to soften it first.
- Add the wet ingredients. Scoop in the peanut butter, honey, and vanilla extract. Stir everything together with your spatula until it’s fully combined. The mixture will look a little thick and sticky—that’s perfect. If it seems too dry, add another teaspoon of honey. If it’s too wet, you’ll fix that in the next step.
- Mix in the dry ingredients. Add the rolled oats, ground flaxseed (if using), and a pinch of salt. Stir until the oats are evenly distributed. The mixture should be thick enough to hold together when you press it. If it falls apart, add another tablespoon of oats. If it’s too stiff, add a tiny splash of milk or water.
- Fold in the chocolate chips. Gently stir in the mini chocolate chips. Don’t overmix—you want them distributed evenly, not smashed into the mixture. If you’re using regular chocolate chips, chop them roughly first so they’re smaller.
- Chill the mixture. Pop the bowl in the fridge for 15-20 minutes. This step is optional, but it makes the mixture much easier to handle. The peanut butter firms up, and the oats absorb some moisture. If you’re in a hurry, you can skip this—just expect stickier hands.
- Roll into balls. Using a small cookie scoop or a tablespoon, scoop out portions of the mixture. Roll them between your palms into smooth balls. Aim for about 1-inch diameter—that’s about 20-22 bites from this batch. If the mixture sticks to your hands, lightly wet your palms with water.
- Chill to set. Place the rolled bites on a parchment-lined baking sheet or plate. Refrigerate for at least 30 minutes to let them firm up. This step is important—it helps them hold their shape in lunchboxes. If you’re impatient (like me sometimes), you can eat one right away. It’ll be a little soft, but still delicious.
A sensory cue here: when you roll the mixture, it should feel slightly tacky but not wet. The oats should be visible, and the chocolate chips should peek through. The smell is amazing—peanut butter and banana, with a hint of vanilla. It’s like a warm hug in a bowl.
Cooking Tips & Techniques
I’ve made these energy bites about a hundred times, and I’ve learned a few things the hard way. Here are my best tips:
Don’t overmix the oats. I know it’s tempting to stir until everything is perfectly combined, but overmixing can make the oats break down and turn the mixture into a paste. Just fold until you don’t see dry oats anymore.
Use a slightly wet hand for rolling. The mixture can get sticky, especially if you skipped the chilling step. Run your hands under cold water and shake off the excess before rolling. It makes a world of difference.
Adjust the sweetness to your taste. I’ve made these with very ripe bananas that were almost black, and they were sweet enough without honey. If your banana is just barely ripe, use the full 2 tablespoons of honey. Taste the mixture before rolling—if it’s not sweet enough, add a little more honey.
One mistake I made early on: I used chunky peanut butter once, thinking the extra texture would be nice. It wasn’t. The peanut pieces made the bites crumbly and hard to roll. Stick with creamy peanut butter for the best texture.
Timing tip: Make these the night before you need them. The flavors meld together overnight, and the bites get even better. I often double the batch on Sunday and use them all week.
Variations & Adaptations
This recipe is super flexible, so don’t be afraid to play around. Here are some of my favorite variations:
Chocolate Peanut Butter Bliss: Swap the mini chocolate chips for dark chocolate chunks and add a tablespoon of cocoa powder. It turns these into a fudgy, brownie-like treat. My kids call them “healthy brownie bites.”
Tropical Twist: Replace the chocolate chips with dried pineapple or mango pieces and add 2 tablespoons of shredded coconut. The banana and coconut combo is incredible—it’s like a tropical vacation in a bite.
Seed Butter Version: For nut-free lunchboxes, use sunflower seed butter instead of peanut butter. The flavor is slightly different, but it works beautifully. Just note that sunflower seed butter can react with baking soda if you ever bake these, but since we’re not cooking them, it’s fine.
Vegan Option: Use maple syrup instead of honey, and make sure your chocolate chips are dairy-free. Everything else is already plant-based.
High-Protein Boost: Add 2 tablespoons of vanilla protein powder and reduce the oats by 2 tablespoons. The protein powder absorbs some moisture, so you might need an extra teaspoon of honey. I’ve tried this with both plant-based and whey protein, and both work great.
My personal favorite variation? I add a pinch of cinnamon and a tablespoon of chia seeds. The cinnamon makes them taste like banana bread, and the chia seeds add a fun little crunch. It’s my go-to for fall.
Serving & Storage Suggestions
These energy bites are best served cold or at room temperature. I usually pull them straight from the fridge and toss them into lunchboxes. They’re perfect as a mid-morning snack, an after-school treat, or even a quick breakfast on busy mornings.
For presentation, I like to arrange them in a small container with a few fresh berries or apple slices. It makes the lunchbox look colorful and inviting. Sometimes I’ll drizzle a little melted chocolate on top for a fancier version, but that’s totally optional.
Storage: Keep the bites in an airtight container in the refrigerator for up to 1 week. They firm up nicely when chilled and stay fresh. If you’re packing them for lunch, just pop them in the lunchbox straight from the fridge—they’ll thaw by snack time.
Freezer instructions: These freeze beautifully. Place the rolled bites on a baking sheet and freeze for 1 hour, then transfer them to a freezer-safe bag or container. They’ll keep for up to 3 months. To thaw, just leave them in the fridge overnight or at room temperature for about 30 minutes.
One thing I’ve noticed: the flavors get better after a day or two in the fridge. The banana and peanut butter meld together, and the oats soften slightly. So don’t worry if they seem a little dry on day one—they’ll be perfect by day two.
Nutritional Information & Benefits
Here’s the approximate nutritional breakdown for one energy bite (based on 20 bites per batch):
- Calories: 110
- Protein: 3g
- Carbohydrates: 14g
- Fiber: 2g
- Sugar: 7g
- Fat: 5g
The health benefits here are real. Bananas are packed with potassium, which is great for muscle function and energy. Peanut butter provides healthy fats and protein to keep little tummies full. Oats are a fantastic source of soluble fiber, which helps with digestion and sustained energy release. And if you add the flaxseed, you’re getting omega-3 fatty acids, which are great for brain health.
These bites are naturally gluten-free if you use certified gluten-free oats, and they can be made nut-free with sunflower seed butter. They’re also dairy-free as written, as long as your chocolate chips are dairy-free. The only potential allergen here is peanuts, so just be mindful of that if you’re packing for a nut-free classroom.
From a wellness perspective, I love that these bites give my kids real energy—not a sugar spike followed by a crash. They’re perfect for active afternoons or long school days. And honestly, knowing I’m sending something homemade and wholesome in their lunchbox makes me feel like a superhero mom.
Conclusion
These peanut butter banana energy bites have become a staple in my kitchen for a reason. They’re quick, they’re forgiving, and they make everyone happy. Whether you’re a busy parent trying to survive the school week, a college student looking for a study snack, or just someone who loves a good no-bake treat, these little bites deliver.
I’d love for you to try them and make them your own. Add your favorite mix-ins, adjust the sweetness, or swap the nut butter—whatever works for your family. And if you come up with a killer variation, please share it in the comments below. I’m always looking for new ideas to try.
So go ahead, mash that banana, and roll yourself into a better day. You’ve got this. And if you make a mess along the way? That’s part of the fun. Happy snacking!
Frequently Asked Questions
Can I use quick oats instead of rolled oats?
Yes, but the texture will be different. Quick oats are more finely processed, so they absorb moisture faster and can make the bites a little mushy. If you only have quick oats, use 3/4 cup instead of 1 cup, and expect a softer, denser bite.
How do I keep the bites from falling apart?
If your mixture is too dry, add a little more honey or a splash of milk. If it’s too wet, add another tablespoon of oats. The key is to chill the mixture for 15-20 minutes before rolling—it helps everything hold together. Also, make sure your banana is very ripe, because under-ripe bananas don’t mash smoothly and can cause crumbling.
Can I make these without peanut butter?
Absolutely. Use almond butter, cashew butter, sunflower seed butter, or even tahini. Just note that different nut butters have different consistencies. If your alternative butter is very runny, you might need to add a little more oats. If it’s thick, you might need a splash of milk.
How long do these energy bites last?
In the refrigerator, they stay fresh for up to 1 week in an airtight container. In the freezer, they last up to 3 months. Just make sure they’re well-sealed so they don’t absorb any weird freezer smells. I like to wrap them in a layer of parchment paper inside the container for extra protection.
Are these suitable for toddlers?
Yes, with a few precautions. Make sure the bites are rolled small enough to avoid choking hazards—about 3/4 inch in diameter is good. Also, if your toddler has a peanut allergy, use a seed butter instead. The texture is soft and easy to chew, so they’re generally safe for little ones who are comfortable with finger foods.
Pin This Recipe!
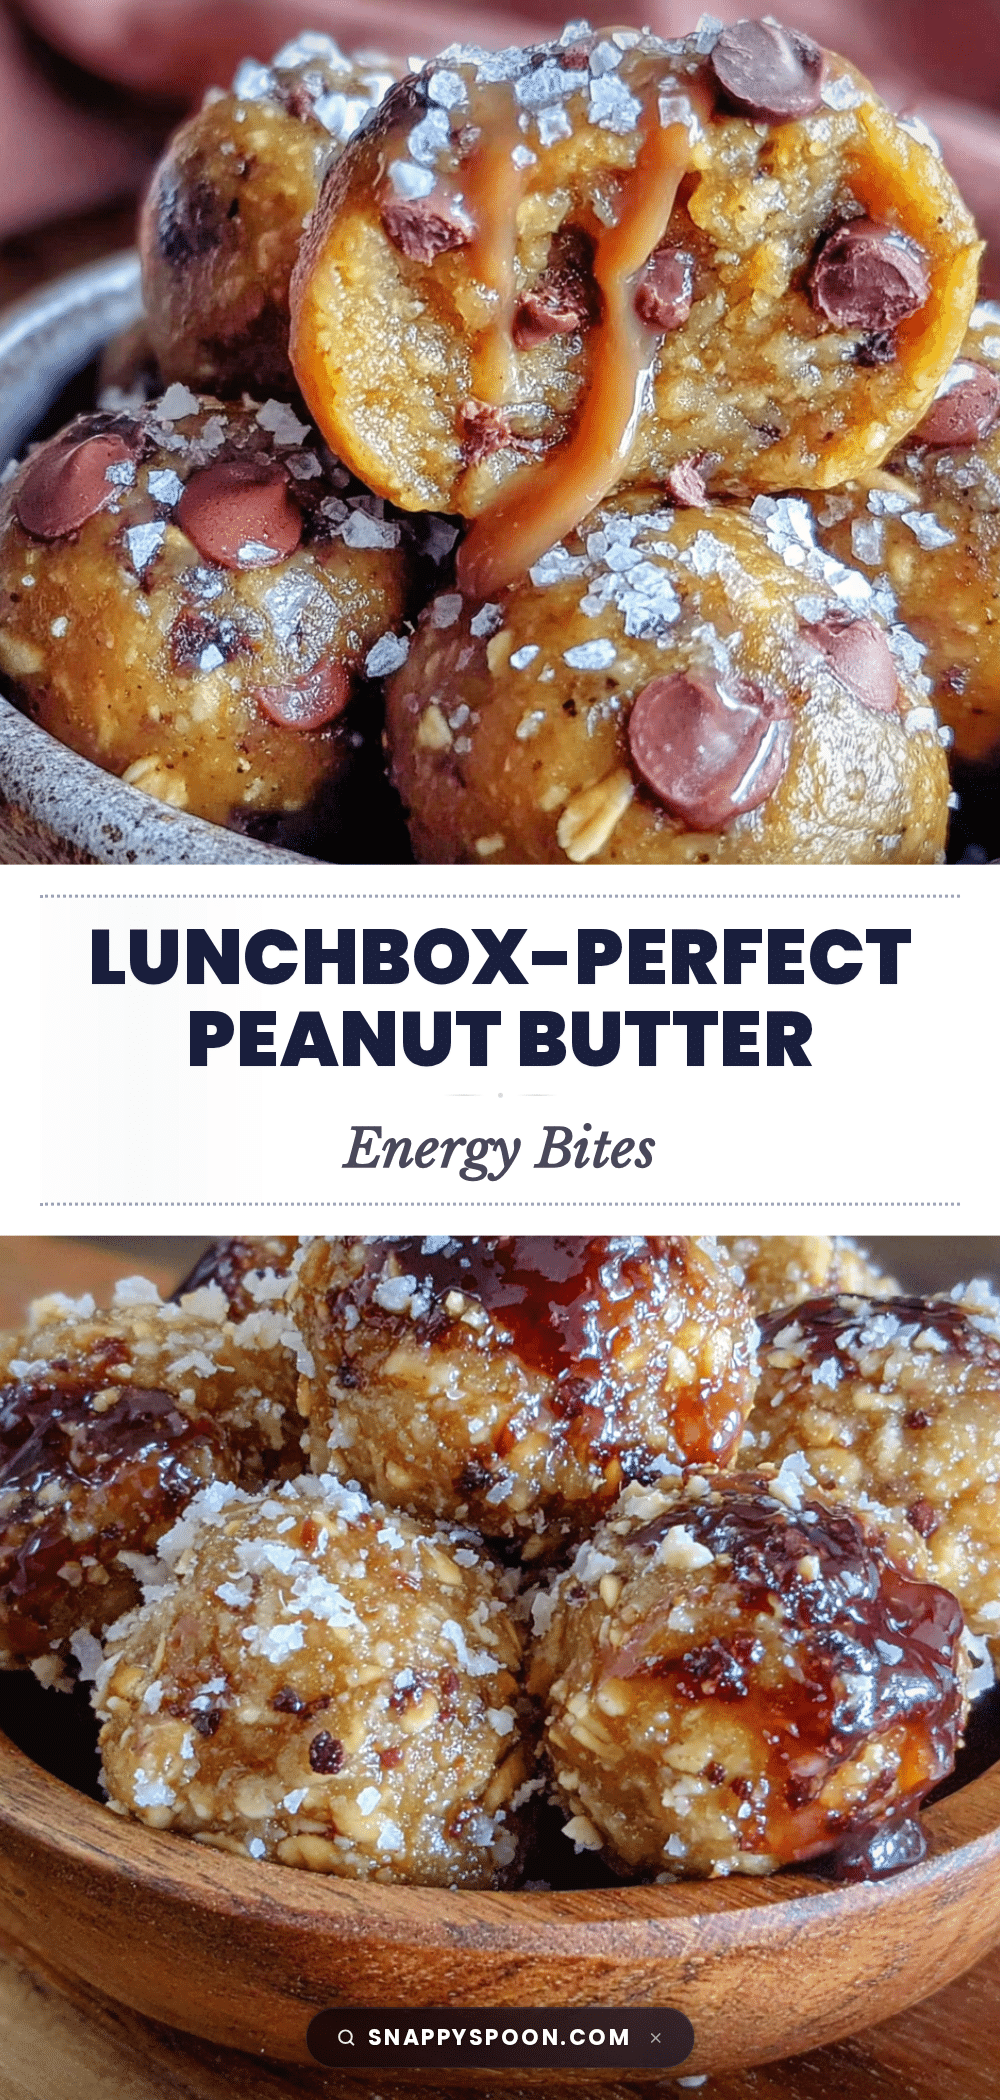
Easy Peanut Butter Banana Energy Bites for Lunchboxes

These no-bake energy bites combine ripe banana, creamy peanut butter, and oats for a quick, healthy snack that’s perfect for lunchboxes. Ready in under 10 minutes, they’re a crowd-pleasing treat that kids and adults love.
- Prep Time: 10 minutes
- Cook Time: 0 minutes
- Total Time: 10 minutes (plus 30 minutes chilling)
- Yield: 20-22 bites 1x
- Category: Snack
- Cuisine: American
Ingredients
- 1 cup rolled oats (not quick oats)
- 1/2 cup creamy peanut butter
- 1 large ripe banana, mashed
- 2 tablespoons honey
- 1/4 teaspoon vanilla extract
- 1/4 cup mini chocolate chips
- 2 tablespoons ground flaxseed (optional)
- Pinch of salt (if peanut butter is unsalted)
Instructions
- Mash the banana in a large mixing bowl until smooth (about 30 seconds).
- Add peanut butter, honey, and vanilla extract; stir until fully combined.
- Mix in rolled oats, ground flaxseed (if using), and salt until evenly distributed.
- Gently fold in mini chocolate chips.
- Chill the mixture in the refrigerator for 15-20 minutes (optional, but helps with rolling).
- Using a small cookie scoop or tablespoon, roll mixture into 1-inch balls (about 20-22 bites).
- Place rolled bites on a parchment-lined baking sheet or plate and refrigerate for at least 30 minutes to set.
Notes
For best results, use a very ripe banana (brown spots are ideal). If mixture is too sticky, wet hands lightly with water before rolling. Flavors improve after a day in the fridge. Freeze for up to 3 months.
Nutrition
- Serving Size: 1 energy bite
- Calories: 110
- Sugar: 7
- Sodium: 50
- Fat: 5
- Saturated Fat: 1
- Carbohydrates: 14
- Fiber: 2
- Protein: 3
Keywords: energy bites, peanut butter banana, no-bake snack, lunchbox snack, healthy snack, kid-friendly