Love this? Save it for later!
Share the inspiration with your friends
The PTA Halloween party was in twelve hours and I’d completely forgotten. Not just the sign-up sheet—I’d volunteered for desserts *and* somehow blocked it out entirely. Everyone else would be bringing elaborate graveyard brownies, those creepy-crawly cupcakes with the gummy worms, and the mom who always wins the bake-off had already posted a photo of her spiderweb cake on Facebook. I had a box of sugar cookie mix, a bag of candy melts, and honestly? A minor panic attack brewing in my kitchen.
I stood there staring at my pantry shelves, mentally kicking myself. It was a Tuesday. Who plans a Halloween party for a Tuesday? Apparently, the entire PTA except me. My daughter kept asking if we could just buy cookies from the store, and for a second, I almost gave in. But you know that stubborn part of you that refuses to show up empty-handed? That kicked in. I grabbed the cookie mix, spotted some leftover candy eyes from last year’s gingerbread house disaster, and decided I was going to make *something* work.
That’s when I remembered a cookie cake I’d seen online—but I didn’t have the fancy piping bags or the patience for a multi-step decorating project. So I improvised. I pressed the dough into a skillet (because who has a proper cookie cake pan?), baked it until golden, and then just… melted some green candy wafers and let them drip. On purpose. The messiest, most chaotic decorating choice I’ve ever made. And honestly? It looked like a melted witch—complete with a little hat and candy eyes that were definitely crooked.
I brought it to the party feeling like a fraud. But you know what happened? That melted witch cookie cake disappeared first. People kept asking where I bought it. Kids were pointing and laughing at the “melty witch face.” I didn’t win the bake-off (that mom’s spiderweb cake was legit), but I did walk away with three people asking for the recipe. And that’s the thing about this easy melted witch Halloween cookie cake—it looks like you tried way harder than you actually did. It’s the perfect last-minute Halloween dessert, and I’ve been making it every year since. Maybe you’ve been there, staring at a calendar and realizing you’re out of time? This one’s for you.
Why You’ll Love This Recipe
Let me tell you why this easy melted witch Halloween cookie cake has become my go-to for every spooky season gathering. I’ve tested this recipe about six times now—once I accidentally used salted butter instead of unsalted, and another time I forgot the egg entirely (that was a crumbly mess, but the kids still ate it). Through all those trials, I’ve figured out exactly what makes this work.
- Quick & Easy: From start to finish, this cookie cake comes together in under 45 minutes. That’s faster than driving to the bakery. The decorating takes maybe 10 minutes, and most of that is just waiting for the candy melts to set.
- Simple Ingredients: You probably already have butter, sugar, eggs, and flour in your kitchen. The only “special” things are the green candy melts and a witch hat decoration, both of which you can find at any grocery store or craft store during October.
- Perfect for Halloween Parties: Whether it’s a classroom celebration, a neighborhood potluck, or just a fun night in with the kids, this cookie cake fits right in. It’s festive without being fussy.
- Crowd-Pleaser: I’ve served this to kids, adults, and even that one picky uncle who “doesn’t do sweets.” Everyone loves a giant cookie. Add a silly witch face on top, and you’ve got a guaranteed hit.
- Unbelievably Delicious: The texture is exactly what you want from a cookie cake—crispy edges, soft and chewy center, with that buttery vanilla flavor that feels like a warm hug.
What makes this recipe different from every other Halloween dessert out there? It’s the melted witch concept. Instead of trying to pipe perfect lines or create intricate designs, you *lean into the mess*. The melting is the whole point. It’s forgiving, it’s fun, and it actually looks better when it’s a little imperfect. Plus, you don’t need any special decorating skills—just a microwave and a spoon.
This recipe isn’t just good—it’s the kind that makes you close your eyes after the first bite. The cookie base is soft and buttery, the chocolate chips add little pockets of sweetness, and the candy coating gives it that satisfying snap. It’s comfort food reimagined for Halloween—faster, easier, but with the same soul-soothing satisfaction. Perfect for impressing guests without stress, or turning a simple Tuesday night into something memorable.
What Ingredients You Will Need
This recipe uses simple, straightforward ingredients to deliver that classic cookie cake texture and flavor. The magic really happens with the decorations, but the base is a tried-and-true sugar cookie that you can whip up in minutes.
- For the Cookie Cake Base:
- 1 ½ cups all-purpose flour (spooned and leveled—don’t scoop straight from the bag or you’ll get too much)
- ½ teaspoon baking soda
- ¼ teaspoon salt (I use fine sea salt; table salt works too)
- ½ cup unsalted butter, softened to room temperature (if you only have salted butter, just skip the added salt)
- ¾ cup granulated sugar
- 1 large egg, room temperature (cold eggs don’t cream as well)
- 1 teaspoon vanilla extract (I like Nielsen-Massey, but any pure vanilla works)
- ½ cup semi-sweet chocolate chips (or milk chocolate if you prefer sweeter)
- For the Melted Witch Decoration:
- 1 cup green candy melts (I recommend Wilton brand—they melt smoothly and set firm)
- 1 tablespoon coconut oil or vegetable shortening (this thins the candy melts so they drip better; don’t skip it)
- 2 candy eyes (the large ones, about ½ inch wide)
- 1 small witch hat decoration (edible or plastic—just make sure it’s food-safe; I’ve used both)
- Optional: black decorating gel for a spooky smile
Ingredient Selection Tips: For the best texture, make sure your butter is truly softened—it should give slightly when you press it, but not be melty. If you’re in a hurry, cut the butter into small cubes and let it sit for 10 minutes. For the candy melts, I’ve tried generic store brands and they sometimes seize up or don’t melt as smoothly. Stick with Wilton or Merckens for reliable results. And if you can’t find a witch hat decoration, don’t worry—you can pipe one out of black candy melts using a small piping bag. I’ve done that before and it works great.
Substitution Guidance: Need this gluten-free? Swap the all-purpose flour for a 1:1 gluten-free baking blend (I like Bob’s Red Mill). For a dairy-free option, use plant-based butter and dairy-free chocolate chips. The candy melts are typically dairy-free, but double-check the label. If you don’t have coconut oil, any neutral vegetable oil will work to thin the candy melts.
Equipment Needed
You don’t need a fancy bakery setup for this one. Here’s what you’ll need:
- 10-inch cast iron skillet or round cake pan: I use my trusty Lodge skillet because it gives the cookie those perfect crispy edges. A 9-inch round cake pan works too—just grease it well. If you use a cake pan, the cookie will be slightly thicker and need an extra 2-3 minutes of baking time.
- Electric mixer (hand or stand): You can cream the butter and sugar by hand, but your arm will thank you for using a mixer. I’ve done it with a wooden spoon before and it took forever.
- Mixing bowls: One medium, one large. Nothing fancy.
- Rubber spatula: For scraping down the bowl and pressing the dough into the pan.
- Microwave-safe bowl: For melting the candy coating. Glass works best.
- Parchment paper: If using a cake pan, line the bottom for easy removal. In the skillet, you don’t really need it.
- Cooling rack: Helps the cookie cake cool evenly so the candy melts set properly.
Budget-Friendly Tip: Don’t have a cast iron skillet? A regular 9-inch round cake pan works perfectly. I’ve even made this in a disposable aluminum pie plate when I was traveling—it worked fine, just watch the baking time since it cooks faster in thin metal. And if you don’t have an electric mixer, you can cream the butter and sugar by hand—just make sure the butter is really soft and you’re prepared for a mini arm workout.
Preparation Method
- Preheat your oven to 350°F (175°C). Position the rack in the center of the oven. If you’re using a cast iron skillet, place it in the oven while it preheats—this helps the edges crisp up faster. If using a cake pan, just grease it with butter or non-stick spray and set aside.
- Cream the butter and sugar. In a large mixing bowl, beat the softened butter and granulated sugar together on medium speed until light and fluffy—about 2-3 minutes. You’re looking for a pale yellow color and a texture that looks like wet sand. Scrape down the sides of the bowl with your spatula halfway through. This step is important because it incorporates air into the dough, giving you that soft, tender center.
- Add the egg and vanilla. Crack the egg into a small bowl first (just in case you get shell pieces—learned that one the hard way). Add it to the butter mixture along with the vanilla extract. Beat on medium speed until fully combined, about 30 seconds. The mixture might look slightly curdled at this point—that’s totally normal, don’t panic.
- Mix the dry ingredients. In a separate medium bowl, whisk together the flour, baking soda, and salt. This ensures the baking soda is evenly distributed so your cookie cake rises evenly. If you skip this step, you might end up with a lopsided cookie—ask me how I know.
- Combine wet and dry. Gradually add the flour mixture to the butter mixture, mixing on low speed. I usually add it in three additions, mixing just until the flour disappears after each one. Overmixing at this stage will make your cookie cake tough. The dough should be soft and slightly sticky but hold together when pressed.
- Fold in the chocolate chips. Use your rubber spatula to gently fold the chocolate chips into the dough. Don’t overmix—just fold until they’re evenly distributed. If you’re feeling fancy, reserve a handful of chips to press onto the top of the dough after it’s in the pan (this makes it look prettier).
- Press the dough into the pan. If your skillet is hot from preheating, carefully remove it using oven mitts. Transfer the dough into the skillet or prepared cake pan. Use your spatula or lightly floured fingers to press it into an even layer. The dough will be thick—take your time to spread it all the way to the edges. I like to leave a slightly raised edge because it gives that bakery-style look.
- Bake the cookie cake. Place the pan in the preheated oven and bake for 18-22 minutes. At 18 minutes, check it: the edges should be golden brown and the center should look slightly underdone and puffy. A toothpick inserted into the center should come out with a few moist crumbs, not wet batter. Remember, it will continue to cook from residual heat after you take it out. I’ve overbaked this before and it turns into a crunchy cookie—still good, but not the soft, chewy texture we’re going for.
- Cool completely. This is the hardest part—waiting. Let the cookie cake cool in the pan for 10 minutes, then transfer it to a cooling rack (if using a cake pan, run a knife around the edges first). Let it cool completely, about 30-40 minutes. If you try to decorate while it’s warm, the candy melts will slide right off into a sad, puddled mess. Trust me on this one.
- Melt the green candy coating. Once the cookie cake is completely cool, place the green candy melts and coconut oil in a microwave-safe bowl. Microwave in 30-second intervals, stirring thoroughly between each. It usually takes about 1-2 minutes total. The mixture should be smooth and slightly runny—if it’s too thick, add another ½ teaspoon of oil. Be careful not to overheat it, or the candy will seize up and become grainy.
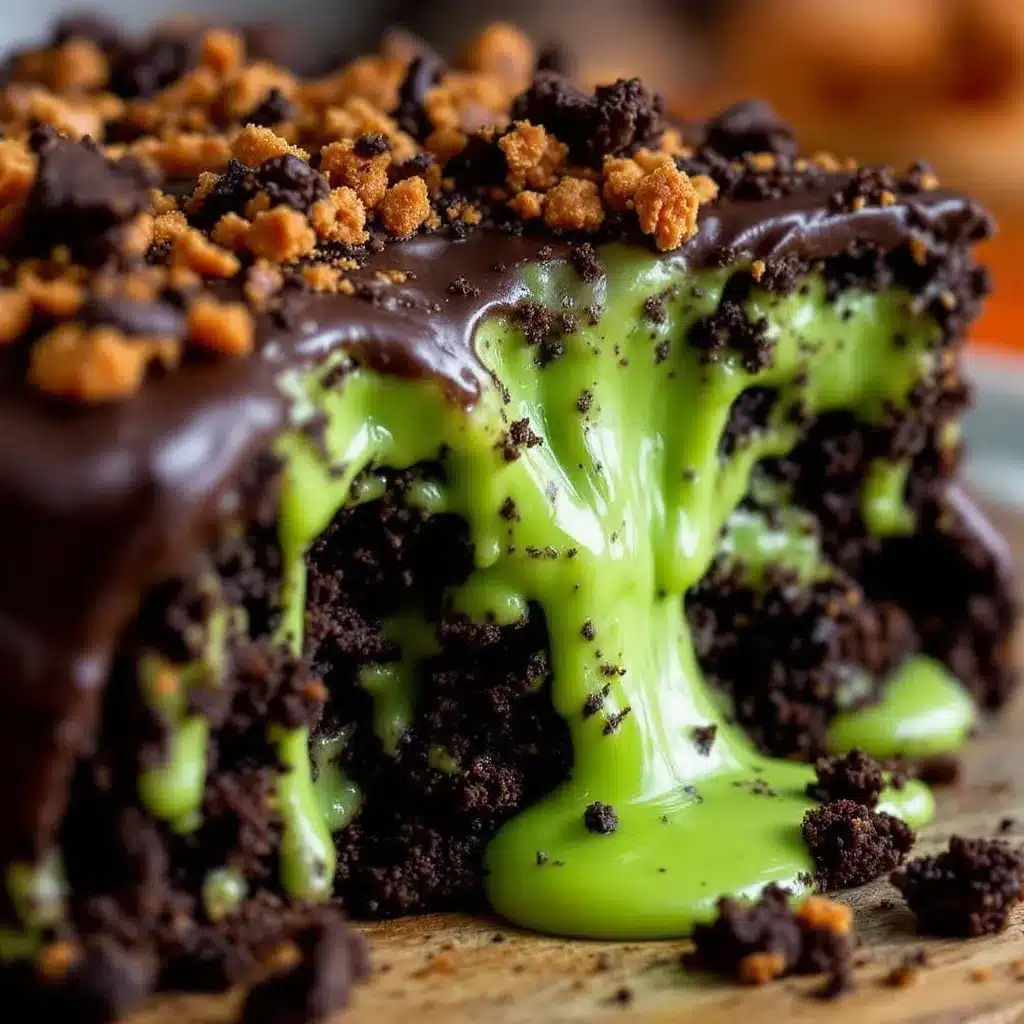
- Create the melted witch effect. Here’s the fun part. Using a spoon, dollop the melted green candy onto the top of the cookie cake, focusing on the center. Then, using the back of the spoon, gently push the candy toward the edges, letting it drip over the sides. Don’t try to cover the entire cookie—leave some of the golden brown cookie visible. The drips are what make it look like a “melted witch.” I usually do one big dollop in the center and then let gravity do the work.
- Add the witch face. While the green candy is still wet, place the two candy eyes in the center of the green area. Press them gently so they stick. Place the witch hat slightly above the eyes, angled slightly to the side for a whimsical look. If you’re using black decorating gel, pipe a crooked smile below the eyes. Let the decoration set for about 15-20 minutes before serving.
Sensory Cues: When the butter and sugar are properly creamed, the mixture will look lighter in color and feel fluffy when you run a spatula through it. The dough should smell sweet and buttery, with a hint of vanilla. When baking, your kitchen will start to smell like a bakery—that’s your cue to check on it. The finished cookie cake should have a golden-brown edge that’s slightly crispy, while the center remains pale and soft to the touch.
Cooking Tips & Techniques
I’ve made this easy melted witch Halloween cookie cake enough times to have a few tricks up my sleeve. Here’s what I’ve learned the hard way so you don’t have to.
Don’t overbake. This is the number one mistake I see. Cookie cakes continue to bake after they come out of the oven, so pull it when the center still looks slightly underdone. The residual heat will finish the job. I once left mine in for the full 22 minutes because I was distracted by a phone call, and the cookie came out more like a cookie crisp. Still edible, but not the soft, chewy texture you want.
Room temperature ingredients matter. Cold butter doesn’t cream properly, and cold egg can cause the mixture to separate. Take the butter and egg out of the fridge about 30 minutes before you start baking. If you forget (which I do, constantly), you can soften the butter in the microwave for 10 seconds at a time, and place the egg in a bowl of warm water for 5 minutes.
Thin the candy melts properly. The coconut oil is non-negotiable here. Without it, the candy melts will be too thick to drip nicely. I learned this the first time I tried—the candy just sat in a thick blob on top of the cookie. Adding the oil makes it pourable and gives you those beautiful, spooky drips. If your candy starts to thicken while you’re working, pop it back in the microwave for 10 seconds.
Work quickly with the decorations. The candy melts start to set as soon as they cool, so have your eyes and hat ready before you start pouring. I arrange everything on a small plate next to the cookie cake so I can grab them without fumbling. If the candy sets before you add the eyes, just dip the back of the eyes in a tiny bit of melted candy and press them on.
Multitasking strategy: While the cookie cake is baking, get your decorations ready. Place the candy eyes on a small plate, unwrap the witch hat, and have your spoon and oil measured out. This way, when the cookie is cooling, you’re not scrambling to find things. I usually clean up my mixing bowls while it bakes too—makes the post-baking cleanup way less painful.
Variations & Adaptations
One of the best things about this easy melted witch Halloween cookie cake is how customizable it is. Here are some variations I’ve tried and loved.
Dietary Variations: For a gluten-free version, swap the all-purpose flour with a 1:1 gluten-free baking blend. I’ve used Bob’s Red Mill and King Arthur Flour’s versions with great success—just make sure your blend contains xanthan gum for structure. For a dairy-free option, use plant-based butter (I like Miyoko’s) and dairy-free chocolate chips. The candy melts are usually dairy-free, but check the label.
Seasonal Twists: This concept works for other holidays too! For Christmas, use red and green candy melts with a Santa hat. For Easter, try pastel colors and bunny ears. For a birthday party, use the person’s favorite color and add sprinkles. I once made a “melted snowman” version with white candy melts, a tiny top hat, and pretzel stick arms—it was a hit.
Flavor Variations: Swap the vanilla extract for almond extract for a different flavor profile—just use ½ teaspoon since almond is stronger. Add ¼ teaspoon of cinnamon or pumpkin pie spice to the dough for a fall twist. You can also use white chocolate chips instead of semi-sweet for a sweeter cookie. My personal favorite variation is adding ¼ cup of chopped pecans to the dough—the crunch is amazing against the soft cookie.
Different Cooking Methods: Don’t have an oven? You can make this in an air fryer! Use a 7-inch round pan that fits in your air fryer basket, and cook at 325°F (163°C) for about 12-15 minutes. Check it early since air fryers cook faster. I’ve also made mini versions in a muffin tin—just press a tablespoon of dough into each greased cup and bake for 10-12 minutes. Decorate each mini cookie with a tiny dollop of melted candy and mini eyes for adorable individual servings.
Allergen Substitutions: Nut-free? Skip the pecans and make sure your chocolate chips are processed in a nut-free facility. Egg-free? Use a flax egg (1 tablespoon ground flaxseed mixed with 3 tablespoons water, let sit for 5 minutes). I tried this once and the texture was slightly denser but still delicious.
Serving & Storage Suggestions
This cookie cake is best served at room temperature, which is perfect because it’s already cooled by the time you decorate it. Slice it like a pizza—I usually cut it into 8-10 wedges, depending on how generous I’m feeling. The edges are perfect for people who like crispy cookies, while the center pieces are soft and gooey.
Presentation Tips: Serve the cookie cake on a festive Halloween plate or a wooden cutting board for a rustic look. I like to place it on a cake stand to give it some height—it makes the melted witch effect more dramatic. If you’re bringing it to a party, leave it in the skillet or cake pan and just set it on a trivet. It keeps the cookie warm and looks intentional.
Complementary Dishes: This cookie cake pairs beautifully with a cold glass of milk, a scoop of vanilla ice cream, or a warm mug of apple cider. For an adult gathering, try it with a salted caramel latte or a pumpkin spice cocktail. I’ve also served it alongside a cheese board for a sweet-and-savory Halloween spread—sounds weird, but the contrast works.
Storage Instructions: Store any leftover cookie cake in an airtight container at room temperature for up to 3 days. Don’t refrigerate it—the cookie will dry out and the candy coating might get sticky. If you need to store it longer, wrap it tightly in plastic wrap and then foil, and freeze for up to 2 months. To thaw, leave it at room temperature for about an hour.
Reheating Tips: If you want that fresh-from-the-oven experience, microwave individual slices for 10-15 seconds. The cookie gets soft and warm, and the chocolate chips get melty again. Don’t microwave the whole cookie cake—the candy coating will melt and lose its shape. If you’re serving it the next day, just let it come to room temperature naturally.
Flavor Development: Honestly, this cookie cake tastes even better the next day. The flavors meld together and the texture evens out—the edges soften slightly and the center stays perfectly chewy. I’ve been known to make it a day ahead on purpose. Just don’t add the decorations until right before serving, or the candy might get a little soft from humidity.
Nutritional Information & Benefits
Let’s be real—this is a treat, not a health food. But here’s the nutritional breakdown for one serving (assuming 10 slices):
- Calories: Approximately 310 per serving
- Total Fat: 16g
- Saturated Fat: 10g
- Carbohydrates: 40g
- Sugar: 24g
- Protein: 3g
- Fiber: 1g
Health Benefits of Key Ingredients: The butter provides vitamin A, which is good for eye health (ironic, given the candy eyes). Dark chocolate chips contain antioxidants called flavonoids. And while the sugar isn’t exactly a superfood, there’s something to be said for the mental health benefits of sharing a fun, festive dessert with loved ones. Sometimes joy is the most important nutrient.
Dietary Considerations: This recipe contains gluten, dairy, and eggs. For gluten-free, dairy-free, or egg-free options, check the Variations section above. The candy melts may contain soy lecithin, so check the label if you have a soy allergy. I personally love that this recipe can be adapted to fit most dietary needs with simple swaps.
My Personal Wellness Perspective: I’m all about balance. I eat salads most days, but Halloween is for cookie cake. This recipe uses real ingredients—butter, eggs, flour—nothing artificial or processed. And because it’s so easy to make, you’re more likely to bake it from scratch than buy something pre-made. That counts for something in my book.
Conclusion
This easy melted witch Halloween cookie cake is the dessert you didn’t know you needed—until you see that green candy dripping over the edges and those googly eyes staring back at you. It’s fun, it’s forgiving, and it tastes like childhood in the best possible way. Whether you’re a seasoned baker or someone who burns toast on the regular, this recipe is designed to make you look like a Halloween hero.
I love this recipe because it captures the spirit of Halloween without the stress. It’s creative without being complicated, and it’s the kind of dessert that makes people smile. Every time I make it, I remember that frantic Tuesday night when I thought I’d ruined the PTA party—and instead, I stumbled onto something magical.
Now I want to hear from you! Have you tried making this melted witch cookie cake? Did your kids help with the decorations? Did you try a different color or variation? Drop a comment below and let me know—I read every single one and I love seeing your creations. And if you share a photo on Pinterest, tag me so I can cheer you on. Happy Halloween, and happy baking!
Frequently Asked Questions
Can I use a store-bought cookie dough instead of making it from scratch?
Absolutely! If you’re short on time, grab a tube of refrigerated sugar cookie dough. Press it into the pan and bake according to the package directions, then decorate the same way. The texture will be slightly different—store-bought dough often has more preservatives—but the melted witch effect will still work beautifully. I’ve done this in a pinch and nobody knew the difference.
How do I prevent the candy melts from seizing up?
Seizing happens when moisture gets into the candy melts. Make sure your bowl and spoon are completely dry—even a drop of water can cause the candy to turn into a stiff, grainy mess. Also, don’t overheat the candy. Microwave in short bursts and stir thoroughly between each. If your candy does seize, you can try adding a teaspoon of coconut oil and stirring vigorously, but sometimes it’s better to just start over with fresh melts.
Can I make this cookie cake ahead of time?
Yes! Bake the cookie cake up to 2 days in advance and store it in an airtight container at room temperature. Wait to add the decorations until the day you’re serving it—the candy melts can get soft or sticky if stored too long. If you need to make it even further ahead, freeze the undecorated cookie cake for up to 2 months, then thaw and decorate on serving day.
What if I can’t find a witch hat decoration?
No problem! You can make your own using black candy melts. Pipe a small triangle onto parchment paper to form the hat, then add a tiny rectangle for the brim. Let it set completely (about 10 minutes) before placing it on the cookie. You can also use a chocolate kiss with a small piece of black licorice as the brim—I’ve done that before and it looks adorable.
How do I get the candy drips to look intentional?
The key is to not overthink it. Dollop the melted candy in the center, then use the back of a spoon to push it toward the edges. Some drips will naturally go over the side—that’s the look you want. If you want longer drips, use a spoon to push a little extra candy to the very edge and let gravity do the work. If a drip goes too far, you can wipe it off with a paper towel before it sets. Remember, the melted witch is supposed to look messy, so embrace the chaos!
Pin This Recipe!

Easy Melted Witch Halloween Cookie Cake

A quick and easy Halloween dessert that looks like you tried way harder than you actually did. This soft and chewy cookie cake is topped with a melted green witch face, complete with candy eyes and a witch hat.
- Prep Time: 15 minutes
- Cook Time: 20 minutes
- Total Time: 45 minutes
- Yield: 10 servings 1x
- Category: Dessert
- Cuisine: American
Ingredients
- 1 ½ cups all-purpose flour (spooned and leveled)
- ½ teaspoon baking soda
- ¼ teaspoon salt (fine sea salt or table salt)
- ½ cup unsalted butter, softened to room temperature
- ¾ cup granulated sugar
- 1 large egg, room temperature
- 1 teaspoon vanilla extract
- ½ cup semi-sweet chocolate chips
- 1 cup green candy melts (Wilton brand recommended)
- 1 tablespoon coconut oil or vegetable shortening
- 2 candy eyes (large, about ½ inch wide)
- 1 small witch hat decoration (edible or food-safe plastic)
- Optional: black decorating gel for a spooky smile
Instructions
- Preheat your oven to 350°F (175°C). Position the rack in the center of the oven. If using a cast iron skillet, place it in the oven while it preheats. If using a cake pan, grease it with butter or non-stick spray and set aside.
- In a large mixing bowl, beat the softened butter and granulated sugar together on medium speed until light and fluffy, about 2-3 minutes. Scrape down the sides of the bowl halfway through.
- Crack the egg into a small bowl, then add it to the butter mixture along with the vanilla extract. Beat on medium speed until fully combined, about 30 seconds.
- In a separate medium bowl, whisk together the flour, baking soda, and salt.
- Gradually add the flour mixture to the butter mixture, mixing on low speed in three additions, mixing just until the flour disappears after each one.
- Use a rubber spatula to gently fold the chocolate chips into the dough until evenly distributed.
- If using a hot skillet, carefully remove it from the oven using oven mitts. Transfer the dough into the skillet or prepared cake pan. Use a spatula or lightly floured fingers to press it into an even layer, leaving a slightly raised edge.
- Bake for 18-22 minutes. At 18 minutes, check: the edges should be golden brown and the center should look slightly underdone and puffy. A toothpick inserted into the center should come out with a few moist crumbs.
- Let the cookie cake cool in the pan for 10 minutes, then transfer it to a cooling rack. Let it cool completely, about 30-40 minutes.
- Once the cookie cake is completely cool, place the green candy melts and coconut oil in a microwave-safe bowl. Microwave in 30-second intervals, stirring thoroughly between each, until smooth and slightly runny (about 1-2 minutes total).
- Using a spoon, dollop the melted green candy onto the top of the cookie cake, focusing on the center. Use the back of the spoon to gently push the candy toward the edges, letting it drip over the sides. Leave some of the golden brown cookie visible.
- While the green candy is still wet, place the two candy eyes in the center of the green area and press gently. Place the witch hat slightly above the eyes, angled slightly to the side. If using black decorating gel, pipe a crooked smile below the eyes. Let the decoration set for about 15-20 minutes before serving.
Notes
Don’t overbake—the cookie continues to cook from residual heat. Room temperature ingredients are important for proper creaming. Thin the candy melts with coconut oil for better drips. Work quickly with decorations as the candy sets fast. The cookie cake tastes even better the next day.
Nutrition
- Serving Size: 1 slice (1/10 of coo
- Calories: 310
- Sugar: 24
- Sodium: 150
- Fat: 16
- Saturated Fat: 10
- Carbohydrates: 40
- Fiber: 1
- Protein: 3
Keywords: Halloween cookie cake, melted witch, easy Halloween dessert, cookie cake, last-minute Halloween dessert