Love this? Save it for later!
Share the inspiration with your friends
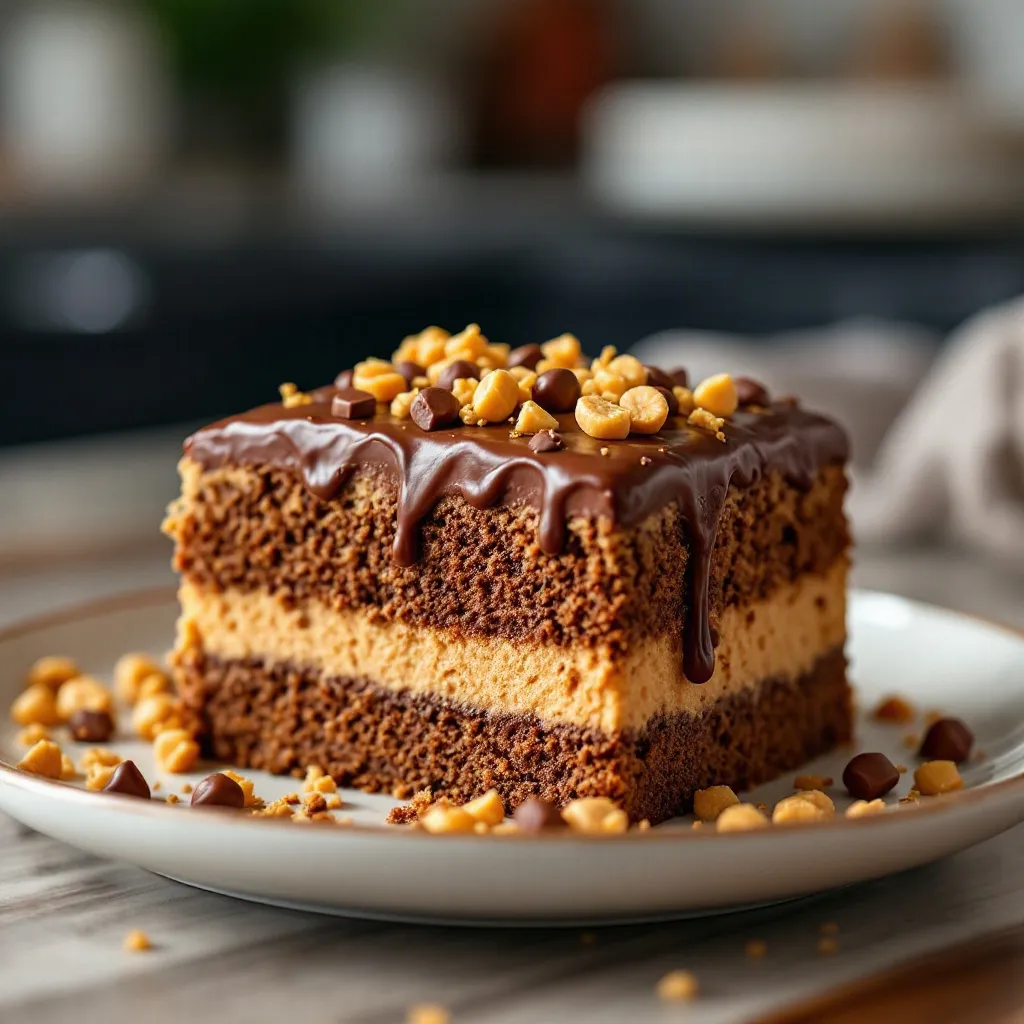
I wasn’t expecting baking advice from the accountant who does my taxes, but there I was, sitting in his cluttered office last April, watching him pull a crumpled, chocolate-stained recipe card from his desk drawer. He said, “This cake is the only thing I make that my wife doesn’t complain about.” I laughed, thinking it was a joke. But he was dead serious. He told me about the Ultimate Reese’s Peanut Butter Chocolate Layer Cake like it was a secret handshake, a code only a select few were worthy of knowing. He described the layers—rich, dark chocolate cake, a creamy peanut butter filling that’s almost mousse-like, and a chocolate ganache that drips down the sides like a slow-motion waterfall.
Honestly, I was skeptical. An accountant? A tax guy? But he had a glint in his eye that said he knew something I didn’t. So I took the card home, and let me tell you, I am so glad I did. The first time I baked it, I forgot to soften the butter for the frosting—a rookie mistake—and ended up with lumpy peanut butter clouds. The cake itself was perfect, though. That deep chocolate flavor was everything. I brought a slice to my neighbor, and she actually groaned. Out loud. It was that kind of cake.
Maybe you’ve been there, looking for that one showstopper dessert that feels both impressive and deeply comforting. This is it. The combination of creamy peanut butter and rich chocolate is a classic for a reason, but this cake takes it to a whole new level. It’s the kind of dessert that makes you close your eyes after the first bite. I’ve made it for birthdays, for no reason at all, and for when I just needed a win. It never, ever disappoints. This recipe stayed with me because it is more than just a cake—it is a moment of pure, unapologetic joy.
Why You’ll Love This Recipe
This isn’t just another chocolate cake recipe. After testing this version more times than I care to admit, I can tell you it’s the one. I’ve tweaked the ratios, changed the baking times, and even tried a few questionable substitutions (don’t ask about the time I used crunchy peanut butter). This version is the final boss of layer cakes.
- Quick & Easy: While it looks like it took hours of fancy bakery work, the process is surprisingly straightforward. You can have the cake layers baked and cooled in about an hour.
- Simple Ingredients: No weird, hard-to-find items here. You probably have most of the dry ingredients in your pantry right now. The star players are pantry staples and a bag of your favorite Reese’s cups.
- Perfect for Celebrations: Birthdays, anniversaries, or a “just because” Tuesday—this cake makes any day feel special. It’s a guaranteed crowd-pleaser.
- Crowd-Pleaser: I have yet to meet a single person who doesn’t love this cake. Kids go wild for it, and adults sneak extra slices when they think no one is looking.
- Unbelievably Delicious: The texture is what gets me every time. The cake is moist and tender, the peanut butter filling is silky and rich, and the ganache is the perfect glossy finish. It’s a symphony of textures and flavors.
What makes this recipe different from the rest is the method. I use a hot coffee technique that deepens the chocolate flavor without making the cake taste like coffee. It’s a little trick that makes the chocolate taste, well, more chocolatey. Plus, the peanut butter filling uses a touch of cream cheese, which gives it a slight tang that cuts through the sweetness. It’s not just another version—it’s the best version.
What Ingredients You Will Need
This recipe uses simple, high-quality ingredients to create something truly spectacular. Most of these are pantry staples, which makes this cake easy to whip up on a whim.
For the Chocolate Cake Layers
- All-purpose flour (3 cups / 375g): The base of our cake. Spoon and level it for the most accurate measurement.
- Granulated sugar (2 cups / 400g): For sweetness and a tender crumb.
- Unsweetened cocoa powder (¾ cup / 75g): I prefer Dutch-processed for a deeper, richer flavor, but natural works great too.
- Baking powder (2 teaspoons) and baking soda (1½ teaspoons): Our leavening agents for a perfect rise.
- Salt (1 teaspoon): Balances the sweetness and enhances the chocolate flavor.
- Buttermilk (1 cup / 240ml): Adds incredible moisture and tenderness. You can make a quick substitute by adding 1 tablespoon of lemon juice to 1 cup of milk and letting it sit for 5 minutes.
- Vegetable oil (½ cup / 120ml): Keeps the cake moist for days. I use canola or avocado oil.
- Large eggs (2): For structure and richness. Make sure they are at room temperature.
- Vanilla extract (2 teaspoons): Pure vanilla is best.
- Hot coffee (1 cup / 240ml): This is the secret ingredient. It doesn’t make the cake taste like coffee; it just intensifies the chocolate flavor. Trust me on this.
For the Peanut Butter Filling
- Cream cheese (8 oz / 226g), softened: This gives the filling a slight tang and a wonderfully creamy texture.
- Unsalted butter (½ cup / 113g), softened: For richness and stability.
- Creamy peanut butter (1 cup / 240g): Use a standard brand like Jif or Skippy for the best texture. Natural peanut butter that separates can make the filling grainy.
- Powdered sugar (3 cups / 360g): Sweetens and thickens the filling.
- Heavy cream (2-3 tablespoons): To adjust the consistency to a perfect, spreadable texture.
- Vanilla extract (1 teaspoon): For warmth.
For the Chocolate Ganache
- Semi-sweet chocolate chips (1 cup / 175g): I recommend Ghirardelli or Guittard for a smooth, shiny finish.
- Heavy cream (½ cup / 120ml): The higher the fat content, the better the ganache.
For the Garnish
- Mini Reese’s Peanut Butter Cups (1-2 cups): Chopped or whole, for decorating the top and sides of the cake.
Equipment Needed
You don’t need a professional bakery setup to make this cake, but a few key tools will make your life much easier. I learned the hard way that trying to level a cake with a butter knife is a recipe for disaster.
- Three 9-inch round cake pans: This recipe makes a generous amount of batter, perfect for three even layers. If you only have two, you can bake them in batches.
- Electric hand mixer or stand mixer: A stand mixer is a lifesaver for the filling, but a hand mixer will work just fine. Your arm will get a workout, though.
- Parchment paper: Cut circles for the bottom of your pans to ensure your cakes release perfectly every time. I learned this tip from my mom, and it never fails.
- Cooling rack: Essential for cooling your cake layers evenly and preventing soggy bottoms.
- Offset spatula: This is my favorite tool for spreading the filling and frosting. It gives you a smooth, professional finish.
- Cake stand or serving plate: For the grand reveal.
- Serrated knife: For leveling the cake layers. A long bread knife works perfectly.
Preparation Method
Let’s get to the fun part. Follow these steps, and you’ll have a cake that looks like it came from a fancy bakery. Take your time, and don’t rush the cooling steps—it makes all the difference.
- Preheat and Prep: Preheat your oven to 350°F (175°C). Grease the bottoms and sides of three 9-inch round cake pans. Line the bottoms with parchment paper circles, then grease the paper. This double-layer of protection ensures your cakes will slide right out.
- Mix the Dry Ingredients: In a large bowl, whisk together the flour, sugar, cocoa powder, baking powder, baking soda, and salt. Make sure there are no lumps. I use a whisk to break up any cocoa clumps.
- Combine the Wet Ingredients: In a separate, medium-sized bowl, whisk together the buttermilk, oil, eggs, and vanilla extract until smooth and well combined.
- Combine Wet and Dry: Pour the wet ingredients into the dry ingredients and mix on low speed with your hand mixer (or by hand with a spatula) until just combined. The batter will be very thick at this point. Don’t overmix!
- Add the Hot Coffee: With the mixer on low speed, slowly pour in the hot coffee. Mix until the batter is smooth and thin. It will look very liquidy—that’s perfect. The batter will be thin, almost like a soup. Don’t panic.
- Bake the Cakes: Divide the batter evenly between the three prepared pans. I use a kitchen scale to be precise, but eyeballing it works too. Bake for 22-28 minutes, or until a toothpick inserted into the center comes out with a few moist crumbs. The cakes should spring back when lightly touched.
- Cool Completely: Let the cakes cool in the pans for 10 minutes. Then, run a knife around the edges and invert them onto a cooling rack. Peel off the parchment paper and let them cool completely. This is crucial. If the cakes are even slightly warm, the filling will melt and slide off. I usually make the cakes a day ahead and wrap them tightly in plastic wrap once cool.
- Make the Peanut Butter Filling: While the cakes are cooling, make the filling. In a large bowl, beat the softened cream cheese and butter together until smooth and creamy, about 2 minutes. Add the peanut butter and beat until fully combined. Gradually add the powdered sugar, one cup at a time, mixing on low speed. Add the heavy cream and vanilla, then increase the speed to medium-high and beat for 2-3 minutes until light and fluffy. If it’s too thick, add another tablespoon of cream.
- Make the Ganache: Place the chocolate chips in a heatproof bowl. Heat the heavy cream in a small saucepan over medium heat until it just begins to simmer (small bubbles around the edges). Pour the hot cream over the chocolate chips. Let it sit for 5 minutes without stirring. Then, whisk gently until smooth and glossy. Let it cool for 15-20 minutes to thicken slightly before pouring over the cake.
- Assemble the Cake: Place one cake layer on your serving plate. Spread about ¾ cup of the peanut butter filling evenly over the top. Repeat with the second layer. Place the third layer on top. Apply a thin “crumb coat” of the remaining filling all over the cake to seal in the crumbs. Refrigerate for 30 minutes.
- Pour the Ganache: Pour the cooled ganache over the top of the chilled cake. Use your offset spatula to gently push it over the edges, allowing it to drip down the sides. Let it set for 10 minutes.
- Decorate: While the ganache is still a bit tacky, press the chopped mini Reese’s cups onto the sides and top of the cake. Get creative with it.
Cooking Tips & Techniques
I’ve made this cake more times than I can count, and I’ve made every mistake in the book so you don’t have to. Here are my best tips for success.
- Room Temperature is Key: Make sure your eggs, buttermilk, and cream cheese are at room temperature. This helps them emulsify properly, creating a smooth, even batter and filling. Cold ingredients can cause the batter to curdle and the filling to be lumpy.
- Don’t Overmix the Batter: Once you add the flour, mix only until it’s combined. Overmixing develops the gluten, which can make your cake tough and dense. A few lumps are perfectly fine.
- Use a Kitchen Scale: For the most consistent results, weigh your ingredients, especially the flour. Scooping flour can add up to 25% more than a recipe calls for, leading to a dry cake. It’s a game-changer.
- Level the Cakes: Once your cakes are completely cool, use a serrated knife to slice off the domed tops. This gives you flat, even layers that stack perfectly. I use a gentle sawing motion.
- Chill Before Slicing: For the cleanest slices, refrigerate the assembled cake for at least 30 minutes before cutting. Use a sharp, thin-bladed knife, and wipe it clean between cuts. Your slices will look like they belong on a magazine cover.
Variations & Adaptations
This cake is a fantastic base for experimentation. Don’t be afraid to make it your own. I’ve tried a few twists over the years, and some have become new favorites.
- Peanut Butter Lover’s Dream: For an even more intense peanut butter flavor, add ½ cup of creamy peanut butter to the chocolate cake batter. It will make the cake slightly denser but incredibly delicious.
- Chocolate Peanut Butter Cup Explosion: Fold 1 cup of chopped mini Reese’s cups into the peanut butter filling before spreading it between the layers. Every bite will have a little surprise.
- Gluten-Free Option: Substitute the all-purpose flour with a good quality 1:1 gluten-free baking flour blend. I’ve had great results with King Arthur Flour’s Measure for Measure blend. Make sure your cocoa powder is also certified gluten-free.
- Dairy-Free Adaptation: Use a high-quality vegan butter, dairy-free cream cheese, and a plant-based buttermilk (make it by adding a tablespoon of lemon juice to oat or soy milk). For the ganache, use full-fat canned coconut cream instead of heavy cream. The texture will be slightly different, but still delicious.
- Spicy Mexican Chocolate Twist: Add 1 teaspoon of ground cinnamon and a pinch of cayenne pepper to the dry ingredients for the cake. The warmth of the spices pairs beautifully with the rich chocolate and creamy peanut butter.
Serving & Storage Suggestions
This cake is a showstopper, so serve it with pride. Here’s how to make the most of it.
- Serving Temperature: Serve the cake at room temperature for the best flavor and texture. If it’s been refrigerated, let it sit out for about 30 minutes before slicing. The cake will be more tender, and the filling will be perfectly creamy.
- Presentation: Place the cake on a beautiful stand. For a truly decadent experience, serve each slice with a scoop of vanilla bean ice cream or a dollop of lightly sweetened whipped cream. A drizzle of warm chocolate sauce is never a bad idea.
- Storage: Store any leftover cake in an airtight container in the refrigerator for up to 5 days. The flavors actually meld together and get even better after a day or two. The cake is so moist, it stays delicious.
- Freezing: This cake freezes beautifully. You can freeze the unfrosted cake layers, tightly wrapped in plastic wrap and foil, for up to 3 months. Thaw them at room temperature before assembling. You can also freeze the fully assembled cake (without the garnish) for up to 2 months. Thaw overnight in the refrigerator, then add the Reese’s cups before serving.
- Reheating: If you want that just-baked warmth, microwave a single slice for about 15-20 seconds. The chocolate ganache will get a little melty, which is pure heaven.
Nutritional Information & Benefits
Let’s be honest, this is a decadent treat, not a health food. But knowing what’s in it helps you enjoy it mindfully. The values below are estimates for one slice (based on 12 servings).
| Nutrient | Amount per Serving |
|---|---|
| Calories | ~620 |
| Fat | 38g |
| Carbohydrates | 68g |
| Protein | 12g |
| Sugar | 48g |
While it’s not low-calorie, it does have some surprising benefits. The peanut butter provides a good source of protein and healthy fats, which can help keep you feeling full. Dark chocolate (if you use a high-percentage cocoa in the ganache) is rich in antioxidants. Plus, there’s the undeniable mental health benefit of eating something that brings you pure joy. For those with dietary restrictions, this recipe contains gluten, dairy, and peanuts, so it’s not suitable for everyone. But for a special occasion, it’s absolutely worth it.
Conclusion
This Ultimate Reese’s Peanut Butter Chocolate Layer Cake is more than just a dessert. It’s a celebration. It’s the cake you bring to a party when you want to be the hero. It’s the cake you make for yourself on a rainy Sunday when you need a little pick-me-up. It’s the cake that my tax accountant, of all people, trusted me with, and I am so glad he did.
I love this recipe because it’s forgiving, it’s impressive, and it always, always makes people smile. The combination of rich, moist chocolate and creamy, salty-sweet peanut butter is a match made in heaven. I encourage you to make it your own—add extra peanut butter cups, try a different chocolate, or just follow the recipe exactly as written. You really can’t go wrong.
I’d love to hear how it turns out for you! Did you try a fun variation? Did your family love it? Drop a comment below and tell me all about it. And if you snapped a photo, share it on Pinterest and tag me—I love seeing your creations. Happy baking, friend!
Frequently Asked Questions
Can I use a different type of pan for this cake?
Yes, you can. You can bake this batter in two 9-inch pans (just increase the baking time by 5-10 minutes) or even as a sheet cake in a 9×13 inch pan. For a sheet cake, bake for 30-35 minutes. The layering is the best part, though, so I recommend sticking with the three-layer version if you can.
My ganache is too thick or too thin. What did I do wrong?
If your ganache is too thick, you may have let it cool too long, or your cream-to-chocolate ratio was off. To fix it, gently reheat it in the microwave in 10-second bursts, stirring in between, or add a splash of warm cream. If it’s too thin, you may have not let it cool enough, or your cream was too hot. Let it sit at room temperature for a bit longer to thicken up.
Can I make this cake ahead of time?
Absolutely! This is a great make-ahead dessert. You can bake the cake layers a day or two in advance and store them tightly wrapped at room temperature. You can also make the peanut butter filling and ganache ahead of time and store them in the fridge. Assemble the cake the day you plan to serve it for the best presentation.
Can I use natural peanut butter in the filling?
I don’t recommend it. Natural peanut butter that separates can be oily and grainy, which will affect the texture of your filling. For the smoothest, creamiest, most stable filling, stick with a standard processed peanut butter like Jif or Skippy. Your cake will thank you.
How do I get clean slices of this cake?
The secret is to chill the assembled cake for at least 30 minutes before slicing. Use a long, sharp, thin-bladed knife. Run the knife under hot water, dry it off, and make your cut. Wipe the blade clean between each slice. This will give you those beautiful, bakery-style slices you see in magazines.
Pin This Recipe!
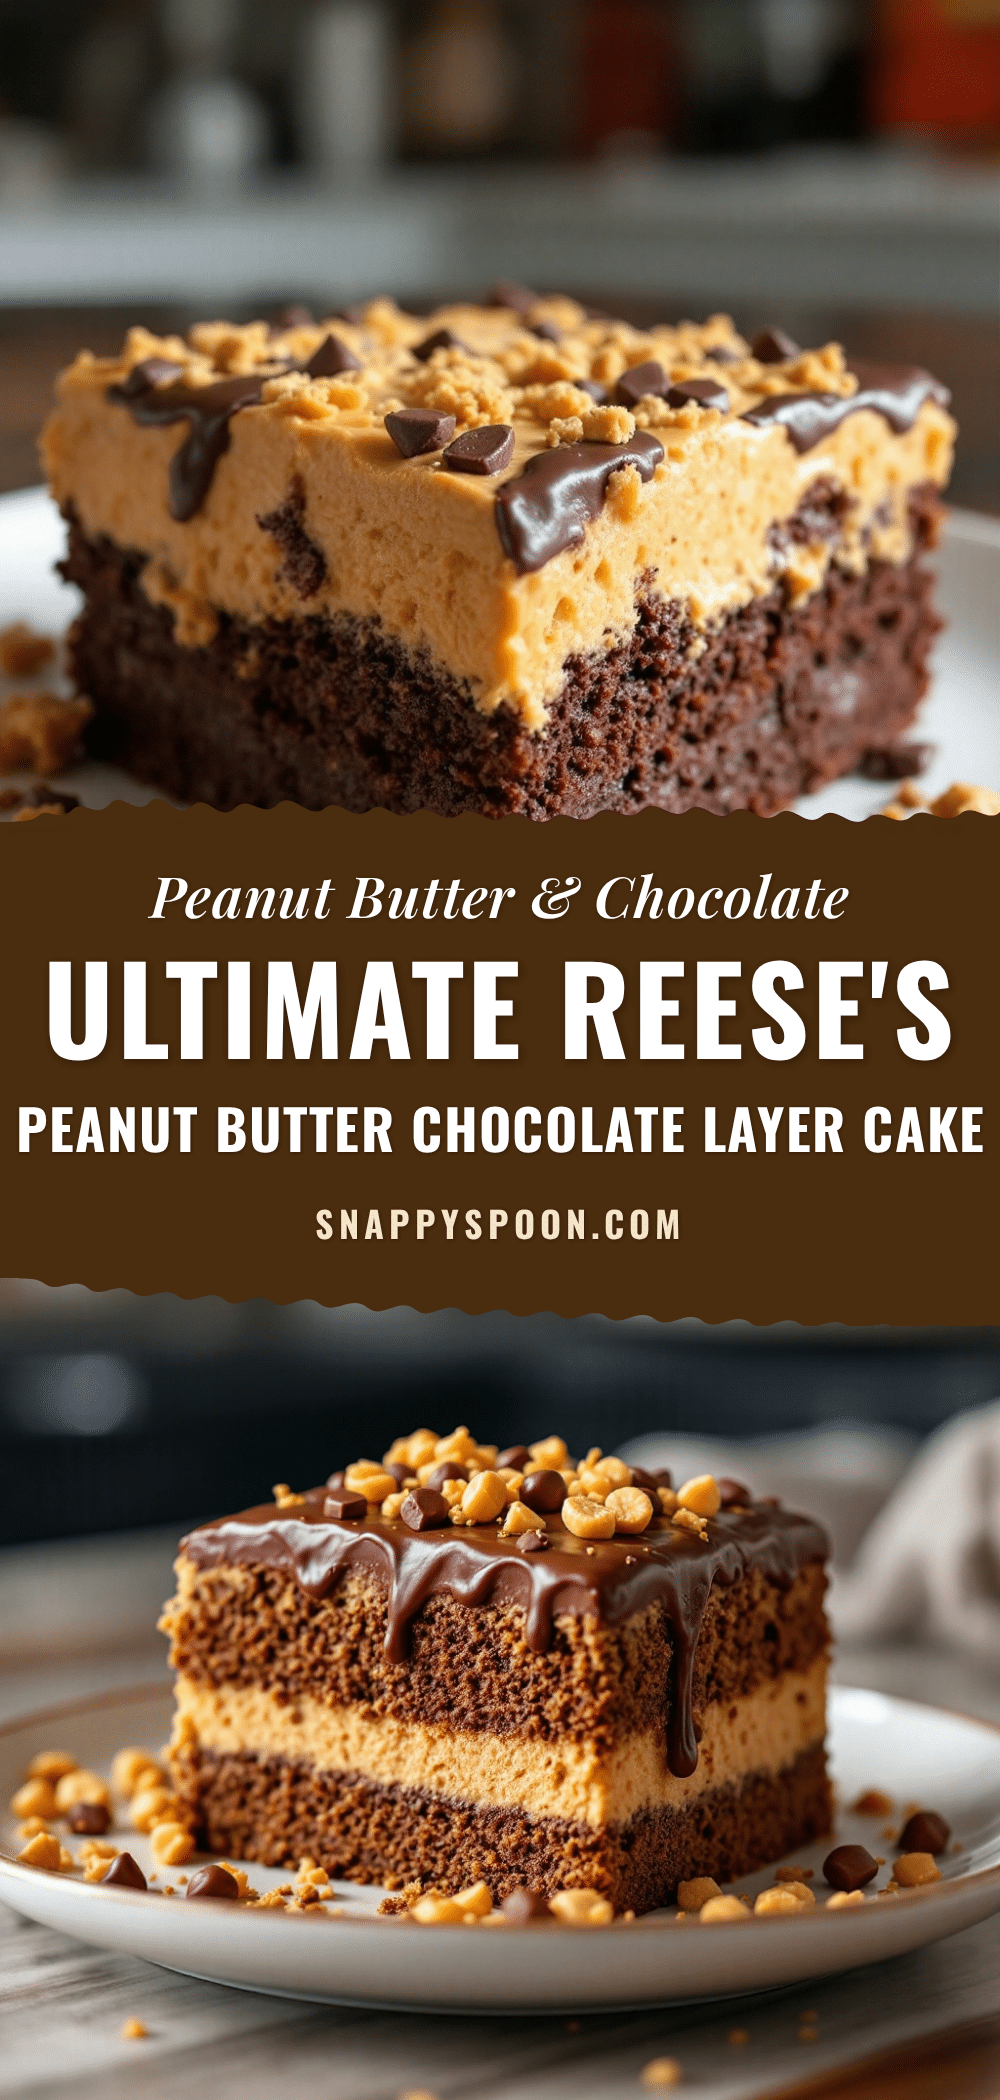
Ultimate Reeses Peanut Butter Chocolate Layer Cake
This Ultimate Reese’s Peanut Butter Chocolate Layer Cake features rich, moist chocolate cake layers, a creamy peanut butter filling, and a glossy chocolate ganache. It’s a showstopper dessert that’s surprisingly easy to make and perfect for any celebration.
- Prep Time: 30 minutes
- Cook Time: 25 minutes
- Total Time: 1 hour 55 minutes
- Yield: 12 servings 1x
- Category: Dessert
- Cuisine: American
Ingredients
- 3 cups (375g) all-purpose flour
- 2 cups (400g) granulated sugar
- 3/4 cup (75g) unsweetened cocoa powder (Dutch-processed preferred)
- 2 teaspoons baking powder
- 1 1/2 teaspoons baking soda
- 1 teaspoon salt
- 1 cup (240ml) buttermilk
- 1/2 cup (120ml) vegetable oil (canola or avocado)
- 2 large eggs, room temperature
- 2 teaspoons vanilla extract
- 1 cup (240ml) hot coffee
- 8 oz (226g) cream cheese, softened
- 1/2 cup (113g) unsalted butter, softened
- 1 cup (240g) creamy peanut butter (Jif or Skippy recommended)
- 3 cups (360g) powdered sugar
- 2–3 tablespoons heavy cream
- 1 teaspoon vanilla extract
- 1 cup (175g) semi-sweet chocolate chips
- 1/2 cup (120ml) heavy cream
- 1–2 cups mini Reese’s Peanut Butter Cups, chopped or whole
Instructions
- Preheat oven to 350°F (175°C). Grease three 9-inch round cake pans, line bottoms with parchment paper, and grease the paper.
- In a large bowl, whisk together flour, sugar, cocoa powder, baking powder, baking soda, and salt.
- In a separate bowl, whisk together buttermilk, oil, eggs, and vanilla extract until smooth.
- Pour wet ingredients into dry ingredients and mix on low speed until just combined (batter will be thick).
- With mixer on low, slowly pour in hot coffee and mix until batter is smooth and thin.
- Divide batter evenly among prepared pans. Bake for 22-28 minutes, until a toothpick inserted in center comes out with moist crumbs.
- Cool cakes in pans for 10 minutes, then invert onto cooling rack. Remove parchment and cool completely.
- For filling: Beat softened cream cheese and butter until smooth. Add peanut butter and beat until combined. Gradually add powdered sugar, then heavy cream and vanilla. Beat on medium-high for 2-3 minutes until fluffy.
- For ganache: Place chocolate chips in a heatproof bowl. Heat heavy cream until simmering, pour over chocolate, let sit 5 minutes, then whisk until smooth. Cool 15-20 minutes.
- Assemble cake: Place one layer on serving plate, spread 3/4 cup filling on top. Repeat with second layer. Top with third layer. Apply thin crumb coat of remaining filling, refrigerate 30 minutes.
- Pour cooled ganache over chilled cake, pushing it over edges to drip down sides. Let set 10 minutes.
- Press chopped Reese’s cups onto sides and top of cake while ganache is still tacky.
Notes
Room temperature ingredients are key for best results. Don’t overmix the batter. For clean slices, chill assembled cake for 30 minutes before cutting. The hot coffee deepens chocolate flavor without making cake taste like coffee.
Nutrition
- Serving Size: 1 slice
- Calories: 620
- Sugar: 48
- Sodium: 420
- Fat: 38
- Saturated Fat: 16
- Carbohydrates: 68
- Fiber: 3
- Protein: 12
Keywords: Reese's cake, peanut butter chocolate cake, layer cake, chocolate ganache, birthday cake, peanut butter filling